• Skip to primary navigation
  • Skip to main content
  • Skip to primary sidebar

Western Garden Centers

for what grows here

  • Home
  • How To
  • Gift Cards
  • Calculate Mulch
  • Locations
    • Store Hours
    • About
    • Garden Shop Employment Team
  • Weddings
    • Salt Lake City, UT
    • West Valley, UT
  • Blog
    • Gardening
    • Recipes

Wendy Pettit

Banana Zucchini Bread Recipe w/Chocolate Chips

April 20, 2017 by Wendy Pettit

WELCOME Zucchini Chefs, Here is a yummy recipe to try!

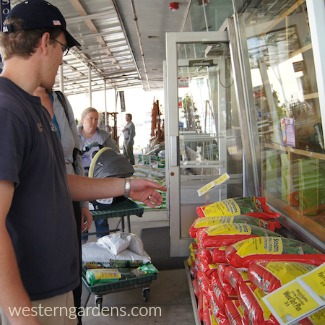
Here is a family favorite zucchini bread recipe for your celebration of National Zucchini Bread Day on April 25th.  On the 24th, pull out your leftover frozen grated zucchini from last year’s harvest or load up the kids and let them each choose a fresh zuc from the local produce store.  Have all your recipe ingredients ready for the next day’s celebrations!  On the 25th, mix, bake and eat some bread, load up the kids and go buy new quality zucchini seeds from Western Gardens or any local independent garden center, and start the seeds indoors.  The kids will love seeing these easy and fast seeds sprout and seedlings grow. If you live in the Salt Lake area, you’ll be safe to plant them outside in your garden after Mother’s Day in May!

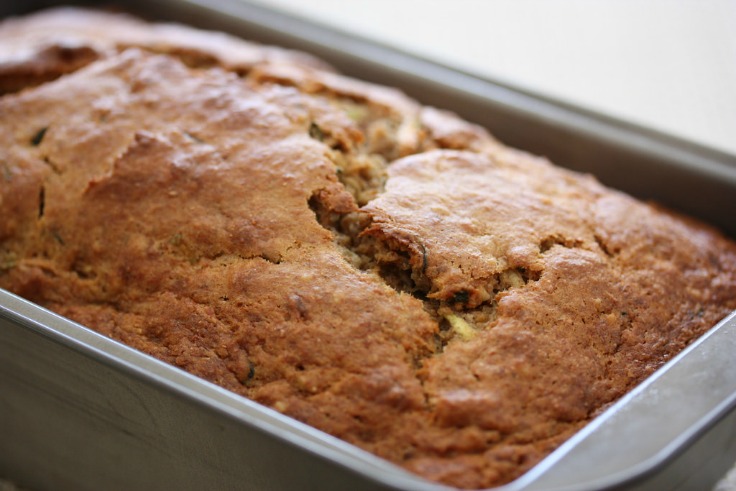
Photo by Meal Makeover Moms with a Flickr CC0 license

Bookmark or pin this recipe for summer deliciousness and for next April’s National Zucchini Bread Day!

Banana Zucchini Bread Recipe by Amy Christensen / Cahoon Cook Book

3 eggs

2 cups sugar

1 cup canola oil

1 cup zucchini, grated

1 cup banana, mashed

1 tablespoon vanilla

3 cups flour

1 teaspoon baking powder

1 teaspoon salt

1 tablespoon cinnamon

1/2 cup semisweet chocolate chips, mini preferred

Combine first 6 ingredients together mixing well.  Add flour, baking powder, salt and cinnamon.  Mix in chocolate chips.

Bake in 325 degree oven for 1 hour.

Makes 3 small loaves.


Happy National Zucchini Bread Day everybody!

Filed Under: Eat from Garden - Recipes, Recipes Tagged With: frozen zucchini, National Zucchini Bread Day, zucchini, zucchini bread, zucchini bread recipe

Garden Advice Alert! 5 Reasons to Support Local Independent Garden Centers

April 17, 2017 by Wendy Pettit

Welcome Gardener Friend! We’re happy you are here.

Gardeners shopping a local independent garden center

The internet and the “mass merchants” can offer garden advice, but information and product specific to your area is a must if you want a thriving garden.  Your local independent garden center, like Western Gardens in Utah, live in and are experienced in your specific climate zone and your certain soil conditions.  These two crucial factors determine which plant varieties will do best in your yard and those that will simply die.  If you don’t match the plant type with the correct area in your yard and with proper soil, you can easily find yourself exhausted and frustrated from all your efforts plus a lot of wasted money. Shopping your independent garden centers will help you successfully grow a beautiful garden.

Here are 5 reasons why: 

#1 KNOWLEDGE

Local professionals – Local independent garden centers tend to hire more local knowledgeable plant gardeners and professionals.  They’ll have a great passion for gardening. A plant enthusiast will help you find success rather than somebody from the window department. (True personal story!)  If your local has a horticulturist by profession, like Western Gardens, even better.  

garden center employee helping customers n the roses

Gardening professionals help you.

Up-to-date Information – Locals stay up-to-date on information regarding weather – both current and recent past conditions.  They also will know of current pest infiltrations, and such.  Someone in another part of the country doesn’t have a clue as to what is happening in Utah.  Your local knows what you need to be successful, so their business can be successful.

Hard hat worker photo by Klaus Hausmann at Pixabay CC0 license

#2 PLANT MATERIAL –

Premium Quality – Local independent nurseries buy premium quality; they do not buy what is cheap. Your long term success is their success.

Timing & Choice – Locals buyers are making the purchases specific for your area, rather than a corporate worker ordering and sending material to their big stores across the country.  For example, big box stores will bring in and try to sell you a watermelon seedling in March. (True story 4-8-2017) It won’t succeed in Utah planting that early; watermelons hate cold weather.  Independents bring in the material for you at the right time.  If it is a little early or their shipment just came in, they will warn you to harden off the plants before planting.  

Unique Material – Independents tend to have a wider variety of unique plant material.  They bring in the latest developed plants that should survive your climate.  

Price – In general, independents tend to be a little more expensive because they don’t buy cheap, but rather quality.  And many times the price difference is pennies.  This quality  saves you money in the long run.    

Consider this when looking at the price: If you purchase a petunia from a mass merchant for 15 cents less than at the independent, but the plant doesn’t do well so you buy more plants to fill in, or you even have to completely replant, did you really save 15 cents?  We all eventually learn that sometimes it is better to pay a little extra for a quality product.  In the end, your effort, sweat, sore muscles, and your money won’t be wasted.

petunia covered with snow at a mass merchant store

A good independent doesn’t prematurely bring in plant material like petunias that are not cold hardy until much warmer weather. Independents save you money by not tempting you to plant certain products too early in the season.

OWN – And we’re not talking Oprah’s TV network.  Independents own the plant material they sell, thus they usually take better care of their product. Remember their passion for gardening!

Many mass merchants sell on consignment, not actually owning the product.  You may see vibrant plants when you walk in, but you take a gamble that the plant has been properly cared for.  A stressed droopy plant can “bounce back” when finally watered, but after repeated neglect by the time you get it planted (giving it a natural shock to its system), your plant may never recover or struggle.  Also, plants don’t like sitting on top of black asphalt in the parking lot.

To illustrate this point of owning and caring for product, see how plant material was cared for by a local mass merchant for three consecutive days (4-8-2017).  Witness below recent care of rose bushes, vegetable seedlings, and lemon trees during an early spring April weekend sale.  Draw your own conclusions about waste and quality of product. In all three cases, material was eventually thrown away and new product brought in.  Independents conserve on waste by taking care of their plant material.  Again, they own what they are selling to you. 

Warm weather vegetables and herbs including tables of peppers, cantaloupe, basil, even watermelon.

Rose bushes that were definitely not hardened off for the cold weather and snow. The independent roses are bigger, healthier, hardened off, and begin at just $2 more than these.

Lemon/Citrus trees. If the roots being exposed and repotted didn’t kill the tree, the snow and cold did.

In short, reputable independents, like Western Gardens, purchase and tend the best plant material for you, their customer.

#3 SOIL  – Local soils are different throughout your area.  Just in the Salt Lake valley, soils drastically range from sandy to heavy clay.  A quality independent will know what you can do to improve your specific soil structure so you can be more successful with your plant selections.  

The Salt Lake Valley has a wide variety of soil types. Photo by TyGuy999 from Pixabay CC0 license

#4 PROBLEM SOLVERS –  Locals are the “go to” people when you need advice.  They give you personal attention to select proper plants for your yard, give advice for additives for your soil, plus tips and tricks to get your garden into tiptop shape.  They are also the ones that people seek when there are problems and pests in the garden.  Your locals are the plant doctors.  Consider this, if you don’t buy your product from the experts, how can you expect them to help you with an inferior product you bought somewhere else?  They are willing to help you with your inferior product when they are able, but why not save yourself heartache and money by purchasing from the independent in the first place?

Bring in samples of your problem. The plant doctor is in!

Plant enthusiasts are ready to help you be successful.

#5 LOCAL ECONOMY – Often shoppers don’t realize that when they purchase from a big national company, a lot of their money leaves the state and pays employees back in Georgia or some other state where the headquarters are located.  When you buy local, you keep the funds within the local community and you keep your independent garden center thriving and open, ready to serve you for years to come.  

Local independents also more often than not buy from local growers, who meet the quality standards.

Keep the independents in business so they will be there when you really need a “plant doctor”.  

Support your neighbor; buy Utah!


Filed Under: Gardening, How To, Tips & How To's, Utah Gardening Tagged With: buy local, buy utah, garden advice, garden centers in Utah, Independent garden centers in Utah, local independent garden centers, mass merchants, plant knowledge, quality plants, shop local, support local independents

utah gardening to-do list in April

April 2, 2017 by Wendy Pettit

Utah Gardening To-Do List in April | Easy Garden Tips | How to Garden in Utah | Beginning GardenerFeeling overwhelmed with so much to do in your yard?   Wondering where to start? lawn? vegetable garden? flower beds?  Check out our helpful Utah Gardening To-Do List in April for the Wasatch Front in Utah.  If you live in a similar growing season, this list can work for you too.

Realize that you may not need to do everything on this list; skip over those that do not apply to your yard.

Take the entire month to do the list.  None of us can do it all in one day off.  Enjoy the process of being out in your yard and digging in the soil.  In other words, stop to smell the roses or other blooms this month.

If you need some inspiration, stop by your local independent garden center like Western Gardens in West Valley or Salt Lake City.  We would love to show you our #1 quality material, expert knowledge, and friendly personal service to inspire and help you be a satisfied and successful gardener.  Your success is our success.

Press HERE for the April Gardening To Do List.

Here are a few blooms at Western this last week.

cold crop starts at local independent garden center in Utah geum bloom at western garden centers utah utah hellebores at western gardens celery starts on a rainy day at garden center salt lake city western gardens shipment of heuchera pansies of all colors at garden center in utah buttercup primrose blooms at western garden centers utah bees love saxifraga at salt lake city western garden centers unique succulents at salt lake and west valley city garden centers burkwood viburnum in bloom west valley western gardens

Drop in and see more!

western gardens two locations in utah

Filed Under: Gardening, To-Do List, Utah Gardening Tagged With: april gardening to do list, april gardens, burkwood viburnum, buttercup primrose, garden centers in Utah, gardening to-do list, hellebores, heuchera, local independent garden centers, pansies, primrose, saxifraga, succulents, Utah gardening, utah gardening april, utah gardening to-do list in april, viburnum, Western Garden Centers, Western Gardens

Wheatgrass Juice Basics

March 28, 2017 by Wendy Pettit

Welcome Friend! Happy you came by again.

Did you make an Easter project growing wheat grain into wheatgrass?  In our Wheatgrass Easter Egg project, we grew enough wheatgrass that would cost $3 or more if you purchased at the local market.  If you find it difficult to throw away that gorgeous green wheatgrass, try your hand at making Wheatgrass Juice.  Here are the basics.

Learn a few basics about making healthy Wheatgrass juice

Basic How-To’s:

Harvest when wheatgrass is about 4-8 inches in height.  

Use sharp scissors and cut just above the roots.

Wash grass blades and chop with knife into ½-1 inches lengths.  This size is easiest to work with unless you are feeding them into a manual grinder.  In this case, no need to cut the blades smaller.

Use about ¼ – ½ cup of wheatgrass for one serving. Use your favorite method to extract the juice from the grass. (see methods below)

For best nutritional value, drink the wheatgrass juice within 30 minutes.

Wheatgrass juice can be mixed with other juices for a better taste.  There are hundreds of recipes ranging from adding lemon juice, spinach leaves, cinnamon, and a myriad of other ingredients.  Choose one and give it a try!

Mortar & Pestle method:

Slow but sure, use a mortar and pestle to make wheatgrass juice.
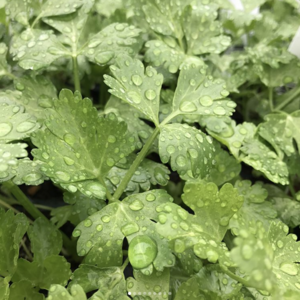
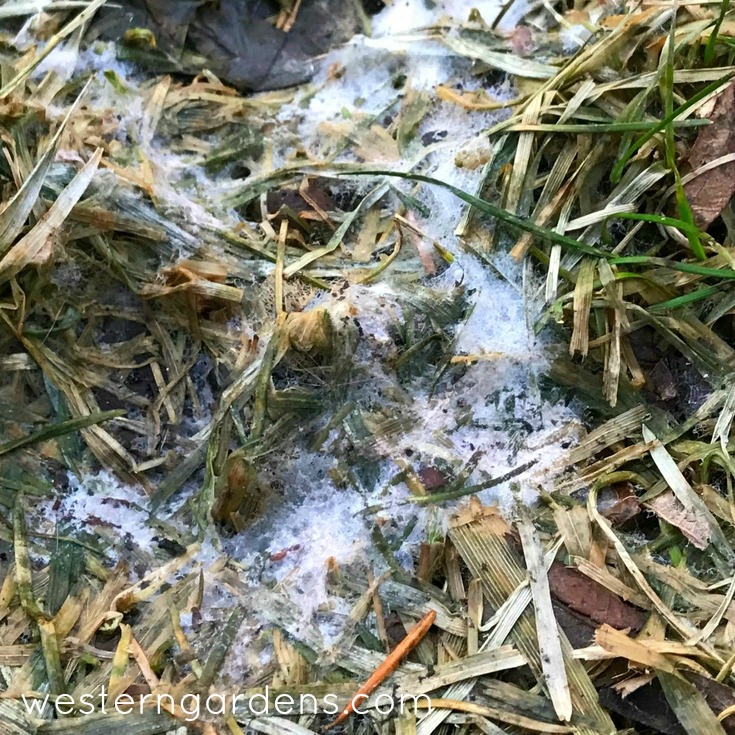
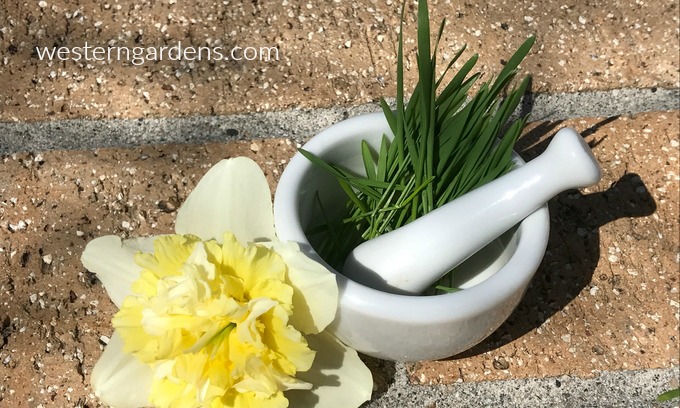
Place grass in a mortar with about one tablespoon of water.  

Grind the grass with the pestle until water turns a very dark green.

Pour into a small glass the water and grass through cheesecloth or a coffee filter.  Place the grass pulp back in the mortar. Add another tablespoon of water and grind again until water is dark green.  Filter the water again and replace grass back into mortar.

Continue this process until the water doesn’t turn dark green anymore.

The spent ground grass can be composted.  

 Blender method:

A basic blender can be used to make wheatgrass juice.

Place about ½ cup wheatgrass in blender with 1 cup water.

Pulverize for one-two minutes.  

Strain and discard the pulp.  

Manual Juicer method:

CC BY-SA 3.0, https://commons.wikimedia.org/w/index.php?curid=204681

Manual Grinder for DIY wheatgrass juice. Photo used under Wikimedia Commons GNU License

Follow the instructions for the machine you are using.

Did you know…

Wheatgrass is gluten free because it is taken from the sprouts rather than from the plant when it is old enough to produce the wheat seed.

Ancient Egyptians used wheatgrass for the effect on their health and beauty.

Wheatgrass is a good source of potassium, vitamins A, C, E, K, B6, dietary fiber, thiamin, riboflavin, niacin, iron, zinc, copper manganese, selenium and even protein.

According to Charles Schnabel, a wheatgrass proponent in the 1940’s, “fifteen pounds of wheatgrass is equal in overall nutritional value to 350 pounds of ordinary garden vegetables.” 


Filed Under: Eat from Garden - Recipes, Recipes Tagged With: gluten free, gluten free drink, juice methods, wheatgrass, wheatgrass juice

Wheat Grass Easter Eggs – Kids Project

March 28, 2017 by Wendy Pettit

Welcome Friends!  Glad you dropped in.

This Wheatgrass Easter Egg is a great kid craft to do anytime in the spring, not just for Easter.  It is inexpensive and easy to make – even little 3 year-old hands can do this; customizable to whatever you have – plastic egg, bucket, basket, whatever; quick and fun to do – who doesn’t like to play in the dirt; and very gratifying within a few days – children observe the growing seeds.  If you want to do this for the holiday, you need to think ahead about 1 1/2 weeks. Easter changes every year, so be sure to check the calendar!

wheatgrass easter eggs are simple to make and fun to watch grow.

SUPPLIES:

» Leak-proof Easter container – pail, bottle, cup, plastic-lined basket, etc.  (I’m using a large plastic easter egg I found at my local dollar store. It came with a lid.)

» Plastic wrap or plastic lid

» Potting soil or vermiculite  (I used potting soil from my last year garden pots.)

» Whole-wheat grain (I used 30 year old wheat I had in my food storage.)

» Water

Items needs for making wheatgrass easter egg project.

Soil, whole wheat grain, container, plastic wrap or cover, and water. That’s it!

Wheatgrass Easter Egg INSTRUCTIONS:

1. One to two weeks before Easter, fill container with soil or vermiculite to 1-2 inches below the top of the rim.  Gently pat down.

Placing soil into container.

Little by little putting soil in to within 1-2 inches of rim.

Pat down the soil

Gently pat soil. (You can talk or sing to it too if you want!)

Little girl with soil on hands.

Don’t have to get all dirty!

2. Sprinkle a layer of wheat over the soil.

Sprinkling wheat grain on top of the soil.

The layer of wheat stays on top of the soil. Do not cover the seeds with dirt.

3. Pour water into container until water is barely visible beneath the wheat.  Note: Drain or “bail” out some water if you accidentally add too much and the seeds are swimming.

Pour water onto seeds and dirt.

Be slow and careful when pouring water into your container.

bailing out too much water from seeds and soil.

Be careful to bail out water if you get too much. Don’t want the seeds to drown!

4. Place lid or plastic wrap over the wheat.  

5. Place container in a sunny spot (not in direct sunlight).

6. After 2-3 days, small sprouts should appear.  Remove plastic top.  

Little wheatgrass starts are popping out.

Take lid or plastic off when you see the wheat growing. Put in good sunlight (not direct-sunlight).

7. Watch your wheatgrass grow.

NOTE:  During this process, if wheat appears to be dry, mist lightly with water.

8. In 7-10 days, you should have a velvety grass patch!!  

wheatgrass grows quickly.

Be patient and watch your grass grow. For fun, get a ruler and mark how far the grass grows in a day.

I initially did this project with a group of women.  We tied pretty ribbons around the eggs and shared them with family and neighbors to watch grow.

Wheatgrass Easter Eggs are ready to give away with ribbon around them.

Put a ribbon around the egg and give to another to let them see the seeds grow. Or keep for yourself and enjoy measuring how much the grass grows in a day! Or make a fairy garden in the grass!

9. Add smaller plastic eggs or other little Easter characters in the wheatgrass, if desired.  After the wheatgrass had grown in the egg that I kept for my own family,  I placed in the grass colorful plastic eggs filled with jelly beans and other Easter favorites.  IDEA: It could be fun to create a fairy scene.

A byproduct of this activity – Wheatgrass juice  

Instead of throwing away your Wheatgrass Easter Egg, you could try making wheatgrass juice.  You’ve got a good little crop to give it a try.  Wheatgrass is gluten-free and is touted as one of the best super foods.  Many believe that it can detoxify the body and improve digestion.   Learn some basics about preparing this superfood by clicking here. 

Basics about wheatgrass juice


Filed Under: Crafts, How To Tagged With: Easter, easter craft, easter eggs, how to's, kid crafts, kid friendly, Kids Craft, seeds, wheat, wheatgrass

Snow Mold on Your Lawn – 8 Simple Ways to Solve

March 11, 2017 by Wendy Pettit

Welcome Gardening Friends! Thanks for stopping by.

When the snow finally melted off our back lawn, my grass looked like it was dying. If yours does too, it could be a lawn fungus called SNOW MOLD. Don’t worry too much, snow mold seldom destroys the lawn; your lawn will recover.  This annoying disease can appear when the snow melts off the lawn in the spring.  Your turf will have circular type patches of matted straw-colored grass and can have a top layer of stringy mold.  (It reminded me of a salad mold that once grew in my refrigerator.) 

Here are 8 simple ways to solve SNOW MOLD on your lawn, and better yet, prevent it from happening.

8 ways solve snow mold on lawn

Current Problem Solutions to Snow Mold –

  • In the spring when you discover the mold, take action by gently raking the area.  This will help the air circulate through the lawn to dry it out and stop the mold from growing further.  Be careful not to rip up the grass.  The disease usually affects only the blade, so the crown of the plant is still good and will recover.  Throw away the grass you have raked up.rake grass to stop snow mold from growingbefore-and-after photos of raked lawn for snow mold
  • According to the proper schedule, regular fertilizing and mowing will help your lawn outgrow the fungus.  The lawn will green up and the damaged blades will eventually be cut off.
  • If your lawn has extreme snow mold, and you have tried the above solutions, a disease control product may need to be applied to the affected area.  See your local garden center, like the experts at Western Gardens, to obtain the correct product.  It’s always a good idea to take to the garden shop samples of the diseased plant and a photo of the area.

discard snow mold contaminated grass

Snow Mold Preventative Actions –

  • In the fall, be sure to rake leaves off the lawn. This can be annoying if you have trees that take all winter to lose their leaves, like a Sycamore.
  • In the fall, be careful not to use excessive nitrogen fertilizer. This will help slow down the growth of the grass before winter arrives.
  • In the fall, be sure to continue mowing until the lawn’s growth slows down.  Make sure your last mowing is a shorter cut.  The taller the blades of grass when winter hits, the more snow mold is encouraged to develop.  (I believe this was the culprit for our problems this spring. We put the lawnmower away and then had a mild fall.)bicycle lawn mower
  • If each year you have this problem in certain areas, apply a fungicide to the grass in the fall.  Be sure to talk with your local garden expert for the correct preventative product.
  • In the winter, if piles of snow build up where you or the street plows have worked, be sure to disperse the snow.  Where the snow is too deep on your lawn, it can take much longer in the spring to melt, inviting snow mold to grow with the warm spring temperatures. riding snow plow in cold winter
snow mold close up on lawn

SNOW MOLD on my Utah lawn

This warm weather signals time to dig in the dirt; but first, I’m going to walk barefoot through my recently raked and drying lawn.

barefoot in grass

Filed Under: Gardening, Lawn Care, Tips & How To's, Yard Care Tagged With: fall lawn care, how to's, Lawn Care, lawn disease, lawn fungus, snow mold, spring lawn care

  • « Go to Previous Page
  • Go to page 1
  • Go to page 2
  • Go to page 3
  • Go to page 4

Primary Sidebar

Shopping Cart

Items in Your Cart

Your cart is empty
Visit The Shop

Follow Western Gardens

  • Facebook
  • Instagram
  • Pinterest
  • YouTube

See what we’ve been pinning!

Follow Me on Pinterest
Followed by people.
?

Pinterest Badge by Skipser

Here’s What We’ve Been Up To!

Save water and money by Turf Training - train your lawn to grow deep roots
work at western gardens utah garden center
Senior gardening woman Edu Carvalho from Pexels
nursery center open to public

Copyright © 2025. Western Gardens - Privacy Policy