• Skip to primary navigation
  • Skip to main content
  • Skip to primary sidebar

Western Garden Centers

for what grows here

  • Home
  • How To
  • Gift Cards
  • Calculate Mulch
  • Locations
    • Store Hours
    • About
    • Garden Shop Employment Team
  • Weddings
    • Salt Lake City, UT
    • West Valley, UT
  • Blog
    • Gardening
    • Recipes

Gardening

Cowboy Caviar

March 18, 2014 by Becky

If you are looking for something a little different, really simple, and super quick, look no further!  It’s a fabulous appetizer served with chips, or as part of a main meal…like a taco bar topping.  Whether your ingredients are straight from the garden, or came from the produce section, you will impress your guests with this flavorful treat!

Cowboy Caviar

Cowboy Caviar

Ingredients:

  • 1 can (15.25 oz) supersweet yellow corn
  • 1 can (15.25 oz) white corn, drained
  • 2 cans (15 oz each) black beans, rinsed & drained
  • 1 can (14.5 oz) petite diced tomatoes, drained
  • 1/2 bunch cilantro, chopped
  • 3 green onions, thinly sliced
  • 1 red bell pepper, diced
  • 2-3 cloves garlic, minced
  • 1 avocado, diced
  • 1 packet Good Seasons Italian Dressing mix (dry)
  • 3/4 cup fresh lemon juice
  • 1/4 cup fresh lime juice
  • 3 Tbsp extra virgin olive oil
  • 3 Tbsp red wine vinegar
  • 1 1/2 tsp salt

Directions:

  1. Add all ingredients to a large bowl and gently combine.  Delicious right away, but even better once the flavors have had a chance to mingle.  Serve with chips, or in a taco bar.

Cowboy Caviar square

FOLLOW US  on  Facebook  Instagram  Pinterest  Twitter  Google+  YouTube

Becky


~Becky

Filed Under: Recipes, Tomatoes, Vegetables Tagged With: avocado, Corn, garlic, Lemon, lime, recipe, Tomato, vegan, vegetarian

Creamy Potato Soup

March 11, 2014 by Becky

If you’re not quite ready to give up soup season, give this creamy potato soup a try. It’s my most requested soup recipe! And unlike most creamy soups, it is NOT made with cream! Which means you won’t have to worry about calories. Or you can eat more. I always opt for eating more!

Creamy Potato Soup WGC

Creamy Potato Soup

Ingredients:

  • 8 medium potatoes, peeled and quartered
  • 1 large carrot, peeled and finely diced
  • 1 stalk celery, finely diced
  • 1 medium onion, finely diced
  • 2 cloves garlic, minced
  • 3 cups chicken broth
  • 2 tsp salt
  • 5 cups milk
  • 6 Tbsp butter, melted
  • 6 Tbsp flour
  • 2 Tbsp parsley
  • 2 tsp pepper
  • 2 cups shredded cheddar cheese

Directions:

  1. In a large saucepan, bring potatoes, carrot, celery, onion, garlic, chicken broth and salt to a boil.
  2. Reduce heat; cover and simmer until potatoes are just tender.  Do not drain; mash slightly.  Stir in milk.
  3. In a small bowl, blend butter, flour, parsley and pepper; stir into potato mixture.  Cook and stir over medium heat until thickened and bubbly.
  4. Remove from heat; add cheese and stir until cheese is almost melted.  Let soup stand for 5 minutes.
  5. Serve hot.

Creamy Potato Soup Square

FOLLOW US  on  Facebook  Instagram  Pinterest  Twitter  Google+  YouTube

Becky


~Becky

Filed Under: Recipes, Vegetables Tagged With: carrots, celery, garlic, onion, potatoes, soup, vegetarian

St. Patrick’s Day Mini Fruit Skewers

March 6, 2014 by Becky

If you are looking for a new idea, try these fun and festive (and healthy!) fruit skewers for St. Patrick’s Day!

Fruit Skewers Collage

St. Patrick’s Day Mini Fruit Skewers

Ingredients:

  • 1 kiwi
  • 1 cucumber
  • 1 green apple
  • 1 d’anjou pear

Directions:

  1. Cut fruit and cucumber into bite-sized pieces.  Using a party toothpick (with a green tip), skewer the fruit.  Serve immediately.
  2. Green grapes (cut in half) would be a great option too!

Happy Spring, it’s almost here!!

FOLLOW US  on  Facebook  Instagram  Pinterest  Twitter  Google+  YouTube

Becky


~ Becky

Filed Under: Fruit, Recipes Tagged With: Fruit, St. Patrick's Day

Priming Your Utah Garden Rake!

September 7, 2013 by Becky

Necessity is the mother of invention!  I believe it!  Check out this fun idea of how to utilize your garden rake while you are waiting for the leaves to fall!  We suggest a leaf rake without painted tines.  Of course, you will want to begin with a clean sterilized rake; you know how to do that.  Gather your ingredients.  Get your fire-pit going with just the right coals.  Now you are ready to assemble, roast, and enjoy your s’mores.  Follow the photo – a picture is worth a 1000 words!

Call your local Western Gardens store to check on current stock of these rakes; these are a most popular garden tool, now for several purposes!  Happy s’moriing while you wait for the raking to begin!

Fall store hours – 10am-6pm


Leaf Rake Smores

Filed Under: Gardening, Recipes, Uncategorized, Yard Care Tagged With: garden rakes, garden tools, s'mores, Utah Garden rake, Western Gardens

Utah Garden Centers – Planting Trees in the Right Spot

June 11, 2013 by Becky

Planting trees is a long term investment.   Initially, it costs you time and money and then years of watering and tending.  Your tree can become priceless to you and so worth your time and effort.  However, don’t let your investment go to waste by planting your favorite trees in the wrong spot.  You’ll end up ripping out your tree, fixing house and sidewalk problems, or experience a ghastly sight if the power company has to come and trim your branches away from the power lines.  Avoid these potential problems by planning ahead.  Even if you start a one-gallon sized tree, following these simple guidelines before you dig your hole, will save you time and money and heartache in the future.  Planting trees in the right spot is very important!

The most important overriding rule is know the final/adult size and shape of your tree.  All little babies grow up, even cute little baby saplings.  Good independent garden centers in Utah, like Western Garden Centers, will provide excellent quality material and you’ll have the information you need for these guidelines.

#1 Plan where you plant your tree in relation to your house or buildings.  We have a friend who moved into a neighboring house.  The previous owners liked a little blue spruce and wanted to frame their home with it.  Well, they actually did frame it, about 2 feet away from the home.  They didn’t plan ahead for a potentially 40 foot blue spruce to be so close to the home.  In a few more years, even the trunk itself could be up again the rain-gutter.  Eventually, the new owners will have to take out the tree to save on expensive eave and roof repairs.    Misplaced trees can also have their roots damage your home’s foundation, sidewalk, and driveway.  Know your tree’s potential, above ground and below! 

#2 – Do not plant under power lines if your tree will become too tall or big!  If your tree looses a branch and cuts the electricity during a Utah heavy snow storm, then remember that all your neighbors will be ticked off as they rush to save the food in their freezers and hope that their computers didn’t fry on the disruption.  Know that eventually, the power company does have the right to keep clear any branches of residence and business’ trees.  It’s part of living in a community!  They will come and clear away any and all branches within a certain amount of feet from the lines.  Plus, anything directly above the lines have to be pruned also.  Your trees won’t get the tender loving care of a good arborist, the power company will cut away like a marine hair cut!   Know your tree and be responsible!

#3 – Don’t plant too many “baby” trees together just because you like the look of a lot of material.  Again, eventually you’ll be ripping out your good money.  They will grow and crowd each other, also causing disease and basic illness of some of your trees.   Know your tree and don’t overplant!

Last week I went driving within a 4 mile radius of our home and took photos of trees that were not well thought out before they were planted.   Carefully examine and don’t become a victim of this common error.  Know your Tree!

Filed Under: Gardening, Yard Care Tagged With: garden centers in Utah, Independent garden centers in Utah, plant under power lines, Planting trees, Planting trees in the right spot, Western Garden Centers, Western Gardens, where to plant trees

Grilled Caprese Sandwich (aka the best thing you’ve ever tasted!)

September 28, 2012 by Becky

Our oldest had a birthday, and for his birthday dinner he wanted grilled cheese.  We eat far too much grilled cheese anyway (because the kids will actually eat it without crying about how gross dinner is), but you can’t say no to a birthday dinner request.  I wanted something slightly more exotic, so I ran out to the garden to grab a tomato.  Then I saw the basil, which reminded me that I had mozzarella in my fridge and balsamic vinegar in my cupboard.  Rejoice!  As I was making my beautiful sandwich, my darling husband looked on.  Very skeptically.  He watched me take the first bite, and when I liked it, he took my sandwich to taste it.  (That’s how it works at our house.)  After one bite, he wanted his own.  And I’ve been making them almost nonstop since.  This is so simple, but the flavor will just about knock your socks off!  Everyone that has tried this sandwich has asked for seconds.  Every. Single. One.  It’s that good!!

Grilled Caprese Sandwich

makes 2 sandwiches

4 slices bread (I made bread because, hey, this was for a birthday dinner!) Otherwise use italian, french, or sourdough bread.
4 slices mozzarella cheese
1-2 tomatoes, sliced
10 basil leaves
garlic salt to taste
fresh ground pepper to taste
balsamic vinegar to taste
melted butter

Using half of the ingredients for each sandwich, lay out the 4 slices of bread. Place the mozzarella and tomatoes on two of the slices of bread. Sprinkle garlic salt and pepper over the tomatoes, and top with basil leaves. Lightly drizzle balsamic vinegar on the other two slices of bread, and place vinegar-side down over the basil. Brush melted butter on top of each sandwich, and place butter-side down on a hot griddle. Brush remaining unbuttered side with butter. Cook each side 2-3 minutes, or until golden and gooey.

Serve your unbelievably delicious sandwich with this incredible roasted red pepper and tomato basil soup.  Everyone who eats it will have undying admiration and love for you.

Tomato and Basil. Such a perfect combination of colors and flavors!

Filed Under: Recipes, Tomatoes

Roasted Red Pepper and Tomato Basil Soup

September 28, 2012 by Becky

Grilled cheese is serious business at our house. It’s one of the few meals that every member of our family will eat (without crying and complaining about how gross dinner is and asking what the kids get to eat and then crying harder when I tell them they don’t get a different dinner). Anyway. The adults in our house also love tomato soup.  We’re dippers and sippers.  We usually have our soup in a mug.  We dip our sandwiches, and when they’re gone we finish off the soup like a drink.  It’s total comfort food…I grew up on it.  Well, with the wagon full of tomatoes we picked the other day, I’ve been trying to get creative to use them.  I plan on freezing as many as I can, but I also want to eat as many I can while I can.  Because there isn’t much that compares to a fresh tomato, ripe off the vine.  Now that some of the days are getting a little chilly, it’s officially soup season at our house!  (I love soup season.  A lot.)  Enter: Roasted Red Pepper and Tomato Basil Soup!

Roasted Red Pepper and Tomato Basil Soup

3 roasted red peppers, rough chopped (click HERE to see how to roast your own.  don’t be scared, it’s easy.)

5 large tomatoes, skins removed, rough chopped

1 medium onion, diced

3 cloves garlic, diced

1/2 tsp thyme

2 tsp paprika

garlic salt & fresh ground pepper to taste

generous pinch cayenne pepper

generous dash of your favorite hot sauce

10 leaves of fresh basil, torn into thirds

6 cups vegetable or chicken broth

1 1/2 Tbsp butter

1 1/2 Tbsp flour

Saute onion and garlic over medium heat in a stock pot until fragrant.  Add the tomatoes and peppers.  Cook until the juices are slightly reduced.  Add the thyme, paprika, garlic salt, pepper, cayenne pepper, hot sauce and basil.  Using an immersion blender, or blending in batches (mine actually fit in one batch), process until smooth (or leave it a little chunky if you like.  I don’t.  Not for tomato soup.)  Add back to the stock pot if necessary and add the veg or chicken broth.  Melt the butter in a small bowl and stir in the flour.  Add to the soup and thoroughly combine.  Let simmer for about 25 minutes.  Makes about 8 servings.

Serve with a grilled caprese sandwich (aka the best grilled sandwich known to man).

*To remove tomato skins, lightly score an X into the bottom of the tomato.  Gently drop into boiling water, remove after 30-60 seconds.  Place directly into an ice bath until tomato is cool.  The skins will slide right off.

*I have to say it.  This is the best tomato soup I’ve ever had, including canned, boxed, restaurant, semi-homemade, etc.  This is also the best caprese sandwich I’ve ever had, including the one I had at a restaurant that’s been highlighted on at least one food show I like to watch.  Waaaaay better.  So much better.  I wish I could make this for everyone I meet.  It’s so fabulous.  I’ve made it for a number of family members and friends, and the look on their faces after that first bite…it says, “I knew you said this was going to be a good sandwich, but it’s way better than I thought it would be.  It’s probably the best thing I’ve ever tasted.  Start making another one now.  Right now.  MOVE!”

Enjoy!

Filed Under: Recipes, Tomatoes, Vegetables

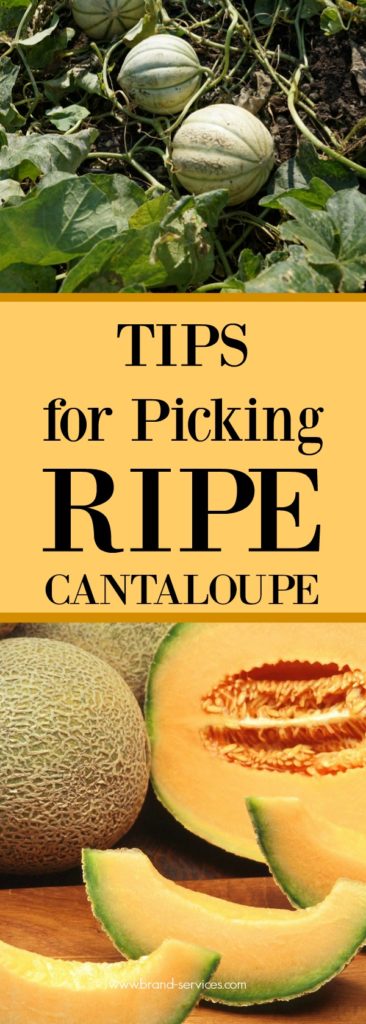
Tips For Picking Ripe Cantaloupe

September 27, 2012 by Becky


If you’re like me, you can use some tips for picking ripe cantaloupe, because it can be hard to tell when it’s ready to eat!

I used to think I didn’t like cantaloupe very much.  And I guess I didn’t really.  My problem was that I was eating bland, dry, flavorless cantaloupe that I bought on sale somewhere.  I learned my lesson and discovered how to choose or pick a cantaloupe that is ripe and ready to eat.  Now when I’m either picking fruit at the store or from my own garden, there are some simple tips to help you spend your money and time wisely.


Follow these simple tips to choose a melon that is ripe and ready to eat.

  1. LOOK – Cantaloupe should be a nice golden yellow color.  Don’t pick cantaloupe that are greenish.  They are not ready!  Don’t worry about rough spots that may be on the outside of your cantaloupe.  They don’t mean anything as to the ripeness.
  2. FEEL – You should be able to feel the edges of the outer skin.  A smooth skin means it is not ripe.  The flower end (the end not attached to the vine) is soft.  You should be able to press it gently in.  If it springs back out after pressing, your cantaloupe is ready.
  3. SMELL – Place that blossom end or the “button” of the cantaloupe just under your nose and take a whiff.  A strong sweet aroma indicates the cantaloupe is ready.  Sometimes you will smell the strong aroma without smelling the button.  If it doesn’t have a scent, don’t pick it or don’t buy it.  It is not sweet.

Now when I eat cantaloupe, it is like a little slice of heaven.  Fresh from my garden, picked right off the vine.  It is heavy, fragrant, so very juicy, and still warm from sitting in the sun in my happy little weed-filled corner of the world.  This is what makes me love to garden.  And what makes me love to eat!

Perfection!

Filed Under: Fruit, Gardening, Tips & How To's Tagged With: Cantaloupe, Fruit, Gardening, melon, ripe fruit, tips

How to Roast Red Peppers

September 17, 2012 by Becky

Red peppers are one of the best reasons to grow a garden.  They’re flavorful, delicious, great for snacking and cooking, and they’re so versatile.  You can put them in sandwiches, salads, burgers, or on eggs or pizza, or even use them in hummus.  I love roasted red peppers!  I bought a jar once at Costco, but after they stopped carrying them, I decided I would learn how to make my own.  It’s so EASY!  There are several methods, but this is the way I like to do it, because I think it’s the easiest!

You need a foiled-lined rimmed cookie sheet, an oil sprayer or non-stick spray (this is optional), and your beautiful peppers.

Preheat your broiler.  Mine has a high and low setting, I use high.  Cut the peppers in half lengthwise and remove the stem, membrane and seeds.

Give the foil a light spray of oil or non-stick spray and place them cut-side down.  Then give the peppers a light spray of oil.  I use my handy dandy oil sprayer because it’s cheaper than buying can after can of non-stick spray, and then it doesn’t have all the additives.

You don’t have to use oil, but I’ve done it both ways and the skins seem to peel off more easily if I give them a light spray.  Try it both ways.  If you don’t need the oil, then save some calories and don’t use it!

Look how pretty they are…just waiting to be charred!

Put them in your oven and wait for them to turn black!  I set my timer for 5 minutes, and then just watch them carefully after that.  These are just starting to char.

They don’t always char evenly, so I usually have to pull them out and rearrange them.  The peppers in the middle tend to take a little longer in my oven.  You want them nice and charred…these went back in the oven for some more black!

(You can also do this with whole peppers, and you can do them on the grill or over a gas burner, but this is the easiest way for me.  And I always like to follow the path of least resisitance.)

Once they come out of the oven, put them directly into a bowl and cover with plastic wrap, or into a ziploc or brown paper bag.  They need to finish steaming so you can easily peel them.  Let them sit for about 20 minutes.

After 20 minutes the skin should easily peel off and you should be left with beautiful, delicious roasted peppers!

Then do something fun with them, like roasted red pepper hummus!

…

Read More »

Filed Under: Recipes, Vegetables

Campfire Starters

July 21, 2012 by Becky

We have little kids.  And even though we camped a lot when I was a kid, the thought of taking four kids ages 7 and under out into the wilderness just doesn’t appeal to me yet.  I think it will soon, but probably not until we’re out of the baby stage.  Because camping with a baby just sounds hard.

But I’ve heard of a bunch of different DIY ideas for campfire starters.  And since I love the idea of camping, I decided to try the ideas to see which one is the best.  Because I’m not opposed to campfires…and we can do that in the backyard!  Then the kids can all have a bath and go to bed.  Which sounds perfect.

I tried four different starters.  I had everything on hand except for wax, so the only additional purchase I made was about $3 at the craft store for some paraffin wax.  I used 1/3 of the wax, so the additional cost for these was just under $1.  Not bad for 27 campfire starters!

The first one I made was just dryer lint stuffed inside toilet paper tubes.  Dryer lint and cardboard are both flammable…and then you’re reusing what would otherwise be trash.  Great idea.

The second one was cotton rounds dipped in wax.  Super light weight and small, perfect for camping.  Especially backpacking.

The third one was dryer lint stuffed in the cups of a cardboard egg carton, then covered with wax.  Again reusing something that would be garbage.

The fourth idea was dryer lint (are you seeing a theme here?) in paper muffin liners, covered with wax.

Making them was super easy, and quick too!  I went and bought my wax at the craft store.  It was $4.29, but with my 40% off coupon it was just under $3.  Love a good deal!

It came with three bars of wax, so each was just under $1.

I cut one of the bars into three pieces and then put it in a double boiler (I got a clean, empty can of beans out of my recycle can, and put that in a pot of simmering water).

When the wax was melted, I started by dipping my cotton rounds. I tossed them in the can, and when they had soaked up some wax (about 3 seconds), I took them out with my long tweezers and let them dry on a piece of tin foil. I’m sure waxed or parchment paper is great, but I keep my tin foil next to my stove, so that’s what I used.

After I dipped 10 cotton rounds, I used the rest of the wax to pour over my egg carton and muffin liner lint cups.

I didn’t know how much to pour on, so I just used enough to cover most of the dryer lint.  Until I ran out.  The last one didn’t get very much wax.

The only thing left to do at this point was test them!  I wasn’t planning on any campfires, so I grabbed my tinfoil from dipping the cotton rounds, and I tested my fire starters on the grill!

The only prep needed for any of the starters is to rip a cup off the egg carton, and tear the cotton round about half way down the middle.  You just need some of the cotton fibers exposed so you have something to light.

It was windy when I tested these, but I figured that was more of a real life scenario for camping anyway.  It was tricky to get the toilet paper tube and muffin paper starters to stay lit.  No problems at all with the cotton round and egg carton cup.

Once they all caught, they lasted a lot longer than I was expecting.  The toilet paper tube burned for 5 min 30 sec, the cotton round for 6 min 20 sec, the egg carton cup for 9 min 50 sec, and the muffin liner for more than 12 minutes.

So which one is BEST?  It depends.

Toilet Paper Tube: No additional cost, but the fire doesn’t burn as hot or as long (notice the flame size & intensity compared to the others).

Cotton Round: Cheap and easy to make, and is the smallest to store out of all the starters.

Egg Carton: Burns hot and long, but if you take the whole carton, it’s the bulkiest to pack.  However, if you just rip a couple off the carton to take camping, it’s convenient to store.

Muffin Liner: Biggest surface area, so it burns the longest out of the four.  You can even stack them to pack with your camping gear, which is pretty convenient.

I think we’ll plan a campfire night this week with our kids so I can test these out somewhere a little more exciting than the grill!  And since these are made from household items & garbage, I’d say it’s a pretty great thing!

Filed Under: Outdoors

  • « Go to Previous Page
  • Go to page 1
  • Interim pages omitted …
  • Go to page 14
  • Go to page 15
  • Go to page 16
  • Go to page 17
  • Go to page 18
  • Go to Next Page »

Primary Sidebar

Shopping Cart

Items in Your Cart

Your cart is empty
Visit The Shop

Follow Western Gardens

  • Facebook
  • Instagram
  • Pinterest
  • YouTube

See what we’ve been pinning!

Follow Me on Pinterest
Followed by people.
?

Pinterest Badge by Skipser

Here’s What We’ve Been Up To!

Save water and money by Turf Training - train your lawn to grow deep roots
work at western gardens utah garden center
Senior gardening woman Edu Carvalho from Pexels
nursery center open to public

Copyright © 2022. Western Gardens - Privacy Policy