• Skip to primary navigation
  • Skip to main content
  • Skip to primary sidebar

Western Garden Centers

for what grows here

  • Home
  • How To
  • Gift Cards
  • Calculate Mulch
  • Locations
    • Store Hours
    • About
    • Garden Shop Employment Team
  • Weddings
    • Salt Lake City, UT
    • West Valley, UT
  • Blog
    • Gardening
    • Recipes

Fruit

St. Patrick’s Day Mini Fruit Skewers

March 6, 2014 by Becky

If you are looking for a new idea, try these fun and festive (and healthy!) fruit skewers for St. Patrick’s Day!

Fruit Skewers Collage

St. Patrick’s Day Mini Fruit Skewers

Ingredients:

  • 1 kiwi
  • 1 cucumber
  • 1 green apple
  • 1 d’anjou pear

Directions:

  1. Cut fruit and cucumber into bite-sized pieces.  Using a party toothpick (with a green tip), skewer the fruit.  Serve immediately.
  2. Green grapes (cut in half) would be a great option too!

Happy Spring, it’s almost here!!

FOLLOW US  on  Facebook  Instagram  Pinterest  Twitter  Google+  YouTube

Becky


~ Becky

Filed Under: Fruit, Recipes Tagged With: Fruit, St. Patrick's Day

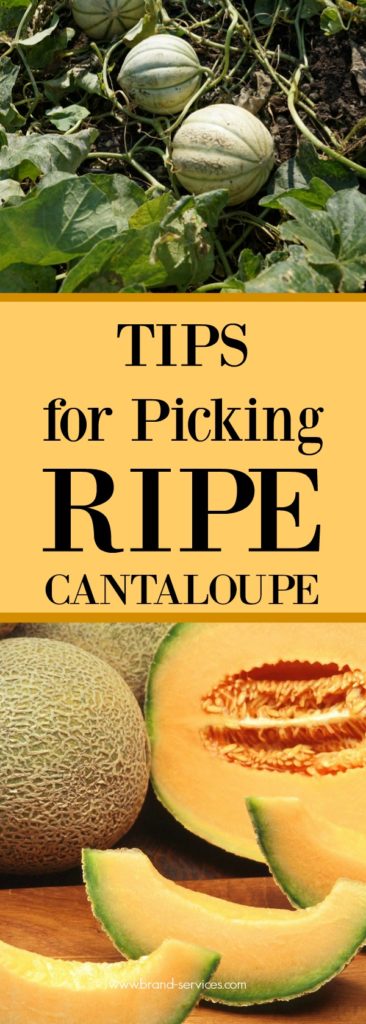
Tips For Picking Ripe Cantaloupe

September 27, 2012 by Becky


If you’re like me, you can use some tips for picking ripe cantaloupe, because it can be hard to tell when it’s ready to eat!

I used to think I didn’t like cantaloupe very much.  And I guess I didn’t really.  My problem was that I was eating bland, dry, flavorless cantaloupe that I bought on sale somewhere.  I learned my lesson and discovered how to choose or pick a cantaloupe that is ripe and ready to eat.  Now when I’m either picking fruit at the store or from my own garden, there are some simple tips to help you spend your money and time wisely.


Follow these simple tips to choose a melon that is ripe and ready to eat.

  1. LOOK – Cantaloupe should be a nice golden yellow color.  Don’t pick cantaloupe that are greenish.  They are not ready!  Don’t worry about rough spots that may be on the outside of your cantaloupe.  They don’t mean anything as to the ripeness.
  2. FEEL – You should be able to feel the edges of the outer skin.  A smooth skin means it is not ripe.  The flower end (the end not attached to the vine) is soft.  You should be able to press it gently in.  If it springs back out after pressing, your cantaloupe is ready.
  3. SMELL – Place that blossom end or the “button” of the cantaloupe just under your nose and take a whiff.  A strong sweet aroma indicates the cantaloupe is ready.  Sometimes you will smell the strong aroma without smelling the button.  If it doesn’t have a scent, don’t pick it or don’t buy it.  It is not sweet.

Now when I eat cantaloupe, it is like a little slice of heaven.  Fresh from my garden, picked right off the vine.  It is heavy, fragrant, so very juicy, and still warm from sitting in the sun in my happy little weed-filled corner of the world.  This is what makes me love to garden.  And what makes me love to eat!

Perfection!

Filed Under: Fruit, Gardening, Tips & How To's Tagged With: Cantaloupe, Fruit, Gardening, melon, ripe fruit, tips

Quick Gardening Tips

May 7, 2011 by Becky

Three of the simplest things you can do for success in your garden this year are: mulching, weeding, and keeping the pests out.  Here are a few hints to help you this Spring.

Mulching: To keep down weeds, conserve moisture, and keep fruit crops clean.  Use a six inch layer of straw or other organic material (shredded leaves, grass clippings, etc.) between rows of vegetables.  You can also lay strips of black plastic between plants.

Weeding: Hoe between crops regularly to control weeds and give your vegetables the best chance for success.  Weeds take nutrients from the soil (and thus away from your veggies), and weed roots can crowd out, or even become entangled with your veggie roots.

Pests: A 2 foot chicken wire fence will keep out most four-legged pests, but watch closely for insect pests.  If you do have a problem with pests, no matter how many legs, stop by one of our locations for advice from one of our garden experts.

What is YOUR favorite gardening tip?

Filed Under: Fruit, Vegetables

I Love Raspberries

June 28, 2010 by Becky

There is almost nothing better than snagging a few delicious raspberries while strolling through my garden.  I grow red everbearing raspberries, (but there are a number of varieties that do very well here in Utah).  Everbearing produce two crops on the same canes, one in the fall of the first year, the second in the summer of the following year.

Our area is perfect for raspberries because they need a winter chill and a lingering springtime with slowly warming temperatures.  Which is why the famous Bear Lake Raspberries are so tasty.  However, you don’t have to live in Bear Lake Valley to grow delicious berries.  (Even in warmer zones, light shade and heavy mulch will keep the ground cooler.  Rich, slightly acidic soil around pH 6-6.5 is ideal.)

To get started, plant the bare-root stock in the spring.  Set red and yellow raspberries 2.5-3 feet apart, in rows spaced 6-10 feet apart.  Plant black and purple raspberries in slightly raised mounds 2-3 feet apart in rows 6-8 feet apart (they will develop into clumps of canes).  Mulch plantings to discourage weed growth and keep the soil moist.  Water is needed most during flowering and fruiting.  Fertilize at bloom time.

Red and yellow raspberries are produced on erect plants with long straight canes; they can grow as freestanding shrubs, but are tidier and easier to manage if trained on trellis or hedgerow (pairs of parallel wires strung 3 feet and 5 feet above the ground along either side of a row of plants).

Summer-bearing varieties should produce three to five canes in the first year.  Don’t be shy about pulling out any canes that grow more than a foot away from the trellis or row.  In early spring cut the canes back to 4-5 feet tall.  When growth resumes, new canes will appear all around the parent plant and between the rows.  After the original canes bear fruit, cut them to the ground.  Select the best 5-12 new canes and tie them to the support (they will bear next summer); cut the remaining canes to the ground.  Everbearing red and yellow varieties fruit in the first autumn on the top of a cane, then again in the second summer on the lower two-thirds of the cane.  Cut off the upper portion of the cane after the first harvest; cut out the cane entirely after the second harvest.

Black and purple berries are produced on clump-forming plants with arcing canes.  No support is needed.  In the first summer, force branching by heading back new canes to 2-2.5 feet.  In early spring, remove all the weak or broken canes.  Leave 6-8 canes in each hill and shorten the side branches to 8-12 inches.  The side branches will bear fruit in late summer.  After harvesting, cut to the ground all canes that have fruited and cut back all new canes as described for the first summer’s growth.

Keeping your raspberries free of disease and small pests is really quite easy, be sure to stop by Western Garden Center to talk to one of our skilled gardeners to learn more about keeping your plants strong and healthy.

Oh, and don’t forget to let us know when you’re harvesting your yummy raspberries, we’d love a taste!

Filed Under: Fruit

  • « Go to Previous Page
  • Go to page 1
  • Go to page 2
  • Go to page 3

Primary Sidebar

Shopping Cart

Items in Your Cart

Your cart is empty
Visit The Shop

Follow Western Gardens

  • Facebook
  • Instagram
  • Pinterest
  • YouTube

See what we’ve been pinning!

Follow Me on Pinterest
Followed by people.
?

Pinterest Badge by Skipser

Here’s What We’ve Been Up To!

Save water and money by Turf Training - train your lawn to grow deep roots
work at western gardens utah garden center
Senior gardening woman Edu Carvalho from Pexels
nursery center open to public

Copyright © 2025. Western Gardens - Privacy Policy