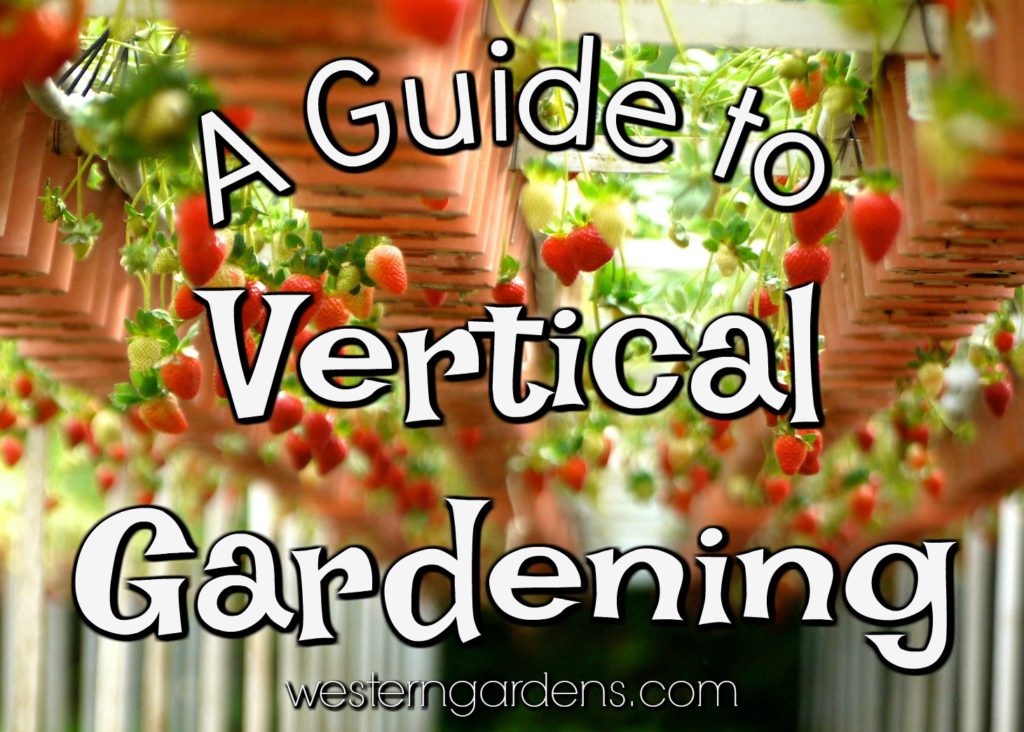
• Skip to primary navigation
  • Skip to main content
  • Skip to primary sidebar

Western Garden Centers

for what grows here

  • Home
  • How To
  • Gift Cards
  • Calculate Mulch
  • Locations
    • Store Hours
    • About
    • Garden Shop Employment Team
  • Weddings
    • Salt Lake City, UT
    • West Valley, UT
  • Blog
    • Gardening
    • Recipes

Tips & How To's

A Guide to Vertical Gardening

April 17, 2020 by Wendy Pettit

A Guide and Tips to Vertical Gardening in Utah

By Connie Pelton

The lack of a large space discourages many would-be gardeners. But if you can’t go out, perhaps you should consider going in a different direction: up.

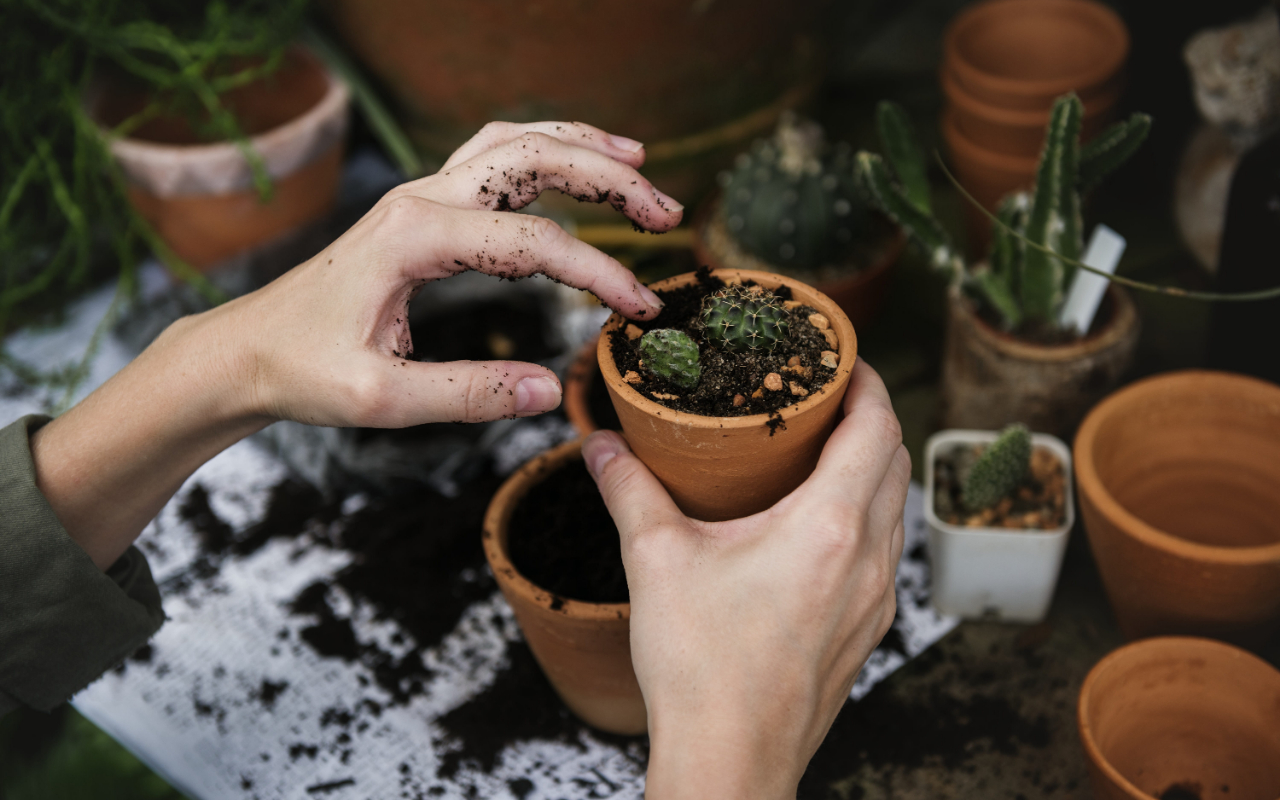
Vertical gardening is a highly efficient way to make the most of a small area.  Vertical gardeners enjoy higher yields per square foot than their traditional counterparts. They also have an easier time with pest control and harvesting. Whether you dream of bountiful blooms or tangy tomatoes fresh off the vine, you can make a vertical garden work. Here is a guide to vertical gardening to get you started.

Vertical gardening in utah

Source

Location and Orientation

Plants, like people, are particular about where they like to live. Some love full sun, and others want a smattering of shade. If you follow the rules, you’ll have a successful vertical garden. Most vegetables and herbs thrive in as much sun as possible; morning sun is essential. If you have a south-facing wall, fence, or railing, this is your spot.
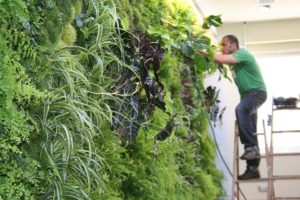
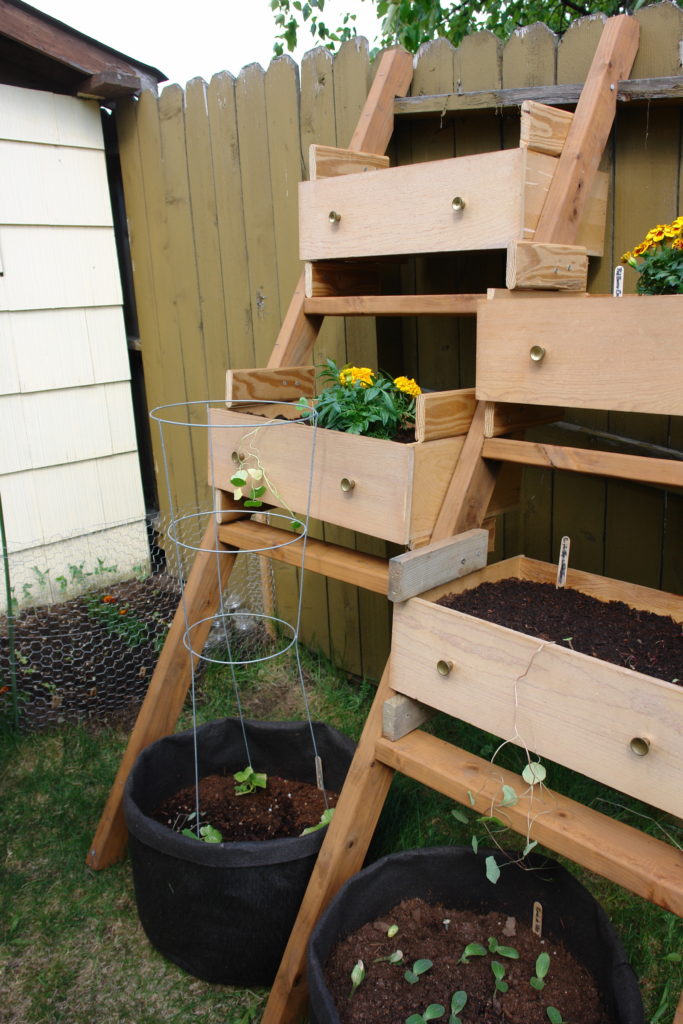
Planting Systems

vertical gardening with baskets

Source

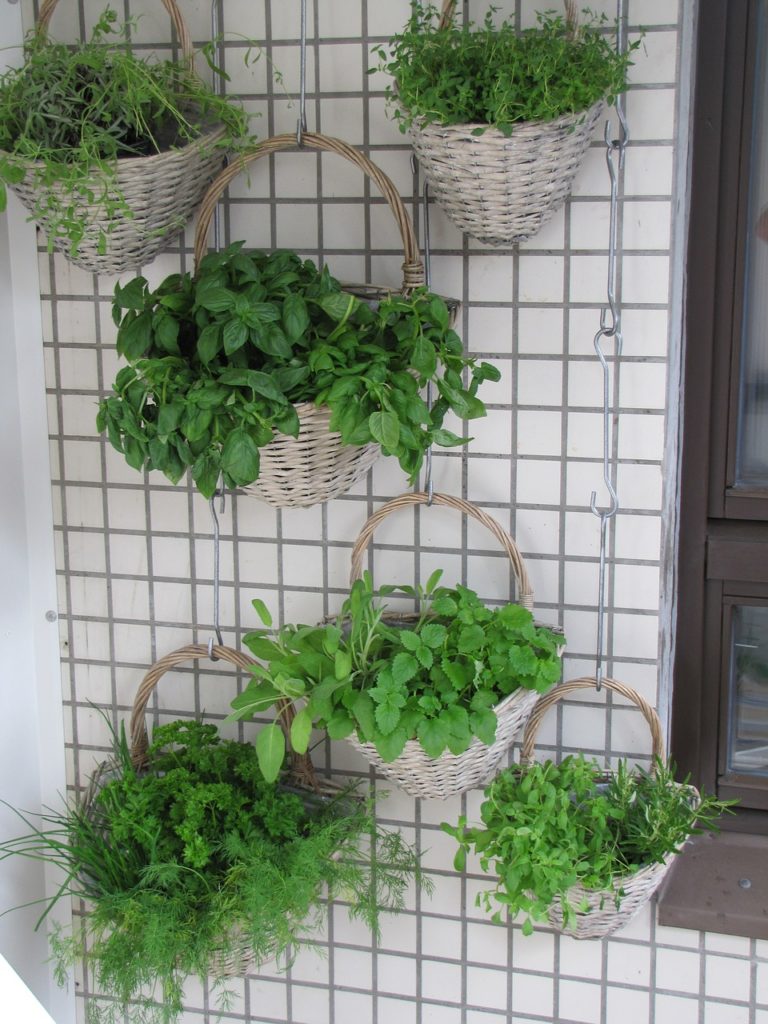
You have numerous vertical gardening systems to choose from.

  • Pocket systems hang on walls.
  • Modular systems stack atop one another.
  • Pallets are made with upcycled materials, with one side covered in fabric or plywood, then leaned against a fence or wall and filled with soil.
  • Ladder-like shelves hold potted plants leaning against a wall.
  • Hanging baskets are linked together in a chain.
  • Rain gutters let you plant strawberries in them and hang on a fence.
  • Trellises can be shaped like a teepee or A-frame and arranged over a soil-filled bed.
vertical gardening using plastic bottle

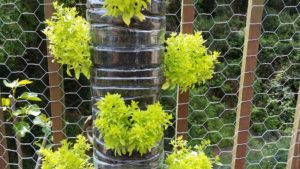
Photo by Luisgopa at Pixabay

vertical garden wood letter box

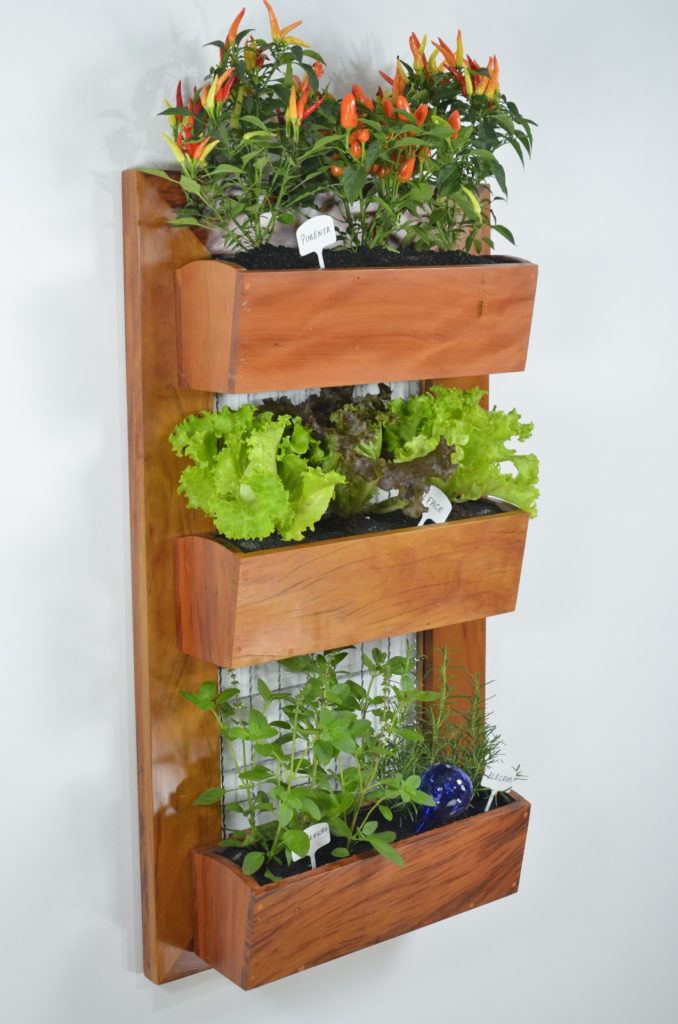
Photo by Dieneves at Pixabay

Feeling overwhelmed?  No worries!  See some tips for early spring gardening here.

Layering and Light

Because vertical gardening involves trellises and tiers, be mindful of plants that will cast shade on one another. You can underplant vining veggies such as tomatoes and squash with herbs such as mint, chives, tarragon, cilantro or parsley, which can handle a bit of shade. Try to plant varieties that are close to the same height and grow at the same rate to avoid crowding and shading. Sweet corn has such a solid stalk structure that you can use it to support climbers like beans. “Companion planting” is actually an ancient crop tradition.

Caring for a Vertical Garden

DIY vertical gardening with drawers

Source

Vertical gardens have some special needs. If you have trellises, you’ll want to keep a close eye on your climbers and do a bit of training to make sure vines stay where you want them. If you’re using containers or a raised bed, check the soil moisture often to make sure your plants don’t get dehydrated. You’ll also want to add a heavy layer of mulch – 2-4 inches– over the soil surface of raised beds. This helps the garden retain water during the hottest months of summer.

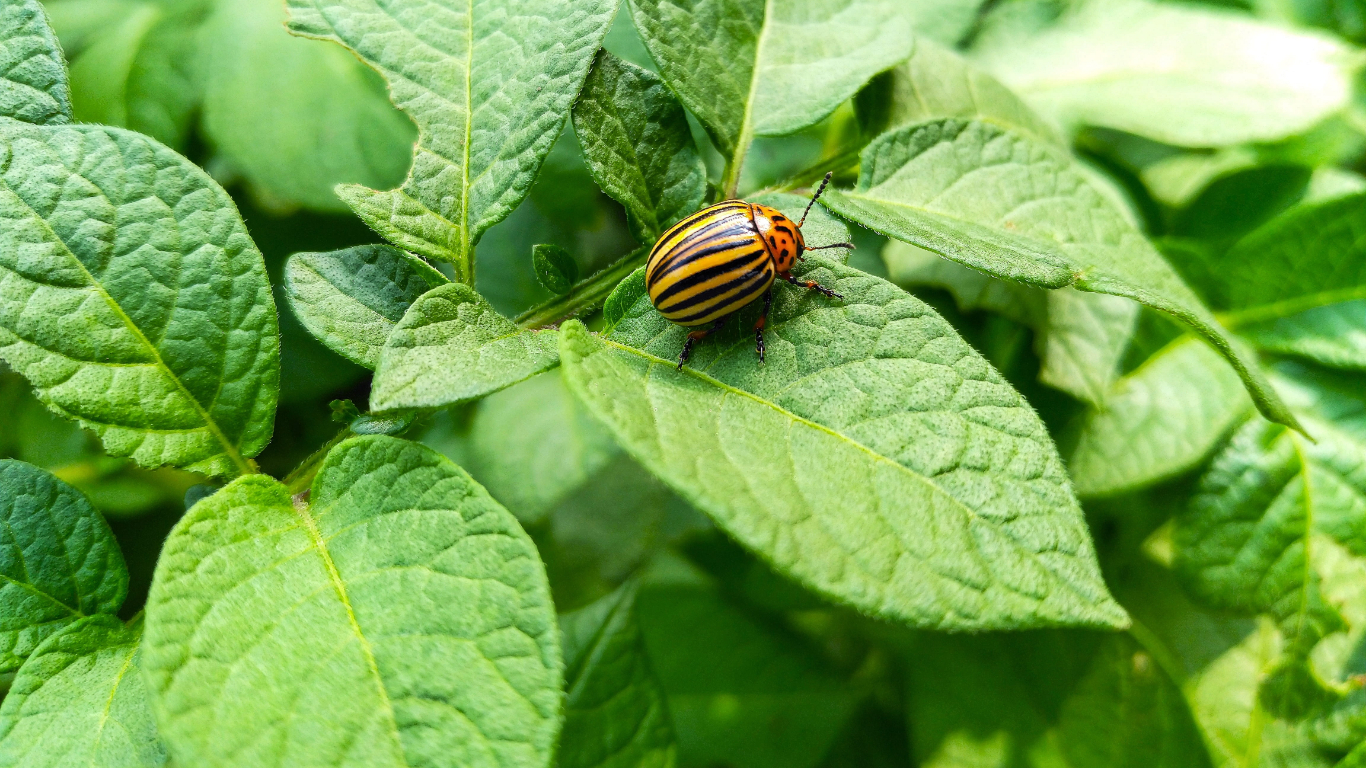
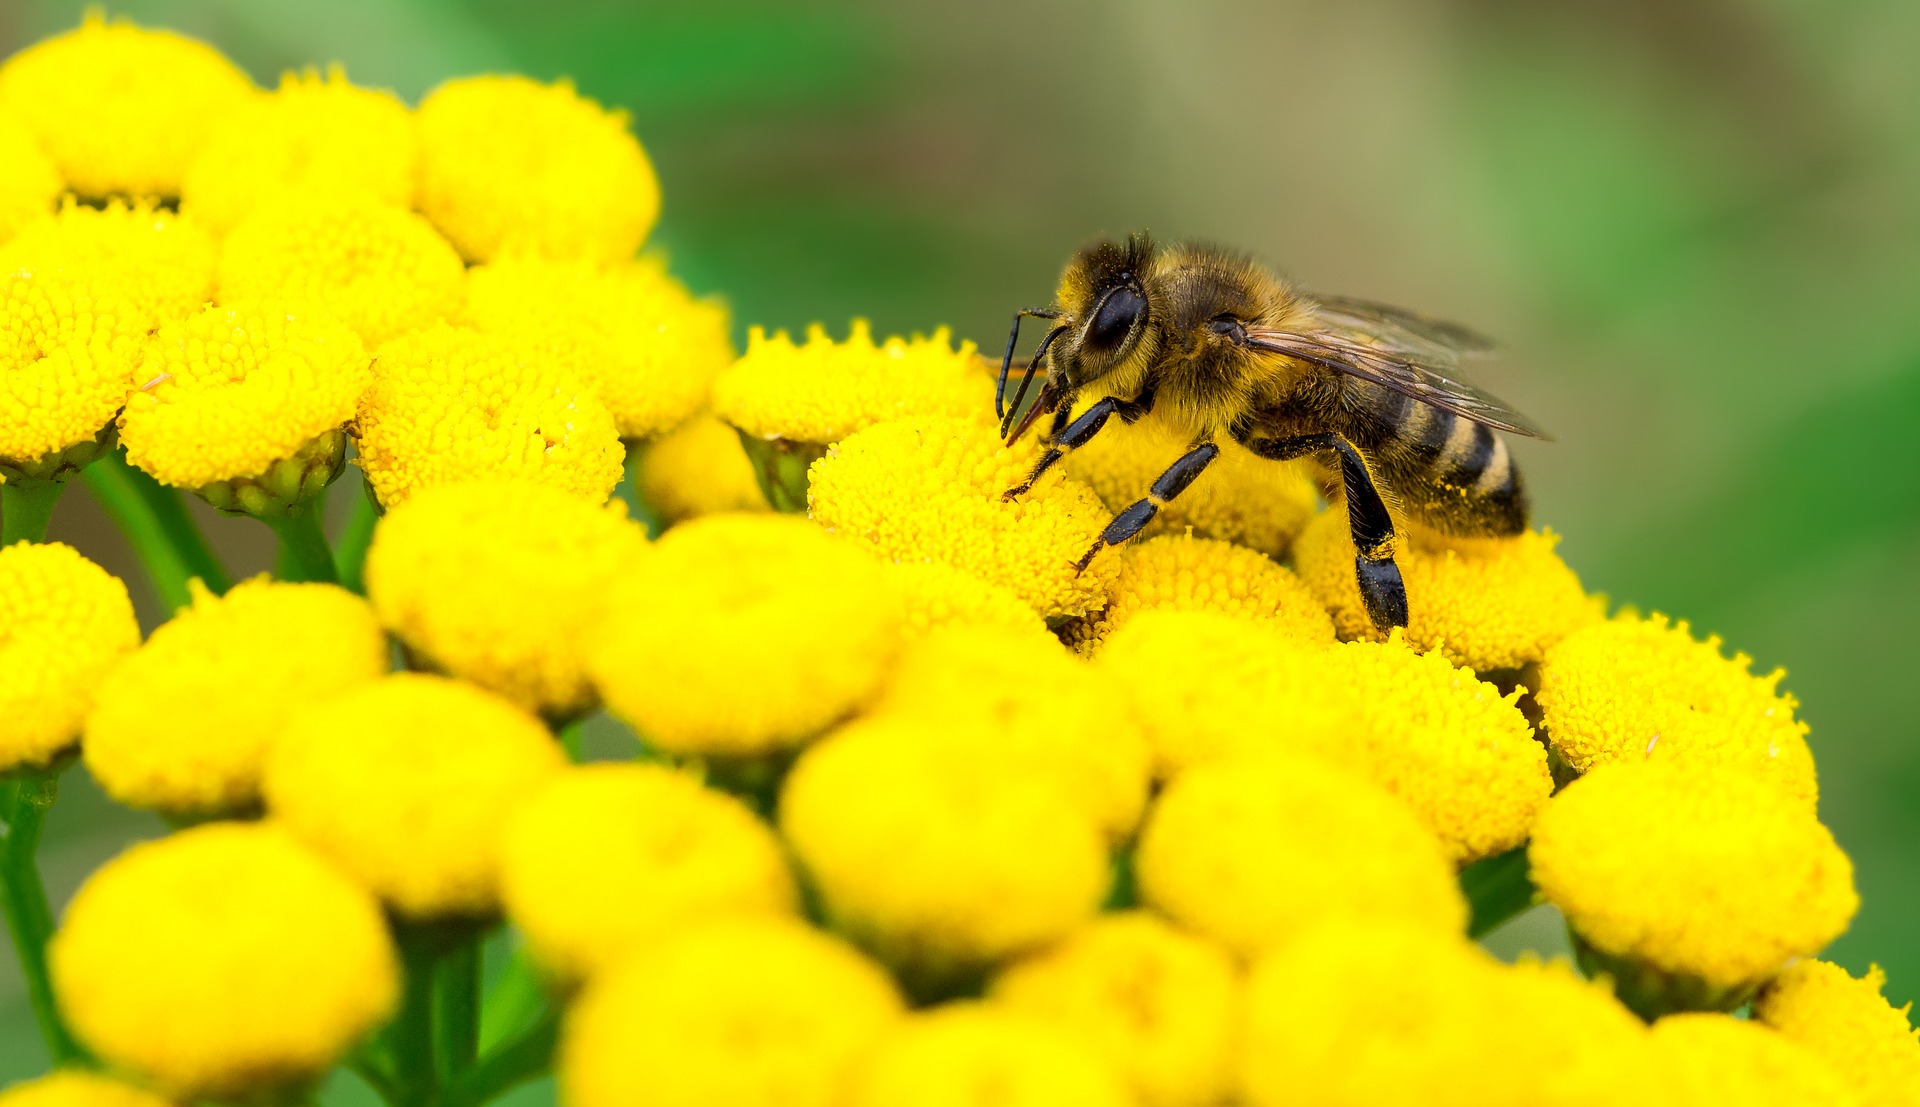
It’s easy to spot pest problems since many of your plants’ leaves will be exposed and closer to eye-level. Using organic pest control will ensure that your harvests are free of chemicals. If you see signs of aphids or other pests, you should treat them immediately. Hand-picking is your first line of defense against large pests such as caterpillars and beetles. For smaller insects, your approach may vary. Biological pest control is an organic, ecologically friendly way to combat garden pests on your lawn or in your garden.  By attracting or placing predator insects (praying mantids, ladybugs, lacewings) into the garden, you can let nature take care of your pest problems.

cages and drawers for utah vertical gardening

Source

Harvesting

Whether you use a tiered or trellised system, most vertical gardeners enjoy the relative ease of vertical harvesting. Rather than having to bend or crouch, you can harvest from a vertical garden while standing upright. This makes it a preferable option for the mobility-impaired or elderly gardeners.

Whether you’re a seasoned gardener or just developing your green thumb, vertical gardening is a beautiful way to take your gardening to the next level. Onward and upward!

harvesting a vertical garden

About the author:  Connie Pelton is a retired teacher who spends most weekends gardening with her grandchildren. Together, they built and planted an indoor vertical garden wall taller than both of them.

Filed Under: Container Gardening, Gardening, Herbs, How To, Tips & How To's, Utah Gardening, Veggie Gardening Tagged With: garden vertical, utah gardeners, Utah gardening, vertical gardening

Western Gardens Plant Material April 2020

April 13, 2020 by Wendy Pettit

Plant material at western garden centers utahWith the current pandemic situation, we now only do phone and email orders for pick up.  On this page, please find some videos and photos showing the excellent prime material we’ve had delivered to our door.  We will do our best to choose the best selection for your yard or needs.  Just let us know what you want, and we will get it.  You’ve trusted us for years, you can trust us now!

vivid orange and yellow ranunculus for early spring in utah

Ranunculaceous in vivid colors

Plant material as of April 13, 2020 –

SPRING COLOR ANNUALS & PERENNIALS

CLICK – Spring colder color annuals & perennials


GROUND COVERS

CLICK – Ground cover by Utah local growers


HERBS – VEGETABLES – BERRIES

CLICK – Berries –  Raspberries, blackberries, blueberries, grapes, pomegranate, currant, and more…

CLICK – Strawberries

CLICK – Herbs – cold-hardy herbs for April

CLICK – Herbs BASIL

CLICK – Tomatoes

CLICK – Vegetables cold crops


peony white and pink

Peony

FLOWERING SHRUBS & ROSES

Our prime ROSES will be here by the end of April.  We have a few that wintered over and just beginning to come out.  Email your requests.

CLICK – Magnolias

CLICK – Peonies – beautiful shipment just waiting to plant in your yard

CLICK – Lilacs – an old-time favorite with fragrance


SMALLER SHRUBS for TEXTURE & COLOR

CLICK – Barberries

CLICK – Spireas


FRUIT TREES

Realize that the fruit trees are just now coming out of dormancy.  Some look like sticks, but they are healthy and prime – ready for your yard!

CLICK – APPLES, APRICOTS, APRUMS, CHERRIES – bush or tree form

CLICK – NECTARINES, NECTAPLUM & FRUIT SALAD (varieties on same tree)

CLICK – PEACHES (including favorite “Donut”), PEACHOTUM, PLUERRY, COMBOS

CLICK – PEARS – all kinds including the Asian Pear

CLICK – PLUMS, COMBOS, PLUOTS, WALNUT


SHADE TREES

CLICK – FLOWERING CHERRIES – Beautiful selection of all types –

Special Local Note:  If you haven’t seen them, hurry and witness the color and fragrance of the cherry blossoms at the Utah State Capitol.  They are gorgeous!  (April 12, 2020)


MORE TO COME


Filed Under: Annuals, Flowers, Fruit, Gardening, Herbs, Outdoors, Perennials, Products, Tips & How To's, Tomatoes, Trees, Uncategorized, Vegetables Tagged With: annuals, apple, blueberries, cold hardy perennials, currant, fruit trees, Herbs, peach, pear, plum, pomegranate, shade trees, strawberries

Western Gardens HARD GOODS

April 11, 2020 by Wendy Pettit

Many are asking for better photos of what we have in HARDGOODS – chemicals, organics, tools, etc.  Here are some of our most requested items and video walk-throughs of our aisles at the Salt Lake Store.  Our West Valley store has the same!  Give us a call with your order!  We will even load it in your vehicle for you!  Thanks for supporting Utah small business!

FUNGICIDES & HERBICIDES

Video – FUNGICIDES – CLICK HERE

Video – HERBICIDES – CLICK HERE (coming soon)

F-Stop fungicide in Utah major lawn diseases

F-Stop is a great one that solves most lawn diseases.

Wide variety of fungicides in liquid, powder, concentrate, and more.

Wide variety of fungicides in liquid, powder, concentrate, and more. Follow label instructions


INSECTICIDES, PEST CONTROLS, & ORGANICS

Video – INSECTICIDES, PEST CONTROLS, ORGANICS – CLICK HERE

Video – How to use the TREE & SHRUB SYSTEMIC INSECT DRENCH – CLICK HERE

Systemic Insect drench to apply early utah spring for non-fruit bearing trees

Apply early to mid April in Utah. Drench non-fruit bearing trees and shrubs. Follow directions on label. It works!

Neem Oil organic pest control

Organic insect controller

Diatomaceous Earth Organic pest control

Organic pest control for those critters with soft bodies and joints

Weed Free Zone - kills broadleaf weeds in lawn

Proven to work in early spring (cool weather). Kills weeds in lawn – spurge, clover, and more. Do NOT spray on any broad leaf plant you want to stay alive. Made only for weeds in lawn application. Follow label instructions!

ANIMAL REPELLENTS

Video – ANIMAL REPELLENTS – CLICK HERE


FERTILIZER PRODUCTS

Video – Fertilizers – Specialized, Organics, Tree Stakes and more –  CLICK HERE 

Video – Fertilizer Favorite – Gardener’s Special –  CLICK HERE

Video – Fertilizer WGC General use & SOIL AMENDMENTS – CLICK HERE

Video – LAWN CARE – Our 4-STEP PROGRAM FERTILIZER – CLICK HERE

Video – LAWN CARE – ORGANIC Fertilizers – CLICK HERE

Gardeners special fertilizer with micro-nutrients

Our manager’s favorite all-purpose fertilizer with micro-nutrients.

BIRD SUPPLIES

Video – BIRD SUPPLIES – CLICK HERE


CONTAINERS – Pots and more (inside store – not including Ceramic Pots outside)

Video – CLAY POTS (small/medium), SEED TRAYS, LABELS – CLICK HERE

Video – PLASTIC POTS, CASTORS for moving heavy pots – CLICK HERE

Video – HANGING baskets, WINDOW boxes, Liners, etc. – CLICK HERE


LAWN CARE / GRASS SEED & STARTING A NEW LAWN

Video – GRASS SEED / STARTING A NEW LAWN OR OVERSEEDING – CLICK HERE

Video – Our Popular 4-STEP PROGRAM for Lawns all season long – CLICK HERE

Video – ORGANIC Fertilizer for LAWN CARE – CLICK HERE

pdf –  INSTRUCTIONS  – How to Plant a New Lawn from Seed

Array of sun and shade grass seed. April is a perfect time to plant lawn from seed.

Array of sun and/or shade loving grass seed. April is a perfect time to plant lawn from seed.

More shade and sun loving grass seed options

More shade and sun loving grass seed options

bare spot repair for lawns and grass

Need to just fix a bare spot in your lawn? Here is an easy product to work with!

TOOLS – including GLOVES etc.

Video – TOOLS – CLICK HERE (COMING SOON)

Photos of Favorite Tools – CLICK HERE

2 in 1 bench/kneeler.

Another best seller! 2 in 1 bench/kneeler.

Best Wolf Garden hand pruners

Wolf Garden is a hand pruner that we highly recommend. We gave our mother her very own pair to hide so that others didn’t walk off with hers!

PLANT SUPPORTS

Video – PLANT SUPPORTS – CLICK HERE

POTTING SOILS & ORGANICS, RAISED BEDS, PEAT MOSS – LARGE SIZES

Video – POTTING SOILS, RAISED BEDS, PEAT MOSS – CLICK HERE

Bumper Crop ORGANIC potting soil

This is a fantastic organic product for planting up your new pots.

raised bed organic soil for growbox

Did you build a new growbox or raised bed? This is the soil you want.

SPECIALIZED POTTING SOILS

Video – SPECIALIZED POTTING SOILS – CLICK HERE

Potting soil specialized

A wide variety of specialized soils for specialized plants in pots.


SOIL AMENDMENTS

Video – SOIL AMENDMENTS – CLICK HERE

Video about our BEST – BUMPER CROP SOIL BUILDER – #1 Product for Utah soils  – CLICK HERE

Bumper Crop ORGANIC SOIL BUILDER FOR UTAH GARDEN SOILS

This is our most favorite and most popular product we sell. Find great success with Bumper Crop Soil Builder.


KIDS in the Garden

Video – FAIRY GARDENS – figurines, houses, stones, moss, and more.

We also have an array of children’s tools and toys to help them be part of your garden.

Garden kid starter kit for utah children

Get your kids involved with their own garden tools. Here is a perfect starter kit. Their little hands can actually help a lot.

children tools for garden work

Variety of children tools to teach them the miracle of a garden.

children yard fun with kites

Activities for in the yard or garden


For more instore products – CLICK HERE TO RETURN TO HOME PAGE

Filed Under: Container Gardening, Gardening, How To, Insects, Kids in the Garden, Lawn Care, Products, Seeds, Tips & How To's, Utah Gardening, Yard Care Tagged With: animal repellent, bird supply, fertilizers, fungicides, garden containers, garden pest, garden products, garden tools, grass seed, grow box, herbicides, insecticides, kid friendly, kid garden tools, Lawn Care, organic, peat moss, pest control, raised beds, soil amendments

guide to low-maintenance indoor gardening

March 1, 2020 by Wendy Pettit

by Connie Pelton

indoor gardening on windowsill

Photo by Flickr

Indoor gardening is a growing trend in more ways than one. Not only is gardening good therapy, but it also gives you the chance to eat food picked at its most flavorful. Not everyone has space or energy to maintain a traditional outdoor garden plot. If you want the satisfaction of growing your fruits and vegetables on a more manageable scale, indoor gardening is the solution. Here are our tips for creating an indoor garden that will produce plenty without the upkeep of an outdoor plot.

sunlight for the indoor garden

Photo by Piqsels

Let There Be Light

The biggest hurdle for indoor gardening is usually finding adequate light. Plants need sunlight to grow. If there’s insufficient light, nothing else you do will matter much. “Full sunlight” means six or more hours per day of direct sun. An enclosed patio or any space with lots of large picture windows is a perfect place for an indoor plot. A kitchen windowsill also works. If you aren’t sure whether a location receives enough sun, try tracking the amount of light it gets using photos.

indoor garden pests

Photo by Piqsels

Indoor Garden Pest Control

Bugs and gardens have a complicated relationship. Grubs, aphids, and larvae can wreak havoc on a garden. But bees and other pollinators provide a service that plants can’t live without. Since some garden visitors are beneficial, you need to avoid any pest control that kills the helpful along with the harmful.

Even though your garden is indoors, you still have to worry about pests. It’s true that you won’t find rabbits or deer munching on plants in your kitchen. But, some insects can still make their way into your house. Biological pest control efforts are ideal for indoor use. Nematodes and natural repellants can safely stop unwanted pests without risk to pets, kids, or the helpful insects you want to keep around.

bee pollinating flowers

Photo by Pixabay

Paintbrush Pollination

While most common indoor plants will grow fine without pollination, some must be pollinated for them to produce food. Unless you’re willing and able to bring them outdoors and give them access to bees, you’ll have to pollinate them yourself. Paintbrush pollination is just what it sounds like. You rub the bristles of a tiny paintbrush around the inside of each blossom on your plants. Since indoor gardens are usually small, this is viable, though a tedious option.

person planting a clay pot

Photo by Pikrepo

Water, Soil, and Fertilizer

One advantage of indoor gardening is that you can control your growing conditions. Unlike outdoor plots that are subject to wind, drought, and downpours, your indoor garden is only exposed to the things you choose. This means you can tailor the soil composition and watering schedule to individual species. 

You’ll want to use a potting mix rather than plain soil. The mix contains vermiculite or perlite, and some bark to provide your plants with better drainage. It’s less compact than outdoor dirt, giving your plants the air and moisture they need. With the right soil mix, you should only have to water your plants once a week. Additionally, you’ll want to use plant fertilizer, which depends on which type of plant you are growing.

About every seedling or seed packet you encounter has a small section on the label detailing the needs of the specific plant. One of the most useful things you can do to ensure a good harvest is to read these instructions. Most herbs, including parsley, sage, mint, and rosemary, are easy to grow and don’t take up much room. Plan early and follow the instructions as carefully as you can. That way, each species you grow is in the kind of soil it prefers and getting the amount of water it needs to thrive. Now, combine that with the right amount of sunlight. You’ll soon have an indoor garden you’ll want to show off to everyone who visits.

Connie Pelton is a retired teacher who spends most weekends gardening with her grandchildren. Together, they built and planted an indoor vertical garden wall taller than both of them.


Filed Under: Container Gardening, Gardening, Tips & How To's, Uncategorized, Utah Gardening Tagged With: indoor garden, indoor gardening, indoor herbs, organic pest controls, pest control, window boxes, windowsill garden

How to Compost Your Kitchen Scraps

April 25, 2018 by Marjorie Carter

by Marjorie Carter

Alchemists are famous for their efforts to turn lead in to gold.  It was thought that a “base metal” could be purified or perfected so that it transformed in to something more valuable.

While their efforts were always in vain, it is possible to transform much of your daily waste from food preparation in to something more valuable than it’s original form.  Put in some grass clippings, add in your apple cores, roll together with your potato peelings, onion skins, watermelon rinds, and shredded paper bags.  Let it heat and stir once in a while.  Voila! You end up with black gold (aka compost)!

MY COMPOST EXPERIENCE

The house we bought a few years ago has a large yard (meaning space for a garden) and a few fruit trees.  This is exactly what we were looking for and we have enjoyed trying to keep up with maintaining it.  Our first fall in the house, we were generating a lot of waste as we processed apples, pears, and tomatoes that we’d grown.  We also were looking at all the green waste from pulling up the tomato plants and raking the leaves.  It dawned on us that we could be doing something much more useful and conscientious with all that biodegradable material.  We had spent some money earlier in the year to buy compost from the landfill to amend our soil to make it better for gardening.  Why not make some of our own compost to add to our garden?

We started by making a big pile in the back corner of the yard but realized quickly that, while this would eventually work, it was sort of unsightly and not as effective as it could be.  We then turned to a store bought composter with two plastic barrels mounted on a frame to allow the user to easily spin the barrels once in a while to mix up the contents.  We quite like this composter but quickly realized that this set up was better suited to someone with a smaller amount of material to compost. We needed something bigger to accommodate the amount of material we were generating with all the green waste from our canning and from our yard.

My husband knew someone who was moving and getting rid of a couple of 50 gallon water barrels.  We decided to pick them up to try using them to capture rain water for watering our garden (that’s a conversation for another blog post!) and then it occurred to us that these would make good composting bins.  My husband removed the top from one of them so we could easily put material in to the barrel and then drilled holes down the sides all around (easy and quick job with a power drill).  Suddenly we had much more space to fill. We’ve since added a second 50 gallon bucket in to the composting bin family.

So far we’ve had a couple of ‘batches’ of compost and it is surprisingly satisfying to see the rich black earth that was once a bunch of scraps and leavings.


STEPS FOR COMPOSTING

There are a few tricks to composting but, overall, it’s quite a simple task.

STEP 1:  The first thing is to pick a spot for your composting. Pick a spot that gets plenty of sun since heat is an important factor in getting all that green waste to break down.

STEP 2:  Next you need to pick a container. There are lots of commercially available options out there, you can build your own enclosure, or repurpose something the way we did.

STEP 3:  Once you’ve got things set up, you can start adding the organic material.

MATERIALS TO COMPOST

GREEN WASTE: Green waste includes grass clippings and the fruit and vegetable waste you would normally put in the trash.  Try keeping a metal bowl on the counter to hold your orange peels, wilted spinach leaves, banana peels, coffee grounds, etc.  Empty it daily to keep from attracting fruit flies.  They also sell little counter top buckets with lids for holding your compost.  I own one but I find that I tend to ignore it, even once it’s filled (out of sight out of mind!), and then end up with a smelly mess that is harder to get out of the container.  A bowl keeps things visible so I don’t forget to dump it out regularly.

BROWN WASTE:  Brown material can include dried leaves from your trees, cardboard egg cartons, paper bags, sawdust, and tree bark or cuttings.  As with the green waste, breaking this material in to smaller pieces will speed up the process – shred the paper bag or egg carton, use a wood chipper to chop up large branches, and so on.

AIR: There are steps to composting that include making sure the pile gets air, turning it, and making sure it stays moist.  These will help speed the process.  If you have the space for your compost to sit and do its thing for months, rather than weeks, then these steps can be more intermittent.  I have been a slow composter from the start (mostly due to laziness! Turning is something I just don’t remember to do very often). If you want your compost churned out at a faster pace, then you’ll need to be more mindful of these steps.

HEAT: Heat is important to composting, too, but don’t let that stop you from putting organic material from your scrap bowl in to the composter (rather than sending it to the landfill) during the winter. The decomposition process still occurs during the winter but at a slower pace and will pick back up once it starts to warm up.

It is important to remember that you need a mix of green and brown waste to make good compost. The green waste will provide nitrogen for the final product and the brown waste will provide carbon.  Both components are essential. Too much nitrogen in the compost will make it a smelly mess.  Too much carbon and the compost will take a very long time to decompose in to that black soil you’re hoping for.

TIPS ABOUT YOUR COMPOST

A few tips about the things you throw in to the compost pile/bin –
– large pieces of watermelon rind will take longer to break down than small ones so try chopping them up in to pieces no bigger than 1 inch by 1 inch.
– Egg shells can be added to your compost bin BUT they won’t break down as quickly as the green waste.  If you add egg shells, crush them as small as you can before tossing them in the compost bin
– Don’t put cherry pits or nut shells into the composter.
– Don’t put in bones or meat or dairy or oily materials
– Don’t add weeds with seeds (unless you are diligent with temperatures reaching 160 degrees)
– Don’t add diseased plant material (again, temperature issue, and the last thing you want to do is spread disease throughout your garden)


According to the experts at Utah State University, during the growing season, 30% or more of landfill waste is organic yard refuse (https://extension.usu.edu/htm/publications/publication=4955). Home composting eases landfill problems and helps “reuse, reduce, and recycle” this organic material into a valuable soil amendment.

For me, the thing that is most satisfying about composting is this last point.  My efforts may be small in the grand scheme of the trash scene, but I’m doing my part to keep as much waste out of the landfill as I can.  It also just so happens that doing this is actually beneficial to me.  When I dig into my garden, I know that some of that earth was once on my kitchen countertop as scraps and are now contributing to my delectable tomatoes.

Pin me – composting kitchen scraps!

Basic steps to composting kitchen scraps into rich soil

Filed Under: Gardening, How To, Tips & How To's, Uncategorized, Utah Gardening, Yard Care Tagged With: compost, compost kitchen scraps, composting, kitchen scraps

Pest Control – the Annoying Box Elder Bug

April 19, 2018 by Western Gardens

Boxelder bug on green leaf. CC-BY-SA-3.0 (http://creativecommons.org/licenses/by-sa/3.0/) or CC BY 2.5 (https://creativecommons.org/licenses/by/2.5)]

By Tom Murphy VII on WikimediaCommons

Have you already found a boxelder bug inside your house this spring?  They are often the first bug of spring, at least in my yard. Boxelder bugs (Leptocoris species) are very common over most of the United States. They are considered more of a nuisance than a destroyer.  

Boxelder bugs are most numerous in areas where boxelder, silver maple, ash, and fruit trees grow.  Their main source of food is from sucking the juice from the boxelder tree, which does not damage the tree. In the early spring, the female bugs lay their eggs on the bark of these trees.  The new little hatchlings are called nymphs and are about ¼ inch long and have bright red wingless bodies with black legs. Nymphs congregate in mass, so it’s easy to spot them on the trunk of a tree, building foundation, or wherever. The young feed on tender twigs, foliage, pollen, and seeds through the spring and summer. Controlling the nymphs is easier than controlling the adults so watch this spring to get a jump on them.     

Boxelder adult and nymphs

Boxelder bug Nymphs & Adults – Photo by Viking6 at Wikipedia, CC by 3.0

The Boxelder bug adults grow to be about ½ inch long.  They are red or black with reddish lines on their wings.  In the fall, especially on bright sunny days, the bugs migrate to locations to hibernate through the winter.  In the spring, they emerge to look for host trees so they can eat and lay their eggs, completing the cycle.  

boxelder bug adult on flower

Photo by Bruce Marlin on WikimediaCommons


How to Control Boxelder Bug and/or Prevent their Annoyance

  1. For home invasion prevention, keep sealed doors, windows, foundation cracks, around plumbing, gas, and electrical conduits.  Weather strip around doors and windows plus screen off attic vents and repair broken windows and screens. Expanding-foam sealants may be helpful too.  
sealed window and door keeps bugs out

Photo by Pixxl Teufel on Pixabay

  1. Vacuum the bugs with a “shop” type vacuum, empty the vacuum and seal and dispose of the collected bugs, as they can live through the vacuuming process and will continue to creep around otherwise.
vacuum up boxelder bugs

Photo by Jarmoluk on Pixabay

  1. Avoid smashing the bugs. They don’t feed on fabric or furniture, but when crushed, they do stain household items.  They also release a strong, unpleasant odor.
shoes to squish boxelder bug

Photo by Took-a-Pic on Pixabay

  1. Boxelder bugs, especially the nymphs, are easily drowned.  When watering your plants with a garden hose, it’s also a good time to water-down congregations of bugs on buildings.  
  2. Reduce bug populations by removal of female boxelder trees. Realize that even if you don’t have a boxelder tree on your property, chances are great that there is a Boxelder tree nearby.

Boxelder trees are often called “trash” trees. They may seem pretty and provide shade, but there are many other better choices for shade.

Boxelder tree leaves

  1. Boxelder bugs do not have many natural enemies.  No major insects or birds like to eat them, probably because they can emit an offensive odor, which probably makes them taste bad too.  Spiders could be considered a minor predator.  
  2. Chemical control of boxelder bugs is difficult because these bugs are tolerant of most insecticides.  There are some residual insecticides that can be sprayed around the outside of the building.   Oil based sprays can stain building surfaces, so try to control on the host plants, not the building.  Be sure to check with your local independent garden center, like Western Gardens, to know the latest and best product recommended.   Always follow current label instructions of any pesticide used, as label changes occur and must control application procedures. This or any other instruction must be adjusted/disregarded so application conforms to the current pesticide container label.
  3. For an organic alternative to using synthetic insecticides.  Mix about ½ cup laundry detergent with one gallon of water.  Use a squirt bottle to spray the insects. There is no residual value so you must spray thoroughly and often.  
Organic solution of spray bottle and detergent to kill boxelder bugs

Organic Solution

Resources:  Thanks to Ortho Publications, Utah State Extension, Chuck Solomon, and G. Rex Buys of Western Garden Centers

ways to control boxelder bug

Filed Under: Gardening, Insects, Tips & How To's, Utah Gardening

Keep Kids Safe from Poisonous Plants and Pesticides – Part 1

April 14, 2018 by Western Gardens

Keep Kids safe from Poisonous plants and pesticides

As the first days of spring arrive, people are eager to get outdoors. Unfortunately, the outdoors can pose several dangers to children.  Adults can keep kids safe from poisonous plants and pesticides by being aware of some basic knowledge and advice.

According to the National Capital Poison Center, the most poisoning occurs in children who are six or younger, including almost half of poisoning exposures. Though poisoning affects everyone from seniors to infants, it is most common in one- and two-year-olds.

In 2014, poisonous plants and pesticides were among the top 10 leading causes of poisoning in children younger than six years, accounting for nearly 6 percent of poisoning cases, while bites and stings accounted for 0.5 percent of poisoning cases among the same age group. Additionally, 2.5 percent of poisoning fatalities in children younger than six years from 2010-2014 were due to pesticides, making them one of the more dangerous causes of poisoning in children.

Parents and caretakers need to be informed about the dangers of poisonous plants and pesticides to keep children safe. Parents who know what to keep out of their yards and by teaching children what to avoid can prevent many poisonings by plants and pesticides.

What You’ll Find in This Guide:

  • Types of Poisonous Plants
  • How to Prevent Poisoning from Plants
  • What to Do If Your Child Touches or Eats a Poisonous Plant
  • Pesticide Safety
  • Resources for Preventing Poisoning by Plants and Pesticides
Vibrant larkspur is beautiful but poisonsous.

Vibrant larkspur is beautiful but poisonsous to eat. Photo by Felix Mittermeier on Pixabay

Types of Poisonous Plants

This section covers the more common types of poisonous plants found near backyards, parks, and trails.

Poisonous plants are categorized by the chemicals they contain. The most dangerous plants contain solanine, grayanotoxins and cardiac glycosides.

  • Solanine is found in food and ornamental plants such as Jerusalem Cherry, Nightshade, potato sprouts and unripe tomatoes. Unripe tomatoes and the green eyes of potatoes containing solanine, when ingested, can cause vomiting, diarrhea, headache, and moderate nausea. If children eat plants containing solanine in large quantities, drowsiness, sweating and changes in blood pressure and heart rate can occur. You may see effects within two to 24 hours, and diarrhea may last for three to six days.
  • Grayanotoxins are found in common yard plants including azalea and rhododendron. Lambkill and mountain laurel also contain grayanotoxins. If children eat or chew on leaves in this plant group, they may experience burning, numbness or tingling in their mouths. Within two to three hours, they may display other symptoms of poisoning such as nausea, vomiting, sweating, confusion and slowed heart rate. In severe cases of grayanotoxin poisoning, children have had seizures.
  • Cardiac glycosides are found in plants such as squill, Lily-of-the-Valley, foxglove, and oleander. Initial signs of cardiac glycoside poisoning include stomach pain, dizziness, confusion, headache or vomiting. Children who consume plants containing cardiac glycosides also experience a change in the rate or rhythm of the heart, and effects on blood pressure also may occur.


Other 
common poisonous plants include:

  • Poppies
  • Hemlock
  • Oak leaves and their acorns 
  • Mistletoe
  • Elephant ear plants
  • Poison oak, ivy, and sumac
  • Hyacinths and daffodil
  • Larkspur
  • Black locust
  • Wisteria
  • Mistletoe
Daffodils are beautiful and poisonous.

Daffodils are beautiful but to eat them is not good. Photo by Pixel2013 on Pixabay

Purple grape hyacinths is a poisonous plant

Little cute “grape hyacinths” are not grapes you want your children to eat. Photo by Couleur on Pixabay

Lily of the valley poisonous plant in the garden

Lily of the Valley are a gardener’s favorite, but remember to teach little people not to eat them. Photo by Soorelis at Pixabay

pink white and purple lupine standing very tall in the garden. poisonous plant

Lupine are so colorful and beautiful. However, they are not for consumption. Photo by Punch_Ra on Pixabay

How to Prevent Poisoning from Plants

This section includes tips for preventing children from being poisoned by plants. Parents should proactively teach their children to avoid eating plants or parts of plants. It’s also a good idea for parents of young children to avoid growing poisonous plants in their yards.

The most effective way to prevent poisoning is teaching children to not eat anything they find outside, regardless of whether or not it looks or smells good. Even if the birds are eating the berries, this doesn’t mean they are not poisonous for humans.  Children should only eat plants or fruits from outside if they have your permission and after taking them in the house and washing them off. Try to practice what you preach, and don’t eat items from the family garden outside; tops of potato plants and green portions of potato contain solanine and rhubarb leaves which are poisonous.

To avoid accidental poisoning of children, keep berries, seeds, bulbs and plants out of reach. Try to avoid areas in parks that aren’t commonly used and areas that contain large amounts of plants. Additionally, while it may seem like a no-brainer, try to avoid decorating or landscaping with poisonous plants at home. Plants that have bright flowers and poisonous berries should be avoided until the children are older. The bright colors can be attractive to children, which can lead to ingestion. Also, remove all mushrooms that grow near your home and check your lawn for new mushrooms, especially during a wet and hot summer. 

Making your yard and garden as safe as possible is the best course of action for preventing poisoning from plants. However, you don’t want to shutter your children off from being explorative. Providing safe areas where children can play and not be at risk of poisoning can be a great way to promote imagination. When taking your children on wilderness adventures, be wary of potential hazardous plants along walkways and trails.

Read More in Part 2 – What to do if your child touches or eats a poisonous plant…

young child girl holding plant in hand

Photo by Caroline Hernandez on Unsplash

About the Author:   Angie Bersin, Redfin

Angie is a Marketing Coordinator at Redfin and creates content for the Redfin blog. She writes on a variety of topics including outdoor activities, fitness trends, and real estate. In her free time, Angie enjoys hiking with her dog, exploring the beautiful city of Seattle, and traveling the globe.  See original article


Learn how to keep kids safe around poisonous plants and pesticides

Filed Under: Gardening, Kids in the Garden, Tips & How To's, Utah Gardening Tagged With: children garden, kid safety, pesticides, plant safety, poisonous plants

Keep Kids Safe from Poisonous Plants and Pesticides – Part 2

March 29, 2018 by Western Gardens

young child girl holding plant in hand

What to Do If Your Child Touches or Eats a Poisonous Plant

This section guides parents through the correct course of action should their child come into contact with or ingest a poisonous plant.

If any of these symptoms occur after your child touches or eats a poisonous plant or pesticides, call 911 immediately: choking, unconsciousness, difficulty breathing or difficulty swallowing. If your child is not experiencing these severe symptoms but has touched or eaten a poisonous plant, berry, seed, bulb, or mushroom, contact your local poison center immediately at 1-800-222-1222. Do not wait for symptoms to appear before calling. You should be prepared to give your child’s age, symptoms or illnesses, the names of plants consumed, if possible, how much and which parts were eaten, and how recently the plant was touched or ingested. The poison specialist will instruct you on what to do and which symptoms to look for in your child.

If you are somewhere you cannot immediately get assistance, do not ingest or put a plant in your mouth to check if it is poisonous. You should look for pieces of the plant in your child’s mouth and remove any that you can find. You should give him small sips of water but avoid attempting to make him vomit. If your child has a skin irritation, itching, rash or blisters, immediately rinse his skin with fresh water. Call your local poison center (1-800-222-1222) as soon as you have access to a phone line.

Children like to pick flowers.

Flowers are like magnets to children. They love to pick and smell. Teach them not to eat anything from the yard. Photo by Ardi Evans on Unsplash

Poison Ivy grows in leaves of three. Do not touch poison ivy.

Poison Ivy is a poisonous plant you or your child do not want to even touch. Photo from WikimediaCommons

Pacific Poison Oak in the fall.

Poison oak in the fall is another gorgeous plant. Children may want to gather its leaves. Don’t touch!

Pesticide Safety

Spring and summer also bring out more pests, both inside and outside of the home. This section explores the risks pesticides pose to children and includes tips for using safer alternatives to toxic pesticides.

Early farmers spread pesticides with horses who were protected.

Crazy how the horses were somewhat protected from the sprays. Photo by Internet Archive Book Images on Flickr & Wikimedia Commons. No restrictions.

The National Pesticide Information Center makes it clear that all pesticides carry a level of toxicity and pose a risk to all people but especially to infants and children, who are more sensitive to the toxic effects of pesticides than adults. Because pesticides also pose a poisoning risk to children, it is critical that parents use pesticides responsibly.

If you do choose to use a pesticide, be sure to read the product label to ensure you use it correctly and apply it exactly as the label instructs. Look for the least-toxic pesticides available and store them in their original containers far out of the reach of children. It is critical that you keep your children and pets out of treatment areas while you apply pesticides and until treated areas dry. Children should wear shoes and sit on blankets or use other barriers between them and your lawn if it has recently been treated. When your children are finished playing, make sure they wash their hands with warm water and soap as soon as they enter your home.

The safest way to handle pests in gardens, yards, and homes is to use insecticidal soaps, horticultural oils, and natural ingredients to keep them at bay. If you are looking for different forms of pesticides that can keep your family garden safe, as well as the food you grow in it, try these alternatives:

  • Vegetable oil mixed with mild soap for insects like aphids and mites
  • Mild soap mixed with water for insects like whiteflies, beetles, aphids, and mites
  • Neem oil mixed with mild soap and water to disrupt the life cycle of insects and to protect plants before they become infested
  • Diatomaceous earth as a natural pesticide
  • Pureed garlic mixed with vegetable oil, mild soap and water to act as an insect repellent
  • Garlic, onion, and cayenne pepper, mixed with liquid soap as a natural insecticide

If parents take steps to learn about how to protect their children from pesticide and plant poisoning, most poisonings could be avoided. However, accidents happen to even the most prepared, so it is important to always be ready to contact a poison control center or emergency services if a child ingests or comes into contact with poisonous plants and pesticides.

Read More –  Discover several quality resources for preventing poisoning by plants and pesticides.

Author:  Angie Bersin, Redfin Reality

Angie is a Marketing Coordinator at Redfin and creates content for the Redfin blog. She writes on a variety of topics including outdoor activities, fitness trends, and real estate. In her free time, Angie enjoys hiking with her dog, exploring the beautiful city of Seattle, and traveling the globe.  See original article

 Learn how to keep kids safe around poisonous plants and pesticides

Filed Under: Gardening, Kids in the Garden, Tips & How To's, Utah Gardening Tagged With: kid safety, pesticides, plant safety, poisonous plants

Keep Kids Safe from Poisonous Plants and Pesticides – Part 3 Resources

March 29, 2018 by Western Gardens

Resources for Preventing Poisoning by Plants and Pesticides

We have compiled a list of resources that you can contact or research to get more information on pesticides and poisonous plants. You will find locations and phone numbers, materials for learning and informational sites if you are interest in learning more about the subjects of this guide. Please note, they are listed in alphabetical order.

ASPCA Poisonous Plants is dedicated to informing people which plants are poisonous to pets and animals.

Centers for Disease Control and Prevention Poisoning Prevention focuses on providing tips to prevent accidental home poisonings, including those by pesticides and plants.

Clemson Cooperative Extension’s Home & Garden Information Center gives a thorough overview of poison ivy, a plant that commonly causes skin irritation in children.

Early Childhood Learning & Knowledge Center shares information about poisonous plants and lists both non-poisonous and poisonous plants in charts.

Penn State Extension Pesticide Education is a fun portal that allows families to learn about pesticide safety in a fun way.

Poison Control is the place to call when you suspect your child has ingested or touched a poisonous plant or pesticide. You can get help online or call 1-800-222-1212.

Poisonous Plants in the Home Landscape is a publication by Montana State University professor of horticulture R.E. Gough that lists 72 plants and tells which parts of the plants are poisonous and whether they are dangerous through contact or ingestion.

Quills Up! Spike’s Poison Prevention Adventure is an engaging video for preschool-aged children that includes life lessons in poison prevention including staying away from plants and pesticides.

Texas A&M AgriLife Extension Earth-Kind Landscaping shares a chart of the more common poisonous plants.

The University of California, Berkeley’s CalPhotos: Plants is an image database that contains over 300,000 pictures of plants to help determine if the plants you see on a daily basis are poisonous or not.

U.S. Department of Health & Human Services: Poison Proof Your Home offers tips for preventing poisoning by plants and pesticides.

Author:  Angie Bersin, Redfin

Angie is a Marketing Coordinator at Redfin and creates content for the Redfin blog. She writes on a variety of topics including outdoor activities, fitness trends, and real estate. In her free time, Angie enjoys hiking with her dog, exploring the beautiful city of Seattle, and traveling the globe.  See original article

Learn how to keep kids safe around poisonous plants and pesticides

Filed Under: Gardening, Kids in the Garden, Tips & How To's Tagged With: kid safety, pesticides, plant safety, poisonous plants

Turf Training – Train your Lawn

March 29, 2018 by Western Gardens

Welcome Friends! Glad you dropped in to learn about saving water and money by Turf Training.

Save Water and Money by training your lawn to grow deep roots

You can train your dog and train your lawn too!

You cannot teach a lawn to fetch the paper or to roll over. Even though some say that it can play dead, in the winter!  Now that your lawn is coming out of the dreary winter, it’s time for turf training. You can train your lawn to grow deep lawn roots, so that you can cut your water bill during the summer and your lawn can be happy during those hottest Utah summer weeks. Turf Training is more painful for the owner than the lawn itself, but by July, it is possible to be watering your lawn once every two weeks or less, depending on your soil type.  I know it works; I’ve lived it.  This plan is for established lawns; new turf requires other care.  Follow these steps and you too can have a well trained happy green lawn.

  1.  This month (April & into May), do not water your lawn!  Mother Nature is taking care of watering lawns for you.  DEEP INFREQUENT watering creates deep roots and thriving healthier plants.
  2. Aerate your lawn.  Perfect time is just before one of our spring rains.
  3.  Apply the proper spring fertilizer.  Follow the directions explicitly.  Again, the ideal time is just before a good rain to wash it into the turf.
  4. If you haven’t already, apply pre-emergent.
  5. Keep your finger OFF the automatic sprinkler system. Do NOT water your lawn.  You are in turf training mode.  I know it is painful because the sun is shining and spring is here, but don’t do it.  Your lawn is stretching its roots deep.  Let them go!
  6. In May, repeat #5 unless one of the following occurs…
    • Mother Nature hasn’t watered for 3 weeks. Time to water.
    • When you walk across your lawn, your footsteps don’t bounce back up.  Time to water.
    • When you look across your lawn, you notice a dull bluish green tone in spots.  Time to water.
  7. DEEP WATER – Put a good inch of water or so on your lawn.  Placing a tuna can on your grass will let you know when you’ve watered sufficiently.  All this water will soak down deep and you will train your lawn, by withholding watering cycle, to stretch deep for the water.  The roots will grow deeper and in the hot summer months of July & August, your lawn won’t get as stressed out.  Its roots will be cooler down deep.
  8. Repeat steps #6, #7 and #8.

As you can imagine, it will take time to train your lawn to grow deep roots.  That is why it is important to begin first thing in the spring.  For established Kentucky Blue grass, you may need to follow this method for two seasons, but it can be done. 

This method to train your lawn is not meant for flower beds, newly seeded lawns, newly placed sod, trees or shrubs.  Learn from our experts those proper watering techniques.

Watering Lawn Methods graphic by Texas Smartscape

http://www.txsmartscape.com/design_tools/water_conservation.asp

Watering your lawn in spring? Train your lawn to save water and money.

Article submitted by Wendy P

Filed Under: Lawn Care, Outdoors, Tips & How To's, Yard Care Tagged With: deep lawn roots, drought tolerant grass, spring lawn care, summer lawn, turf, turf training, turf watering, watering lawn, watering lawns, Western Gardens

  • Go to page 1
  • Go to page 2
  • Go to page 3
  • Interim pages omitted …
  • Go to page 6
  • Go to Next Page »

Primary Sidebar

Shopping Cart

Items in Your Cart

Your cart is empty
Visit The Shop

Follow Western Gardens

  • Facebook
  • Instagram
  • Pinterest
  • YouTube

See what we’ve been pinning!

Follow Me on Pinterest
Followed by people.
?

Pinterest Badge by Skipser

Here’s What We’ve Been Up To!

Save water and money by Turf Training - train your lawn to grow deep roots
work at western gardens utah garden center
Senior gardening woman Edu Carvalho from Pexels
nursery center open to public

Copyright © 2025. Western Gardens - Privacy Policy