• Skip to primary navigation
  • Skip to main content
  • Skip to primary sidebar

Western Garden Centers

for what grows here

  • Home
  • How To
  • Gift Cards
  • Calculate Mulch
  • Locations
    • Store Hours
    • About
    • Garden Shop Employment Team
  • Weddings
    • Salt Lake City, UT
    • West Valley, UT
  • Blog
    • Gardening
    • Recipes

Marjorie Carter

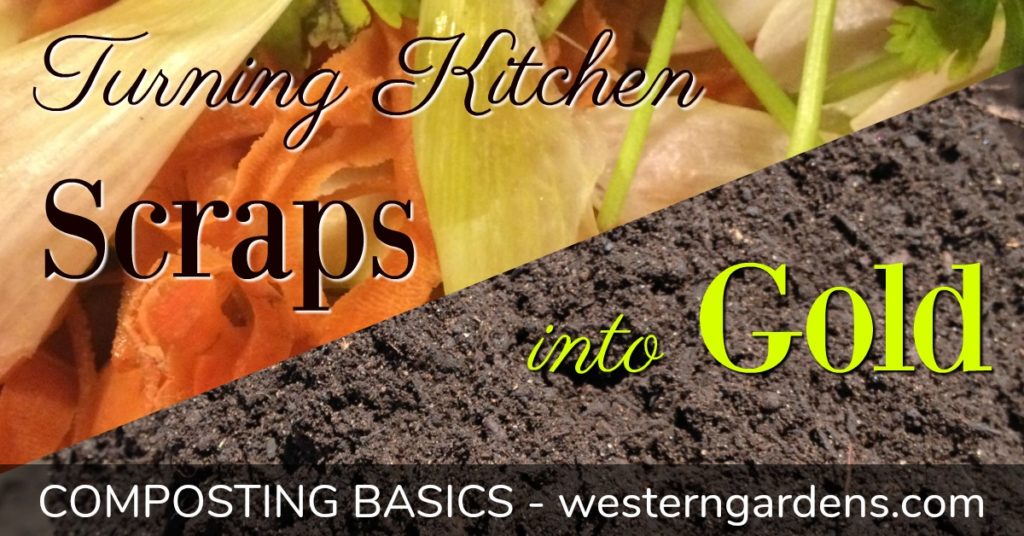
How to Compost Your Kitchen Scraps

April 25, 2018 by Marjorie Carter

by Marjorie Carter

Alchemists are famous for their efforts to turn lead in to gold.  It was thought that a “base metal” could be purified or perfected so that it transformed in to something more valuable.

While their efforts were always in vain, it is possible to transform much of your daily waste from food preparation in to something more valuable than it’s original form.  Put in some grass clippings, add in your apple cores, roll together with your potato peelings, onion skins, watermelon rinds, and shredded paper bags.  Let it heat and stir once in a while.  Voila! You end up with black gold (aka compost)!

MY COMPOST EXPERIENCE

The house we bought a few years ago has a large yard (meaning space for a garden) and a few fruit trees.  This is exactly what we were looking for and we have enjoyed trying to keep up with maintaining it.  Our first fall in the house, we were generating a lot of waste as we processed apples, pears, and tomatoes that we’d grown.  We also were looking at all the green waste from pulling up the tomato plants and raking the leaves.  It dawned on us that we could be doing something much more useful and conscientious with all that biodegradable material.  We had spent some money earlier in the year to buy compost from the landfill to amend our soil to make it better for gardening.  Why not make some of our own compost to add to our garden?

We started by making a big pile in the back corner of the yard but realized quickly that, while this would eventually work, it was sort of unsightly and not as effective as it could be.  We then turned to a store bought composter with two plastic barrels mounted on a frame to allow the user to easily spin the barrels once in a while to mix up the contents.  We quite like this composter but quickly realized that this set up was better suited to someone with a smaller amount of material to compost. We needed something bigger to accommodate the amount of material we were generating with all the green waste from our canning and from our yard.
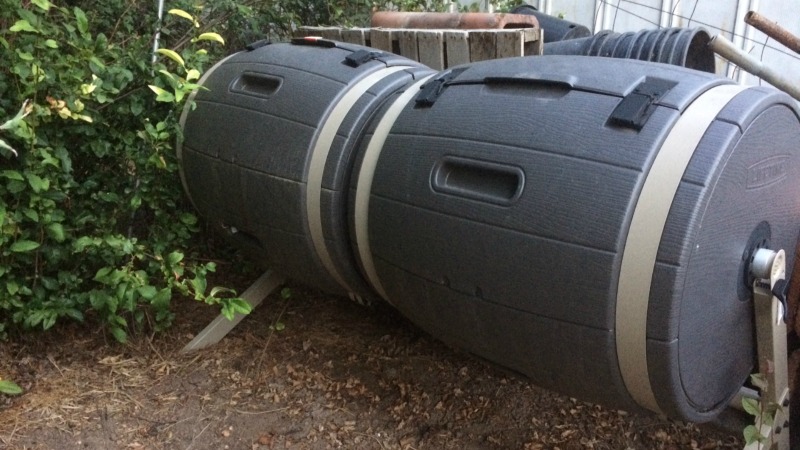
My husband knew someone who was moving and getting rid of a couple of 50 gallon water barrels.  We decided to pick them up to try using them to capture rain water for watering our garden (that’s a conversation for another blog post!) and then it occurred to us that these would make good composting bins.  My husband removed the top from one of them so we could easily put material in to the barrel and then drilled holes down the sides all around (easy and quick job with a power drill).  Suddenly we had much more space to fill. We’ve since added a second 50 gallon bucket in to the composting bin family.
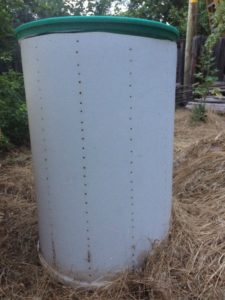
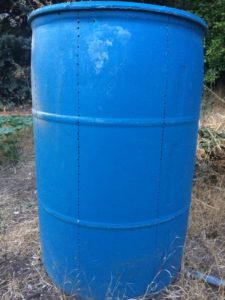
So far we’ve had a couple of ‘batches’ of compost and it is surprisingly satisfying to see the rich black earth that was once a bunch of scraps and leavings.


STEPS FOR COMPOSTING

There are a few tricks to composting but, overall, it’s quite a simple task.

STEP 1:  The first thing is to pick a spot for your composting. Pick a spot that gets plenty of sun since heat is an important factor in getting all that green waste to break down.

STEP 2:  Next you need to pick a container. There are lots of commercially available options out there, you can build your own enclosure, or repurpose something the way we did.

STEP 3:  Once you’ve got things set up, you can start adding the organic material.

MATERIALS TO COMPOST

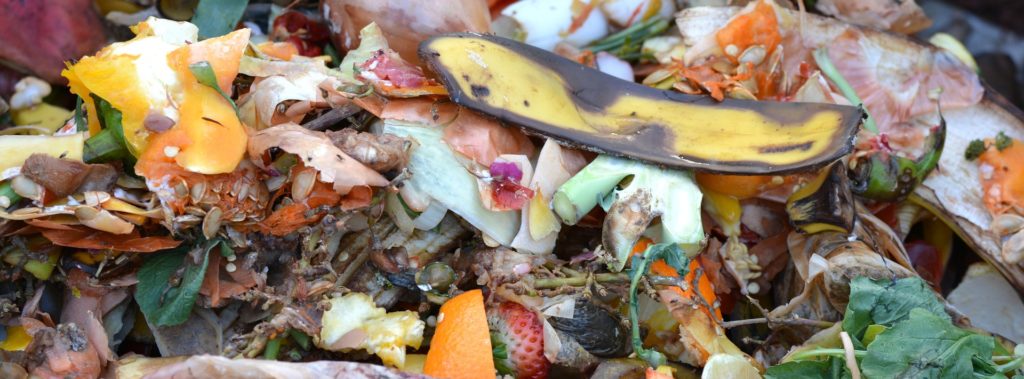
GREEN WASTE: Green waste includes grass clippings and the fruit and vegetable waste you would normally put in the trash.  Try keeping a metal bowl on the counter to hold your orange peels, wilted spinach leaves, banana peels, coffee grounds, etc.  Empty it daily to keep from attracting fruit flies.  They also sell little counter top buckets with lids for holding your compost.  I own one but I find that I tend to ignore it, even once it’s filled (out of sight out of mind!), and then end up with a smelly mess that is harder to get out of the container.  A bowl keeps things visible so I don’t forget to dump it out regularly.
BROWN WASTE:  Brown material can include dried leaves from your trees, cardboard egg cartons, paper bags, sawdust, and tree bark or cuttings.  As with the green waste, breaking this material in to smaller pieces will speed up the process – shred the paper bag or egg carton, use a wood chipper to chop up large branches, and so on.
AIR: There are steps to composting that include making sure the pile gets air, turning it, and making sure it stays moist.  These will help speed the process.  If you have the space for your compost to sit and do its thing for months, rather than weeks, then these steps can be more intermittent.  I have been a slow composter from the start (mostly due to laziness! Turning is something I just don’t remember to do very often). If you want your compost churned out at a faster pace, then you’ll need to be more mindful of these steps.

HEAT: Heat is important to composting, too, but don’t let that stop you from putting organic material from your scrap bowl in to the composter (rather than sending it to the landfill) during the winter. The decomposition process still occurs during the winter but at a slower pace and will pick back up once it starts to warm up.

It is important to remember that you need a mix of green and brown waste to make good compost. The green waste will provide nitrogen for the final product and the brown waste will provide carbon.  Both components are essential. Too much nitrogen in the compost will make it a smelly mess.  Too much carbon and the compost will take a very long time to decompose in to that black soil you’re hoping for.

TIPS ABOUT YOUR COMPOST

A few tips about the things you throw in to the compost pile/bin –
– large pieces of watermelon rind will take longer to break down than small ones so try chopping them up in to pieces no bigger than 1 inch by 1 inch.
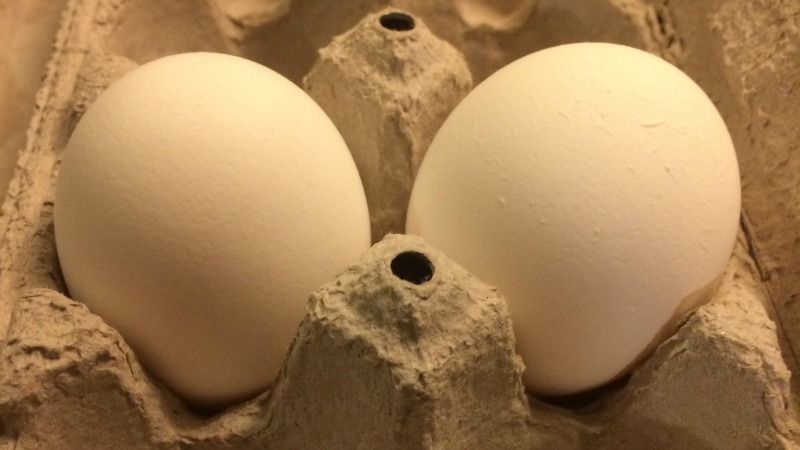
– Egg shells can be added to your compost bin BUT they won’t break down as quickly as the green waste.  If you add egg shells, crush them as small as you can before tossing them in the compost bin
– Don’t put cherry pits or nut shells into the composter.
– Don’t put in bones or meat or dairy or oily materials
– Don’t add weeds with seeds (unless you are diligent with temperatures reaching 160 degrees)
– Don’t add diseased plant material (again, temperature issue, and the last thing you want to do is spread disease throughout your garden)


According to the experts at Utah State University, during the growing season, 30% or more of landfill waste is organic yard refuse (https://extension.usu.edu/htm/publications/publication=4955). Home composting eases landfill problems and helps “reuse, reduce, and recycle” this organic material into a valuable soil amendment.

For me, the thing that is most satisfying about composting is this last point.  My efforts may be small in the grand scheme of the trash scene, but I’m doing my part to keep as much waste out of the landfill as I can.  It also just so happens that doing this is actually beneficial to me.  When I dig into my garden, I know that some of that earth was once on my kitchen countertop as scraps and are now contributing to my delectable tomatoes.
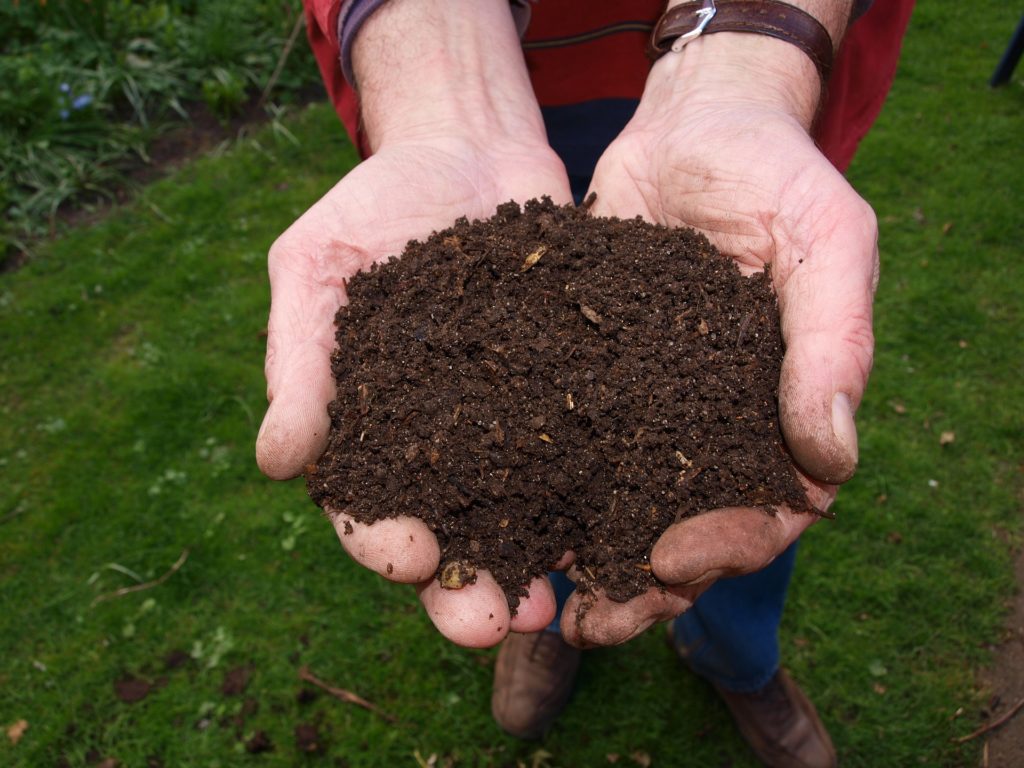
Pin me – composting kitchen scraps!
Basic steps to composting kitchen scraps into rich soil

Filed Under: Gardening, How To, Tips & How To's, Uncategorized, Utah Gardening, Yard Care Tagged With: compost, compost kitchen scraps, composting, kitchen scraps

Apples for Applesauce and Apple Butter

September 14, 2017 by Marjorie Carter

I use different apples for applesauce and apple butter.  Here are ways to use a variety of apples or just Jonagold and Golden Delicious.

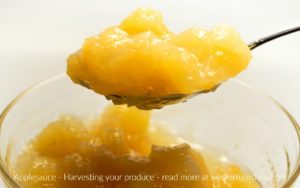
Applesauce

homemade Apple sauce

Photo by Taken at Pixabay

The best tasting applesauce is made using a variety of different apples.  This is a good opportunity to do some apple swapping with neighbors!  If only one apple is used for applesauce, then a sweet-tart variety is best, such as a Jonagold.  
Use jonagold apples for applesauce and apple butter

Photo by Marco Roosink at Pixabay


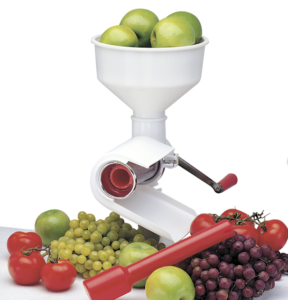
Apples have enough natural sweetness that I avoid adding sugar.  It’s really not necessary. The sauce maker is a big help if you’re trying to process lots of apples.

Photo: Canology/Norpro Click photo for link

Making applesauce is not difficult, especially if you have a sauce maker, but it can be sticky work.  I know there are lots of instructions on the internet.  I like this recipe by PickYourOwn because the writer explains all the steps and equipment needed. 


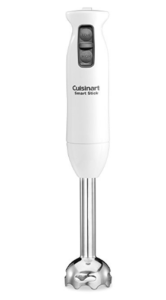
Cuisinart Smart Stick

Photo: Amazon/Cuisinart  Click Photo for Link

If you don’t own a sauce maker, you can peel the apples, remove stems and seeds, then use a stick blender or transfer to a blender jar to puree. Be careful because the apples and the resulting sauce will be hot.


That’s it.  Gobble it up fresh or preserve in bottles using proper canning procedures.


Apple Butter

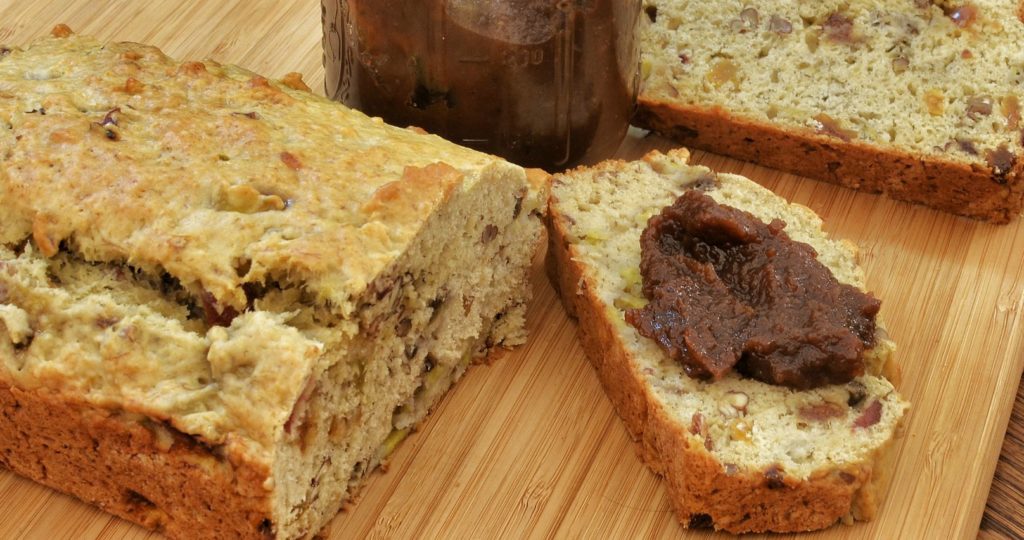
Applebutter on banana nut bread

Photo by Jeffry W at Flickr license CC 2.0

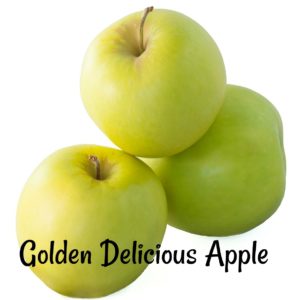
golden delicious apples for applesauce and/or apple butter

Photo: Pixabay

My golden delicious apples, when used alone, make a bland tasting sauce that I don’t really enjoy eating.  However, they make great apple butter. So, if you make any applesauce that does not taste as good as you hoped it might, consider using it for apple butter.   Basically, you will use about 9 quarts of applesauce, slowly cook it down in your crock pot, add a spice blend part way through the process, and end up with about 9 pints of delicious, dark brown apple butter that you’ll want to eat by the spoonful straight out of the jar.  It’s also delicious on toast, biscuits, pancakes, waffles, etc., etc.  The only difference is I do not add any sugar.  Again, apples are sweet enough that they simply don’t need any help.  

I also like to use my stick blender to puree the final product a bit more so it is as smooth as I can get it.  This is purely optional but it makes for a very nice texture. 

FALL is a great time to plant your own fruit trees.  Your local nursery may still have some.  Otherwise, wait until spring for a great selection.

Click BACK to read my CHILDHOOD MEMORIES of APPLES

Click NEXT for APPLE CHIPS and APPLE PIE FILLING

Western Gardens | Utah

  Western Gardens | Utah


Filed Under: Fruit, Gardening, Recipes Tagged With: apple butter, apple recipes, applesauce, golden delicious, homemade, jonagold

Apple Chips and Apple Pie Filling

September 14, 2017 by Marjorie Carter

We’ve eaten fresh long apple skin peels, made delicious applesauce, and rich apple butter.  Here are two other ways that I use to preserve my apples – apple chips and apple pie filling.  The tips I give are from my own personal experience.

Apple chips

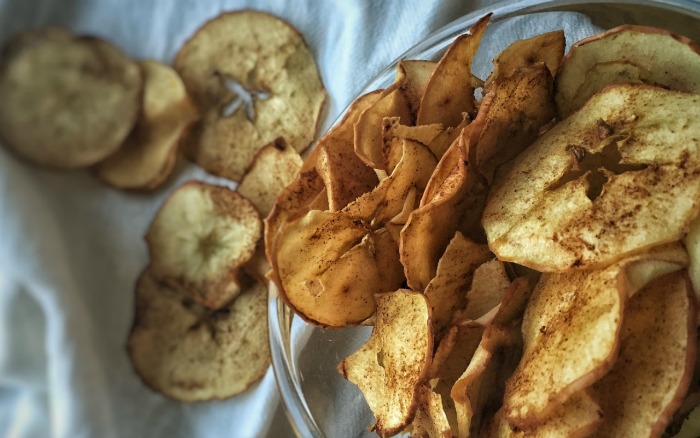
Dehydrated apple chips

Photo by Cook Your Life at Pixabay

I love my food dehydrator.  The first time I needed one, I borrowed my Mom’s dehydrator that she bought back in the early 70s.  It worked very well but it was pretty loud.  I finally bought a newer dehydrator and I love how quiet it is.  It also has a larger capacity than the older one, so I can process more produce per batch.

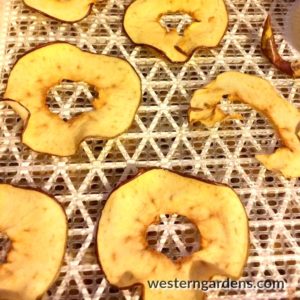
dehydrating sliced apples

If you don’t have a food dehydrator, you can use your oven but you’ll need to be a bit more vigilant about checking on the apples so they don’t burn.  The dehydrator allows you to use lower temperatures than most ovens will permit so you can ignore them for a few hours before checking to see if they’re done.  


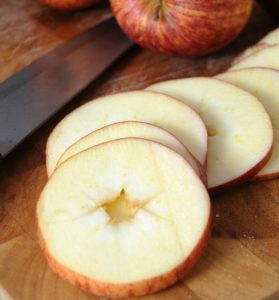
apple slices for drying into apple chips

Photo by Wolffsfa at Pixabay

There’s nothing fancy when it comes to apple chips. 

The biggest trick, in my opinion, for the best apple chip is to cut the slices as thin as you can manage.  That is why I like using a food processor.  It allows for a consistent thickness of all the slices and it also allows you to quickly slice a lot of apples.  If you have boxes of fruit to go through, speed is something that cannot be underrated.   You can also use a sharp knife to cut slices as thin as you can manage.  

Spread the slices out on a tray from your food dehydrator and follow your dehydrator instructions for the right setting.  If using your oven, place apple slices on a baking sheet lined with parchment paper.  Heat oven to 200 degrees and allow the apples to heat for 1.5 – 2 hours.  Or, for a little faster time, heat oven to 225 and cook apples for 45 minutes to 1 hour. 

Optional: Before baking or placing in the dehydrator, you can sprinkle the slices with cinnamon or another mixture of spices to give them extra flavor.  

Pumpkin spice mix is yummy:

  • 2 tbsp. ground cinnamon
  • 1 tbsp. ground ginger
  • 1 ½ tsp. ground nutmeg
  • 1 ½ tsp. ground cloves

Apple Pie Filling

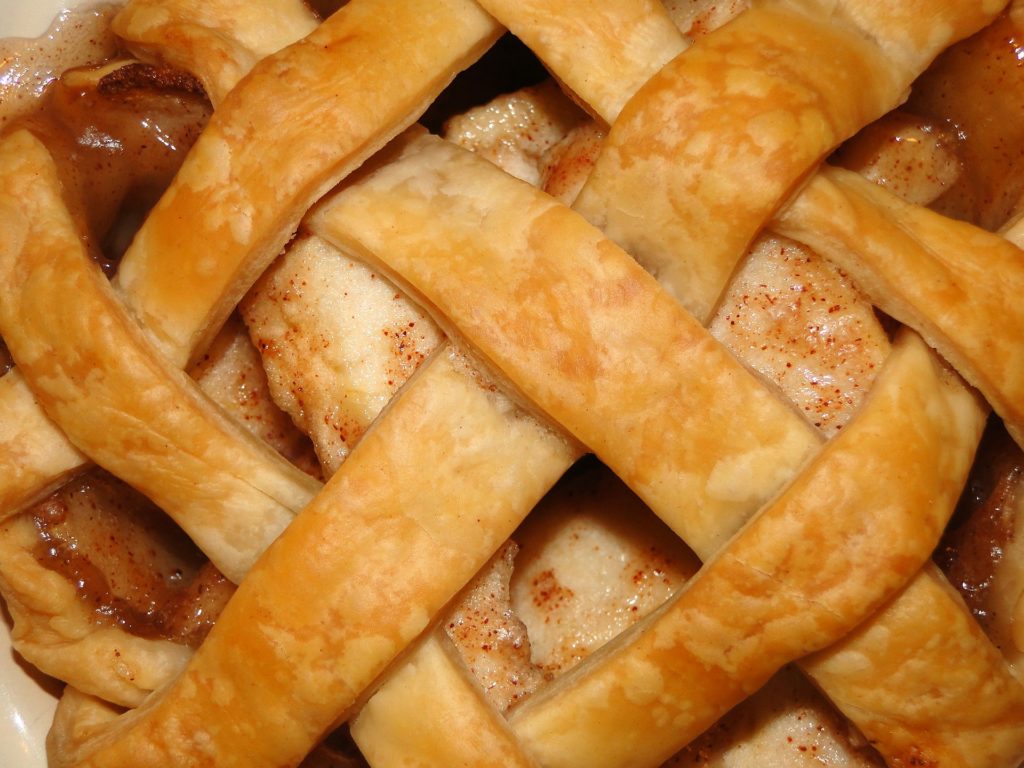
apple pie lattice top

Photo by Dusty Toes at Pixabay

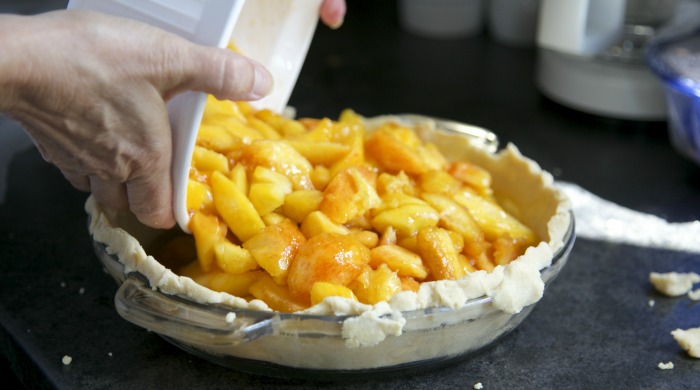
I don’t really have a recipe for apple pie filling.  I’m sure there are wonderful recipes around but my approach is to simply place as many sliced apples in a bowl as I plan to put in my pie, sprinkle with as much cinnamon as I think would be a good amount for a pie (a couple of teaspoons?), add a couple of teaspoons of sugar (have you noticed I don’t like adding much sugar to my apple products?), add a couple of tablespoons of flour, and then mix and place in pie crust.  

homemade apple pie

Photo by Snapwire Snaps at Pixabay

If I’m planning to preserve and bottle pie filling, I only add the cinnamon before packing and processing.  I save the sugar and flour to add later when I open the jars to use the apples.  That way I can use the apples for a variety of baked goods.  If I use them for apple crisp, I don’t add any sugar at all since the topping has enough sugar to make for a sweet dessert.

I love the fall for many reasons.  The cool weather, the falling leaves… and the delicious, fresh apples!  
Click BACK for how I make

APPLESAUCE and APPLE BUTTER

Western Gardens | Utah


Filed Under: Fruit, Gardening, Recipes Tagged With: apple chips, apple pie, apple pie filling, apples, dehydrated, dehydrated fruit

Favorite Apple Varieties and How To Preserve Them

September 14, 2017 by Marjorie Carter

Welcome Apple Lovers!  Glad you dropped in.

I love apples!  There is such a wide variety of apple trees to plant and they are all delicious in their own right.  As a mother, I now used different apple varieties for different occasions.  I have several favorite apple varieties, but let me first share where my first love of apples began.  Maybe you had similar experiences.

bushels of apple varieties

Photo by Sladkovskaivka at Pixabay

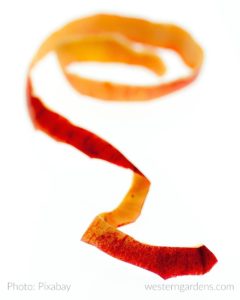
long apple peel to eat

Photo by ChrisWoehri at Pixabay

My memories are vivid of sitting at my mom’s feet as she sat on the porch and peeled apples for apple pie.  I loved to pick out and eat the longest pieces of apple peel from her scrap bowl.  

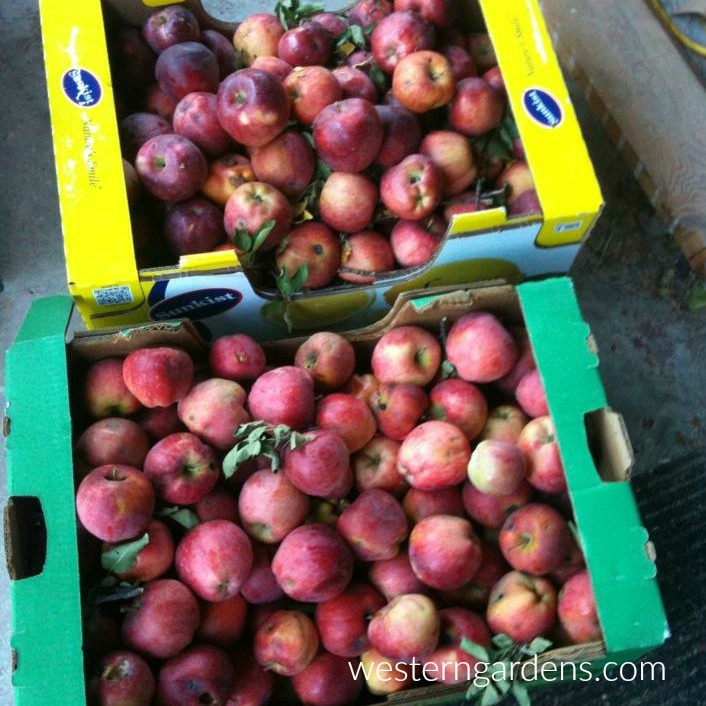
We moved to Virginia when I was in 4th grade and we would go apple picking as a family in the crisp fall weather.  We’d then have boxes and boxes of apples sitting in the garage and I loved picking out the biggest apple from each variety and eating it plain or with peanut butter. 

Boxes of apples

One time I ate so many apples in one sitting that I made myself sick.  In fact, I did this more than once.  For some people, that would result in an aversion to the food that made them sick, but I love apples so much that this was not a deterrent for me.

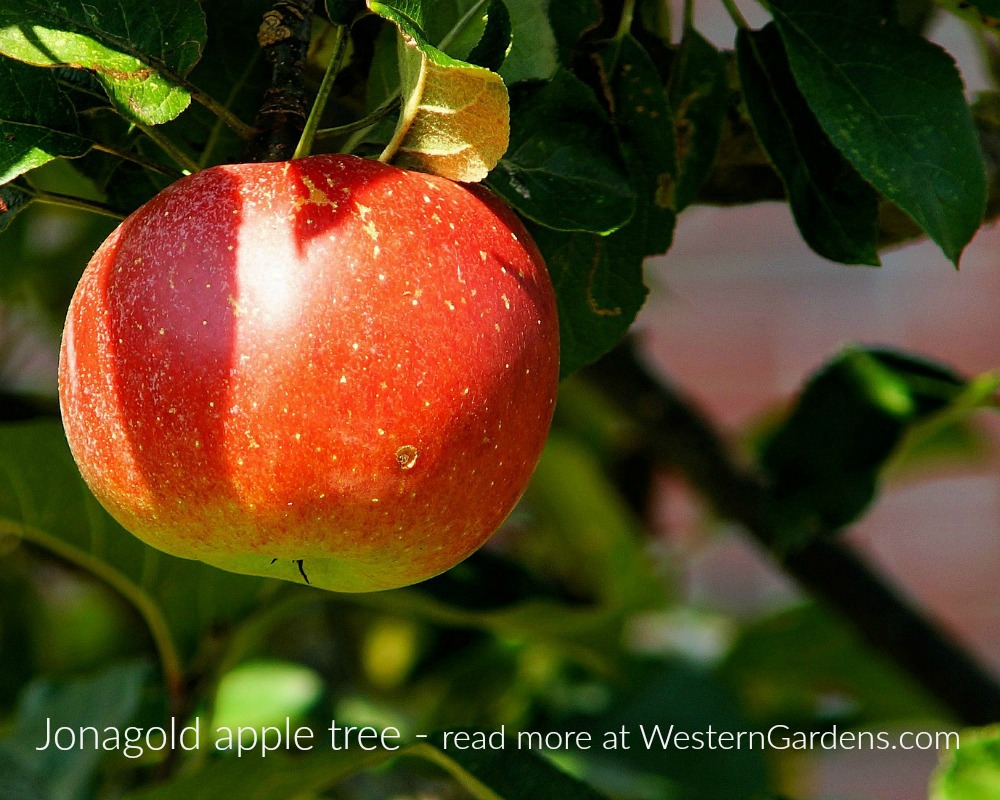
The mature fruit trees, including Golden Delicious Apples and a Jonagold type of apple, were one of the reasons we purchased the home.

Jonagold apple tree

Photo by Kapa65 at Pixabay

The first year there, both trees produced around a bazillion apples each.  We basically made apple sauce and pie filling from so many apples.  We not only used the fresh picked apples, but also the still usable windfall apples. In the years since, we’ve managed to expand the variety of things we do with our apples.  

Our favorite preserving methods are: apple sauce, apple butter, dried apple rings (apple chips), and apple pie filling.  

Some useful tools for different apple recipes:

  • hand powered food strainer/sauce maker
  • food processor with slicing blade
  • food dehydrator
  • crock pot
  • stick blender. 

Of course, if all you have is a knife and a large pot, you can make it work!

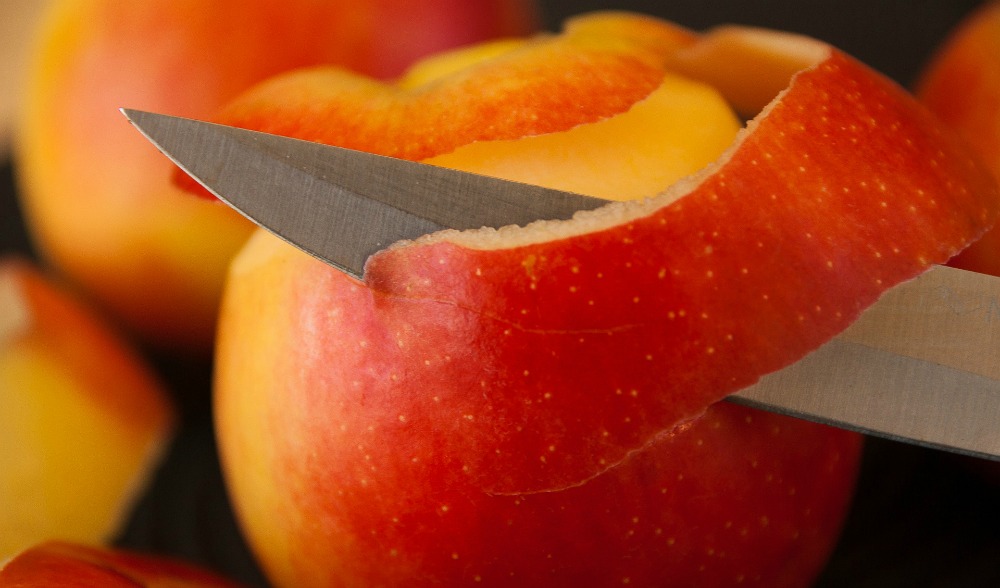
peeling a red apple

Photo by JackMac34 at Pixabay

Read further for a few tips for success and a couple of the recipes we use for enjoying this amazing fruit well after the last one has been plucked from the tree.  I include the tools we use for making them.


Click NEXT for my favorite apples and methods for

APPLESAUCE and APPLE BUTTER and APPLE CHIPS and APPLE PIE FILLING

Western Gardens | Utah


Filed Under: Fruit, Gardening, Recipes Tagged With: apple recipes, apples, golden delicious, jonagold apples

Favorite Edible Flowers from the Garden

August 3, 2017 by Marjorie Carter

Welcome Friends! Glad you are here.

Favorite edible flowers you probably already have in your yard

Edible flowers from the garden are an often overlooked delicious treat.  As a young child, each summer we would visit family living in California.  In the yard was a giant honeysuckle with beautiful red-gold flowers.  My cousins showed me how to pluck the flowers, pull off the green at the base of the blossom, and suck out the sweet nectar; hence, the name honeysuckle.  My young taste buds looked forward each summer to that sweet taste. 

As an adult, I have since learned that there are many kinds of flowers that are edible.  For example, many people know that dandelion blossoms and greens are edible.  However, there are a number of commonly grown flowers that are generally overlooked as a possible addition to a salad. 

Recently, I’ve experimented with flowers that are not simply beautiful but are also edible, with some surprises along the way.

Important points to remember about edible flowers:

  1. Pesticides – If you are going to eat any of your flowers, be sure you never use pesticides or other chemicals on any part of the plant that produces them. Your edible flowers could become not so edible.
  2. Research – Before sampling something, please be sure you research whether or not it is safe to ingest. Not all blossom are edible flowers.  Also, even if the flower is edible, it does not automatically follow that all other parts of that plant are also edible. Those honeysuckles blossoms I loved to taste as a child are safe, but the berries produced by the same vine are not.
  3. Allergies – As with any other food, be aware that some people are allergic to some flowers. If you already know you are allergic to a particular plant, avoid eating the flowers.
  4. Birds vs Humans – Just because birds can eat a berry, doesn’t mean that they are safe for human consumption.
  5. Cleanliness – Remember to wash the blossoms before eating them.  This will help remove any dust, dirt, or small insects that may be hanging out on the petals.
  6. Environment – The flavor of flowers will be impacted by how much water the plant receives, the timing of when you harvest it, the soil conditions, and the variety (and sometimes even the color of the flower). 

A few Edible Flowers to Try:  

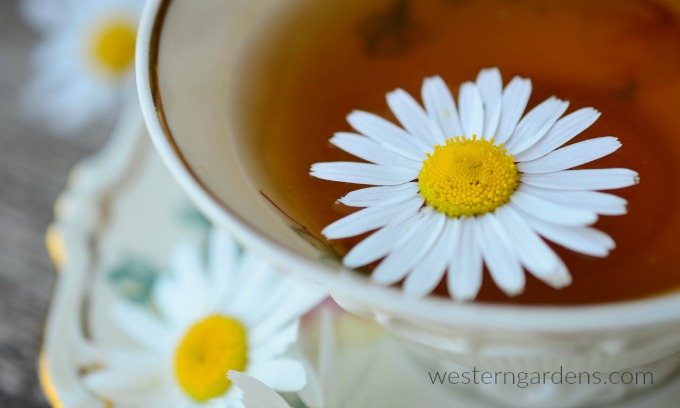
Chamomile can make a tasty tea

Chamomile – Photo Credit: Pixabay

Chamomile – These simple white flowers are lovely and they also make good herbal tea.  I’ve grown them a few times and had to learn to harvest the flowers while the plant was young or the flavor became less to my liking.  Plus, my home grown chamomile had a more “wild” taste than the product I buy in teabags at the grocery store.  It was a bit of an adjustment.

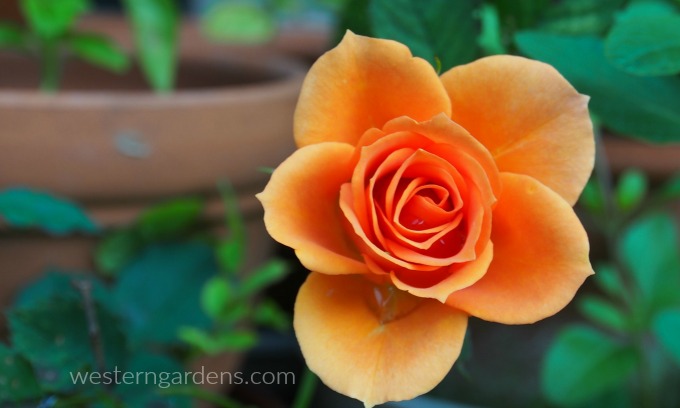
Roses are edible flowers.

Rose – Photo Credit: Pixabay

Rose – Roses are not only a beautiful and dramatic garden favorite, they are edible.  I’ve heard of sugared rose petals, though I’ve never personally tried one.  Rose water is a popular ingredient in a variety of dishes, from cakes to beverages. 

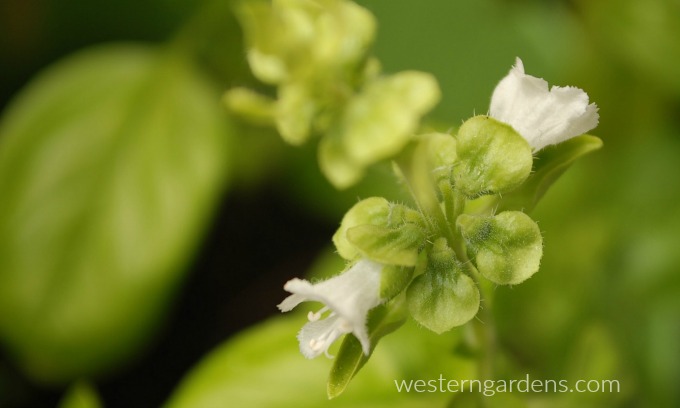
Herb blooms like basil blossoms are edible flowers.

Basil Flowers – Photo Credit: Pixabay

Herbal Flowers (dill, basil, thyme, mint, etc.) – Eating the flowers from your herb garden can provide new options for seasoning your foods.  The flowers generally taste much like the leaves but can be a milder flavor, or a spicier flavor, or different enough that maybe you don’t like it as much as the leaves.  Give them a try and see what you think! 

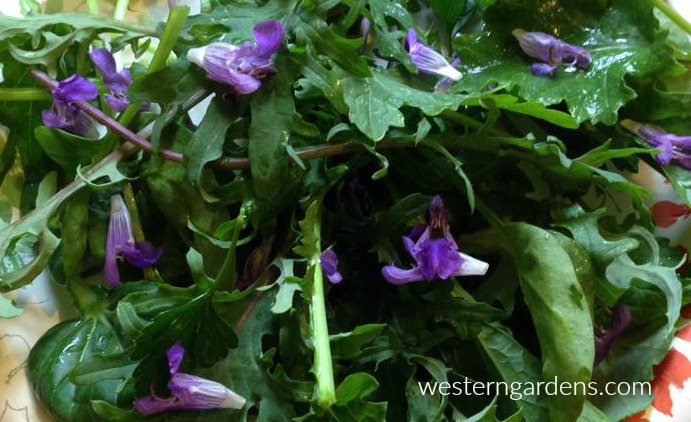
Sage blossoms in a green salad.

Sage blooms in salad – Photo Credit: Marjorie C.

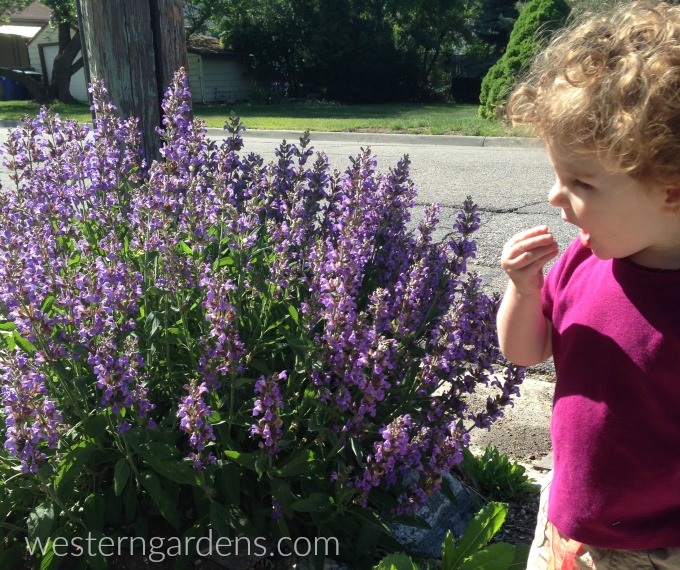
I personally love the flowers from sage.  They remind me of honeysuckle because of their sweetness, which was a surprise to experience.  We add edible flowers to salads or eat them straight off the plant.

Sage edible flowers

Sage – Photo Credit: Marjorie C.

Tulip – This spring we tried eating our tulips.  They basically grow wild in our back yard. My daughter described the flavor perfectly, “sweet red lettuce”. 

Lilacs and tulips are common flowers we can eat.

Lilacs and Tulips – Photo Credit: Marjorie C.

Lilac – I learned only recently that lilacs are edible, too!  I have about half a dozen lilac bushes on my property (thanks to the previous owner).  I love their scent and now look forward to trying out the taste next spring.  I will have purple, pink, and white lilacs to sample.  I think I’ll try a blind taste test to see if I can identify the color of the blossom from its flavor. 

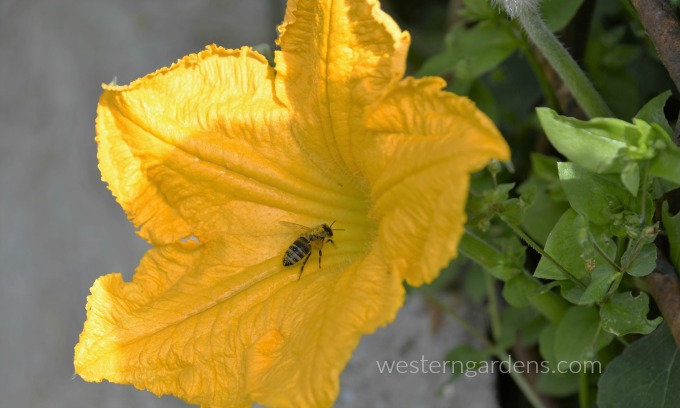
Squash blooms are edible.

Squash Bloom – Photo Credit: Pixabay

Squash – The blossoms from pumpkin vines, zucchini plants, and all other varieties of winter and summer squash are edible. Everyone knows that we all end up with more zucchini than we know what to do with by the end of the summer.  Consider plucking some of the flowers earlier in the growing season and stuffing them, frying them, or making them into soup.

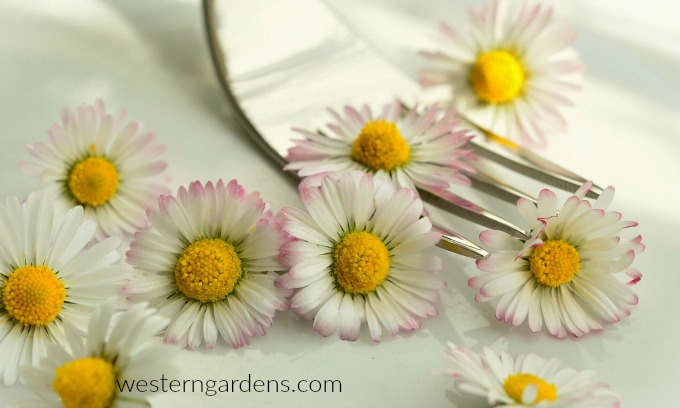
Eat some tasty daisies.

Daisies – Photo Credit: Pixabay

Others – A few other varieties of edible flowers that are common across Utah include: lavender, pansy, peony, marigold, nasturtium, violets, hibiscus, dandelion, clover.   Read about additional  Favorite Edible Flowers.

Finally, just because a flower is edible doesn’t mean it will taste good to you!  Some will taste better to you than others.  Be safe and have fun sampling!

Filed Under: Eat from Garden - Recipes, Flowers, Gardening, Utah Gardening Tagged With: chamomile, edible flowers, edible garden flowers, flowers safe to eat, flowers to eat, garden flowers to eat, herbal flowers, lilac blossoms, rose petals, safe to eat flowers, sage blossoms, squash blooms, tulips

Harmful Garden Insects: Organic Management

July 18, 2017 by Marjorie Carter

 Welcome, Friends! Glad you’re here for some tips to organically manage those pesky harmful garden insects so you’ll have produce left to harvest!

Harmful garden insects can be managed organic methods

All yards and allotments will have harmful garden insects every year; it’s part of nature.  These insects need to eat in order to feed the beneficial insects.  Eliminating ALL the harmful insects from your garden would be time, labor, and resource intensive. You also run the risk of depleting the food source for beneficial insects and other animals that feed on the harmful critters.

Wise Goal – An important and wise goal is to control the harmful garden insects enough to reduce the damage to your garden to a manageable level.  Meaning that by harvest time, there is something left for you to eat.  Losing one or two tomatoes is manageable and probably hardly noticed, but an entire decimated crop means there’s a problem to address. 

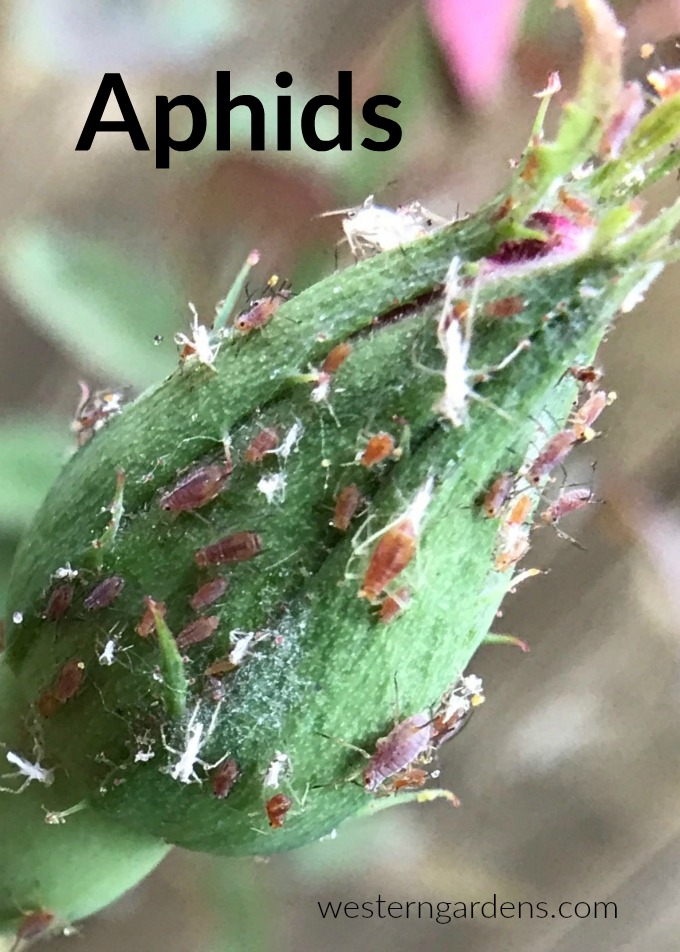
aphids are harmful garden insects that can be easily controlled

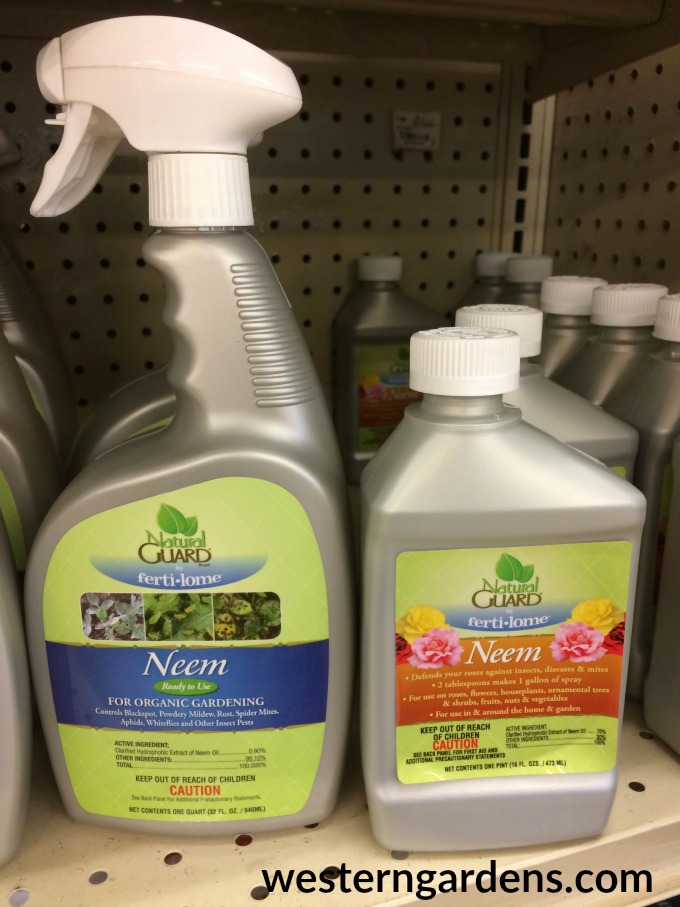
Aphids – One year we had aphids on our herbs which was easily treated by spraying the affected plants with neem oil, a wonderful organic product found at Western Gardens.  This significantly reduced the number of bugs.  They were further kept at bay by some helpful ladybugs, also found at your garden shop. 

Neem Oil is safe organic product. Read label

We were careful to thoroughly wash our herbs before eating them to remove any remaining aphids. Washing anything you harvest before eating it is always a good idea anyway.

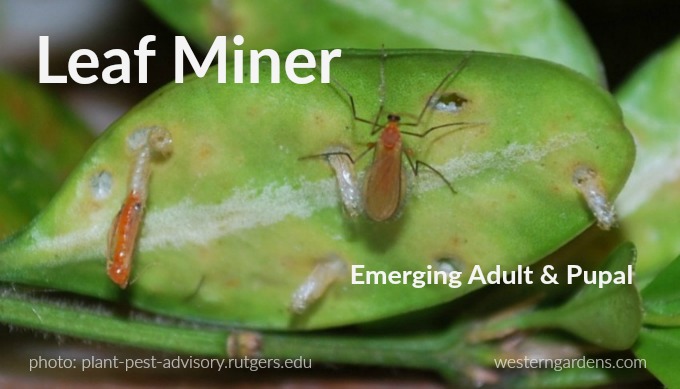
Harmful garden insects include the Leaf Miner

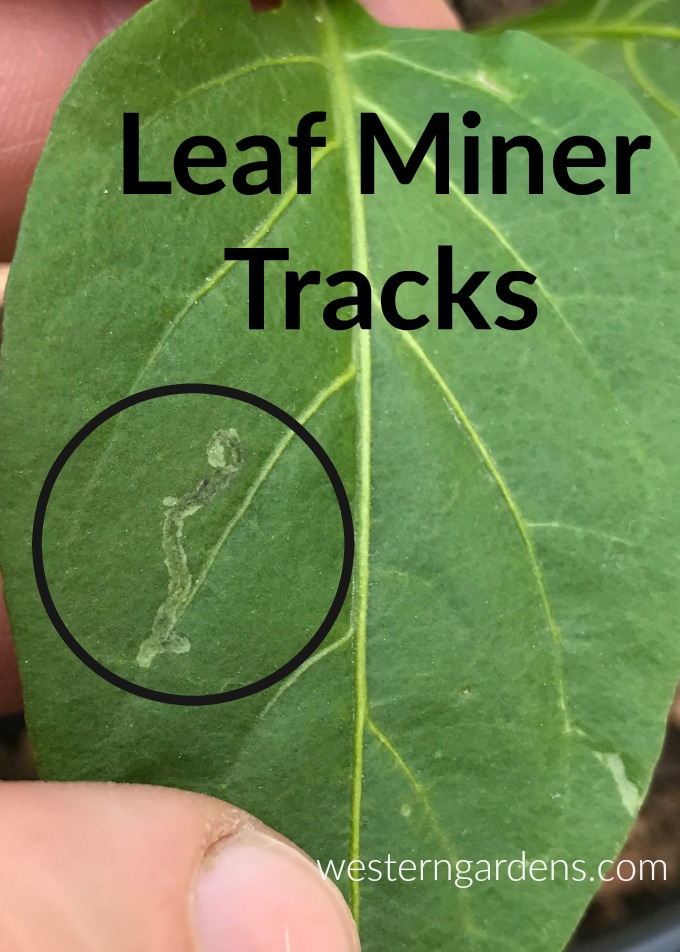
Leaf Miner – Last year, our challenge was leaf miner larvae on our Swiss chard.  In this case, we simply discarded any leaves that had been extensively chewed.  Otherwise, we snipped off the parts that didn’t look as appetizing, like anything that had a visible egg attached to it (usually on the underside of the leaves), washed everything, and then enjoyed our tasty green salad.

tracks of leaf miner on pepper plant leaves

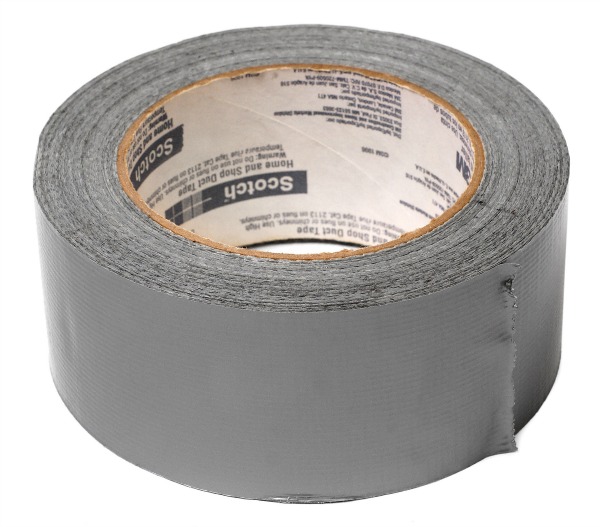
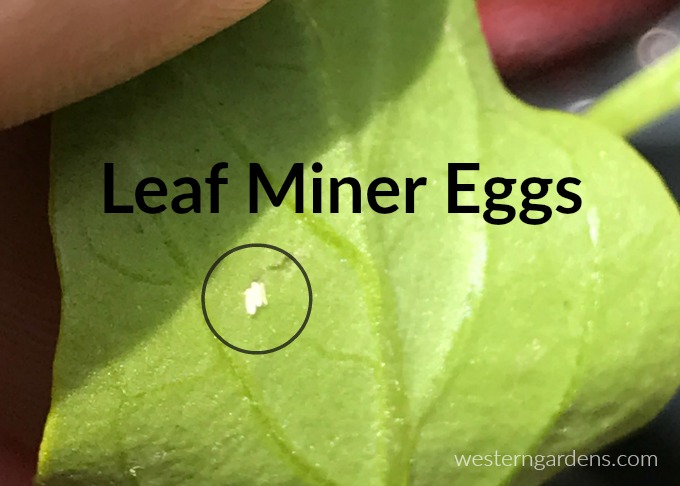
This year, now that we know to look for the leaf miner eggs on the leaves, we were more attentive with our starts for our garden and inspected them daily, looking for them or other harmful garden insects.  We found eggs on our pepper plants and did our best to remove them when the plants were small.  We used a piece of duct tape wrapped around a finger to remove the eggs.

duct tape wrapped around one finger helps lift off insect eggs from plants

We found that using a gentle fingernail was still too rough for the tender young leaves, so gently touching the tiny eggs with the sticky duct tape easily lifted them off.  

Eggs of the leaf miner on pepper plants

Once the plants were more mature and could withstand a little insect activity, we were less vigilant at egg removal, but still mindful of looking for eggs once in a while.  Read more on homemade remedies for treating leaf miners by clicking here.

harmful garden insects also include squash bugs

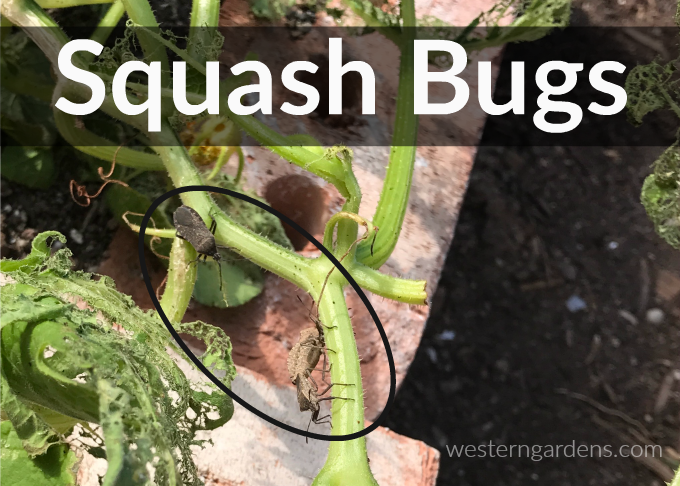
Squash Bug – This year, we planted pumpkins for the first time.  We had heard of the dreaded squash bug and had been looking for them but hadn’t seen any damage to the plants.  Then, just last week (late June), one of our pumpkin plants was nearly devoured overnight by something.

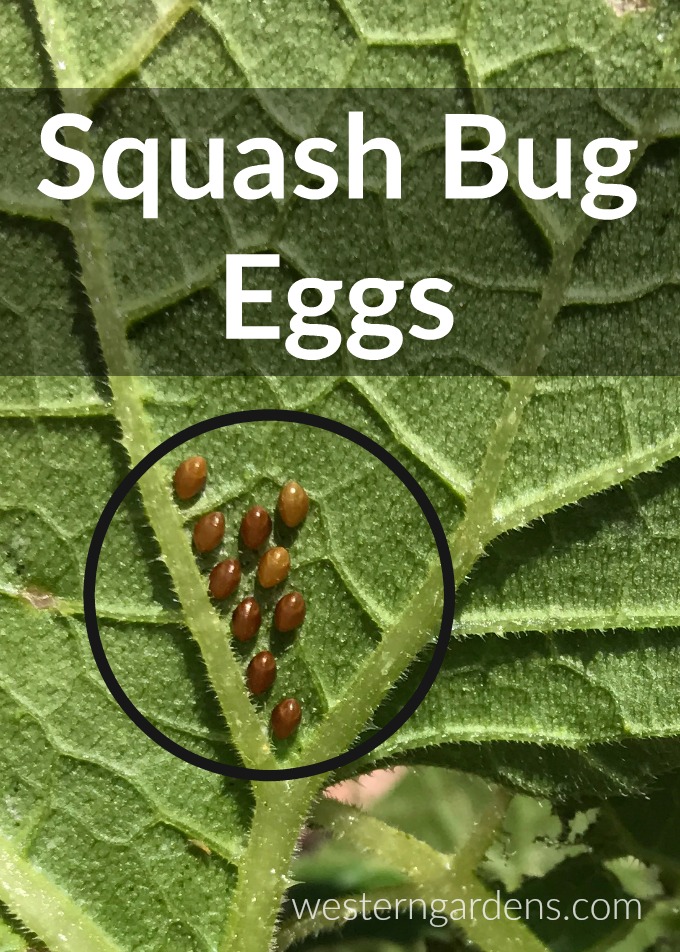
Squash bug eggs are easy to spot and remove.

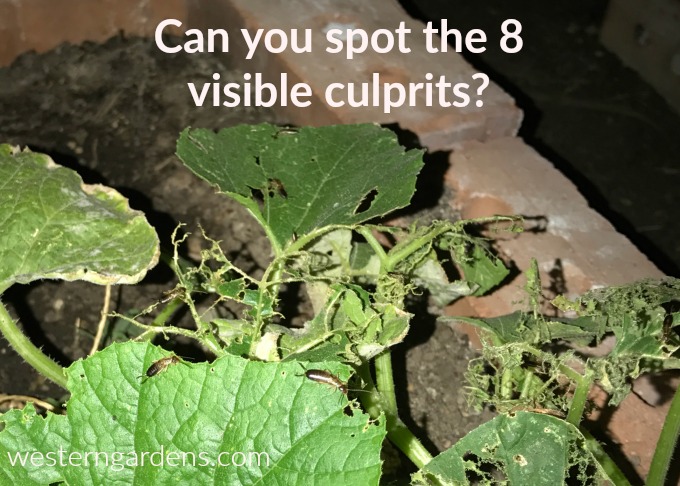
We assumed it was the infamous squash bug.  This assumption was reinforced when, upon closer inspection of the plant, we found a mating pair of squash bugs with a third one waiting on the side-line and eggs attached to the underside of the remaining leaves and the stem. We posted photos of the damage to a Facebook gardening group and learned of some other likely culprits.  That night my husband went out with a headlamp and a bottle of neem oil to investigate.

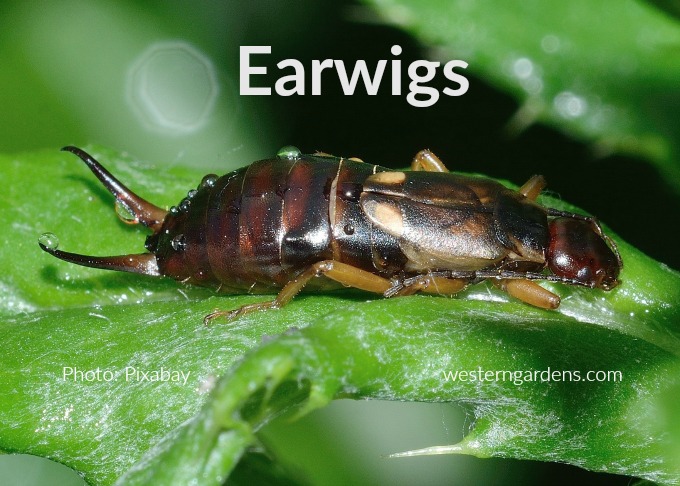
earwigs are harmful but also beneficial

Earwigs – Someone suggested the damage looked like the work of earwigs.  My husband found several earwigs eating on the plant and a swarm of them hiding in a nearby crevasse. Earwigs are a complicated insect in the garden.  They are not only harmful, but also beneficial.  They aid in breaking down organic matter (composting) and they also eat aphids and other harmful insects. However, when there are too many of them around a young susceptible plant, they can be very destructive.  We could also see evidence of earwigs damage on a few leaves of nearby tomato plants.  This minimal damage doesn’t pose a risk to a plant that has hundreds of leaves to perform.  In comparison, the pumpkin plant had only a dozen leaves to start with and most of those were very damaged. 

earwigs eating pumpkin plant leaves

My husband sprayed neem oil on the earwigs on the plant, in the swarm nearby, and even in their nest. It’s still uncertain whether the plant will survive though it already shows signs of new growth. We monitor it closely to prevent another insect attack that would probably kill it.

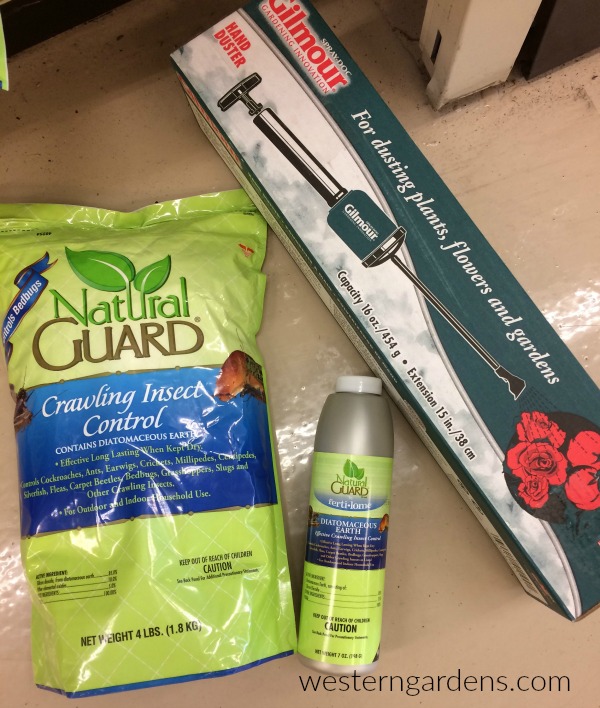
Another organic alternative that works to kill earwigs is diatomaceous earth, which also now offers a nice dispensing bottle which helps cut down on waste and mess.  Check it out at Western Gardens.

diatomaceous earth is a natural organic product to control crawling insects in the garden.

As for the squash bugs, not the main culprits to the pumpkin plant, they were probably snacking on it also.  We’re still removing eggs as we find them (using the duct tape trick mentioned above) and killing any adults.  Their numbers can quickly get out of hand. Again, diatomaceous earth works well to control squash bugs.

Beneficial vs Harmful Insects – Lady bugs, praying mantis, and birds are a few examples of creatures that feed on the harmful garden insects; hence, we like to see these around around the yard.  When considering how to handle any harmful garden insects, the first reaction should generally not be total annihilation.  Rather, try to reduce their numbers and also allow the beneficial insects and animals to do their part until the plant is mature enough to withstand the damage. 

Good luck and happy hunting!

CLICK HERE to read about beneficial insects you want in your garden.

10 beneficial insects you want in your garden! If you spot these in your yard, you're in good shape!

Filed Under: Flowers, Gardening, How To, Insects, Tips & How To's, Utah Gardening, Vegetables, Veggie Gardening, Yard Care Tagged With: Gardening, harmful garden insects, harmful insects, How To, organic management, organic pest controls, Utah gardening, Western Gardens

Difference Between Heirloom and Hybrid Tomatoes

May 24, 2017 by Marjorie Carter

Welcome Gardening Friend! Glad you dropped in.

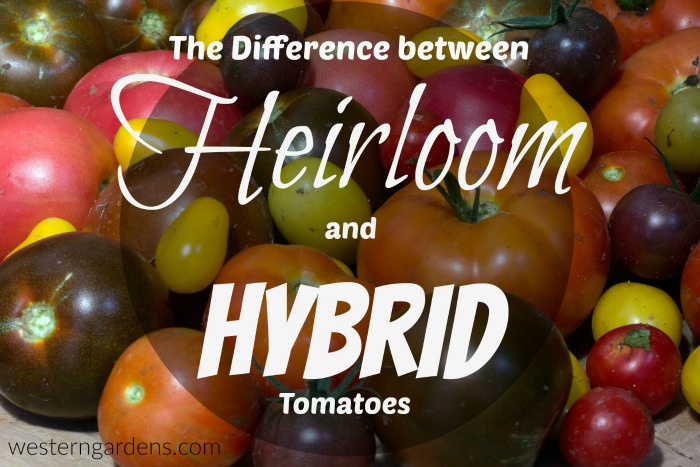
Difference between heirloom and hybrid tomatoes

When we first started growing tomatoes several years ago, I didn’t know the difference between heirloom and hybrid tomatoes.  I had heard about heirloom tomatoes and wondered what that meant.  To me, an heirloom tomato sounded like some prized family possession (like great-great grandma’s china plates) or some secret family seed (like that secret family recipe for chocolate cake) that had been passed down from generation to generation. Basically, it made them sound unattainable without a special connection to someone from a family that had been growing tomatoes for countless generations. That was my impression.  So, I simply went about my business of buying tomato starts at the local garden centers.  I didn’t hear the term “hybrid tomato” until a few years ago.  Hybrids were the kinds of tomatoes I’d been growing but didn’t know it. 

As the push for more natural and organic ways of producing food has been growing, the market for heirloom tomatoes has become much more mainstream.  One can buy packets of certain varieties of heirloom tomato seeds at pretty much any gardening center and starts for heirloom tomatoes can also be found in more locations. 

But really,

What’s the difference between heirloom and hybrid tomatoes?

One way to define an heirloom tomato is a variety that has been passed down within a family or has been around for at least 50 years (though it seems there is some controversy about how old a variety of tomato needs to be in order to be considered an heirloom1 ).  Some heirlooms are recorded as having been cultivated for hundreds of years or more.

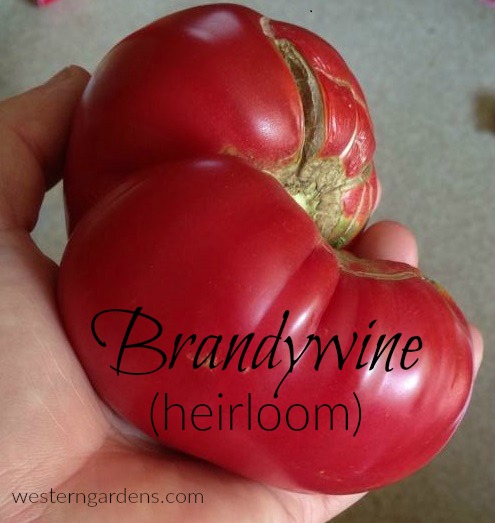
An HEIRLOOM TOMATO is one that has been selectively reproduced for certain characteristics, perhaps a certain trait that is best suited for a growing region or a certain color or flavor.  It may be the best one for canning/bottlings because of its acidic content.  Or maybe a variety that is huge and juicy, where one slice fills an entire sandwich! Some varieties of heirloom tomatoes include Black Beauty, Brandywine, Chocolate Stripes, Green or Red Zebra, Big Rainbow, and many more. As the names would suggest, heirloom tomatoes come in a wide variety of shapes, sizes, colors, and flavors. 

Many would argue that heirloom tomatoes are more flavorful. I have personally grown Brandywine for several years and can attest that they are delicious and juicy.  They also can grow to be quite large, but the same vine could also produce medium or smallish fruit.  They are not completely consistent in size, but always tasty!

brandywine tomato is an heirloom type and very tasty.

A word of caution: Watch your heirloom tomatoes and don’t let them over-ripen on the vine.  Since the colors of an heirloom can vary so much from what most people are used to, like that “tomato red” we all see on hybrid varieties we buy at the grocery store, it can be quite easy to not know an heirloom is ready for harvesting until it’s too late.  Read up on the particular heirloom tomatoes you choose so you can be aware of what to watch for to assess ripeness.

Since an heirloom tomato is one that has been specifically selected over generations of plants for its traits, it is possible to take the seeds from a tomato grown in a home garden and use them to grow that same variety during the next growing season.  (IMPORTANT NOTE: If your heirloom tomato cross-pollinates with some other variety of tomato in your garden, you will end up with seeds that are not true to the original plant.  If you’re interested in preventing this from happening, there are guides on how to prevent cross-pollination.)

A HYBRID TOMATO is one that is the result of intentionally cross-pollinating two different varieties of tomato.  This means the “child” plant will have characteristics of both of the “parent” plants.  These tomatoes can be very hardy, disease resistant, and produce fruit that is consistent in size and shape.  Being disease resistant is probably the biggest and most important benefit.  There are few things as frustrating as growing a big beautiful plant, have lots of fruit forming, then get a plant virus that destroys your crop.  

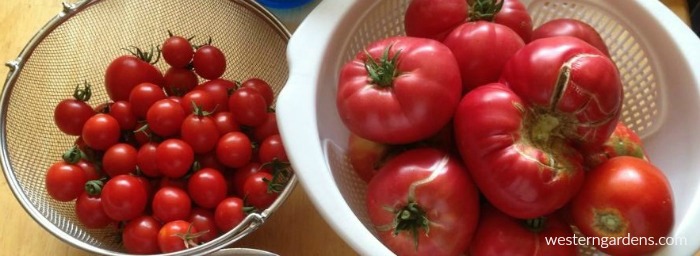
Some popular varieties of hybrid tomatoes are Big Beef, Cherry, Sweet 100, Early Girl, Better Boy, and Grape. 

The biggest difference between heirloom and hybrid tomatoes…

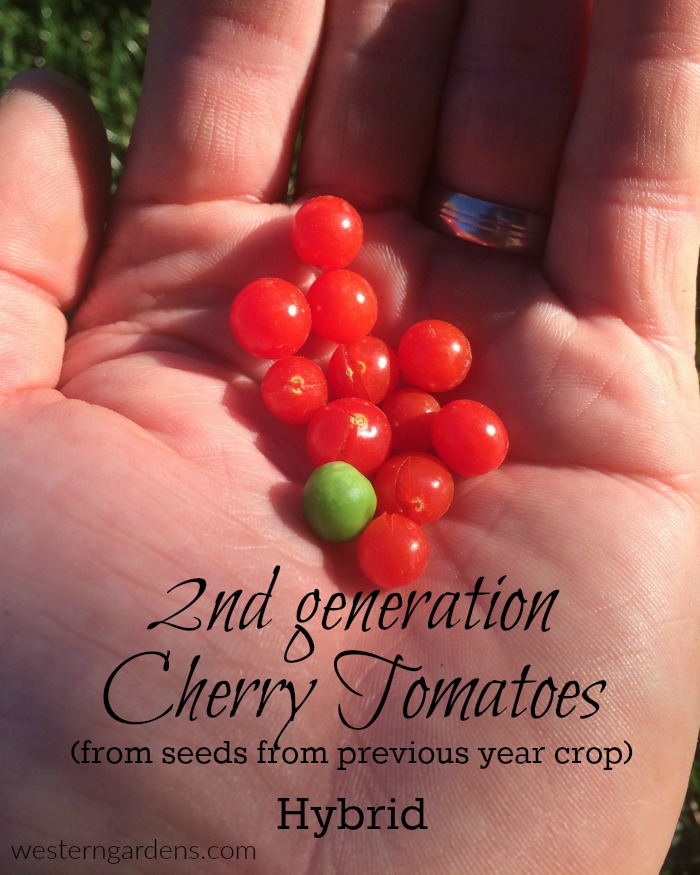
…is what kind of 2nd generation fruit will grow from this year’s plant.  You can’t be certain what kind of tomato will grow from the seed of a hybrid.  Often the seeds are sterile and will not sprout at all.  In the event that they do sprout, they probably won’t be the same as the plant you harvested them from.  We planted a Cherry tomato two years ago and had lots of volunteer plants growing in that area of the garden the next season.  We let a few of them grow and found that the plant produced fruit that was pea size, or smaller!  They were delicious but a real pain to harvest. 

Cherry tomatoes are hybrid. 2nd generation fruit is smaller.

Be sure to check your local independent garden shop, like Western Gardens in Salt Lake City, to find the most popular varieties that will do well in your climate and area.  The locals will have the biggest variety and most unique varieties for you to enjoy.

Either way, the difference between heirloom and hybrid tomatoes may not matter to you. Nevertheless, whichever you chose to plant in your garden, they have one big thing in common: they are designed to be eaten and enjoyed!  

Difference between heirloom and hybrid tomatoes

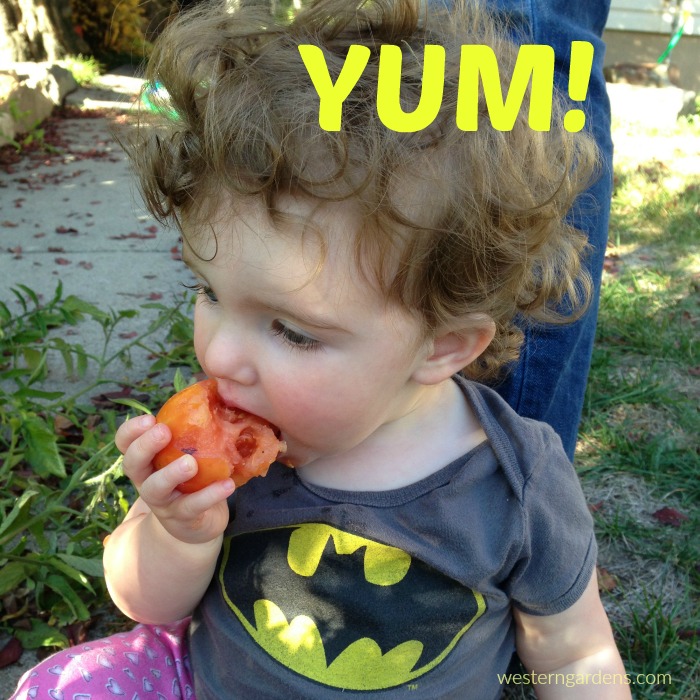
Heirloom and hybrid tomatoes are all delicious - yum!

Filed Under: Gardening, Utah Gardening, Vegetables, Veggie Gardening Tagged With: brandywine tomato, cherry tomato, difference between tomatoes, heirloom tomatoes, hybrid tomatoes, Utah gardening

Plant Peas – Our Favorite Varieties

April 26, 2017 by Marjorie Carter

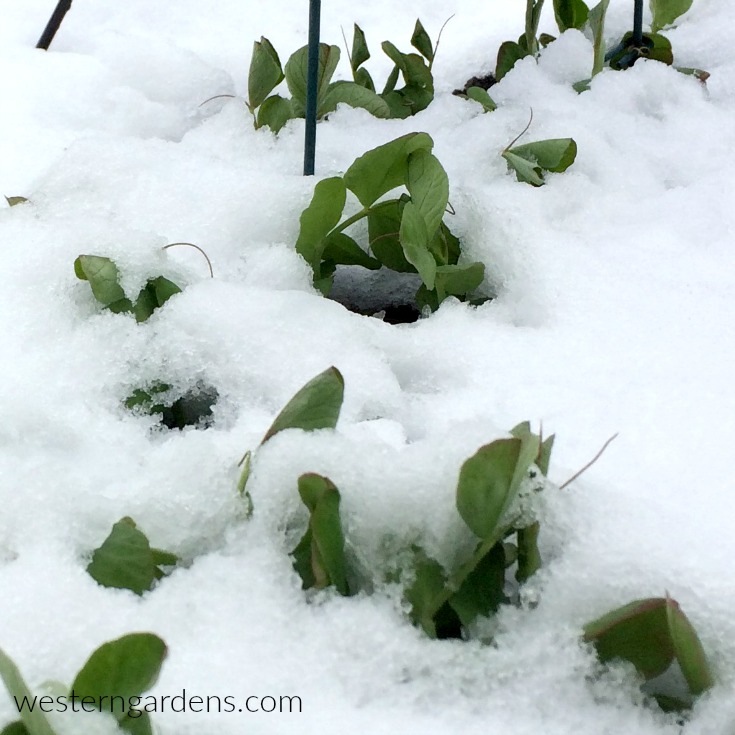
Our favorite garden varieties of peas from the gardenEach year as we get to the last few weeks of winter, my husband and I watch for the first day when it is warm enough for us to work outside in our garden for a few hours so we can plant peas.  We can’t wait to get them in the ground!  Though along the Wasatch front, we typically don’t plant until March, we’ve planted them as early as mid-February (straight in the ground; no greenhouse) and still had great success. Peas are a cool weather plant that needs little attention beyond watering and harvesting.  They tolerate snow and light frost so don’t be afraid to plant peas early.
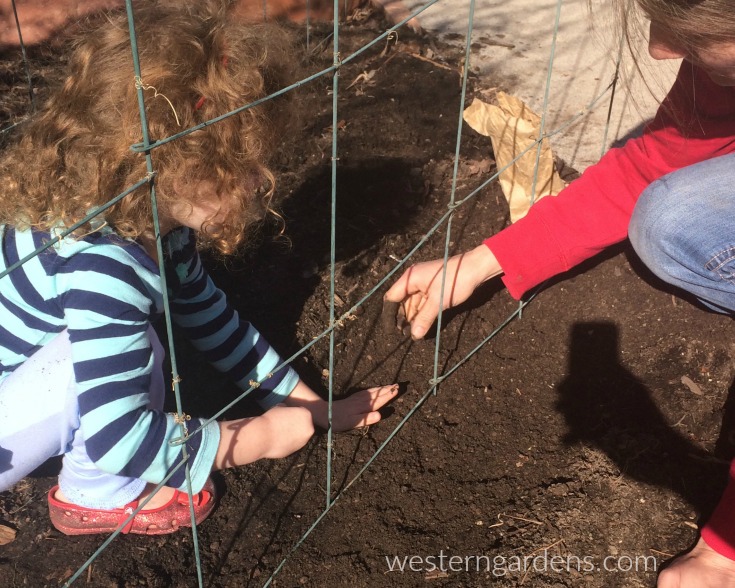
KIDS & PEAS … Planting peas is a great activity to do with young children.  The seeds are a real bonus to work with:

  1. They are large enough that they are easy for small fingers to pick up.  
  2. They are also easy to find after the inevitable spill.
  3. Planting is as simple as sticking your finger in to the ground, dropping in a seed, and covering with soil.  

Again, the size of the seed made this something I could do with my 18 month old.  She has helped plant every year since and even gets upset if she thinks she’s being left out of the planting process for the peas.
little girl planting peas with her mother

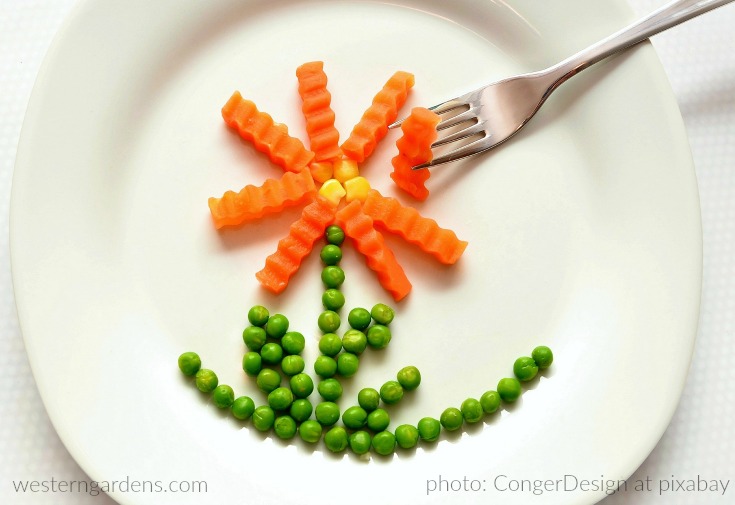
Peas and carrots on dinner plate - photo by CongerDesign - Pixabay CC0 license

Fun idea to see and eat the peas the children grow. That is if you can get any that far into the house from the garden!

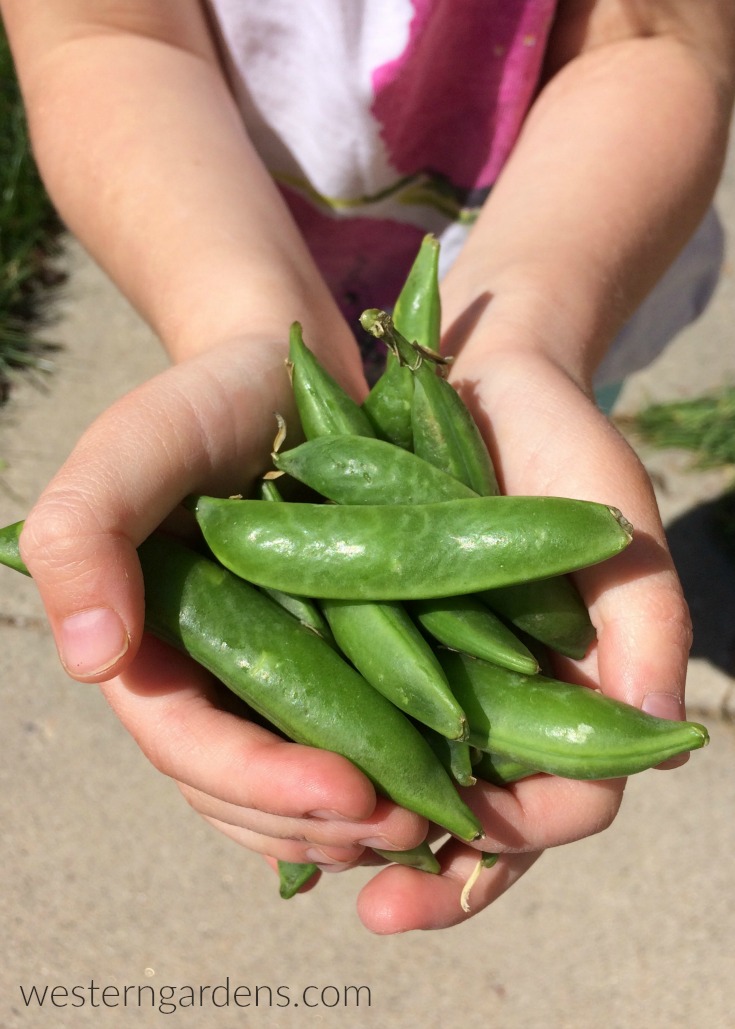
FRESH PEAS IN THE GARDEN… My husband will only eat shelled peas that are freshly picked from the garden.  If they’ve been cooked, frozen, canned, or otherwise tampered with, he will not touch them.  (He’ll eat snap peas in stir fry). When our daughter was very young, we’d go out in the garden to pick peas and she’d eat as many as we’d give her.  Her preferred method was eating them straight out of our hands. She will still eat as many as she can get her hands on, but she’s big enough to do the picking and shelling on her own now.  

plant peas to eat by the handful

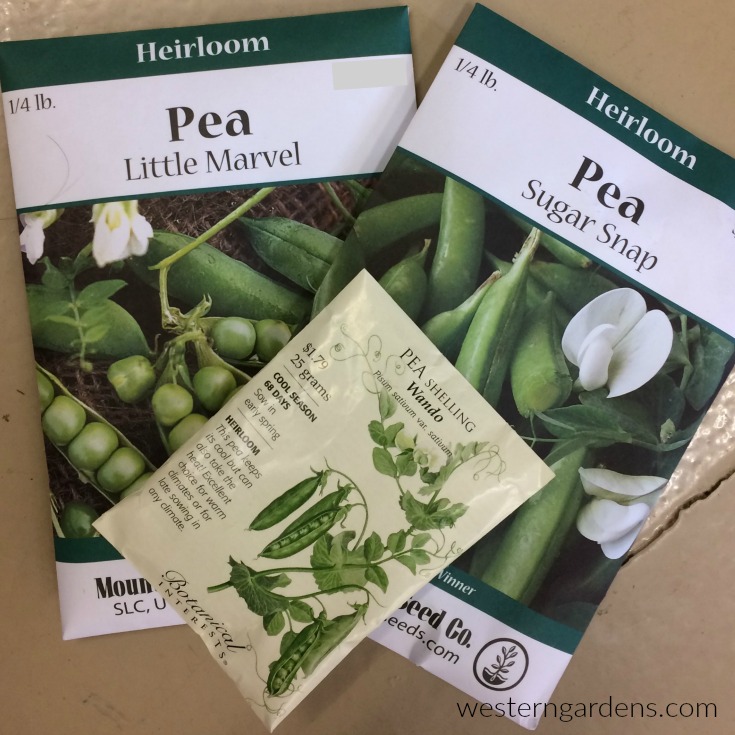
OUR FAVORITE VARIETIES…We’ve tried lots of varieties of peas over the past several years (Green Arrow, Alaska, Snap Peas, Little Marvel, Blue, and more) and have found that our favorites for flavor and abundance on the vine are Little Marvel (a shelling pea) and Snap Peas (edible pods, no shelling required).  We also grow Blue shelling peas because their flower is so beautiful. If you’ve never seen a blue pea, the flowers are purple and white and the pea pods are a dark purple/blue color, making them easy to find on the vine.  Buy quality seeds from your local garden center like Western Garden Centers in Salt Lake City and West Valley, Utah.

Find quality seeds of peas to plant at Western Garden Centers, garden shop in Utah

DID YOU KNOW… Peas are one of the oldest known vegetables.  Archaeologists have found them in ancient tombs at Troy and Thebes. Dried peas keep indefinitely.  This allowed them to survive the ocean voyage to become one of the first crops grown by English colonists coming to North America.

DID YOU KNOW… Peas are “nitrogen fixers”, meaning they take nitrogen from the atmosphere and convert it to ammonia (which is chemically comprised of nitrogen and hydrogen), thereby making the nitrogen available to other plants and organisms in the soil.  This means peas are a great spring crop because they naturally help fertilize your soil prior to planting other garden fruits and vegetables that need nitrogen in order to thrive (think tomatoes!).

TIP:  To maximize this benefit, at the end of the peas’ growing season, trim the plant off at the soil line instead of pulling them out, leaving the roots behind.

GROWING TIP … A friend suggested presoaking the peas prior to placing them in the soil.  This will soften the seeds and allow them to germinate more quickly. Soak for around 12 hours, no more than 24, before planting.  We tried it this year because we wish our peas would sprout sooner.  It worked!  Our peas were sprouted and broken through the soil less than 10 days after planting them, instead of 2 weeks or more.  We look forward to eating our peas that much sooner this year!  

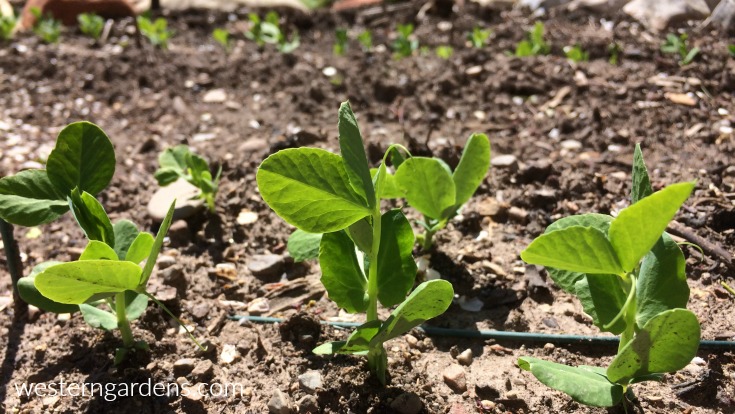
Rows of planted peas coming up in the vegetable garden

FALL PLANTING … After the summer heat is gone (about Labor Day), plant peas again for a fall crop.  Read the package of which variety will produce according to the time you have.

Hmm…  Sounds like something new to try with our garden this fall.

Eat peas straight out of the garden


Filed Under: Gardening, Kids in the Garden, Tips & How To's, Utah Gardening, Vegetables, Veggie Gardening Tagged With: blue shell peas, cold hardy vegetables, cool season vegetables, garden peas, little marvel peas, peas, plant peas, snap peas, Utah gardening, zone 5 peas

Primary Sidebar

Shopping Cart

Items in Your Cart

Your cart is empty
Visit The Shop

Follow Western Gardens

  • Facebook
  • Instagram
  • Pinterest
  • YouTube

See what we’ve been pinning!

Follow Me on Pinterest
Followed by people.
?

Pinterest Badge by Skipser

Here’s What We’ve Been Up To!

Save water and money by Turf Training - train your lawn to grow deep roots
work at western gardens utah garden center
Senior gardening woman Edu Carvalho from Pexels
nursery center open to public

Copyright © 2023. Western Gardens - Privacy Policy