• Skip to primary navigation
  • Skip to main content
  • Skip to primary sidebar

Western Garden Centers

for what grows here

  • Home
  • How To
  • Gift Cards
  • Calculate Mulch
  • Locations
    • Store Hours
    • About
    • Garden Shop Employment Team
  • Weddings
    • Salt Lake City, UT
    • West Valley, UT
  • Blog
    • Gardening
    • Recipes

Outdoors

Western Gardens Plant Material April 2020

April 13, 2020 by Wendy Pettit

Plant material at western garden centers utahWith the current pandemic situation, we now only do phone and email orders for pick up.  On this page, please find some videos and photos showing the excellent prime material we’ve had delivered to our door.  We will do our best to choose the best selection for your yard or needs.  Just let us know what you want, and we will get it.  You’ve trusted us for years, you can trust us now!
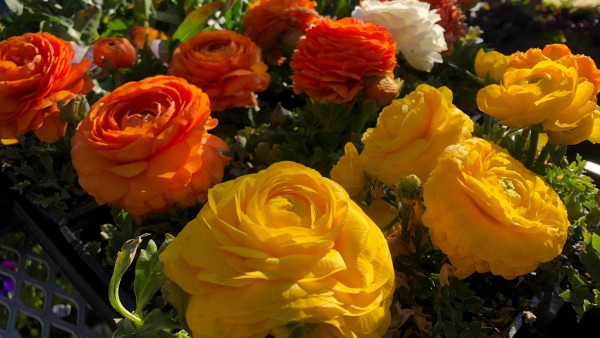
vivid orange and yellow ranunculus for early spring in utah

Ranunculaceous in vivid colors

Plant material as of April 13, 2020 –

SPRING COLOR ANNUALS & PERENNIALS

CLICK – Spring colder color annuals & perennials


GROUND COVERS

CLICK – Ground cover by Utah local growers


HERBS – VEGETABLES – BERRIES

CLICK – Berries –  Raspberries, blackberries, blueberries, grapes, pomegranate, currant, and more…

CLICK – Strawberries

CLICK – Herbs – cold-hardy herbs for April

CLICK – Herbs BASIL

CLICK – Tomatoes

CLICK – Vegetables cold crops


peony white and pink

Peony

FLOWERING SHRUBS & ROSES

Our prime ROSES will be here by the end of April.  We have a few that wintered over and just beginning to come out.  Email your requests.

CLICK – Magnolias

CLICK – Peonies – beautiful shipment just waiting to plant in your yard

CLICK – Lilacs – an old-time favorite with fragrance


SMALLER SHRUBS for TEXTURE & COLOR

CLICK – Barberries

CLICK – Spireas


FRUIT TREES

Realize that the fruit trees are just now coming out of dormancy.  Some look like sticks, but they are healthy and prime – ready for your yard!

CLICK – APPLES, APRICOTS, APRUMS, CHERRIES – bush or tree form

CLICK – NECTARINES, NECTAPLUM & FRUIT SALAD (varieties on same tree)

CLICK – PEACHES (including favorite “Donut”), PEACHOTUM, PLUERRY, COMBOS

CLICK – PEARS – all kinds including the Asian Pear

CLICK – PLUMS, COMBOS, PLUOTS, WALNUT


SHADE TREES

CLICK – FLOWERING CHERRIES – Beautiful selection of all types –

Special Local Note:  If you haven’t seen them, hurry and witness the color and fragrance of the cherry blossoms at the Utah State Capitol.  They are gorgeous!  (April 12, 2020)


MORE TO COME


Filed Under: Annuals, Flowers, Fruit, Gardening, Herbs, Outdoors, Perennials, Products, Tips & How To's, Tomatoes, Trees, Uncategorized, Vegetables Tagged With: annuals, apple, blueberries, cold hardy perennials, currant, fruit trees, Herbs, peach, pear, plum, pomegranate, shade trees, strawberries

Tips for Gardening in Small Spaces

February 5, 2020 by Wendy Pettit

by Rachael Elizabeth

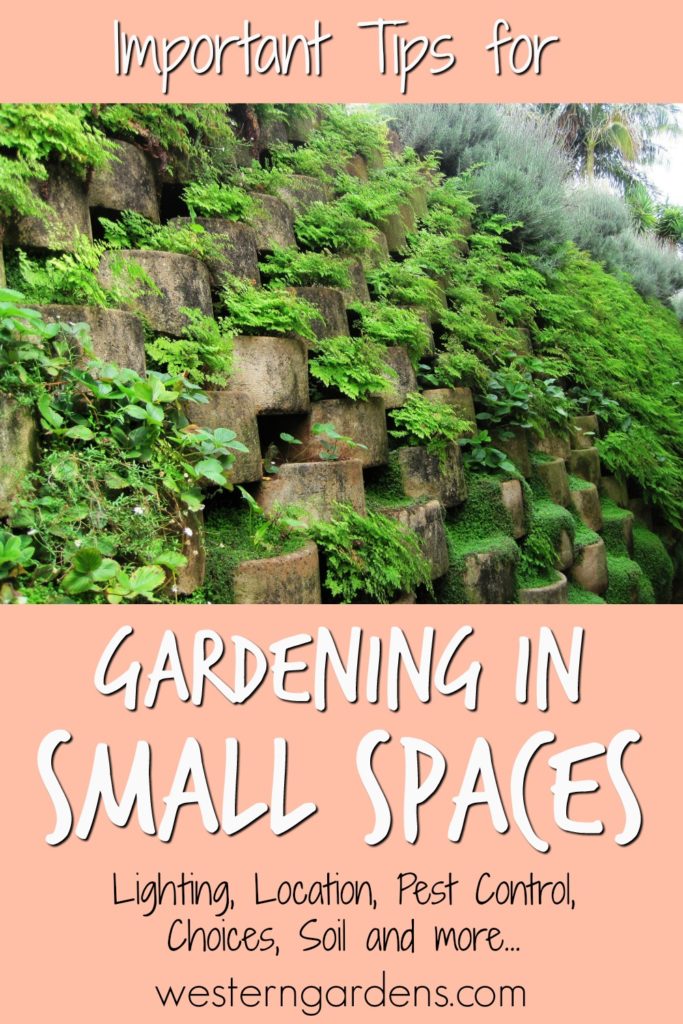
Wall step gardening for small utah gardens

Photo from Needpix

There’s nothing like picking a ripe, red tomato from the vine and popping it in your mouth … yum! Garden-fresh vegetables are a treat, especially when you grow them yourself. You don’t need a large plot of land or lots of tools to spread your seeds. You can do your gardening in small spaces.  Plant Utah flower and veggie gardens in small nooks or pottery — as long as they receive direct sunlight for most of the day.

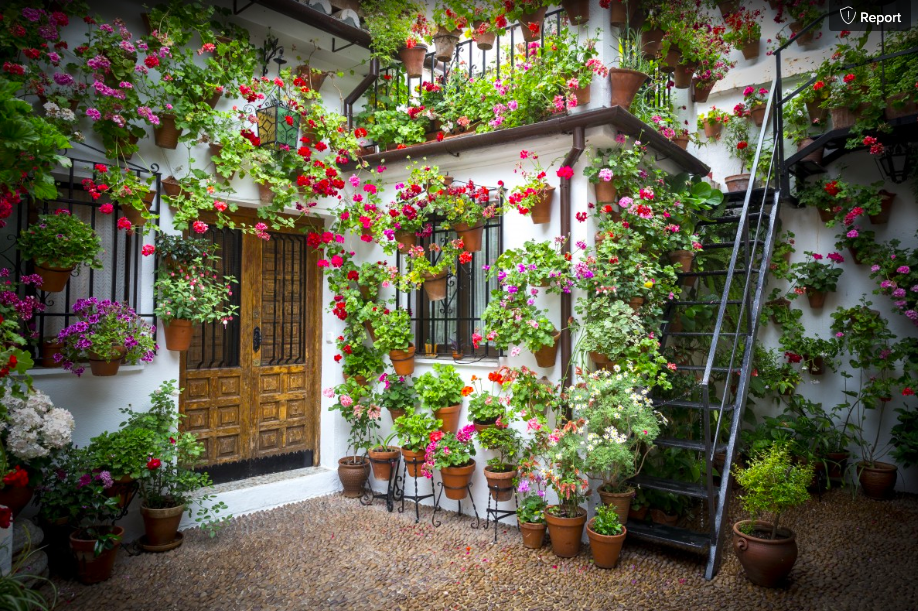
gardening in small spaces with geraniums on wall

Photo from PxHere

Light in Small Gardens

When it comes to plants, “full sunlight” is defined as six or more hours of direct sunshine per day. Before choosing varieties for your garden, you’ll first want to assess the growing space for light. Light-measuring instruments are available, but you can do this yourself by drawing a diagram of the plot. Upon each hour beginning at 7 a.m., jot down on paper, or use your smartphone’s camera to record which areas have sun or shade. Remember that each hour, the angle of the sun determines the direction of light, and it changes as summer begins to fade into fall.

Soil

Now that you know how much sunlight your garden space receives, all you need is soil, seeds (or seedlings) and water. Garden soil in Utah should be well-draining, loose, fertile, and have a pH balance between 6.0 and 8.4. Decaying organic matter in the soil helps plants absorb natural nutrients for feeding. Test the soil and then amend it as necessary with products from your local nursery.

Small Garden Choices

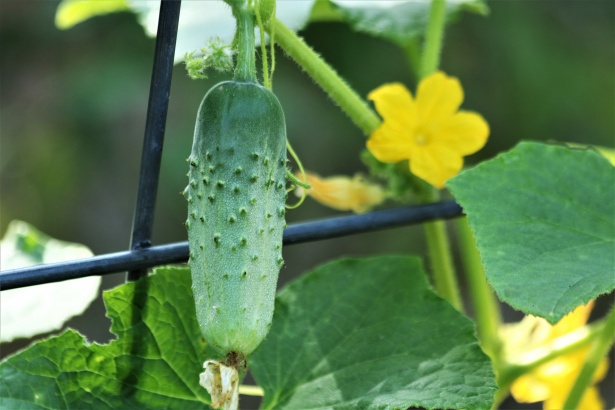
Cucumber on vine in vertical garden

Photo from PublicDomainPhotos

Gardening in small spaces means choosing varieties of flowers, fruits, and vegetables that don’t spread sideways.

Tomatoes, eggplant, zucchini, and lettuce don’t take a lot of space in gardens, and you can plant these vegetables in containers. If you like cucumbers, there are two kinds; vining and bush. Vine cucumber plants will spread; crawling along the ground or climbing trellises. Bush cucumber plants are more compact and better suited for containers and small gardens.

Creative Small Gardening Locations

Why limit yourself to the backyard? Plant your small garden along the driveway; in some old, rehabilitated wall shutters; on a vertical tower; on a flat rooftop; — even on a bird feeder! Anywhere you can place a soil bed that’s in direct sunlight can be a garden. Window boxes, trellises, arbors, potted patio umbrella stands, and framed boxes are just a few ideas to bring your garden to life.

Little Patio Gardens

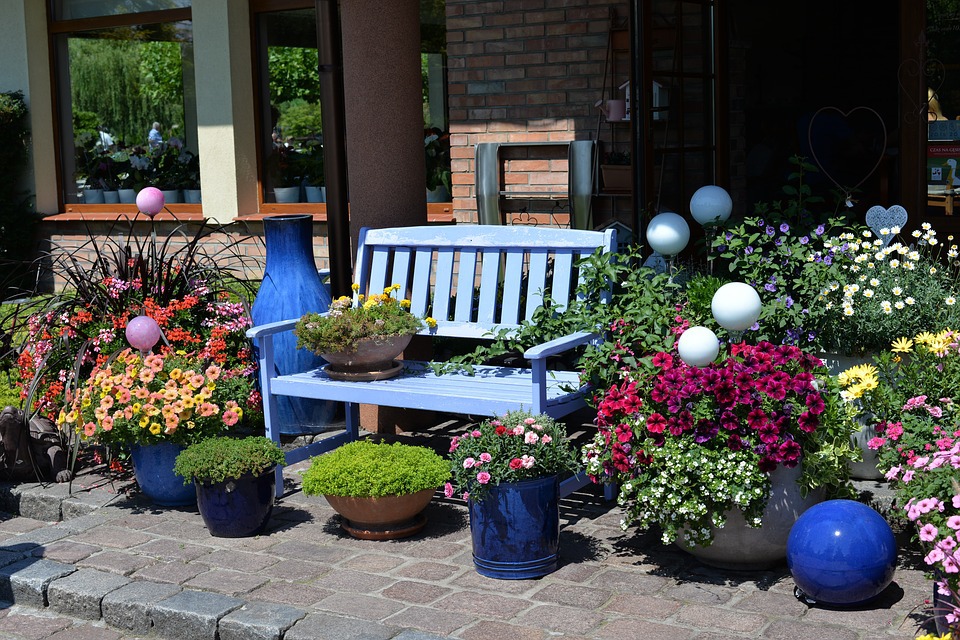
small patio garden for Utah

Photo from Pixabay

Large containers are just as effective as dirt bed gardens, as long as there’s enough sunlight and water available. A mini-garden won’t be overflowing with veggies but, there will be enough for snacks and to add to salads. Beans, tomatoes, peppers, kale, and herbs are perfect for growing in containers. Flowers are also great. Choose some of Utah’s favorites: showy goldeneye, hummingbird, golden currant, or curlycup gumweed.

Pest Control When Gardening in Small Spaces

Much like your Utah lawn, small-space gardens benefit from natural products and predators to control pests. Beneficial nematodes are micro-organisms that feed on grubs and larvae — those tiny worms that eat plant roots. These beneficial nematodes feed on more than 200 species of insects, but they don’t damage plants or roots, and they are not harmful to people or animals.

Slugs and snails are garden-loving pests that enjoy chewing on lettuce, cabbage, strawberries, and other leafy plants, but “normal” pesticides usually don’t work on snails and slugs.  Therefore, you have to get creative.

A beer trap is just what it sounds like — snails and slugs like to belly up to the bar. Fill a small, flat container with beer but don’t let the liquid spill into the soil. Slugs and snails are attracted to the beer, go for a sip, and then fall in and drown. Place a beer trap every 3 feet or so in the garden for this method to be effective.

When gardening in small spaces, don’t forget that natural predators such as those microscopic nematodes will destroy slugs and snails in their early stages. Birds eat them, too!

Gardening space is all relative.  You don’t need more than a few basic tools and a little bit of space to experience the wonderful benefits of gardening.  Make the most of your limited growing area with color, scent, and taste. That small space is waiting for your green thumb!

tips for gardening in small spaces

About the Author

Rachael Elizabeth is a gardening guru and writer. She takes pride tending to her small space garden that is constantly flourishing with fresh herbs and florals. When she’s not practicing her green thumb she can be found exploring nature on a hike or swimming in the lake.

Filed Under: Container Gardening, Flowers, Gardening, How To, Outdoors, Utah Gardening, Veggie Gardening Tagged With: gardening in small spaces, small gardens, small space garden, small utah gardens, vertical gardening

Turf Training – Train your Lawn

March 29, 2018 by Western Gardens

Welcome Friends! Glad you dropped in to learn about saving water and money by Turf Training.

Save Water and Money by training your lawn to grow deep roots

You can train your dog and train your lawn too!

You cannot teach a lawn to fetch the paper or to roll over. Even though some say that it can play dead, in the winter!  Now that your lawn is coming out of the dreary winter, it’s time for turf training. You can train your lawn to grow deep lawn roots, so that you can cut your water bill during the summer and your lawn can be happy during those hottest Utah summer weeks. Turf Training is more painful for the owner than the lawn itself, but by July, it is possible to be watering your lawn once every two weeks or less, depending on your soil type.  I know it works; I’ve lived it.  This plan is for established lawns; new turf requires other care.  Follow these steps and you too can have a well trained happy green lawn.

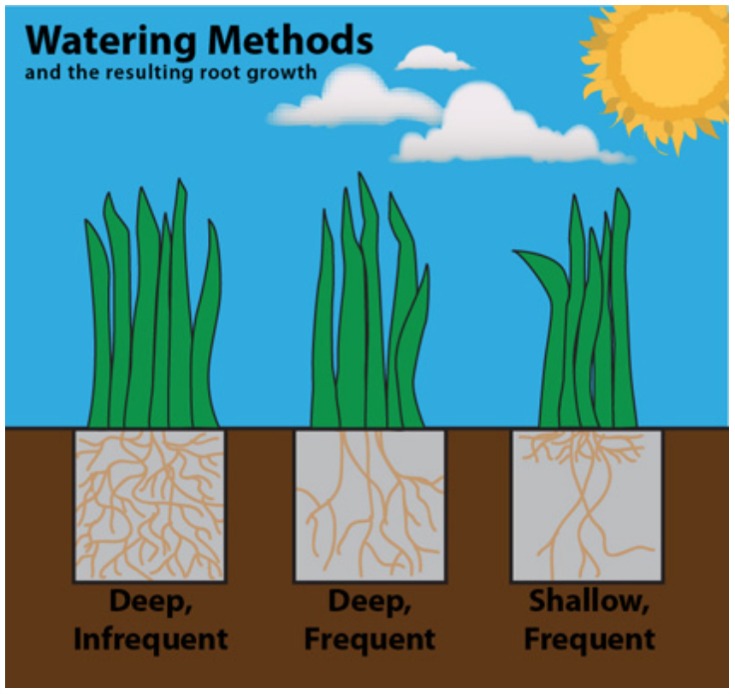
  1.  This month (April & into May), do not water your lawn!  Mother Nature is taking care of watering lawns for you.  DEEP INFREQUENT watering creates deep roots and thriving healthier plants.
  2. Aerate your lawn.  Perfect time is just before one of our spring rains.
  3.  Apply the proper spring fertilizer.  Follow the directions explicitly.  Again, the ideal time is just before a good rain to wash it into the turf.
  4. If you haven’t already, apply pre-emergent.
  5. Keep your finger OFF the automatic sprinkler system. Do NOT water your lawn.  You are in turf training mode.  I know it is painful because the sun is shining and spring is here, but don’t do it.  Your lawn is stretching its roots deep.  Let them go!
  6. In May, repeat #5 unless one of the following occurs…
    • Mother Nature hasn’t watered for 3 weeks. Time to water.
    • When you walk across your lawn, your footsteps don’t bounce back up.  Time to water.
    • When you look across your lawn, you notice a dull bluish green tone in spots.  Time to water.
  7. DEEP WATER – Put a good inch of water or so on your lawn.  Placing a tuna can on your grass will let you know when you’ve watered sufficiently.  All this water will soak down deep and you will train your lawn, by withholding watering cycle, to stretch deep for the water.  The roots will grow deeper and in the hot summer months of July & August, your lawn won’t get as stressed out.  Its roots will be cooler down deep.
  8. Repeat steps #6, #7 and #8.

As you can imagine, it will take time to train your lawn to grow deep roots.  That is why it is important to begin first thing in the spring.  For established Kentucky Blue grass, you may need to follow this method for two seasons, but it can be done. 

This method to train your lawn is not meant for flower beds, newly seeded lawns, newly placed sod, trees or shrubs.  Learn from our experts those proper watering techniques.

Watering Lawn Methods graphic by Texas Smartscape

http://www.txsmartscape.com/design_tools/water_conservation.asp

Watering your lawn in spring? Train your lawn to save water and money.

Article submitted by Wendy P

Filed Under: Lawn Care, Outdoors, Tips & How To's, Yard Care Tagged With: deep lawn roots, drought tolerant grass, spring lawn care, summer lawn, turf, turf training, turf watering, watering lawn, watering lawns, Western Gardens

Gardening Tool Box for Father’s Day

June 4, 2017 by Jenn Crookston

Father's Day gardening bucket giftWith Father’s Day just around the corner I’ve been thinking about useful gift ideas.  My kids always love to give their dad his favorite candies, handmade cards/notes, a new tie, etc…all of these gifts are always greatly appreciated and graciously accepted.  I thought it would be fun this year to put together a Gardening Tool Box and thanks to my local Western Gardens I was able to knock out most of my shopping in one place.  I did get the Husky Bucket Jockey online (here) and we already had the 5-gallon bucket but you can find them online too (here) but the rest of the tools and many many others were all found at Western Gardens.
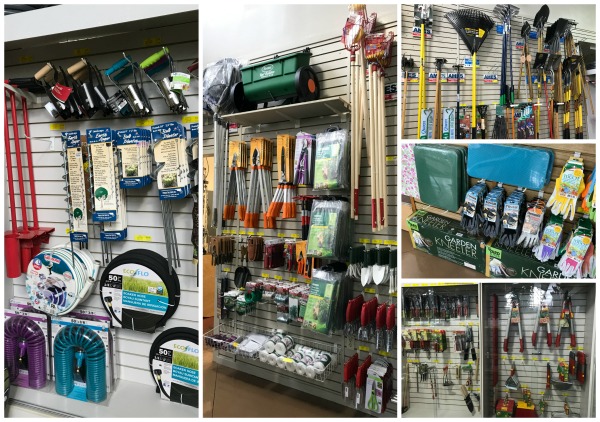
garden tools at western garden centers in salt lake cityCheck out all of this they have in stock, and this isn’t even everything.  It was a great place to start our plan.  There is a gift in the bag from each of the kids.  It includes 2 different types of shovels, gloves, small rake, pruning shears, and weeder.
gardening tools shovels and gloves for tool boxWe loved the bucket jockey because it has pockets all on the outside and the inside to help keep everything organized.  He can use the inside pockets to separate and organize seeds (the kids and I are each excited to pick a few different varieties to include in the kit) and being inside will keep them protected from the elements.  Once the seeds are all planted the bucket can be used to easily gather weeds while out gardening or as a seat when needed.
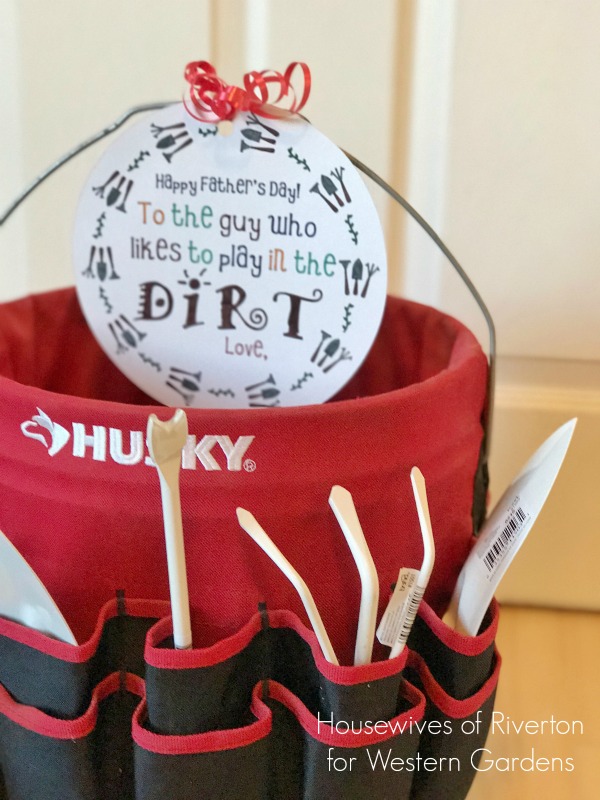
sign play in the dirt gardening bucket tools for fathers day gift ideaTo top off the gift I created this Father’s Day tag perfect for the Gardening Tool Box.  I designed it in black and white and it can be colored by the gift giver.  It’s all all drawn and cut by the Cricut Explore which makes it an easy tag to make.

play in dirt printable sign for gardening tool box for father's day
You can find the cut file here.  I love the way it pulls the whole gift together.  You or your kids can color it to their own liking making the gift even more personal.
I swear It seems like some gardening tools need to be replaced annually at our house, they tend to walk off to who knows where and end up missing forever.  I’m really hoping that each tool having its own home will prevent that from happening this year.
gardening tool box for father's day
If’ you’ve got a dad in your life who has a green thumb (or wishes he did) this gift is the perfect choice for this Father’s Day.

Filed Under: Gardening, Outdoors, Tools, Yard Care Tagged With: fathers day gift, garden tools, gardening tool box, gift idea, play in dirt, tool bucket

DIY Porch Planter Box for Mother’s Day

May 7, 2017 by Jenn Crookston

Welcome – Glad you dropped in for a great idea!

Mother’s Day is just around the corner and I’ve got the perfect Mother’s Day gift that you’ve got plenty of time to create because it is such a fast build.  Your mother/wife/friend will love this DIY Mother’s Day Porch Planter Box.
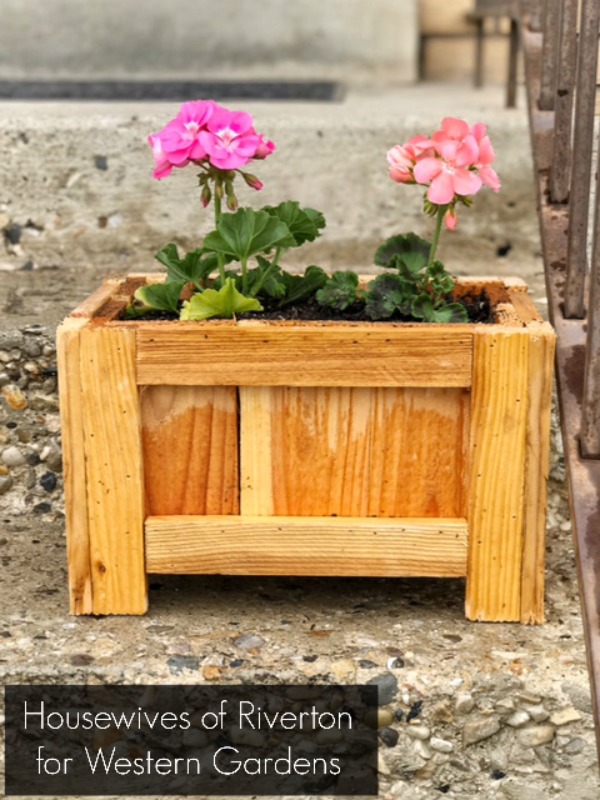
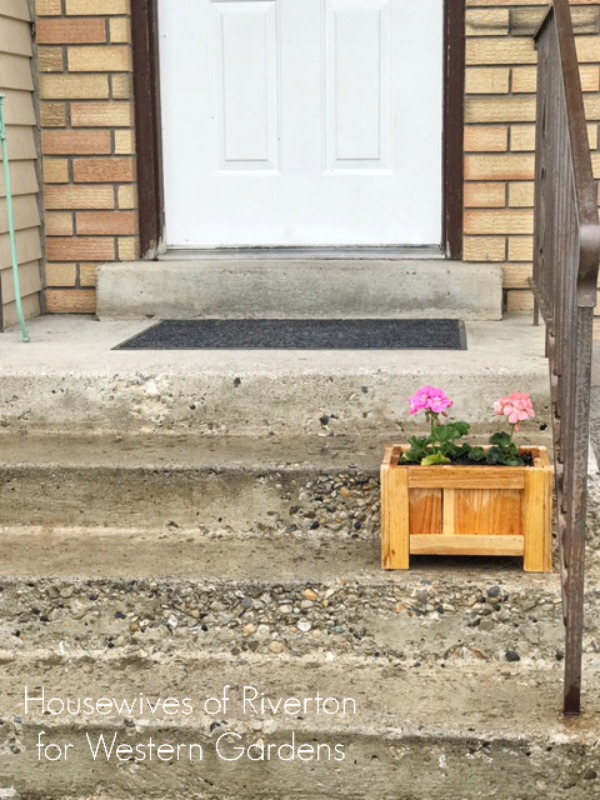
Geraniums in a planter box for your porchI’m pretty sure it’s a proven fact that anything is automatically cuter when it’s small.  That fact holds true with this Mother’s Day Porch Planter Box.  I am completely smitten with how cute it looks sitting on my steps and can’t wait to make it a couple of sisters.  You’re going to love me when I tell you how easy this was to make too.
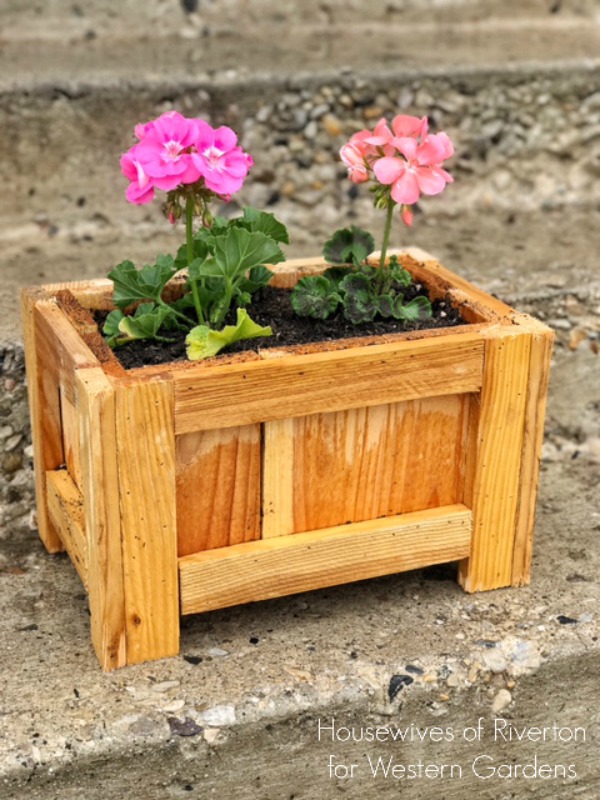
Because I wanted this planter box to be able to sit on a single step on my porch I needed to find materials that weren’t big and bulky.  After walking around the home improvement store for a while and looking at the different options I went with wood fencing and stakes.  Since both of these items are made to be outside in all weather conditions I figured they were perfect for this project and they aren’t bulky pieces of wood which means more room inside the box for flowers.
Here is a good photo of the box assembly.  The fencing is less than $2 a board and the stakes we had on hand but I’m pretty sure were around a dollar each.  I used just over 1 fencing board and 2 stakes for one box.  I think with 4 boards and 7 stakes you could make 3 planter boxes, including nails I think you’re looking at 3 planter boxes for under $20, pretty awesome if you ask me!
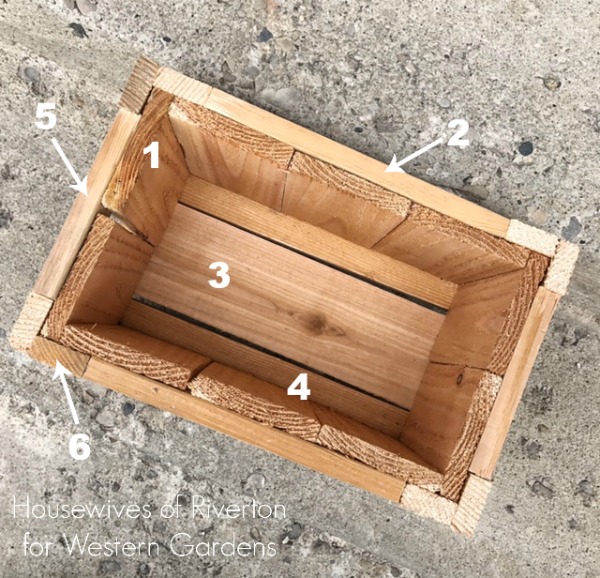
construction of DIY porch planter box for mother's dayI used our miter saw to cut my pieces, if you don’t have a saw at home here is your cut list and the people at the home improvement store can cut them for you.
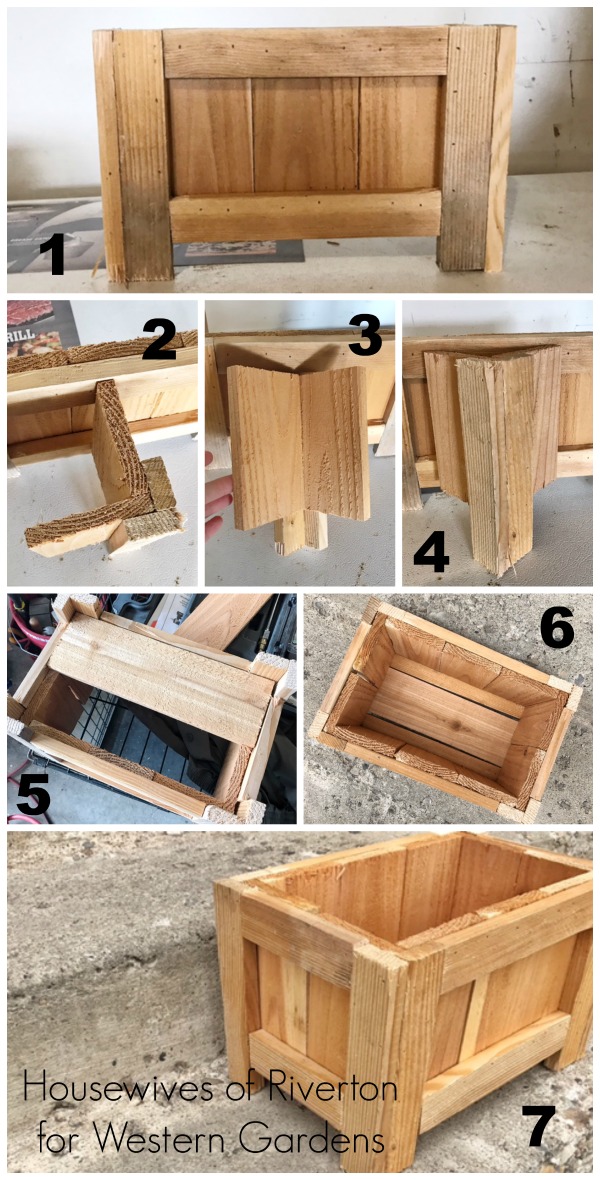
Cut List:

10 #1 (side pieces) – 3.5″x 6″
4 #2 – (long side braces) 1.4″x 8 5/8″
1 #3 – (middle bottom) 3.5″x 11.5″
2 #4 – (side bottom) 1.5″x 11.5″
2 #5 – (short side braces) 1.5″x 5 1/4″
8 #6 – (corners/legs) 1.5″x 8″

Porch Planter Assembly:

I used a brad nailer to create the box with 1″ finish nails.  If you don’t have a nail gun you can use tiny nails and a hammer to create the box it’ll just take a little more time.  These nails are perfect because they’re easily painted over and hidden if you choose to paint your planter box.

To create my planter box I started by creating one side as shown in photo 1. 

Once I got that side done I created the corners as shown in photos 2-4.

When I had the corners done assembly was easy.  I placed the side brace against one corner piece and then nailed into place.

When it was attached I then placed the next side piece in place and attached it to the side brace.

Photos 5 and 6 show the bottom of the planter box.  As you can see in photo 5 there isn’t quite enough room for 2 pieces of fencing on the bottom.  Photo 6 shows how perfect once piece of fencing and two pieces cut from a stake fit leaving enough room between the pieces to allow water drainage.

As you can see in photo 7 I wasn’t too worried about a perfectly smooth surface, you can sand and paint/stain as desired, I love the little more rustic look so this was perfect for me.
Planter box with living flowers on front porch stairs of houseCan’t you just picture a few more of these darling little planter boxes leading all the way up the stairs.  I can’t wait to get them all finished and filled with beautiful flowers from my local independent garden shop Western Garden Centers.
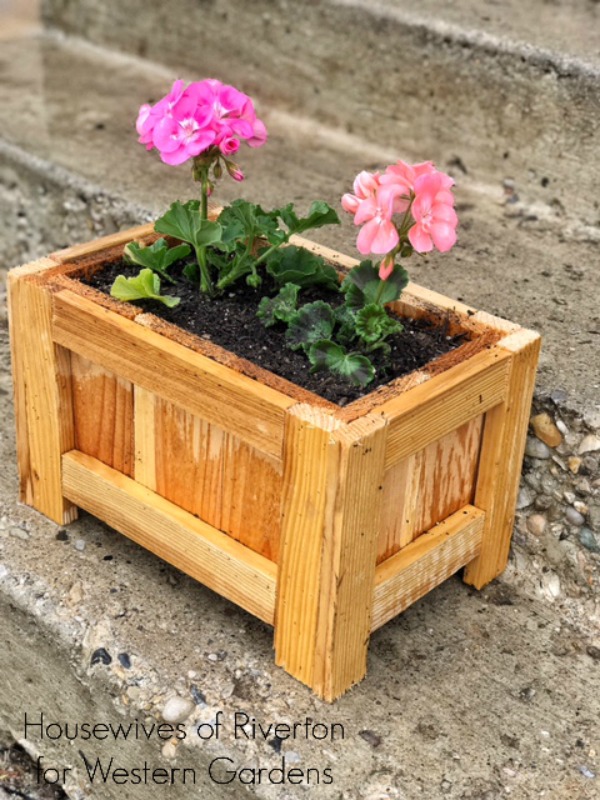
You can easily make this planter box and fill it with flowers for less than you would spend on a bouquet of cut flowers for Mother’s Day and they’ll last all season long and the planter for years to come.
western gardens have geraniums for your planter box

Filed Under: Container Gardening, Flowers, Gardening, How To, Outdoors, Tips & How To's Tagged With: container gardening, DIY, flowers, mother's day gift idea, porch planter, simple gift

DIY Tabletop Terra Cotta Fire Pit

June 7, 2016 by Sydney Anderson

Hi there, thanks for stopping by today!

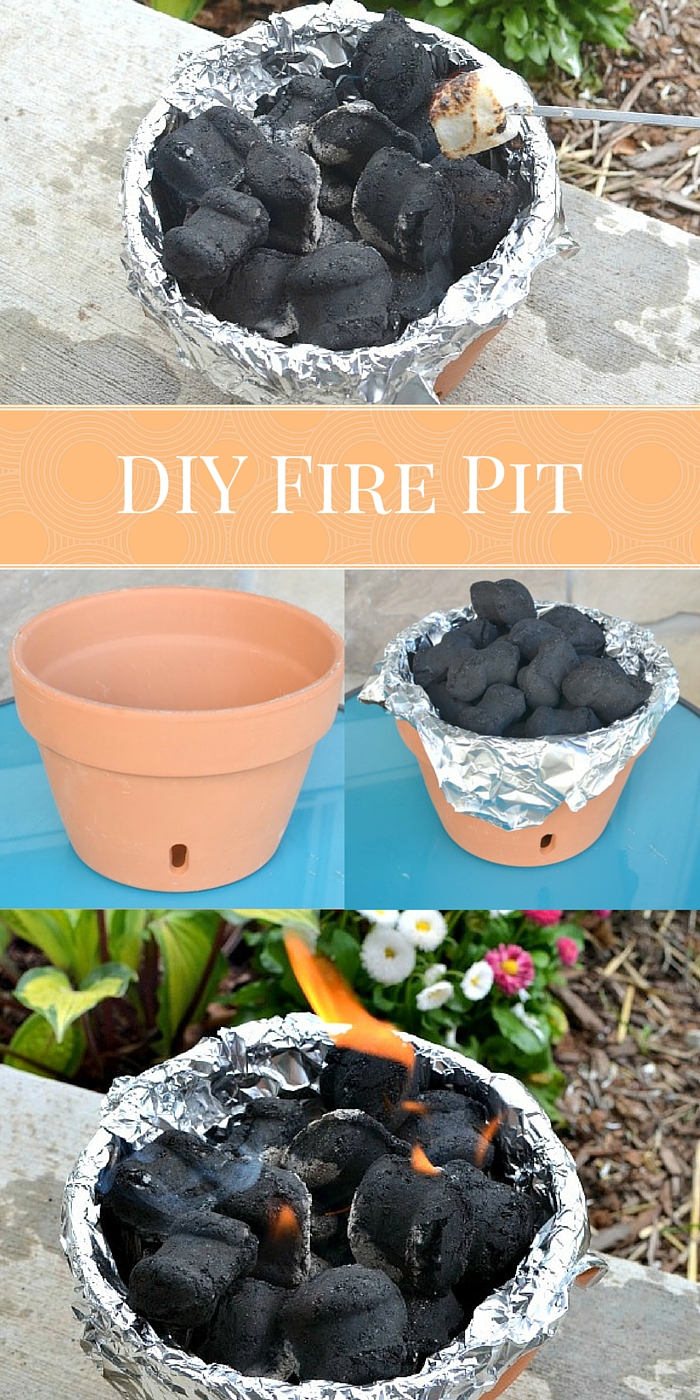
DIY Fire Pit: Make Your Own Campfire At Home For Less Than $5 | Western Gardens

Do you love camping with your family in the summer?  Roasting hot dogs and marshmallows over a fire with the people you enjoy most?  Me too!

Some of my favorite memories are of camping in the mountains, at the lake, in the desert, and even in the backyard!  I can’t wait to make the same memories with my boys…but since I’m 20+ weeks pregnant, sleeping on the ground isn’t very appealing.
DIY Fire Pit: Make Your Own Campfire At Home For Less Than $5 | Western Gardens

So we’re bringing my favorite part of camping right to our front porch—campfires!

There’s nothing better than sitting around a camp fire, roasting hot dogs, making s’mores and just spending time together, laughing and telling stories. Currently we live in a great little townhome community— without a backyard—so building a fire pit was out of the question.

I couldn’t let that stop me!

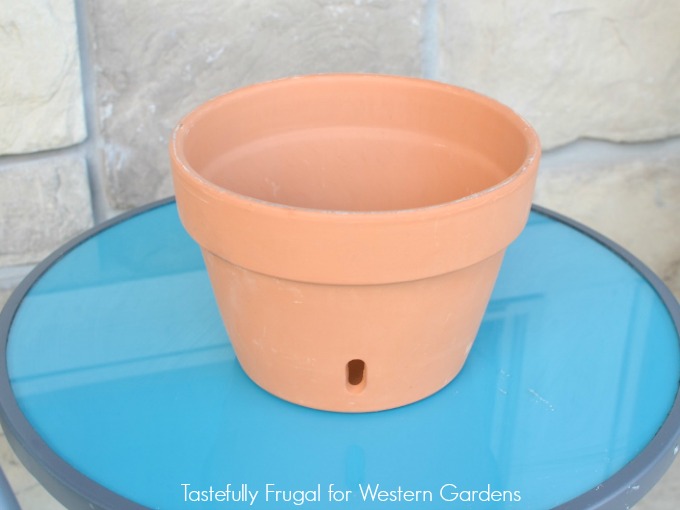
DIY Fire Pit: Make Your Own Campfire At Home For Less Than $5 | Western GardensI took matters into my own hands and made a mini fire pit out of a terra cotta pot for our front porch!  I took my husband, who is definitely the brains of our family, into Western Gardens and he picked out this terra cotta pot with holes in the bottom.  The holes allow more oxygen to enter the pot (just like on a charcoal grill), which will let the fire burn longer.
Longer lasting fires are perfect for those summer nights when the kids are playing, grown ups are chatting and you want to be able to make more s’mores when you get that craving (which happens a lot when you’re pregnant!).

Click NEXT to get the simple instructions!

Western Gardens | Utah

Pages: Page 1 Page 2 Page 3

Filed Under: Crafts, Outdoors Tagged With: DIY, Fire Pit, How To, how to's, Terra Cotta Pot, tips, Utah, Western Garden Centers, Western Gardens

DIY Solar Lantern

May 31, 2016 by Heather Leister

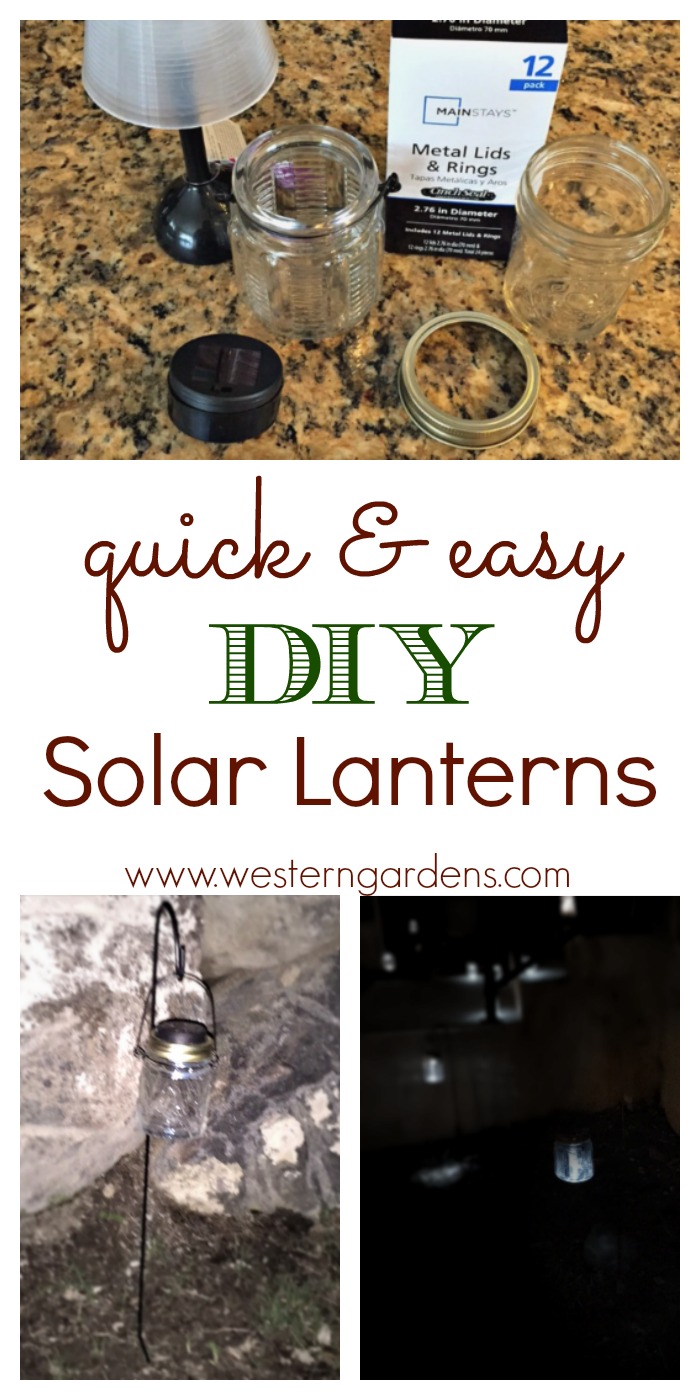
Do you love the look of solar lanterns, but not the cost? Make your own ! They're cheap, easy and fast. Check out the simple instructions!

Welcome, I’m so glad you’re here!

Are you looking for an inexpensive way to light up your yard at night? Look no further! These easy DIY Solar Lanterns can be created with a quick trip to the dollar store.  They’re simple to make and add a fun element to your landscape.

All it takes is a few simple supplies and a few minutes of your time.  This is a project that kids love to help with too!  (or is it just my kids that enjoy taking things apart? 😉)

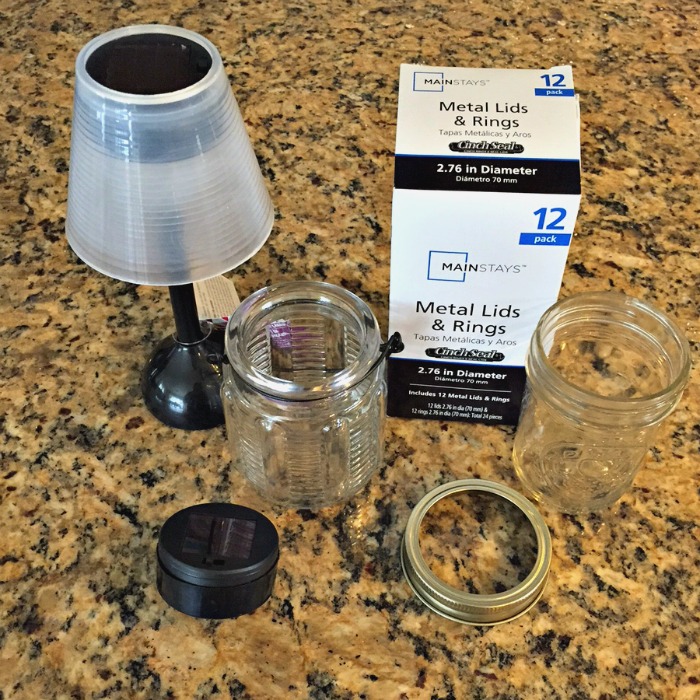
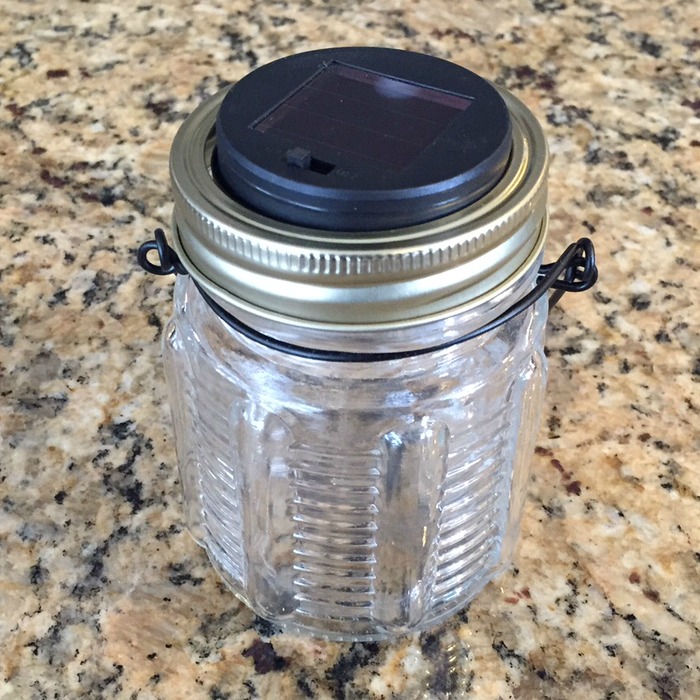
For this project you’ll need some empty mason jars (or other small decorative jars), inexpensive solar lights, canning jar rings (optional, but they do give them a nicer finished look), and some hot glue.

This simple DIY Solar Lantern will light up your yard and impress your neighbors! All it takes is a few inexpensive supplies and a few minutes to assemble. Great project to do with kids!!

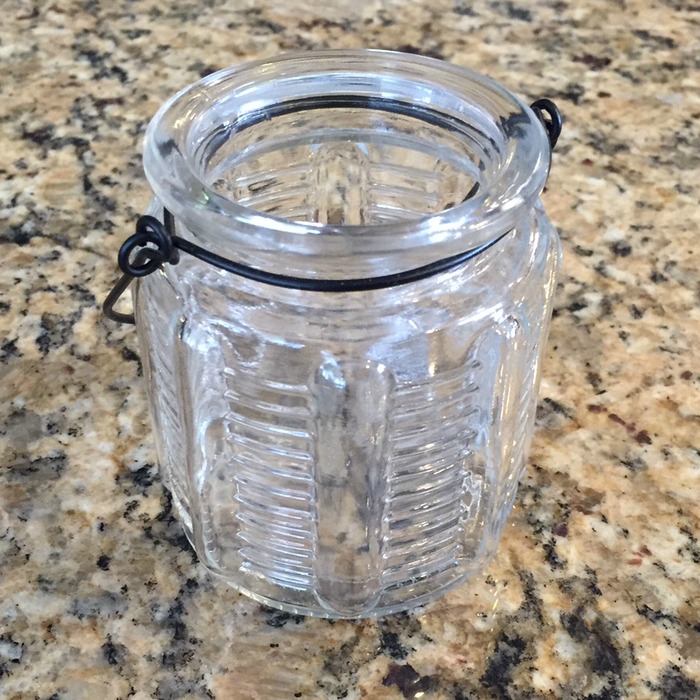
Start with the mason (or other small decorative jar…I’ve used both and they work equally well). The key is to choose a jar with a small opening. If you use a wide-mouth canning jar, the solar light will fall through the opening to the bottom of the jar.

jar

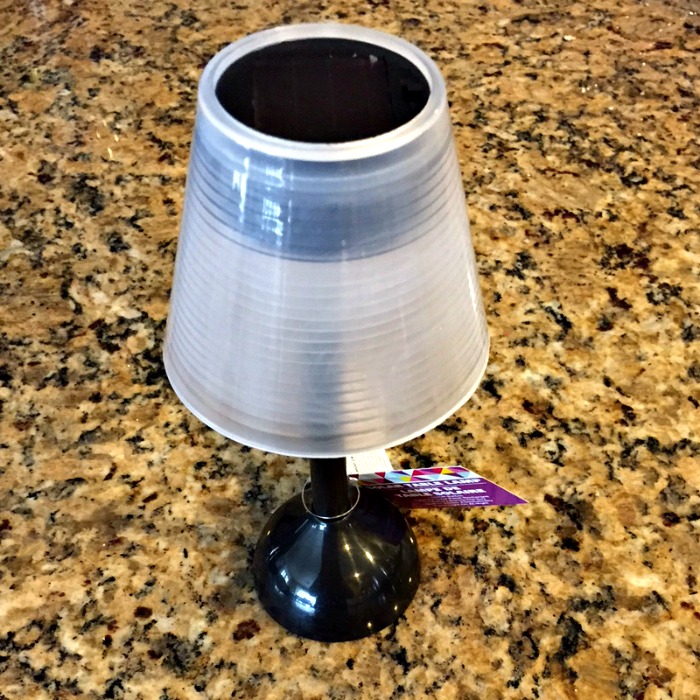
Now is the perfect time to stock up on inexpensive solar yard lights for any DIY solar projects you might have planned. They can be found at the dollar store. Purchase the plainest, simplest solar light you can find. For this example I’m using a solar table lamp that I purchased at my local Dollar Tree.This simple DIY Solar Lantern will light up your yard and impress your neighbors! All it takes is a few inexpensive supplies and a few minutes to assemble. Great project to do with kids!!

If you (or your kids!) like tearing things apart, then you’ll enjoy this next step! Take apart the solar light, what you want is the black, round unit at the top. You will see the solar cells on the top, and the lights at the bottom. This is all you need for the project, so go ahead and recycle the rest of the light, or save it for another project.This simple DIY Solar Lantern will light up your yard and impress your neighbors! All it takes is a few inexpensive supplies and a few minutes to assemble. Great project to do with kids!!

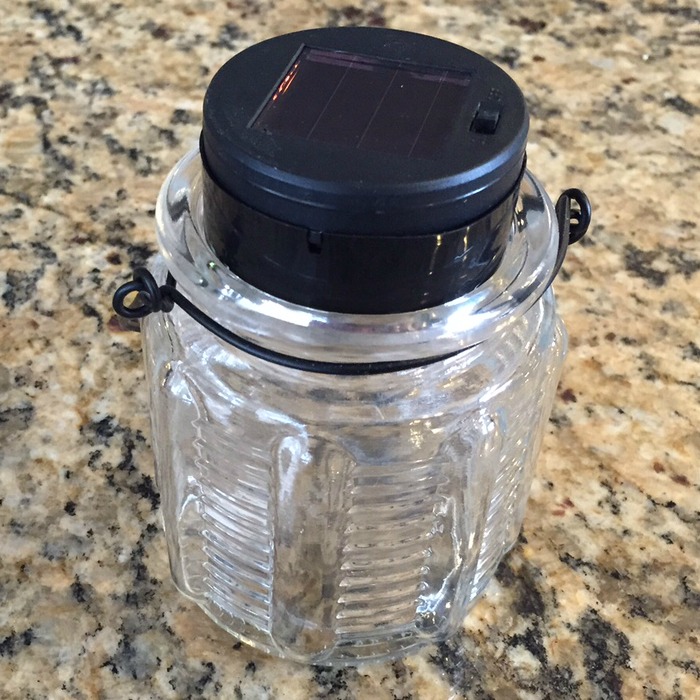
Depending on the size of your jar, your light may fit down in its mouth, or it may sit on top. Either way, I like to secure the solar light to the jar with hot glue.This simple DIY Solar Lantern will light up your yard and impress your neighbors! All it takes is a few inexpensive supplies and a few minutes to assemble. Great project to do with kids!!

For a finishing touch, add a canning ring to the top of the jar. Again, a little hot glue works nicely.

This simple DIY Solar Lantern will light up your yard and impress your neighbors! All it takes is a few inexpensive supplies and a few minutes to assemble. Great project to do with kids!!

That’s it! Sit your lanterns on your porch or hang them on a shepherd’s hook in your yard and enjoy!

Click NEXT for the list of supplies and directions!

2

Pages: Page 1 Page 2 Page 3

Filed Under: Crafts, How To, Outdoors, Tips & How To's Tagged With: craft, DIY, garden, yard

7 Plants A Black Thumb Can Keep Alive

May 24, 2016 by Sydney Anderson

Hi there, I’m so glad you stopped by!

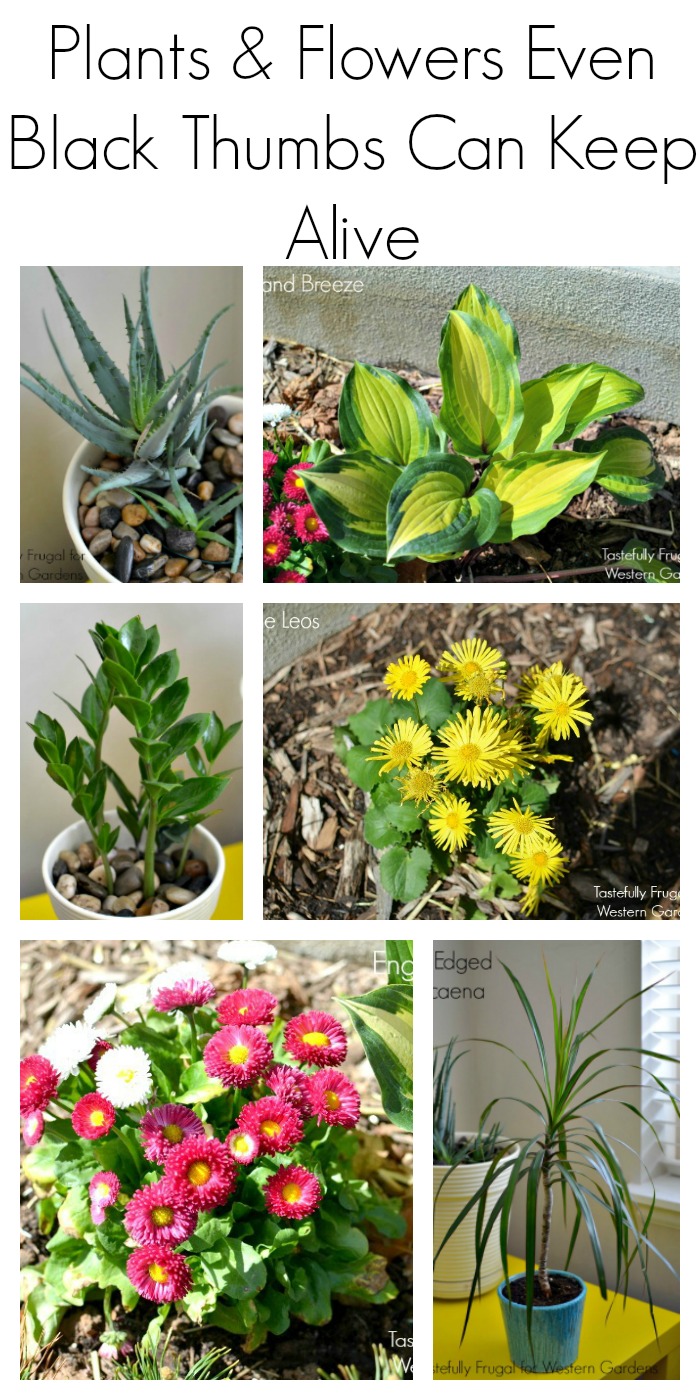
alt=”If you have trouble keeping plants alive, have no fear…. Stick with these 7 varieties and you’ll be able to keep thriving all year long!” width=”700″ height=”1400″ />
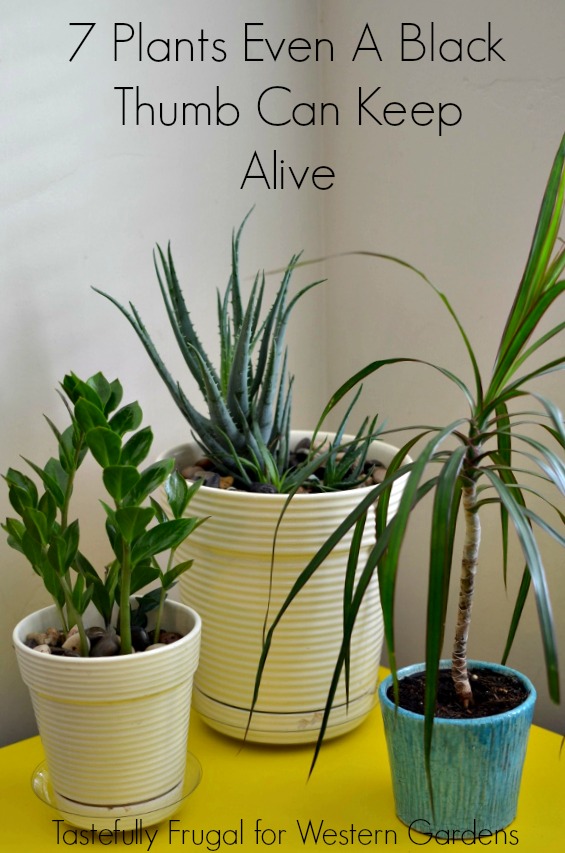
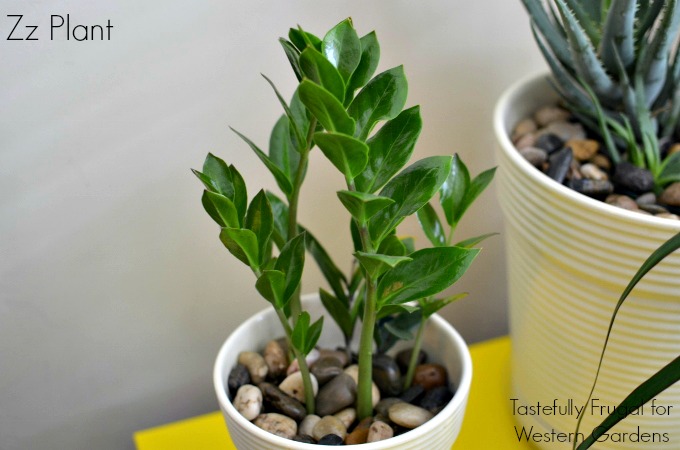
Are you prone to killing innocent plants?  Are you a self-proclaimed black thumb?  Well, take a deep breath, I’m here to help!

I’m sharing 7 beautiful plants that will change your luck and grow your confidence (along with your plants!). Take it from a former black thumb, these plants are a breeze to take care of!

If you have trouble keeping plants alive have no fear.... Stick with these 7 varieties and you'll be able to keep thriving all year long!

I’ve always admired beautiful gardens and flowers.  Trying to have them in my home was another story. Part of the problem was forgetting to water them, and then overwatering when I did remember.  The other part was buying the wrong plants and flowers for my area.

No matter what I did for years, every thing I planted died within a month. But not anymore!  I am happy to say I have now kept three (four including the wine glass succulent in my office) houseplants alive for 2 months and a garden full of beautiful plants and flowers (that survived last month’s crazy warm/cold weather mix!).

If you have trouble keeping plants alive have no fear.... Stick with these 7 varieties and you'll be able to keep thriving all year long!

House plants are easier to keep alive since you don’t have to worry about climate changes. If you’re a little nervous about keeping your plant babies alive, start here.

Click NEXT to see my favorite houseplants!

Western Garden Centers | Salt Lake City | Sandy | West Valley UTAH

Pages: Page 1 Page 2

Filed Under: Flowers, Gardening, Outdoors, Tips & How To's, Utah Gardening Tagged With: black thumb, easy to keep alive, house plants

10 Flowers for Beautiful Hanging Baskets

May 11, 2016 by Kirsten

Welcome, I’m so glad you’re here!

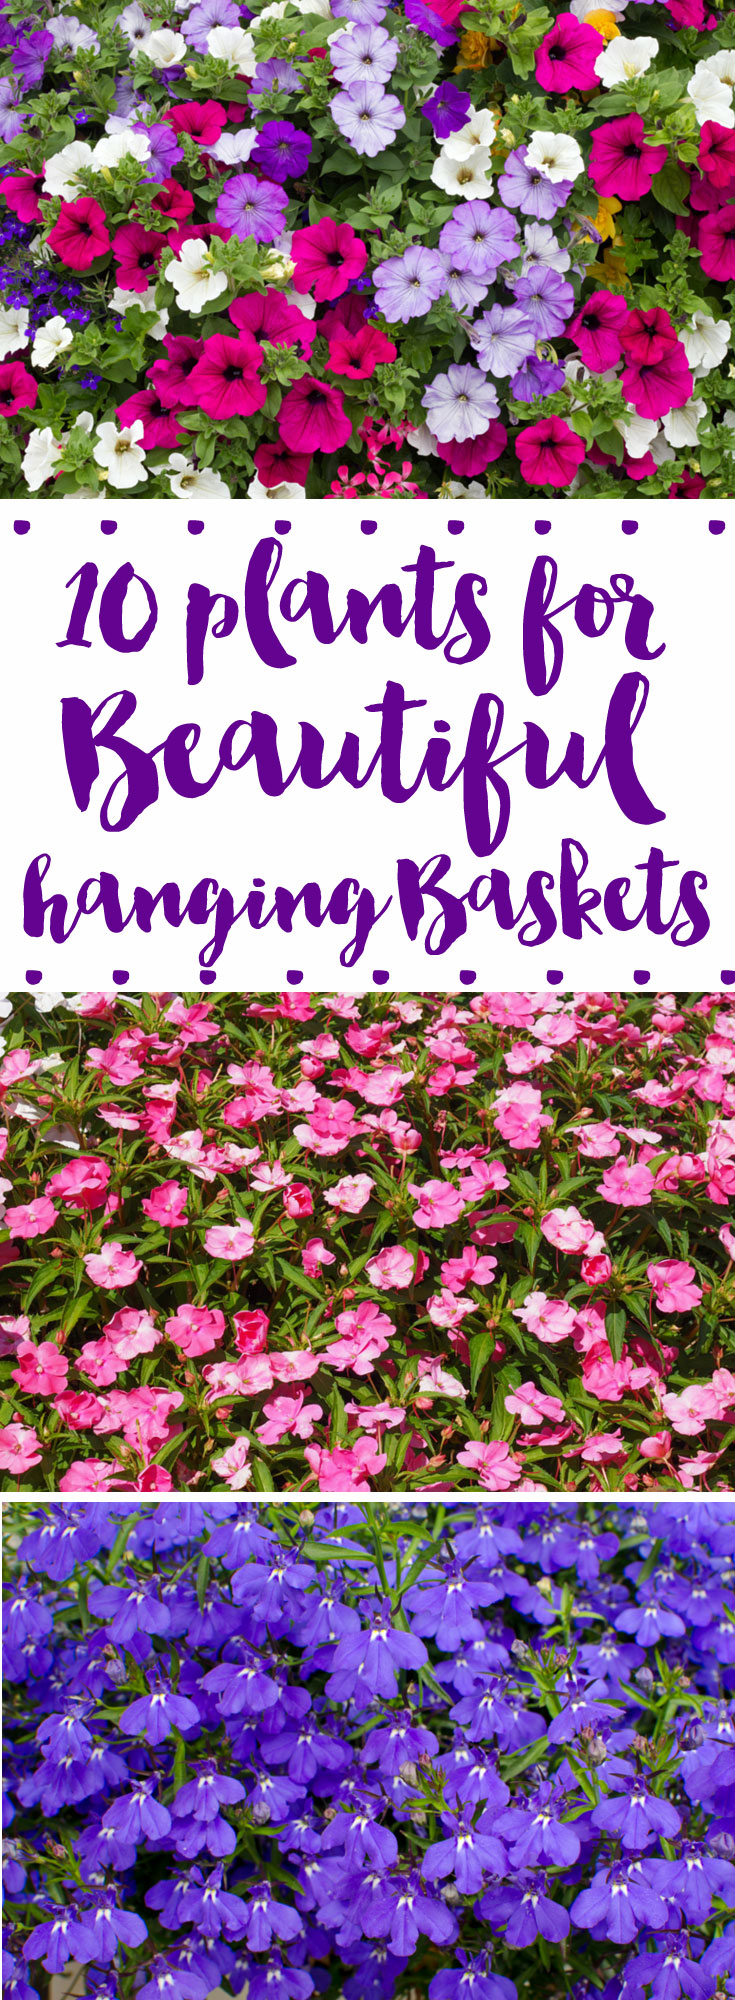
Do you ever see gorgeous hanging baskets that are filled to the brim with blooms cascading down over the sides, and wonder what kind of flowers they are?   And how you can get your hands on some to beautify your own yard?!

Hanging baskets can add so much to a sunny wall, or brighten up shady areas with flowers that flourish in the shade. I also love giving hanging baskets as a gift for those who are getting up in age or have bad knees, because there is no kneeling down in the dirt required, and choosing the appropriate flower can bring the receiver blooms from the summer months, on up to the fall!

If you have ever wondered what the best flowers for hanging baskets are, I’ve got you covered!

10 plants for beautiful hanging baskets- https://westerngardens.com/

One of the most important things you need to consider is if the space you want to decorate has full sun, or if it is in the shade most of the day. If you plant sun-loving flowers in the shade, they won’t thrive.  The same is true if you plant shade lovers in the sun.

You can have each hanging basket dedicated to one type of flower, or you can mix different flowers in each basket giving different colors and textures. Just be sure to put Shade Lovers together and Sun Lovers together!  Also make sure you get the trailing variety of flower for your hanging baskets.

Filed Under: Annuals, Container Gardening, Flowers, Gardening, Outdoors, Perennials, Tips & How To's, Utah Gardening Tagged With: flowers, Gardening, Mother's Day, tips, Western Gardens

Plants That Repel Mosquitoes

May 1, 2016 by Kirsten

5 Plants that Repel Mosquitoes - www.westerngardens.com

Hello and Welcome!

Do mosquitoes drive you crazy?  Do you love spending time outside until you become a feast for these pesky creatures?  Keep reading for our list of plants that repel mosquitoes…a simple solution that doesn’t involve chemical-laden sprays!

Mosquitoes are a real problem, not just because they’re annoying and no one likes the itchy bumps they leave behind, but because they carry disease.  Zika is the newest threat here in the U.S. and it’s particularly alarming for women who are pregnant or who want to become pregnant, as it causes birth defects.

The first step to reducing mosquitoes is to make sure you don’t have standing water around your home, as they need water to reproduce.  This includes rain gutters, outside toys, wagons, dog bowls, etc. Even a bottle cap of water can be a breeding ground for mosquitoes.

The next thing to do is add some mosquito-repelling plants to your landscape and containers.  It’s important to note that the mere presence of these plants doesn’t necessarily repel mosquitoes.  {There are a lot of claims that they do, but there is no scientific backing to support this idea!}

So now what?  To harness the power of these plants, you must actually break the leaves on the plants and rub the oil on your skin in order to truly repel the mosquitoes.

If essential oils are your thing, try THIS recipe for a kid-friendly spray.  You can also try making your own essential oils!  But whether or not you make your own oils, add these plants to your yard to keep your family safe from the summer mosquitos!

Plants that Repel Mosquitoes

5 Plants that Repel Mosquitos - www.westerngardens.com

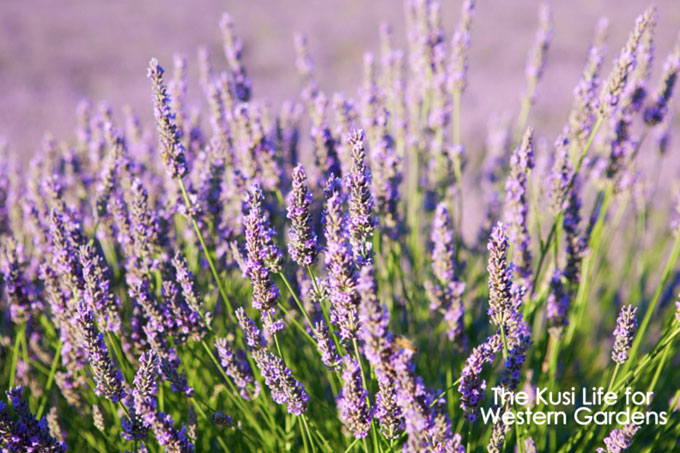
1—Lavender ⇧ 

Lavender is a beautiful plant with a lovely fragrance. It’s known to bring on calmness and relaxation, and can even help you get to sleep. Lavender oil has also been known to stop the itchiness of bug bites and sunburns. Spraying lavender on your body masks your natural scent and will help keep you free of mosquito bites! You can make your own lavender oil by removing the flowers and allowing them to dry, then boiling them in fractionated coconut oil.

5 Plants that Repel Mosquitos - www.westerngardens.com

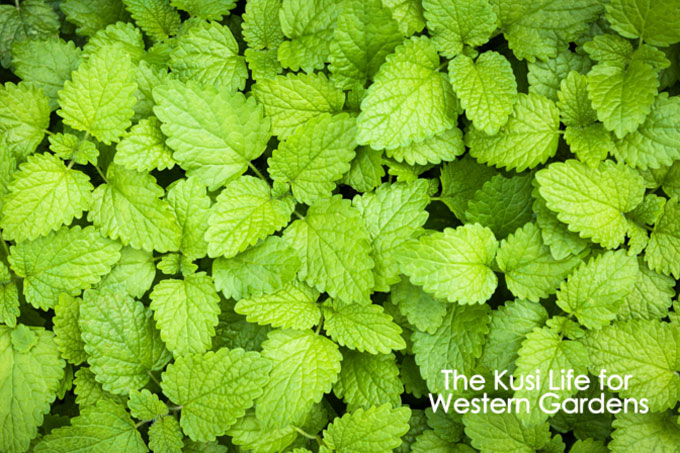
2—Lemon Balm ⇧

Many people enjoy lemon tea from lemon balm leaves and say they have found relief for indigestion, better sleep, and reduced anxiety. You can easily crush the leaves in your hands and rub them over your skin as a natural mosquito repellent.

5 Plants that Repel Mosquitos - www.westerngardens.com

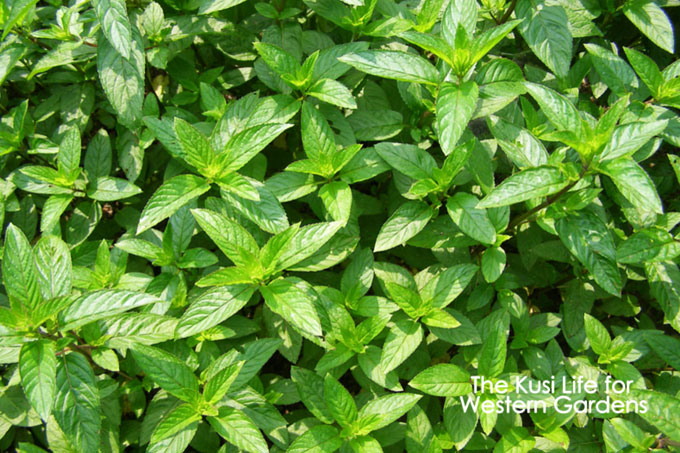
3—Peppermint ⇧ 

Not only is peppermint used in tea and in baking, but it is a fantastic repellent for mosquitoes. It’s easy to gently crush some leaves in your hands and rub over your skin or exposed areas where mosquitoes can bite you. Not only can peppermint repel mosquitoes, it can help relieve the itch, as it has a cooling/tingling feeling when applied to the skin.

5 Plants that Repel Mosquitos - www.westerngardens.com

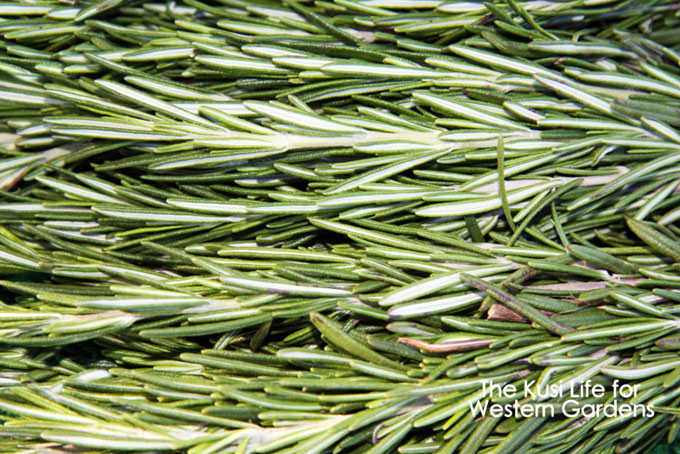
4—Rosemary ⇧

Rosemary is a great herb to have in your garden as the scent helps repel mice and deer. You can make delicious savory dishes and have the added benefit that using just a few leaves a day gives you all the vitamin A you need. Rosemary can be boiled in fractionated coconut oil and then be sprayed on your body as a natural mosquito repellent.

5 Plants that Repel Mosquitos - www.westerngardens.com

5—Sage ⇧

Sage isn’t just for cooking anymore!  This herb is a little different from the others on our list…you can actually burn some dried sage bundles to help keep the mosquitoes away.  We recommend using it in combination with some of the other essential oils mentioned above for total mosquito repelling success!

When you apply natural mosquito repellents on your skin for the first time, make sure you place a small amount on the back of your hand and rub it in. Wait one to two hours to see if the repellent causes irritation.  If you have no irritation, you can spray or rub the repellant over the exposed areas to keep the mosquitoes away.

Have you found another natural way to keep the mosquitoes at bay?  Tell us in a comment below!

See the Happy!

Kirstensig

Filed Under: Container Gardening, Gardening, Herbs, Outdoors, Tips & How To's Tagged With: chemical free, DIY, essential oils, lavender, lemon balm, mosquito, mosquitoes, natural, non toxic, peppermint, plants, repel, repellent, rosemary, sage

  • Go to page 1
  • Go to page 2
  • Go to Next Page »

Primary Sidebar

Shopping Cart

Items in Your Cart

Your cart is empty
Visit The Shop

Follow Western Gardens

  • Facebook
  • Instagram
  • Pinterest
  • YouTube

See what we’ve been pinning!

Follow Me on Pinterest
Followed by people.
?

Pinterest Badge by Skipser

Here’s What We’ve Been Up To!

Save water and money by Turf Training - train your lawn to grow deep roots
work at western gardens utah garden center
Senior gardening woman Edu Carvalho from Pexels
nursery center open to public

Copyright © 2023. Western Gardens - Privacy Policy