• Skip to primary navigation
  • Skip to main content
  • Skip to primary sidebar

Western Garden Centers

for what grows here

  • Home
  • How To
  • Gift Cards
  • Calculate Mulch
  • Locations
    • Store Hours
    • About
    • Garden Shop Employment Team
  • Weddings
    • Salt Lake City, UT
    • West Valley, UT
  • Blog
    • Gardening
    • Recipes

Tips & How To's

Plant Peas – Our Favorite Varieties

April 26, 2017 by Marjorie Carter

Our favorite garden varieties of peas from the gardenEach year as we get to the last few weeks of winter, my husband and I watch for the first day when it is warm enough for us to work outside in our garden for a few hours so we can plant peas.  We can’t wait to get them in the ground!  Though along the Wasatch front, we typically don’t plant until March, we’ve planted them as early as mid-February (straight in the ground; no greenhouse) and still had great success. Peas are a cool weather plant that needs little attention beyond watering and harvesting.  They tolerate snow and light frost so don’t be afraid to plant peas early.

KIDS & PEAS … Planting peas is a great activity to do with young children.  The seeds are a real bonus to work with:

  1. They are large enough that they are easy for small fingers to pick up.  
  2. They are also easy to find after the inevitable spill.
  3. Planting is as simple as sticking your finger in to the ground, dropping in a seed, and covering with soil.  

Again, the size of the seed made this something I could do with my 18 month old.  She has helped plant every year since and even gets upset if she thinks she’s being left out of the planting process for the peas.
little girl planting peas with her mother

Peas and carrots on dinner plate - photo by CongerDesign - Pixabay CC0 license

Fun idea to see and eat the peas the children grow. That is if you can get any that far into the house from the garden!

FRESH PEAS IN THE GARDEN… My husband will only eat shelled peas that are freshly picked from the garden.  If they’ve been cooked, frozen, canned, or otherwise tampered with, he will not touch them.  (He’ll eat snap peas in stir fry). When our daughter was very young, we’d go out in the garden to pick peas and she’d eat as many as we’d give her.  Her preferred method was eating them straight out of our hands. She will still eat as many as she can get her hands on, but she’s big enough to do the picking and shelling on her own now.  

plant peas to eat by the handful

OUR FAVORITE VARIETIES…We’ve tried lots of varieties of peas over the past several years (Green Arrow, Alaska, Snap Peas, Little Marvel, Blue, and more) and have found that our favorites for flavor and abundance on the vine are Little Marvel (a shelling pea) and Snap Peas (edible pods, no shelling required).  We also grow Blue shelling peas because their flower is so beautiful. If you’ve never seen a blue pea, the flowers are purple and white and the pea pods are a dark purple/blue color, making them easy to find on the vine.  Buy quality seeds from your local garden center like Western Garden Centers in Salt Lake City and West Valley, Utah.

Find quality seeds of peas to plant at Western Garden Centers, garden shop in Utah

DID YOU KNOW… Peas are one of the oldest known vegetables.  Archaeologists have found them in ancient tombs at Troy and Thebes. Dried peas keep indefinitely.  This allowed them to survive the ocean voyage to become one of the first crops grown by English colonists coming to North America.

DID YOU KNOW… Peas are “nitrogen fixers”, meaning they take nitrogen from the atmosphere and convert it to ammonia (which is chemically comprised of nitrogen and hydrogen), thereby making the nitrogen available to other plants and organisms in the soil.  This means peas are a great spring crop because they naturally help fertilize your soil prior to planting other garden fruits and vegetables that need nitrogen in order to thrive (think tomatoes!).

TIP:  To maximize this benefit, at the end of the peas’ growing season, trim the plant off at the soil line instead of pulling them out, leaving the roots behind.

GROWING TIP … A friend suggested presoaking the peas prior to placing them in the soil.  This will soften the seeds and allow them to germinate more quickly. Soak for around 12 hours, no more than 24, before planting.  We tried it this year because we wish our peas would sprout sooner.  It worked!  Our peas were sprouted and broken through the soil less than 10 days after planting them, instead of 2 weeks or more.  We look forward to eating our peas that much sooner this year!  

Rows of planted peas coming up in the vegetable garden

FALL PLANTING … After the summer heat is gone (about Labor Day), plant peas again for a fall crop.  Read the package of which variety will produce according to the time you have.

Hmm…  Sounds like something new to try with our garden this fall.

Eat peas straight out of the garden


Filed Under: Gardening, Kids in the Garden, Tips & How To's, Utah Gardening, Vegetables, Veggie Gardening Tagged With: blue shell peas, cold hardy vegetables, cool season vegetables, garden peas, little marvel peas, peas, plant peas, snap peas, Utah gardening, zone 5 peas

Garden Advice Alert! 5 Reasons to Support Local Independent Garden Centers

April 17, 2017 by Wendy Pettit

Welcome Gardener Friend! We’re happy you are here.

Gardeners shopping a local independent garden center

The internet and the “mass merchants” can offer garden advice, but information and product specific to your area is a must if you want a thriving garden.  Your local independent garden center, like Western Gardens in Utah, live in and are experienced in your specific climate zone and your certain soil conditions.  These two crucial factors determine which plant varieties will do best in your yard and those that will simply die.  If you don’t match the plant type with the correct area in your yard and with proper soil, you can easily find yourself exhausted and frustrated from all your efforts plus a lot of wasted money. Shopping your independent garden centers will help you successfully grow a beautiful garden.

Here are 5 reasons why: 

#1 KNOWLEDGE

Local professionals – Local independent garden centers tend to hire more local knowledgeable plant gardeners and professionals.  They’ll have a great passion for gardening. A plant enthusiast will help you find success rather than somebody from the window department. (True personal story!)  If your local has a horticulturist by profession, like Western Gardens, even better.  

garden center employee helping customers n the roses

Gardening professionals help you.

Up-to-date Information – Locals stay up-to-date on information regarding weather – both current and recent past conditions.  They also will know of current pest infiltrations, and such.  Someone in another part of the country doesn’t have a clue as to what is happening in Utah.  Your local knows what you need to be successful, so their business can be successful.

Hard hat worker photo by Klaus Hausmann at Pixabay CC0 license

#2 PLANT MATERIAL –

Premium Quality – Local independent nurseries buy premium quality; they do not buy what is cheap. Your long term success is their success.

Timing & Choice – Locals buyers are making the purchases specific for your area, rather than a corporate worker ordering and sending material to their big stores across the country.  For example, big box stores will bring in and try to sell you a watermelon seedling in March. (True story 4-8-2017) It won’t succeed in Utah planting that early; watermelons hate cold weather.  Independents bring in the material for you at the right time.  If it is a little early or their shipment just came in, they will warn you to harden off the plants before planting.  

Unique Material – Independents tend to have a wider variety of unique plant material.  They bring in the latest developed plants that should survive your climate.  

Price – In general, independents tend to be a little more expensive because they don’t buy cheap, but rather quality.  And many times the price difference is pennies.  This quality  saves you money in the long run.    

Consider this when looking at the price: If you purchase a petunia from a mass merchant for 15 cents less than at the independent, but the plant doesn’t do well so you buy more plants to fill in, or you even have to completely replant, did you really save 15 cents?  We all eventually learn that sometimes it is better to pay a little extra for a quality product.  In the end, your effort, sweat, sore muscles, and your money won’t be wasted.

petunia covered with snow at a mass merchant store

A good independent doesn’t prematurely bring in plant material like petunias that are not cold hardy until much warmer weather. Independents save you money by not tempting you to plant certain products too early in the season.

OWN – And we’re not talking Oprah’s TV network.  Independents own the plant material they sell, thus they usually take better care of their product. Remember their passion for gardening!

Many mass merchants sell on consignment, not actually owning the product.  You may see vibrant plants when you walk in, but you take a gamble that the plant has been properly cared for.  A stressed droopy plant can “bounce back” when finally watered, but after repeated neglect by the time you get it planted (giving it a natural shock to its system), your plant may never recover or struggle.  Also, plants don’t like sitting on top of black asphalt in the parking lot.

To illustrate this point of owning and caring for product, see how plant material was cared for by a local mass merchant for three consecutive days (4-8-2017).  Witness below recent care of rose bushes, vegetable seedlings, and lemon trees during an early spring April weekend sale.  Draw your own conclusions about waste and quality of product. In all three cases, material was eventually thrown away and new product brought in.  Independents conserve on waste by taking care of their plant material.  Again, they own what they are selling to you. 

Warm weather vegetables and herbs including tables of peppers, cantaloupe, basil, even watermelon.

Rose bushes that were definitely not hardened off for the cold weather and snow. The independent roses are bigger, healthier, hardened off, and begin at just $2 more than these.

Lemon/Citrus trees. If the roots being exposed and repotted didn’t kill the tree, the snow and cold did.

In short, reputable independents, like Western Gardens, purchase and tend the best plant material for you, their customer.

#3 SOIL  – Local soils are different throughout your area.  Just in the Salt Lake valley, soils drastically range from sandy to heavy clay.  A quality independent will know what you can do to improve your specific soil structure so you can be more successful with your plant selections.  

The Salt Lake Valley has a wide variety of soil types. Photo by TyGuy999 from Pixabay CC0 license

#4 PROBLEM SOLVERS –  Locals are the “go to” people when you need advice.  They give you personal attention to select proper plants for your yard, give advice for additives for your soil, plus tips and tricks to get your garden into tiptop shape.  They are also the ones that people seek when there are problems and pests in the garden.  Your locals are the plant doctors.  Consider this, if you don’t buy your product from the experts, how can you expect them to help you with an inferior product you bought somewhere else?  They are willing to help you with your inferior product when they are able, but why not save yourself heartache and money by purchasing from the independent in the first place?

Bring in samples of your problem. The plant doctor is in!

Plant enthusiasts are ready to help you be successful.

#5 LOCAL ECONOMY – Often shoppers don’t realize that when they purchase from a big national company, a lot of their money leaves the state and pays employees back in Georgia or some other state where the headquarters are located.  When you buy local, you keep the funds within the local community and you keep your independent garden center thriving and open, ready to serve you for years to come.  

Local independents also more often than not buy from local growers, who meet the quality standards.

Keep the independents in business so they will be there when you really need a “plant doctor”.  

Support your neighbor; buy Utah!


Filed Under: Gardening, How To, Tips & How To's, Utah Gardening Tagged With: buy local, buy utah, garden advice, garden centers in Utah, Independent garden centers in Utah, local independent garden centers, mass merchants, plant knowledge, quality plants, shop local, support local independents

Use Living Flowers for Centerpieces during Easter and Spring

April 14, 2017 by Jenn Crookston

Use living flowers for centerpieces this Easter. Contains basket, tulips, bunnies, fake grass and plastic eggsIt’s pretty safe to say the very best part of Spring is the beautiful living flowers for centerpieces.  I love having fresh flowers in and around my home.  I love the instant brightness they bring and the amazing smells…it’s like bringing sunshine right inside the house.

As I plan my spring and Easter decor I love to plan for flowers anywhere and everywhere I can.  While I love a beautiful spring bouquet I especially love finding ways to use fresh flowers inside that I can then transfer outside so they can continue to grow and beautify my home.
Easter table centerpieces with tulips and ceramic bunniesFirst up I have this adorable Easter Table Centerpiece.  Using just a few items (many you may already have on hand) you can create the perfect centerpiece for your Easter dinner that will last for years to come because you can take that Tulip bulb and plant it in your yard!

Easter Table Centerpiece Supplies:
Basket
(I used a long skinny one I had on hand, you could use any variety)
Fake Grass
(or real grass if you plan ahead and grow some – see growing Wheatgrass)
Small Bucket
Fake Eggs
Ceramic Bunnies
Live Flowers
(I used a tulip, but again any flower would work.  Dainty primroses and colorful pansies are also great living flowers in centerpieces.)

First gather your supplies, plant your flower in the bucket and then place the bucket in the center of the basket and arrange your fake grass.  Once you have the grass arranged place fake eggs in the grass, mine had a hole in one end so I made sure to place the egg so that wouldn’t show.

I used two ceramic bunnies in front of the basket to bring the whole Easter look together. Simple and oh so cute.
Geraniums are a great way to use living flowers for centerpieces.
Once bunnies and Easter eggs are past being in season it’s time for a new Spring Centerpiece to take over the table.

Spring Table Centerpiece Set Up:
I found this cute blue crate at Target and flipped it upside down then added these little chubby birds and tiny cake stand from Hobby Lobby.  The Love Grows Here crate is also from Target and I love that it comes lined with plastic so adding flowers that need watering won’t damage it or anything under it.

I added two geraniums in their little plastic store bought containers, they are a perfect fit!
Easter table centerpieces with geraniums
While I love love love how both of these centerpieces turned out I think my very favorite part is that when I’m ready to make a change for the next season/holiday I get to plant these flowers outside and watch them continue to grow, I don’t have to throw them away in 7-10 days like we have to with cut flowers.

I highly recommend finding ways to bring living flowers into your decor.  I promise they’ll put a smile on your face every time you walk past them.

Filed Under: Crafts, Flowers, How To, Tips & How To's Tagged With: DIY, easter centerpieces, flowers, home decor, living flowers, living flowers centerpieces, spring centerpieces, use living flowers in centerpieces, Western Gardens

Garden Grow Box – Kids Friendly

April 11, 2017 by Vanessa Roush

WELCOME GARDEN FRIENDS, HAPPY TO SEE YOU!

Garden Grow Box DIY with kids

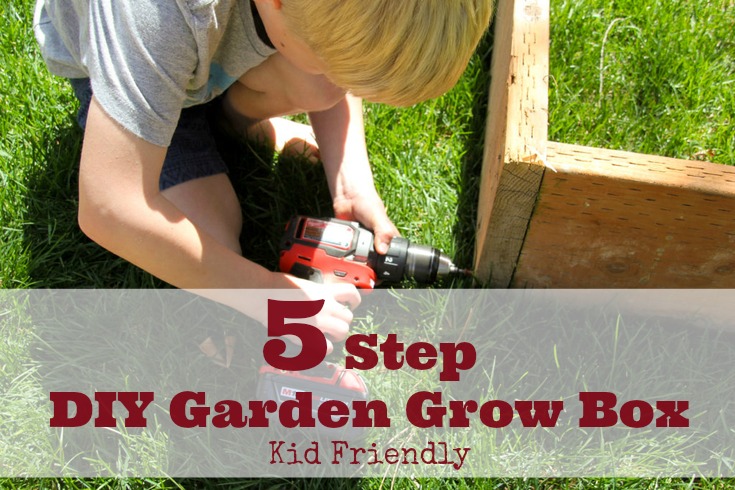
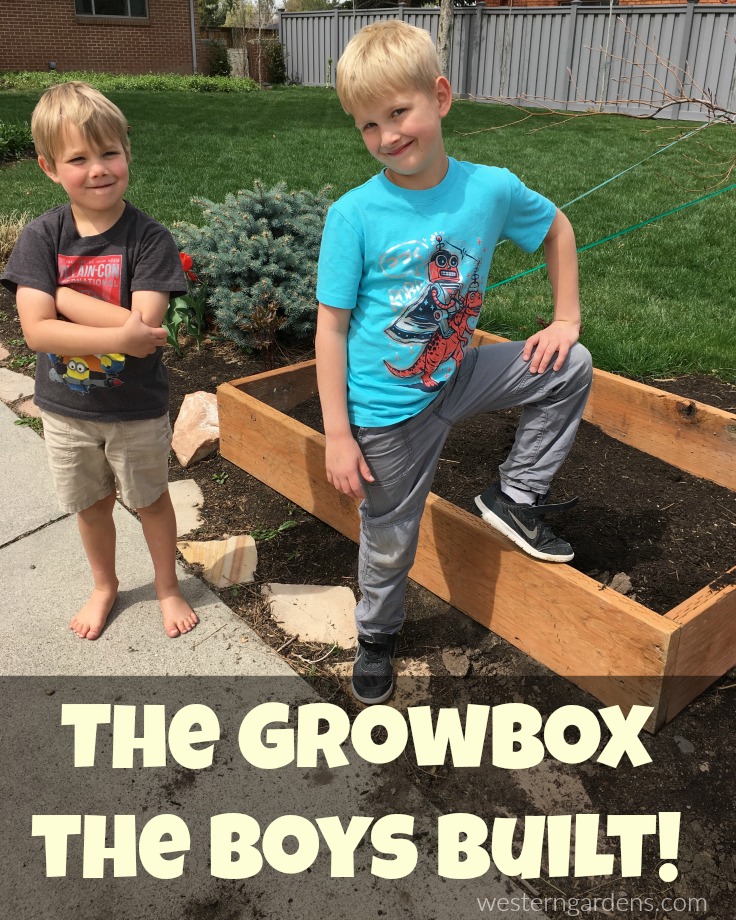
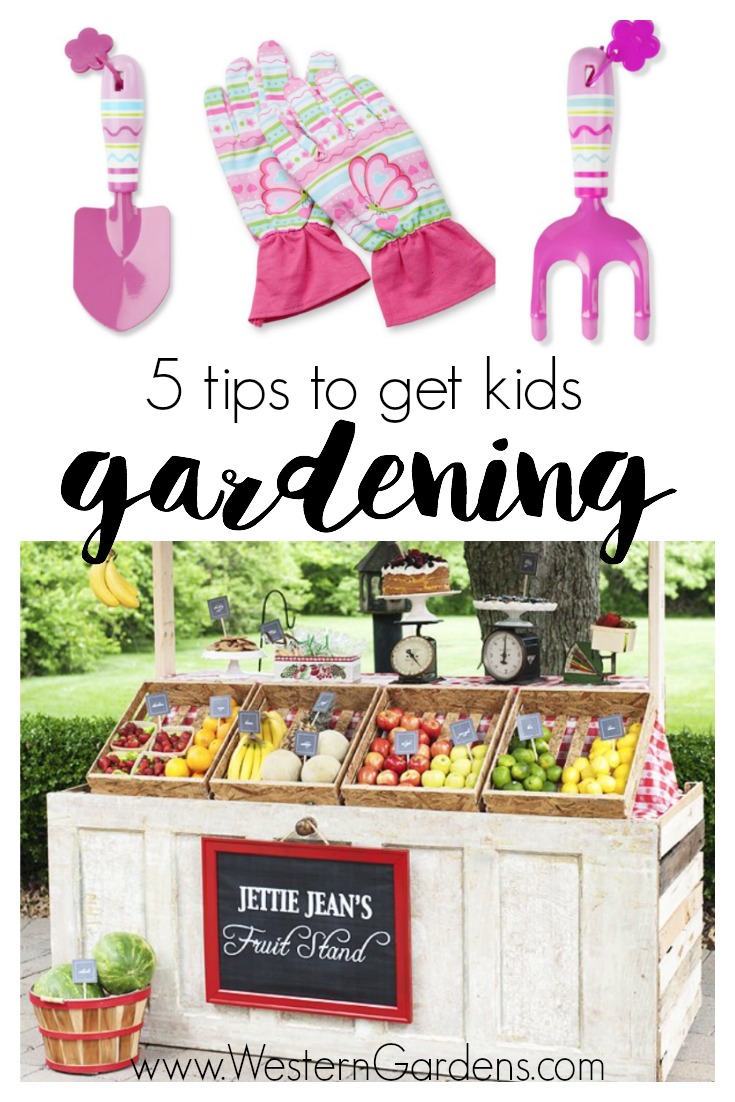
Want to have a garden this year? Wondering where to begin? Start with this simple garden grow box that you and your children can create together.  Here are some simple guidelines that worked for me.

Before heading to your local lumber yard,  decide what size of box you want or have room for. For this example, we are building a 4 foot by 6 foot box, which is a great size just right for the new little gardeners who will help to create it.  However, you can make it the size that fits the space you have.

Garden grow box SUPPLIES:

garden grow box supplies needed.

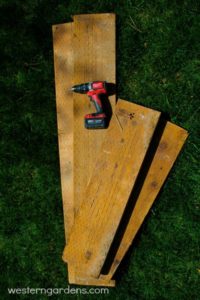
SUPPLIES: 2 10′ boards cut into 2 six feet and 2 four feet lengths. Smaller hands can handle the 4′ boards!

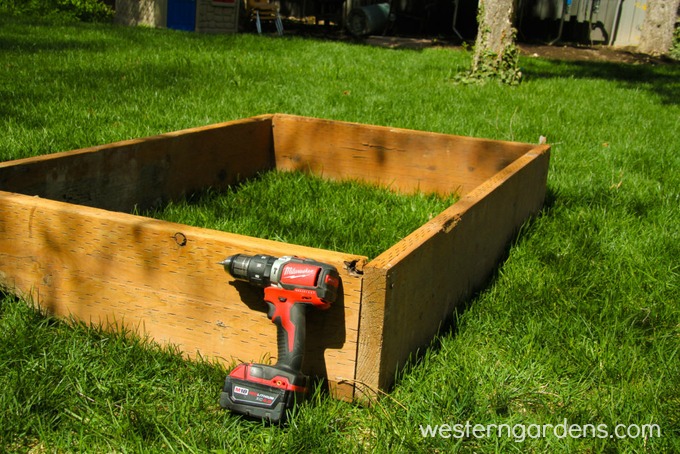
SUPPLIES: Deck screws, drill bit, power drill and/or screw driver, and those helping hands.

1. Two 2’’x8’’ x 10’ long pressure treated beams: (approx. $14 each) Make sure they are straight by pulling them out and looking down the side of them. Also make sure they aren’t severely bowed or have big knot holes. If you don’t have a chop saw at home, have someone at the lumber yard cut both of your boards at 6’. You will be left with two 6’ pieces and two 4’ pieces. This also makes it easier to transport them home. You can also rummage through your scrap wood at home and see if you have something that is at least 6” in depth.

2. A package (or at least 12 pieces) of #9 2 1/2’’ Deck screws: (approx $10 or less) You could also use #10 3’’ screws. They come in a few different colors so you can get a box to match the wood so they are less noticeable. Most of these screws have a star driver head.  Some boxes come with a bit to fit them, but check just to make sure.

3. Drill bit a little smaller than your screws (optional but highly recommended):  For a #9 screw, a drill bit size of 3/32 is recommended. Pre-drilling holes prevents the wood from splitting and ruining the board. If this sounds like Greek to you, take your screw and look for a drill bit that is slightly smaller in diameter. Or ask someone at the lumber store; they’d be more than happy to help!  This is an essential step if you’d like to involve kids. You pre-drill the holes, and then let the child drive in the screws.

4. Weed block or Landscape fabric:  If you have an area that is prone to a lot of weeds, put down some weed block or landscape fabric before you set your box in place.  Layers of old newspaper in the bottom of your box can work too.   Another option is to spray the weeds using Killz-All or Weed-Free Zone.  If you do this, make sure not to cover the sprayed weeds for 7-10 days giving the chemicals time to kill the weeds.  There is no problem using these products on edible vegetable gardens.  The product only works to kill the unwanted plant via the plant’s leaves.

5. Power Drill and/or Screw Driver.

Garden grow box ASSEMBLY:

Putting the box together is easier if you have an extra set of hands, but some rocks or a wall will do if you’re doing this project solo. Enlist the help from a child by asking them to hold one of the boards up for you. The box can be assembled in a few different ways, or styles.
Option A:  Assemble each board on the outer part of the corner on one end, and then inner part of the corner on the other.

Option B:  Assemble the shorter 4′ boards on the outside of of the 6′ boards or vice versa.

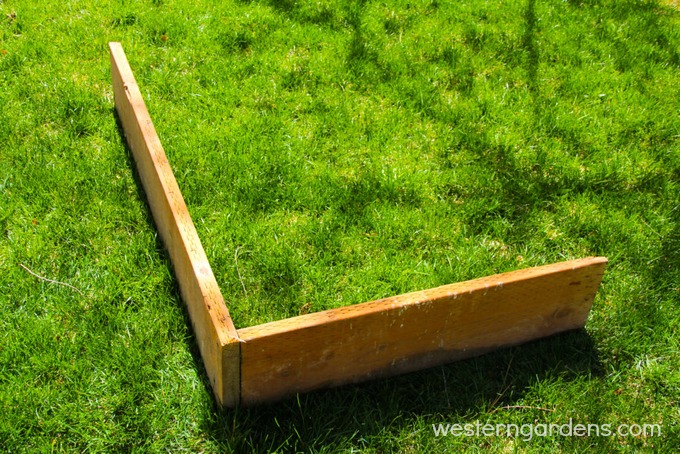
Step 1: Take a 6’ board and a 4’ board and put them together at a right angle. Make sure they are flat against each other. Using your drill bit, pre-drill 3 holes in a line at the top, middle and bottom of the side.

Step 2: Then switch to your screw bit or use a screw driver and drive 3 screws into the holes you just drilled. You should now have two boards creating a right angle or an “L” Shape.


Step 3: Now add the other 6’ board and repeat the pre-drilling and driving the screws.


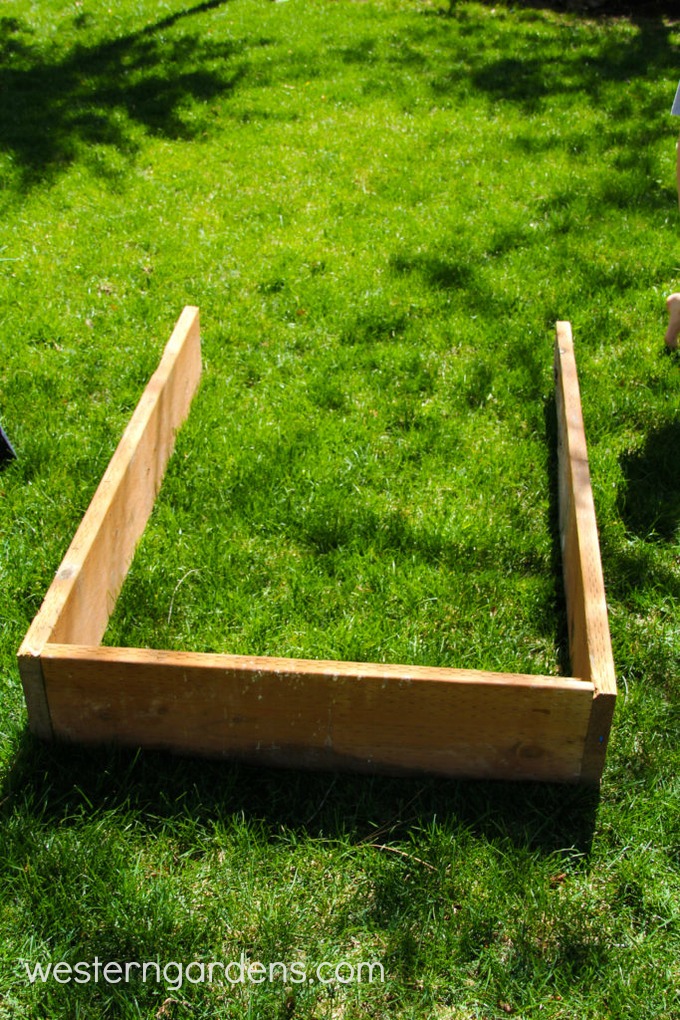
Step 4: Repeat with the last 4’ board.


Step 5:  Set your box in its place.  To help cut down on weeds, place a layer of landscape material from your independent garden store.

simple garden grow box built by kids

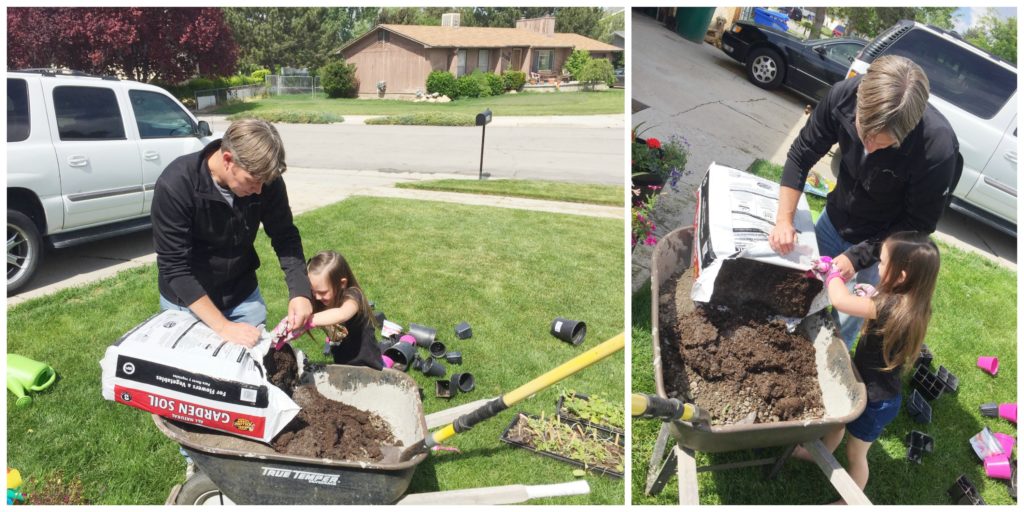
The fun has just begun. Fill with quality soil and get those seeds and plants ready! The box is!

Now you are ready to fill with a high quality dirt.  Bumper Crop from your local independent garden center, like Western Garden centers, is an experienced gardener’s favorite!

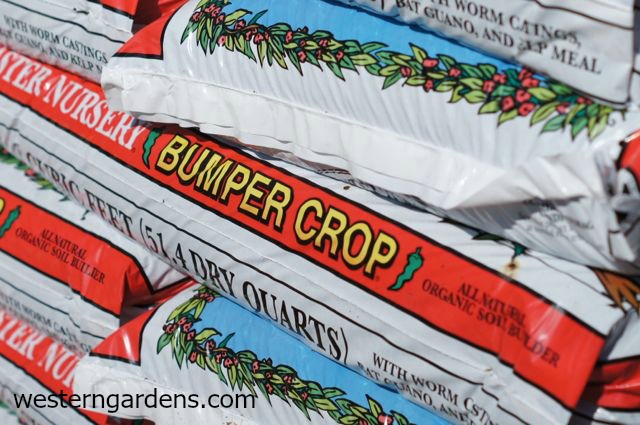
Bumper Crop for your soil is a gardener’s favorite.

Stay tuned for the next episodes of this Kids in the Garden experience.  Their love for gardening is growing, but see what plants these two choose to grow in their grow box!


Filed Under: Container Gardening, Gardening, Kids in the Garden, Tips & How To's Tagged With: building a grow box, bumper crop, DIY grow box, Garden Boxes, grow box, Independent garden centers in Utah, kid project, kids in the garden, Raised Garden Beds, raised garden box, raised vegetable garden, Utah gardening

Snow Mold on Your Lawn – 8 Simple Ways to Solve

March 11, 2017 by Wendy Pettit

Welcome Gardening Friends! Thanks for stopping by.

When the snow finally melted off our back lawn, my grass looked like it was dying. If yours does too, it could be a lawn fungus called SNOW MOLD. Don’t worry too much, snow mold seldom destroys the lawn; your lawn will recover.  This annoying disease can appear when the snow melts off the lawn in the spring.  Your turf will have circular type patches of matted straw-colored grass and can have a top layer of stringy mold.  (It reminded me of a salad mold that once grew in my refrigerator.) 

Here are 8 simple ways to solve SNOW MOLD on your lawn, and better yet, prevent it from happening.

8 ways solve snow mold on lawn

Current Problem Solutions to Snow Mold –

  • In the spring when you discover the mold, take action by gently raking the area.  This will help the air circulate through the lawn to dry it out and stop the mold from growing further.  Be careful not to rip up the grass.  The disease usually affects only the blade, so the crown of the plant is still good and will recover.  Throw away the grass you have raked up.rake grass to stop snow mold from growingbefore-and-after photos of raked lawn for snow mold
  • According to the proper schedule, regular fertilizing and mowing will help your lawn outgrow the fungus.  The lawn will green up and the damaged blades will eventually be cut off.
  • If your lawn has extreme snow mold, and you have tried the above solutions, a disease control product may need to be applied to the affected area.  See your local garden center, like the experts at Western Gardens, to obtain the correct product.  It’s always a good idea to take to the garden shop samples of the diseased plant and a photo of the area.

discard snow mold contaminated grass

Snow Mold Preventative Actions –

  • In the fall, be sure to rake leaves off the lawn. This can be annoying if you have trees that take all winter to lose their leaves, like a Sycamore.
  • In the fall, be careful not to use excessive nitrogen fertilizer. This will help slow down the growth of the grass before winter arrives.
  • In the fall, be sure to continue mowing until the lawn’s growth slows down.  Make sure your last mowing is a shorter cut.  The taller the blades of grass when winter hits, the more snow mold is encouraged to develop.  (I believe this was the culprit for our problems this spring. We put the lawnmower away and then had a mild fall.)bicycle lawn mower
  • If each year you have this problem in certain areas, apply a fungicide to the grass in the fall.  Be sure to talk with your local garden expert for the correct preventative product.
  • In the winter, if piles of snow build up where you or the street plows have worked, be sure to disperse the snow.  Where the snow is too deep on your lawn, it can take much longer in the spring to melt, inviting snow mold to grow with the warm spring temperatures. riding snow plow in cold winter
snow mold close up on lawn

SNOW MOLD on my Utah lawn

This warm weather signals time to dig in the dirt; but first, I’m going to walk barefoot through my recently raked and drying lawn.

barefoot in grass

Filed Under: Gardening, Lawn Care, Tips & How To's, Yard Care Tagged With: fall lawn care, how to's, Lawn Care, lawn disease, lawn fungus, snow mold, spring lawn care

Beneficial Insects You Want in Your Garden

September 15, 2016 by Vanessa Myers

10 beneficial insects you want in your garden! If you spot these in your yard, you're in good shape!

Welcome Gardening Friends! Thanks for stopping by.

Do you ever see insects in your garden and wonder which ones are friendly and which ones aren’t?  Which ones are helping and which ones are harming?  Then keep reading, I’ve put together 10 Beneficial Insects You Want in Your Garden!

Ladybugs are definitely beneficial for your garden

Image by snowpeak under a Flickr Creative Commons Attribution License

10 Beneficial Insects You Want in Your Garden

Bees will help pollinate many of your flowers

Image by zoxcleb under a Flickr Creative Commons Attribution-ShareAlike License

1. Bees

Bees are pollinating powerhouses and you want to see as many of them in your garden as you can get.  The more pollinators you have in your garden, the more fruit your plants will produce.

Braconid wasps lay their eggs in caterpillars

Adult Image by berniedup under a Flickr Creative Commons Attribution-ShareAlike License, Pupae Image by Bev Wagar under a Flickr Creative Commons Attribution License

2. Braconid Wasps

If you have ever found a tomato hornworm on your plants, you have seen the havoc that they can wreak. It won’t take them long to munch away all of the leaves on your tomato plants and you should squish it as soon as possible. However, if you ever find one that looks like the picture above, leave it alone. Braconid wasps are predatory and these beneficial insects lay their eggs in pests like the tomato hornworm. The larva feed on the caterpillar’s body, then emerge and form cocoons. This ultimately ends in the demise of the hornworm and more wasps to hone in on your other pests.

Some Pests Targeted by Various Braconid Wasps:

  • Aphids
  • Beetles
  • Caterpillars
  • Squash Bugs
  • Stink Bugs
Butterflies and moths are good pollinators for your garden plants

Image by Michael Khor under a Flickr Creative Commons Attribution License

3. Butterflies and Moths

Butterflies and moths are not just dainty beauties that like to flit around your garden.  They serve as pollinators for many different flower species, enabling them to produce fruit.  They can potentially be harmful while in the larval stage as caterpillars since they eat away at leaves.  Many times, though, it’s not enough to ultimately harm the plant and you can allow them to complete their metamorphosis.

Damsel bugs are one type of beneficial insect

Image by Bennyboymothman under a Flickr Creative Commons Attribution License

4. Damsel Bugs

Don’t confuse damsel bugs with damselflies, which are similar to their relatives, the dragonflies. Damsel bugs are true insects that love to go after many of the pests that snack on your vegetable garden plants.

Pests Targeted by Damsel Bugs Include: 

  • aphids
  • small caterpillars
  • moth eggs
Dragonflies love pests like mosquitoes

Image by Join the Dots under a Flickr Creative Commons Attribution License

5. Dragonflies

Dragonflies can consume their bodyweight in bugs every 30 minutes, so they’re a great help in keeping the pests at bay!

Hover flies will eat aphids, scales and thrips

Image by Smabs Sputzer under a Flickr Creative Commons Attribution License

6. Hover Flies

Hover flies, also known as syrphid flies, flower flies and drone flies, are great for controlling aphids, thrips, scale insects and caterpillars.  They are almost as effective as lady bugs in controlling aphids!

Lacewings will eat a large variety of harmful insects

Image by Mick Sway under a Flickr Creative Commons Attribution-NoDerivatives License

7. Lacewings

Lacewings are a helpful addition to the garden because the larvae are voracious predators of many pests including: aphids, spider mites (especially red mites), thrips, whitefly, leafhoppers, some beetle larvae, eggs of pest moths, and mealybugs.

Both ladybug larva and adults are beneficial insects

Image by norio_nomura under a Flickr Creative Commons Attribution-ShareAlike License

8. Lady Beetles

Lady Beetles, more commonly known as Lady Bugs, are a popular addition to many gardens.  They are sold in local nurseries because they’re so effective at controlling aphids and other pests like small caterpillars, thrips and other soft-bodied insects.

One insect that is beneficial in your garden is the minute pirate bug

Image by gbohne under a Flickr Creative Commons Attribution-ShareAlike License

9. Minute Pirate Bugs

Minute Pirate Bugs are tiny bugs (less than ⅕ of an inch long!) that are helpful in ridding your garden of pests including: aphids, spider mites, and thrips.  They are very predatory, and can consume up to 20 thrips larvae every day!

Praying mantises are so named because of how their legs are folded

Image by siamesepuppy under a Flickr Creative Commons Attribution License

10. Praying Mantises

Praying Mantises are helpful hunters because they prey on flies, crickets, beetles & moths.  These are great bugs to see in the garden!  But you should note that they are indiscriminate hunters…they eat pesky insects as well as beneficial ones, so just prey that they eat the pests!  😅

Honorary Mention: Spiders

Spiders are not included on this list because they are not actually insects.  Like other arachnids, they have eight legs, while insects have six. Many people shudder just at the thought of them. However, they truly are one of the most beneficial creatures to have around your garden since they take care of a lot of pests. If you can stifle the urge to squash any that are nonpoisonous, your garden will thank you!

What are your favorite beneficial insects?  Let us know in the comments below!

Filed Under: Gardening, Tips & How To's Tagged With: beneficial bugs, beneficial insects, bugs, garden, Gardening, insects, pests, Utah gardening

3 Ways to Get Rid of Snails

July 10, 2016 by Kirsten

3 easy & cheap Ways to Get Rid of Snails, safe for pets and wildlife! www.westerngardens.com

Hello, thanks for stopping by!
3 Ways to Get Rid of Snails www.westerngardens.com

Have you ever had issues with snails or slugs eating your garden?  I sure have!  They’ve devoured some of my favorite plants, which motivated me to find some safe, natural ways to get rid of them!
3 Ways to Get Rid of Snails www.westerngardens.com
This is a pot I was prepping to plant in early Spring.  I especially love the bright colors, they look so happy!
3 Ways to Get Rid of Snails www.westerngardens.com
But this is what was left of my purple decorative kale after a gang of snails enjoyed it for a week or two. I actually found 5 or 6 snails sleeping contently in my pot. I was not happy with them!  If you need to protect your plants too, try one of these cheap and easy methods!  Beer Traps, Egg Shells and Sluggo all have benefits, so keep reading to see which one is right for you!

3 Ways to Get Rid of Snails

 1. Beer Traps

3 Ways to Get Rid of Snails www.westerngardens.com
I developed this particular trap to make it easy to get rid of the snails after they drown in beer.
3 Ways to Get Rid of Snails www.westerngardens.com

Beer Trap Supplies:

  • 2 disposable plastic cups
  • an old pencil
  • a can of beer
3 Ways to Get Rid of Snails www.westerngardens.com
In the evening, dig a hole outside in your vegetable or flower garden, near your plants. Place the cup inside the hole. Make it level with the ground so the snails don’t have to climb far.
3 Ways to Get Rid of Snails www.westerngardens.com
Using scissors, carefully poke 4 drainage holes in the bottom of the remaining cup.  Poke two more holes near the top, just under the lip, for the pencil to go through. This will ensure a gap between the cups so you can easily remove the top one to dispose of the snails the next morning.
3 Ways to Get Rid of Snails www.westerngardens.com
Place the cup with the holes and pencil inside the cup buried in the ground. Pour the whole can of beer inside the cup, leaving about an inch of headspace. This forces the snails to climb down into the cup, where they will drown in the beer.
3 Ways to Get Rid of Snails www.westerngardens.com
We put a few of our snails near the cup, and they were immediately drawn to the beer!
3 Ways to Get Rid of Snails www.westerngardens.com
He started in on his own.
3 Ways to Get Rid of Snails www.westerngardens.com
And down he went for a drink.
3 Ways to Get Rid of Snails www.westerngardens.com
We caught 5 snails the first night!  To empty the dead snails, just pull the inner cup out and the beer will drain out the holes.  Dispose of the snails and gently push the pencil cup back into the inner cup, and the beer will fill back into that inner cup.
This method is easy, it uses only a few items, and I saw results literally overnight. The beer will last up to a week, but after being in the heat all day, I prefer to change it every other night.

Don’t Want to Buy Beer?

The yeast is what lures the snails to the cup to take a drink.  If you don’t want to buy beer because you don’t drink or you just want to save some money, you can make your own yeast mixture with a few pantry staples!

DIY Yeast Snail Bait

  • 1 Tbsp of flour
  • 1 tsp of sugar
  • 1 tsp of yeast
  • 2 cups of water

Click HERE for printable Beer Trap instructions!

2. Egg Shells

3 Ways to Get Rid of Snails www.westerngardens.com
If you eat a lot of eggs, this is a free way to deter snails from your plants—and I stress the word deter, as this will not kill them. Simply save the shells from your eggs and allow them to dry out for a day or two. Then, using the bottom of a cup, crush the egg shells into small, sharp pieces.  Sprinkle the egg shells all the way around your plants, making a border. Make a fairly wide berth around the plant, or the snails will not be deterred.
3 Ways to Get Rid of Snails www.westerngardens.com
Snails hate the sharp pieces and will turn around and look for another place to eat…but they will not die, which is honestly what I want…to get rid of them entirely!  If it rains or if you water, you will probably need to sprinkle more egg shells around your plants again, otherwise they will be feeding on your plants the moment they get the chance!  This isn’t all bad though…egg shells are great for the garden because they add a lot of nutrients to the soil.

3. Sluggo

3 Ways to Get Rid of Snails www.westerngardens.com
Sluggo is a great option when it comes to purchasing a natural snail-killing bait. It is completely safe to use around wild animals and pets as it has iron phosphate—a natural mineral found in the soil.  The snails eat the bait, lose their appetites, head to their hiding place and die within a few days.  And it still works if it rains or if you water your garden!  Sprinkle it around your plants about every two weeks.  I purchased mine as a recommendation from one of the associates at Western Gardens and I love it!

Which One is Best?

There are other methods that claim to get rid of (or deter) snails.  After trying just these 3 methods though, I have to say I loved seeing the dead snails in the beer.  It’s so satisfying to see a difference that quickly. However, the Sluggo is the easiest method of the 3.  Sprinkle the tiny pellets every two weeks and walk away.  This gives me more time to enjoy other things!  Like weeding.  😉  Both of these methods will rid you of snails, and hopefully prevent them from laying eggs before they die.
Have you had success in deterring/killing snails or slugs?  I would love to hear what has or hasn’t worked for you!
See the Happy!
           Kirstensig
Pages: Page 1 Page 2

Filed Under: Gardening, How To, Tips & How To's Tagged With: control, deter, DIY, get rid of, natural, repel, safe, slugs, snails

DIY Kid-Friendly Bug Spray

June 15, 2016 by Sydney Anderson

Make this DIY Kid-Friendly Bug Spray at home with our quick and easy recipe!

DIY Kid Safe Bug Spray: Make your own bug spray at home in minutes and with just 4 ingredients!

Is your favorite part of summer spending those lazy evenings out in the yard, watching the kids play and talking to friends or family?  Mine too!  Avoid making other “friends” while you’re enjoying your summer nights…bugs!

Conventional bug sprays are filled with yucky chemicals that we don’t in our kids’ growing bodies (or our own bodies, for that matter!).  They not only absorb through the skin, but it’s hard to avoid inhaling them while applying the sprays.  We certainly don’t want to do nothing and get bitten…so what’s a mom to do? Make her own, of course!

Kid Safe Bug Spray: Make your own bug spray at home in minutes and with just 4 ingredients!
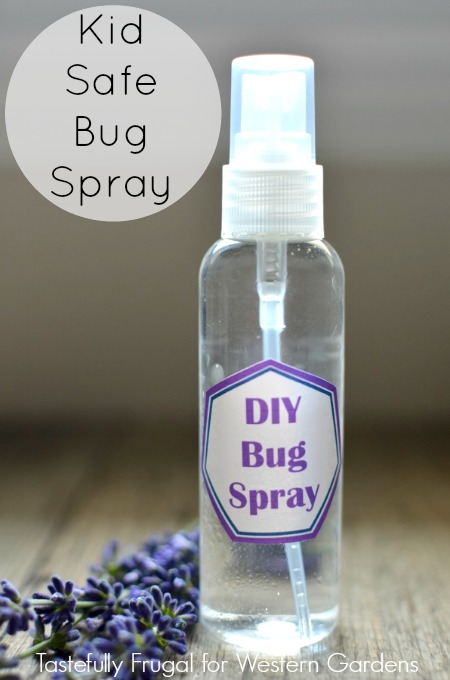
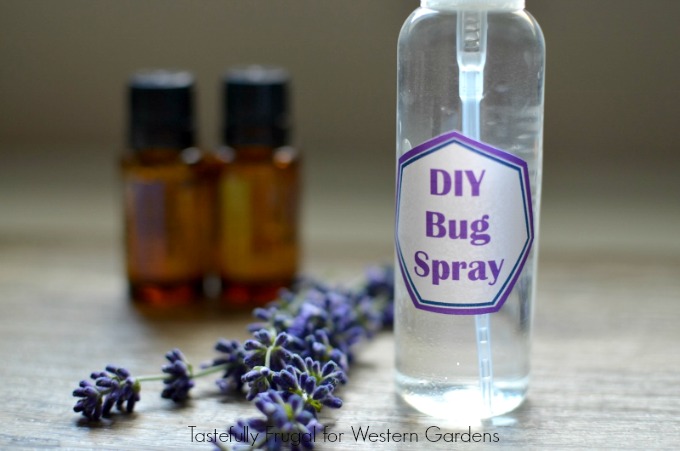
There are lots of different recipes for making your own bug spray because they are so easy to customize to the bugs you want to avoid.  Different bugs dislike different scents, so add what you need in order to avoid those bites! Here are a few essential oils that are good to keep these bugs away:

Mosquitoes—lavender, eucalyptus, citronella

Flies—lavender, peppermint, rosemary

Ticks—lavender, lemongrass, eucalyptus

Some essential oils aren’t safe for kids, so I’ve only included oils in this spray that are safe for everyone…lavender and lemon. Both are fresh scents, safe for kids and good for keeping away mosquitoes and ticks!  And if you want to add some plants to your yard to help repel mosquitoes, click HERE!

DIY Kid-Friendly Bug Spray

Supplies:

  • Spray Bottle
  • Label (you can print your FREE copy here)
  • 1 oz witch hazel
  • 1 oz distilled water
  • 5 drops lavender essential oil
  • 5 drops lemon essential oil

Directions:

  1. Combine all ingredients in spray bottle and shake well to combine.
  2. Shake well before each use.

Notes:

  • I put my Bug Spray in a 2 oz travel size spray bottle.  They are inexpensive and small enough to carry in a purse or diaper bag!

Kid Safe Bug Spray: Make your own bug spray at home in minutes and with just 4 ingredients!

Now that you’re protected from the bugs check out these fun (and FREE) outdoor activities:

Nature Bingo | Tastefully FrugalNature Bingo

Color Scavenger Hunt | Tastefully FrugalColor Scavenger Hunt

Filed Under: Recipes, Tips & How To's Tagged With: bug spray, DIY, kid friendly, tips

5 Tips to Get Kids Gardening

June 10, 2016 by Jenn Crookston

5 Tips to Get Kids Gardening | Life Tips | Parenting Tips | Garden

Do you love planning out your garden?  Do you eagerly anticipate all the delicious food you’ll be enjoying after all the hard work of caring for a garden?  This is one of the highlights of Spring at our house!

But there always seems to be one downfall.

Life gets crazy and everyone gets busy, and no one wants to help.  It turns into a bit of a Henny Penny situation…everyone wants to enjoy the delicious garden produce as long as I do all the work!  And I bet it’s not just our family.

Over the years, I’ve come up with 5 tips to get kids gardening.  These are easy tips for busy families, and they’ll help your garden look its best all summer long!

These 5 tips should help cover a variety of children’s personalities as well as their daily mood, and it’s nice to have a surprise in your back pocket if yesterday’s plan doesn’t work today!

5 Tips to get Kids Gardening

1. Get them their own tools

Everything is more fun if you’ve got your own supplies (bonus points if they’re cute and they match!).  It’s also easier for kids to work with tools that fit them, and when it’s easier they’re a lot more likely to want to help!
5 Tips to Get Kids Gardening | Life Tips | Parenting Tips | Garden
(photo source)

2. Let Them Choose What You Grow

If they’re excited about the food you’re going to grow, chances are they’ll be excited about working in the garden to keep their plants healthy and growing strong.  You can even give them a section of the garden to be in charge of.  If they do all their own weeding and watering and harvesting, they’ll have a great sense of accomplishment!

3. Involve Friends

I know this might sound strange.  What kid wants to go somewhere else and do chores? I’ve found that when kids are working with their friends, they don’t seem to mind the work.  It can be fun if they’re working together, and popsicles are the perfect payment on a hot summer day!

4. Let Them Earn Money

If your child is driven by money, offer to let them have a produce stand with the extra veggies!  We always seem to have a plethora of certain veggies (zucchini comes to mind!).  Your produce stand can be as easy as some baskets set out on the curb, a folding table, or something as cute as this⬇︎
5 Tips to Get Kids Gardening | Life Tips | Parenting Tips | Garden
(photo source)

5. Work With Them

I don’t know about you, but it doesn’t matter if it’s a job inside the house or out in the yard, our children work harder and more happily when we’re working with them.  I like to set aside about 30 minutes several mornings each week to work with my kids, weeding and cleaning up the garden area.  This allows the kids to ask questions and get guidance and when we’re all working together, the work gets done quickly.
5 Tips to Get Kids Gardening | Life Tips | Parenting Tips | GardenWhat tips do you have for getting kids to help you in the garden?  Let me know in a comment below!
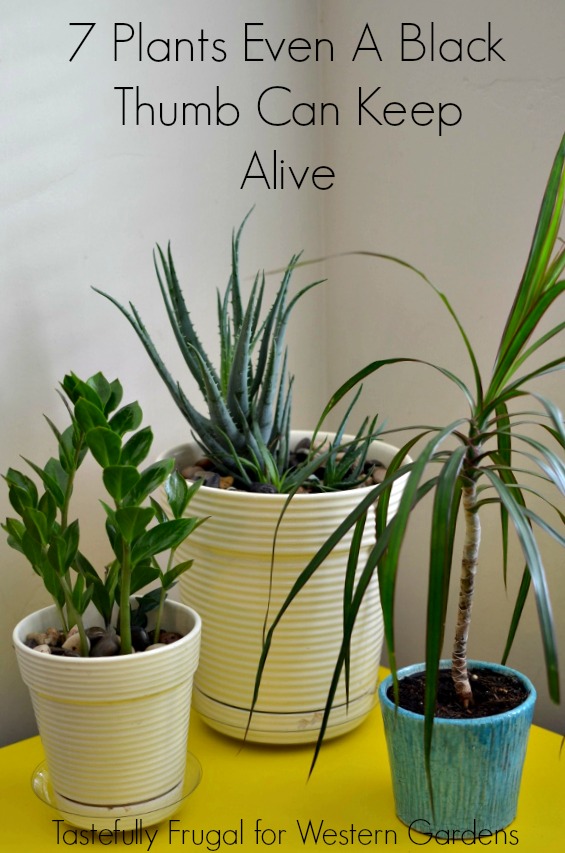
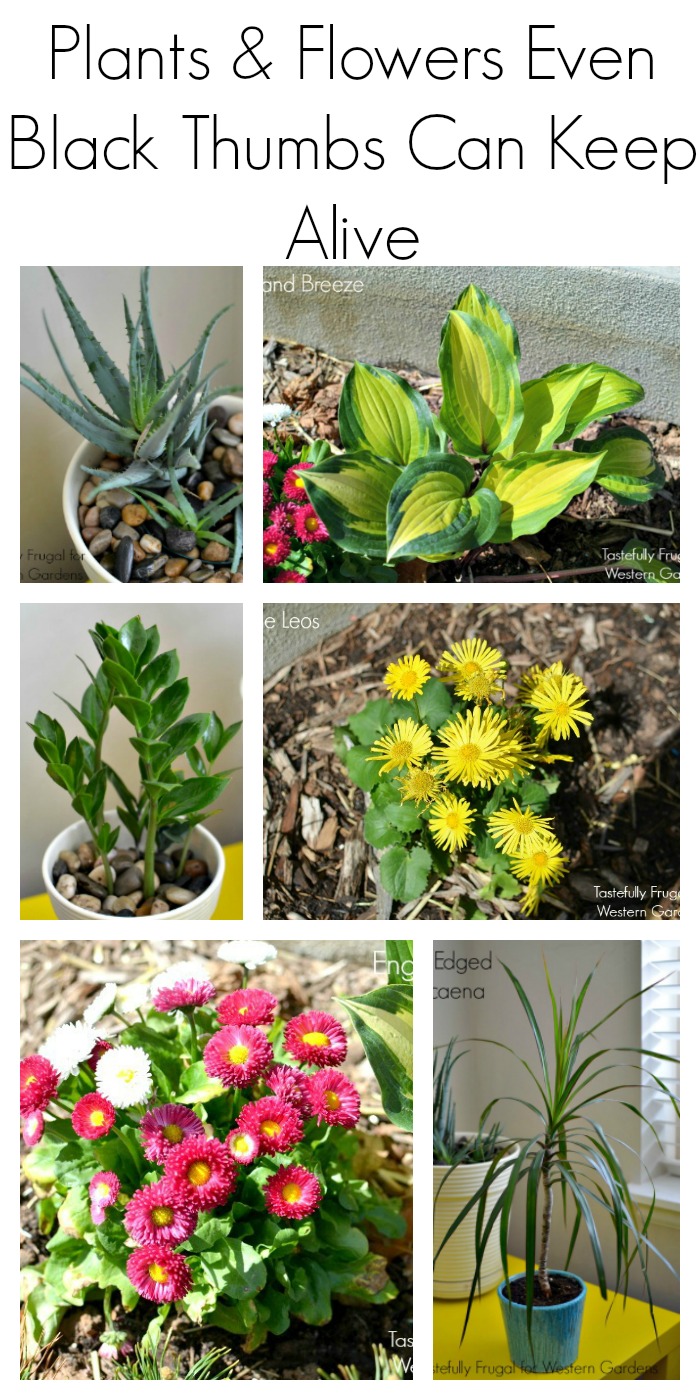
Filed Under: Gardening, Tips & How To's, Vegetables, Veggie Gardening

DIY Solar Lantern

May 31, 2016 by Heather Leister

Do you love the look of solar lanterns, but not the cost? Make your own ! They're cheap, easy and fast. Check out the simple instructions!

Welcome, I’m so glad you’re here!

Are you looking for an inexpensive way to light up your yard at night? Look no further! These easy DIY Solar Lanterns can be created with a quick trip to the dollar store.  They’re simple to make and add a fun element to your landscape.

All it takes is a few simple supplies and a few minutes of your time.  This is a project that kids love to help with too!  (or is it just my kids that enjoy taking things apart? 😉)

For this project you’ll need some empty mason jars (or other small decorative jars), inexpensive solar lights, canning jar rings (optional, but they do give them a nicer finished look), and some hot glue.

This simple DIY Solar Lantern will light up your yard and impress your neighbors! All it takes is a few inexpensive supplies and a few minutes to assemble. Great project to do with kids!!

Start with the mason (or other small decorative jar…I’ve used both and they work equally well). The key is to choose a jar with a small opening. If you use a wide-mouth canning jar, the solar light will fall through the opening to the bottom of the jar.

jar

Now is the perfect time to stock up on inexpensive solar yard lights for any DIY solar projects you might have planned. They can be found at the dollar store. Purchase the plainest, simplest solar light you can find. For this example I’m using a solar table lamp that I purchased at my local Dollar Tree.This simple DIY Solar Lantern will light up your yard and impress your neighbors! All it takes is a few inexpensive supplies and a few minutes to assemble. Great project to do with kids!!

If you (or your kids!) like tearing things apart, then you’ll enjoy this next step! Take apart the solar light, what you want is the black, round unit at the top. You will see the solar cells on the top, and the lights at the bottom. This is all you need for the project, so go ahead and recycle the rest of the light, or save it for another project.This simple DIY Solar Lantern will light up your yard and impress your neighbors! All it takes is a few inexpensive supplies and a few minutes to assemble. Great project to do with kids!!

Depending on the size of your jar, your light may fit down in its mouth, or it may sit on top. Either way, I like to secure the solar light to the jar with hot glue.This simple DIY Solar Lantern will light up your yard and impress your neighbors! All it takes is a few inexpensive supplies and a few minutes to assemble. Great project to do with kids!!

For a finishing touch, add a canning ring to the top of the jar. Again, a little hot glue works nicely.

This simple DIY Solar Lantern will light up your yard and impress your neighbors! All it takes is a few inexpensive supplies and a few minutes to assemble. Great project to do with kids!!

That’s it! Sit your lanterns on your porch or hang them on a shepherd’s hook in your yard and enjoy!

Click NEXT for the list of supplies and directions!

2

Pages: Page 1 Page 2 Page 3

Filed Under: Crafts, How To, Outdoors, Tips & How To's Tagged With: craft, DIY, garden, yard

  • « Go to Previous Page
  • Go to page 1
  • Go to page 2
  • Go to page 3
  • Go to page 4
  • Go to page 5
  • Go to page 6
  • Go to Next Page »

Primary Sidebar

Shopping Cart

Items in Your Cart

Your cart is empty
Visit The Shop

Follow Western Gardens

  • Facebook
  • Instagram
  • Pinterest
  • YouTube

See what we’ve been pinning!

Follow Me on Pinterest
Followed by people.
?

Pinterest Badge by Skipser

Here’s What We’ve Been Up To!

Save water and money by Turf Training - train your lawn to grow deep roots
work at western gardens utah garden center
Senior gardening woman Edu Carvalho from Pexels
nursery center open to public

Copyright © 2022. Western Gardens - Privacy Policy