Welcome – Glad you dropped in for a great idea!
Mother’s Day is just around the corner and I’ve got the perfect Mother’s Day gift that you’ve got plenty of time to create because it is such a fast build. Your mother/wife/friend will love this DIY Mother’s Day Porch Planter Box.
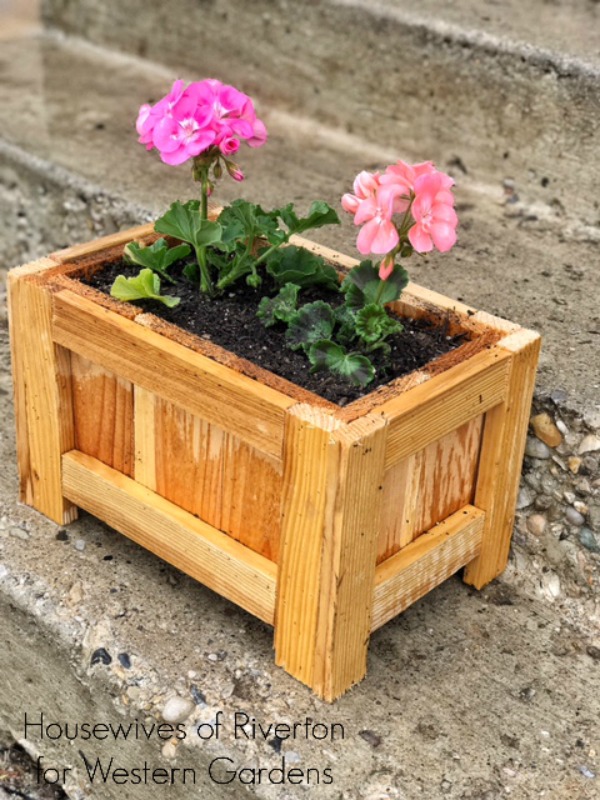
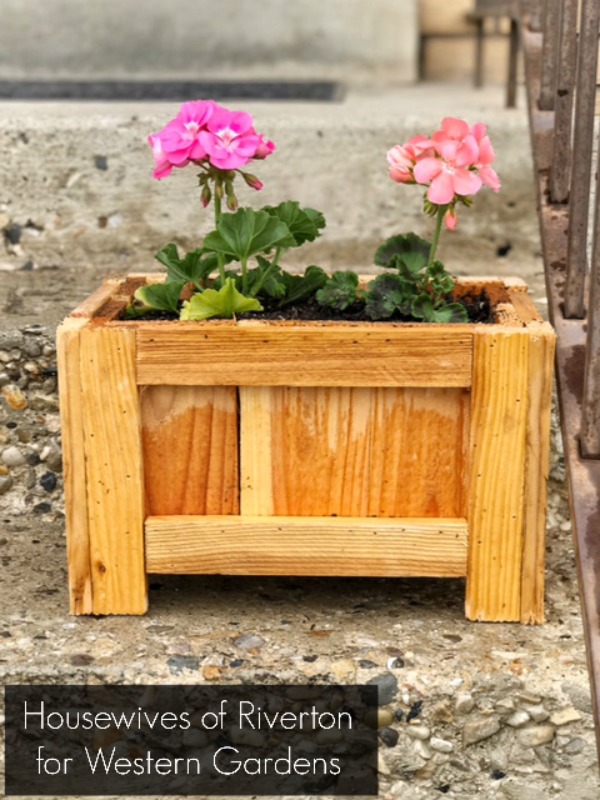 I’m pretty sure it’s a proven fact that anything is automatically cuter when it’s small. That fact holds true with this Mother’s Day Porch Planter Box. I am completely smitten with how cute it looks sitting on my steps and can’t wait to make it a couple of sisters. You’re going to love me when I tell you how easy this was to make too.
Because I wanted this planter box to be able to sit on a single step on my porch I needed to find materials that weren’t big and bulky. After walking around the home improvement store for a while and looking at the different options I went with wood fencing and stakes. Since both of these items are made to be outside in all weather conditions I figured they were perfect for this project and they aren’t bulky pieces of wood which means more room inside the box for flowers.
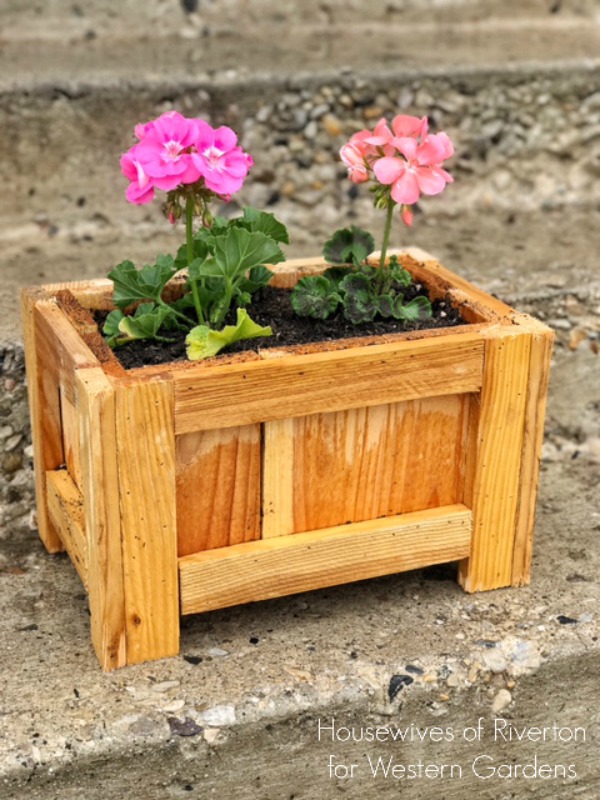 Here is a good photo of the box assembly. The fencing is less than $2 a board and the stakes we had on hand but I’m pretty sure were around a dollar each. I used just over 1 fencing board and 2 stakes for one box. I think with 4 boards and 7 stakes you could make 3 planter boxes, including nails I think you’re looking at 3 planter boxes for under $20, pretty awesome if you ask me!
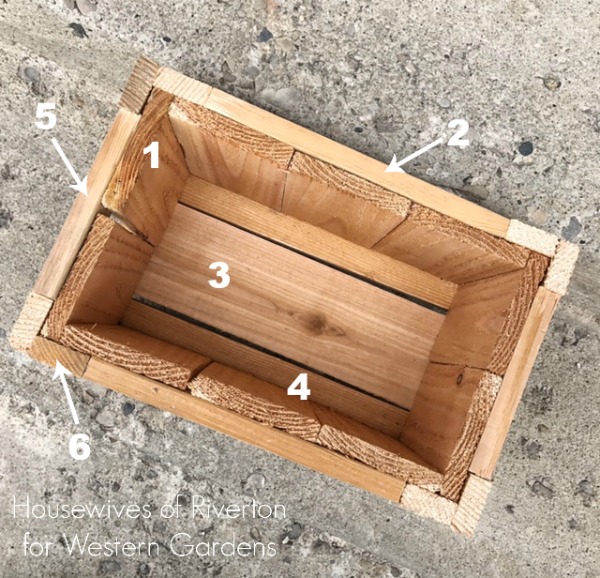 I used our miter saw to cut my pieces, if you don’t have a saw at home here is your cut list and the people at the home improvement store can cut them for you.
Cut List:
10 #1 (side pieces) – 3.5″x 6″
4 #2 – (long side braces) 1.4″x 8 5/8″
1 #3 – (middle bottom) 3.5″x 11.5″
2 #4 – (side bottom) 1.5″x 11.5″
2 #5 – (short side braces) 1.5″x 5 1/4″
8 #6 – (corners/legs) 1.5″x 8″
Porch Planter Assembly:
I used a brad nailer to create the box with 1″ finish nails. If you don’t have a nail gun you can use tiny nails and a hammer to create the box it’ll just take a little more time. These nails are perfect because they’re easily painted over and hidden if you choose to paint your planter box.
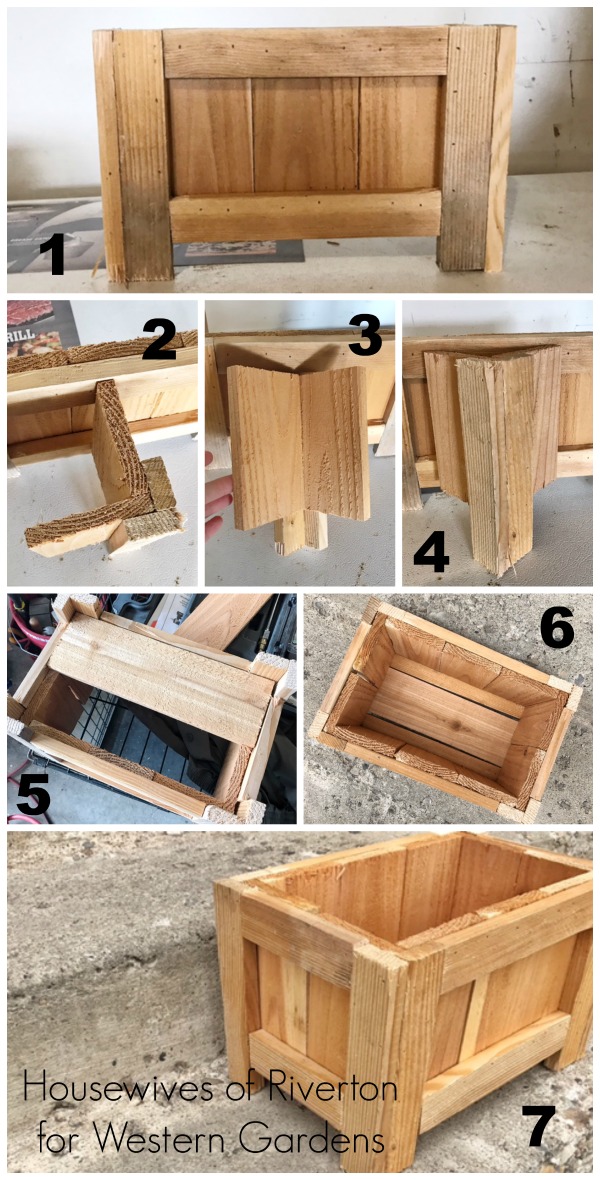
To create my planter box I started by creating one side as shown in photo 1.
Once I got that side done I created the corners as shown in photos 2-4.
When I had the corners done assembly was easy. I placed the side brace against one corner piece and then nailed into place.
When it was attached I then placed the next side piece in place and attached it to the side brace.
Photos 5 and 6 show the bottom of the planter box. As you can see in photo 5 there isn’t quite enough room for 2 pieces of fencing on the bottom. Photo 6 shows how perfect once piece of fencing and two pieces cut from a stake fit leaving enough room between the pieces to allow water drainage.
As you can see in photo 7 I wasn’t too worried about a perfectly smooth surface, you can sand and paint/stain as desired, I love the little more rustic look so this was perfect for me.
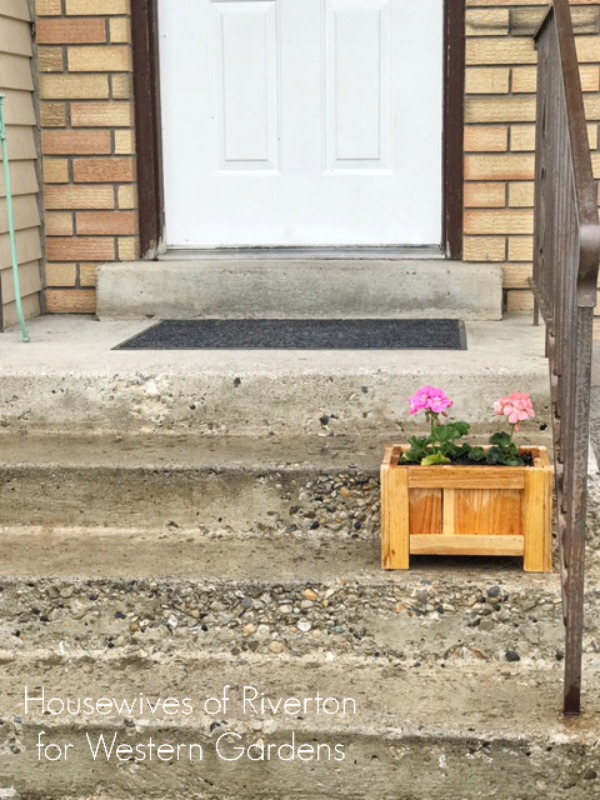 Can’t you just picture a few more of these darling little planter boxes leading all the way up the stairs. I can’t wait to get them all finished and filled with beautiful flowers from my local independent garden shop Western Garden Centers.
You can easily make this planter box and fill it with flowers for less than you would spend on a bouquet of cut flowers for Mother’s Day and they’ll last all season long and the planter for years to come.
Latest posts by Jenn Crookston (see all)
- National Sneak Some Zucchini Onto Your Neighbor’s Porch Day - August 5, 2017
- Fresh From The Garden Gift Tags - July 12, 2017
- Homemade Ketchup Recipe - June 5, 2017