• Skip to primary navigation
  • Skip to main content
  • Skip to primary sidebar

Western Garden Centers

for what grows here

  • Home
  • How To
  • Gift Cards
  • Calculate Mulch
  • Locations
    • Store Hours
    • About
    • Garden Shop Employment Team
  • Weddings
    • Salt Lake City, UT
    • West Valley, UT
  • Blog
    • Gardening
    • Recipes

Recipes

Fresh Squeezed Strawberry Lemonade Recipe

May 6, 2017 by Jenn Crookston

fresh strawberry lemonade for National Lemonade day
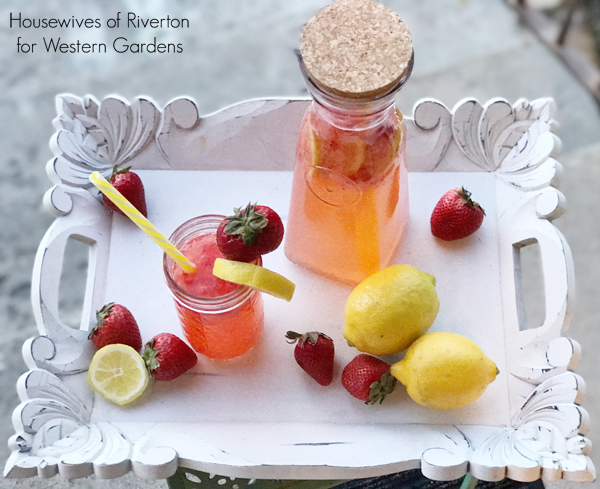
Did you know that May is National Strawberry Month and that May 20th is National Strawberry Picking Day?  As if those two things weren’t the best on their own, the first Sunday in May is also National Lemonade Day.  As Strawberry Lemonade is my very favorite drink I was excited to come up with the perfect Fresh Squeezed Strawberry Lemonade recipe.  If the reviews from my whole family are to be believed I have succeeded with perfection.
Use your own fresh strawberries for this strawberry lemonade recipe The recipe is simple and delicious, you’re going to love it and love me for sharing it with you.

Fresh Squeezed Strawberry Lemonade Recipe:
1 cup sugar
1 cup cold water + 5 cups cold water
4 lemons + 1 lemon
Approximately 10 large strawberries
(or per your taste, more for garnish)

Easy recipe for National Lemonade day Recipe directions:
In small sauce pan combine 1 cup cold water and 1 cup sugar.  Bring to a boil and stir to dissolve sugar.  Remove from heat and let cool to room temperature and the place in refrigerator to chill.

While sugar mixture is chilling squeeze the juice from 4 lemons (approximately 1 cup).  You’ll want to remove the seeds but keep as much pulp as possible.

To get the most juice from your lemons before cutting heat them individually in the microwave for 15-30 seconds then roll back and forth across the counter.  Then slice in half and using a juicer get as much juice out of them as you can collecting in a dish so you can measure that you have right about 1 cup.

Next remove stems from approximately 10 strawberries, wash, and then mash.
In pitcher combine 5 cups cold water, lemon juice, mashed strawberries, and chilled sugar mixture.  Stir well.

Strawberries will float to the top so be sure to give it a good stir before serving.
I included extra strawberries and lemons to the recipe to use as garnish in both the pitcher and on cups.

grow your own lemons and strawberries for this strawberry lemonade recipe 
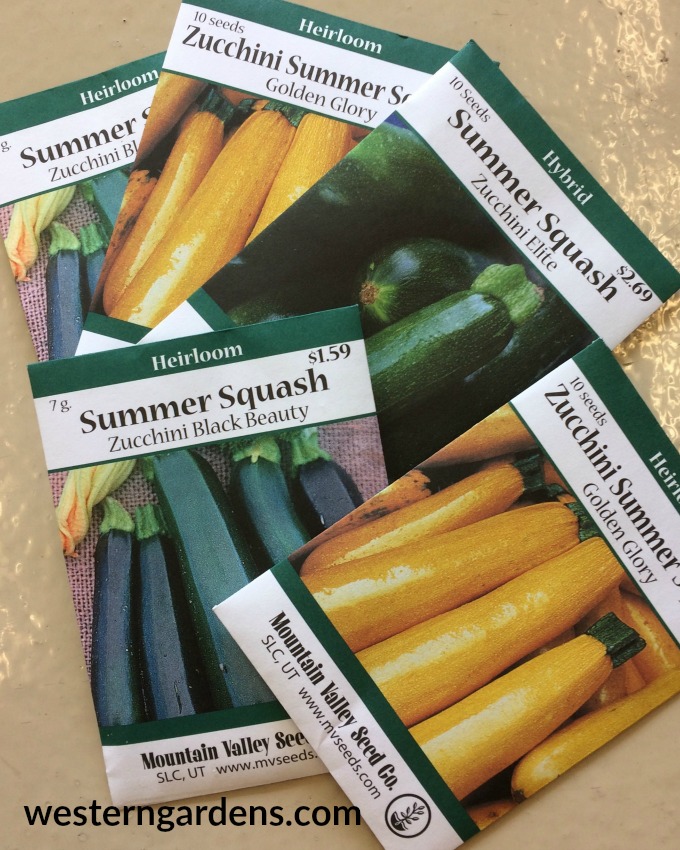
This Fresh Squeezed Strawberry Lemonade recipe is so refreshing, not too tart or sweet, the perfect combination.  My whole family was so excited about this recipe that we’re looking forward to picking up our own strawberry plants to put in our garden this year and did you know that you can grow Lemon Trees indoors?

During a recent trip to Western Gardens I was talking to a woman and she gave me some pointers on how to keep a lemon tree alive here in Utah.  Western carries some lemon trees and I will be getting one as soon as I do a little more research on being an indoor bee.  I don’t think my family will agree with me just letting bees live in the house.  I’m actually looking forward to giving it a try, I’m imagining Fresh Squeezed Strawberry Lemonade made from lemons and strawberries we grew on our own, doesn’t that sound awesome?

I hope you enjoy this recipe and that it adds to your strawberry and lemonade appreciation month. It has already added to ours.

Filed Under: Fruit, Recipes

Banana Zucchini Bread Recipe w/Chocolate Chips

April 20, 2017 by Wendy Pettit

WELCOME Zucchini Chefs, Here is a yummy recipe to try!

Here is a family favorite zucchini bread recipe for your celebration of National Zucchini Bread Day on April 25th.  On the 24th, pull out your leftover frozen grated zucchini from last year’s harvest or load up the kids and let them each choose a fresh zuc from the local produce store.  Have all your recipe ingredients ready for the next day’s celebrations!  On the 25th, mix, bake and eat some bread, load up the kids and go buy new quality zucchini seeds from Western Gardens or any local independent garden center, and start the seeds indoors.  The kids will love seeing these easy and fast seeds sprout and seedlings grow. If you live in the Salt Lake area, you’ll be safe to plant them outside in your garden after Mother’s Day in May!

Photo by Meal Makeover Moms with a Flickr CC0 license

Bookmark or pin this recipe for summer deliciousness and for next April’s National Zucchini Bread Day!

Banana Zucchini Bread Recipe by Amy Christensen / Cahoon Cook Book

3 eggs

2 cups sugar

1 cup canola oil

1 cup zucchini, grated

1 cup banana, mashed

1 tablespoon vanilla

3 cups flour

1 teaspoon baking powder

1 teaspoon salt

1 tablespoon cinnamon

1/2 cup semisweet chocolate chips, mini preferred

Combine first 6 ingredients together mixing well.  Add flour, baking powder, salt and cinnamon.  Mix in chocolate chips.

Bake in 325 degree oven for 1 hour.

Makes 3 small loaves.


Happy National Zucchini Bread Day everybody!

Filed Under: Eat from Garden - Recipes, Recipes Tagged With: frozen zucchini, National Zucchini Bread Day, zucchini, zucchini bread, zucchini bread recipe

National Zucchini Bread Day

April 20, 2017 by Heather Leister

Welcome Zucchini Lovers. Celebrate with us!

national zucchini bread day is April 25 - zucchini bread recipe

You are just in time for National Zucchini Bread Day!  If you included zucchini in last summer’s garden then there’s a good chance that your freezer is well stocked with leftovers from last year’s harvest. This easy to grow squash is notorious for producing more crop than gardeners know what to do with. If you still have a ziplock bag, or two, of frozen zucchini hanging around then you’re in luck! Now is the perfect time to defrost your zucchini leftovers because April 25th is National Zucchini Bread Day.

sliced zucchini bread for national food holiday

Photo Credit: Flickr Commons

Who doesn’t love an excuse to celebrate a national food day? With zucchini bread you have a way to satisfy your craving for warm carbohydrates while also getting in a serving of vegetables. Not to mention fiber! It’s always a plus when your fiber comes in the form of delicious bread. As an added bonus you’ll be able to either use up freezer leftovers or have an excellent excuse for finally starting your garden.

zucchini for national zucchini bread day

Photo Credit: Wikimedia

If you don’t already have zucchini in your freezer, don’t panic. Pick up the produce at your local store and use fresh zucchini in your bread recipe. Then head to the garden center for seeds and celebrate National Zucchini Bread Day by planting something that you will enjoy both in a few months time and at next year’s celebration!

several varieties of zucchini seed packets

Quality seeds for a successful crop! Choose varieties that will thrive in your area.

Mid May happens to be an excellent time to plant zucchini seeds because the ground has begun to warm up. You can also begin your seeds indoors, but if you want to direct-seed and avoid transplanting then it’s best to wait until the soil temperature measures around 60-degrees. Check with your local independent garden center to know when it is ideal for planting your seeds. In Utah along the Wasatch Front, gardeners remember Mother’s Day as the time when the rest of the garden can be planted.  Cold crops can be planted as early as March.  Zucchini is definitely not a cold crop.  

grate and freeze fresh zucchini for national zucchini bread day in april

Photo Credit: Flickr

In the fall, if your plants have done well, you will most likely find yourself giving away zucchini. To friends, neighbors, coworkers, maybe even strangers. Even after all that generosity you should still have plenty of zucchini left to freeze for the following year. Preserving the squash is easily done. Wash the zucchini in cold water, pat it dry, then cut off both ends. Use a cheese grater to grate the plant and then store the grated zucchini in a well-labeled ziplock bag in the freezer. The vegetable should keep in the freezer for approximately eight months. Which means you’ll be prepared and ready to bake when National Zucchini Bread Day comes around again!

Click next for a simple delicious Banana Zucchini Chocolate Chip bread recipe.  It will please everyone!

Western Gardens | Utah

Filed Under: Eat from Garden - Recipes, Vegetables, Veggie Gardening Tagged With: Food Days, National food holidays, National Zucchini Bread Day, Squash, zucchini, zucchini bread, zucchini recipes

Wheatgrass Juice Basics

March 28, 2017 by Wendy Pettit

Welcome Friend! Happy you came by again.

Did you make an Easter project growing wheat grain into wheatgrass?  In our Wheatgrass Easter Egg project, we grew enough wheatgrass that would cost $3 or more if you purchased at the local market.  If you find it difficult to throw away that gorgeous green wheatgrass, try your hand at making Wheatgrass Juice.  Here are the basics.

Learn a few basics about making healthy Wheatgrass juice

Basic How-To’s:

Harvest when wheatgrass is about 4-8 inches in height.  

Use sharp scissors and cut just above the roots.

Wash grass blades and chop with knife into ½-1 inches lengths.  This size is easiest to work with unless you are feeding them into a manual grinder.  In this case, no need to cut the blades smaller.

Use about ¼ – ½ cup of wheatgrass for one serving. Use your favorite method to extract the juice from the grass. (see methods below)

For best nutritional value, drink the wheatgrass juice within 30 minutes.

Wheatgrass juice can be mixed with other juices for a better taste.  There are hundreds of recipes ranging from adding lemon juice, spinach leaves, cinnamon, and a myriad of other ingredients.  Choose one and give it a try!

Mortar & Pestle method:

Slow but sure, use a mortar and pestle to make wheatgrass juice.Place grass in a mortar with about one tablespoon of water.  

Grind the grass with the pestle until water turns a very dark green.

Pour into a small glass the water and grass through cheesecloth or a coffee filter.  Place the grass pulp back in the mortar. Add another tablespoon of water and grind again until water is dark green.  Filter the water again and replace grass back into mortar.

Continue this process until the water doesn’t turn dark green anymore.

The spent ground grass can be composted.  

 Blender method:

A basic blender can be used to make wheatgrass juice.

Place about ½ cup wheatgrass in blender with 1 cup water.

Pulverize for one-two minutes.  

Strain and discard the pulp.  

Manual Juicer method:

CC BY-SA 3.0, https://commons.wikimedia.org/w/index.php?curid=204681

Manual Grinder for DIY wheatgrass juice. Photo used under Wikimedia Commons GNU License

Follow the instructions for the machine you are using.

Did you know…

Wheatgrass is gluten free because it is taken from the sprouts rather than from the plant when it is old enough to produce the wheat seed.

Ancient Egyptians used wheatgrass for the effect on their health and beauty.

Wheatgrass is a good source of potassium, vitamins A, C, E, K, B6, dietary fiber, thiamin, riboflavin, niacin, iron, zinc, copper manganese, selenium and even protein.

According to Charles Schnabel, a wheatgrass proponent in the 1940’s, “fifteen pounds of wheatgrass is equal in overall nutritional value to 350 pounds of ordinary garden vegetables.” 


Filed Under: Eat from Garden - Recipes, Recipes Tagged With: gluten free, gluten free drink, juice methods, wheatgrass, wheatgrass juice

Fresh Peach Mint Lemonade

August 1, 2016 by Sydney Anderson

Fresh Peach Mint Lemonade: Sweet peaches paired with cool mint add a refreshing twist to traditional lemonade.

Hello, thanks for stopping by!

Do you love a tangy, refreshing lemonade on a hot summer day?  Me too!  Add in some peaches and mint and you have the ultimate drink…Fresh Peach Mint Lemonade!

Fresh Peach Mint Lemonade: Sweet peaches paired with cool mint add a refreshing twist to traditional lemonade.

Sweet peaches and refreshing mint pair perfectly with tangy lemonade.  We can’t grow lemon trees here in our Utah climate, but if you grow peaches and mint in your garden, this recipe is a necessity!

Fresh Peach Mint Lemonade: Sweet peaches paired with cool mint add a refreshing twist to traditional lemonade.

For help picking the right trees and tips for taking care of them talk, to an expert at Western Gardens.  There are a lot of varieties and they’ll help you choose exactly what you need!  (And if you ask nice, they might even show you some of the cool multi-variety trees like the “fruit salad” tree!  It has four different kinds of fruit grafted onto ONE tree!  So cool, right?!)

Fresh Peach Mint Lemonade: Sweet peaches paired with cool mint add a refreshing twist to traditional lemonade.As I was slicing peaches for this lemonade, I saw my blooming mint plant on the counter and decided to throw some mint leaves into the mix too.  And I’m so glad I did!  The mint added a cool, refreshing hint to the sweetness and made every sip a wonderful mix of tart, tangy, sweet and refreshing. I’ve made three batches so far and I’ve found that the longer you let the lemonade cool in the fridge, the better it tastes. I recommend letting it cool in the fridge for at least 3 hours.

Fresh Peach Mint Lemonade

Ingredients:

  • 4 cups water
  • ½ cup sugar
  • 4 medium peaches, pits removed and quartered
  • 2 Tbsp mint leaves
  • 1 cup fresh lemon juice (about 3 large lemons)

Directions:

  1. Add water and sugar to a large saucepan and bring to a boil.
  2. Add mint and peaches to sugar/water mix, reduce heat to med-low and let simmer for 5 minutes.
  3. Pour into a blender jar and remove the center of the lid, if possible (to allow steam to escape).
  4. Place a towel over the lid and blend on low for 25-30 seconds, or until smooth.
  5. Pour through a cheesecloth or fine mesh strainer into a pitcher. Discard the solids.
  6. Whisk in lemon juice and cool in fridge for at least 3 hours.

 Fresh Peach Mint Lemonade: Sweet peaches paired with cool mint add a refreshing twist to traditional lemonade.

Are you a tangy lemonade fan?  Or do you prefer your drinks a little sweeter?  No matter what your taste is, Western Gardens has a wide variety of herbs and fruit trees to make any drink your taste buds can imagine!  Talk to an expert today to see what plants will thrive best in your garden.

If this Fresh Peach Mint Lemonade sounds good, check out these other tasty drinks!Fresh Peach Mint Lemonade

Blackberry Mint Lemonade | Brazilian Lemonade | Lemon Berry Slush

To get a PRINTABLE version of this recipe, click NEXT!

Western Gardens | Utah

Pages: Page 1 Page 2

Filed Under: Fruit, Recipes Tagged With: fresh fruit, lemonade, mint, peach, recipe

DIY Kid-Friendly Bug Spray

June 15, 2016 by Sydney Anderson

Make this DIY Kid-Friendly Bug Spray at home with our quick and easy recipe!

DIY Kid Safe Bug Spray: Make your own bug spray at home in minutes and with just 4 ingredients!

Is your favorite part of summer spending those lazy evenings out in the yard, watching the kids play and talking to friends or family?  Mine too!  Avoid making other “friends” while you’re enjoying your summer nights…bugs!

Conventional bug sprays are filled with yucky chemicals that we don’t in our kids’ growing bodies (or our own bodies, for that matter!).  They not only absorb through the skin, but it’s hard to avoid inhaling them while applying the sprays.  We certainly don’t want to do nothing and get bitten…so what’s a mom to do? Make her own, of course!

Kid Safe Bug Spray: Make your own bug spray at home in minutes and with just 4 ingredients!There are lots of different recipes for making your own bug spray because they are so easy to customize to the bugs you want to avoid.  Different bugs dislike different scents, so add what you need in order to avoid those bites! Here are a few essential oils that are good to keep these bugs away:

Mosquitoes—lavender, eucalyptus, citronella

Flies—lavender, peppermint, rosemary

Ticks—lavender, lemongrass, eucalyptus

Some essential oils aren’t safe for kids, so I’ve only included oils in this spray that are safe for everyone…lavender and lemon. Both are fresh scents, safe for kids and good for keeping away mosquitoes and ticks!  And if you want to add some plants to your yard to help repel mosquitoes, click HERE!

DIY Kid-Friendly Bug Spray

Supplies:

  • Spray Bottle
  • Label (you can print your FREE copy here)
  • 1 oz witch hazel
  • 1 oz distilled water
  • 5 drops lavender essential oil
  • 5 drops lemon essential oil

Directions:

  1. Combine all ingredients in spray bottle and shake well to combine.
  2. Shake well before each use.

Notes:

  • I put my Bug Spray in a 2 oz travel size spray bottle.  They are inexpensive and small enough to carry in a purse or diaper bag!

Kid Safe Bug Spray: Make your own bug spray at home in minutes and with just 4 ingredients!

Now that you’re protected from the bugs check out these fun (and FREE) outdoor activities:

Nature Bingo | Tastefully FrugalNature Bingo

Color Scavenger Hunt | Tastefully FrugalColor Scavenger Hunt

Filed Under: Recipes, Tips & How To's Tagged With: bug spray, DIY, kid friendly, tips

Strawberry Mango Salsa

May 28, 2016 by Sydney Anderson

Hi there, so glad you stopped by!

Are you looking for a sweet, tangy and delicious salsa?  Something out of the ordinary that will have everyone begging for the recipe?  Then you’re in the right place!  This Strawberry Mango Salsa has only 6 fresh ingredients, and is ready to eat in less than 10 minutes!

Strawberry Mango Salsa: A sweet and tangy salsa the whole family is sure to enjoy!

Did you know that May is National Strawberry Month?! If it was up to me, every month would be National Strawberry Month.  Since, sadly, it’s not, I will take full advantage of it in May and stock up on strawberries at a great price, while I wait for my strawberry plant to start delivering those red beauties right to my door step!

There are many ways to eat strawberries. From eating them plain to putting them in desserts or drinks, or even in your favorite breakfast.  Strawberries are great no matter how you eat them! Today I’m sharing a new way to eat this delicious red fruit…in salsa!

I’m not a big spicy salsa fan. In fact, most salsas are too spicy for me. So when I heard about fruit salsas, I was in the kitchen whipping up a batch that night. My first attempt was a tasty peach salsa that we made last fall.

Peaches are out of season this time of year and this pregnant mama was wanting a sweet salsa to enjoy with some tortilla chips. Luckily, A few weeks ago I found strawberries for $1 a box and knew they would be a good base for my salsa. I also picked up a few mangoes and limes and made my way home.

I cut some cilantro from my indoor herb garden, diced up some leftover onions from burgers that weekend and mixed it all together. What I got was a sweet and tangy salsa my whole family devoured! I actually had to go back to the store the next day to get more strawberries to make another batch. If you like a little more heat to your salsa you could add some jalapeño or serrano peppers to kick it up a notch.

Strawberry Mango Salsa: A sweet and tangy salsa the whole family is sure to enjoy!

Strawberry Mango Salsa

Ingredients:

  • 1 cup strawberries, diced
  • 1 cup mango, diced (about 1 mango)
  • 1/8 cup red onion, diced
  • 2 Tbsp cilantro, chopped
  • 1 Tbsp honey
  • juice from 1 lime

Directions:

  1. In a small bowl, combine honey and lime juice.
  2. In a large bowl combine strawberries, mangoes, onions and cilantro.
  3. Toss with honey-lime mix.
  4. Chill until ready to serve.

Print
Strawberry Mango Salsa

Strawberry Mango Salsa

Ingredients

  • 1 cup strawberries, diced
  • 1 cup mango, diced (about 1 mango)
  • 1/8 cup red onion, diced
  • 2 Tbsp cilantro, chopped
  • 1 Tbsp honey
  • juice from 1 lime

Instructions

  1. In a small bowl combine honey and lime juice.
  2. In a large bowl combine strawberries, mangoes, onions and cilantro.
  3. Toss with honey-lime mix.
  4. Chill until ready to serve.
3.1
https://westerngardens.com/strawberry-mango-salsa/

What is your favorite way to eat strawberries? Head into any Western Gardens Center to pick up your strawberry plants and get started enjoying the fruit of the month!

 Want a few more tasty strawberry recipes? Check these out:

No Bake Strawberry Cheesecake | Tastefully FrugalNo Bake Strawberry Cheesecake

Strawberry French Toast Cannolis | Tastefully FrugalStrawberry French Toast Cannolis

Copy Cat Sonic LemonBerry Slush | Tastefully FrugalCopy Cat Sonic Lemon Berry Slush

Filed Under: Fruit, Recipes Tagged With: Fruit, recipe, Salsa, Strawberry

Cookie Butter Apple Dip

April 20, 2015 by Becky

Cookie Butter Apple Dip Mother’s Day is just around the corner and do we have a treat for you today!  In fact, we have a double treat.  We’re going to show you a simple 4 ingredient Cookie Butter Apple Dip in mini chocolate bowls, PLUS we have a great giveaway for a Gardening Grab Bag!  Win it for yourself, or give it to a favorite mother in your life.  Keep reading, you won’t want to miss a thing!

Cookie Butter Apple Dip
The chocolate bowls go together in minutes, and then you can put them in the fridge to set.  Everything can be prepped ahead of time so you can just pull it out of the fridge when you’re ready to serve!
Cookie Butter Apple Dip
Simply melt your chocolate (the instructions below will keep it in temper.  If you overheat the chocolate, the cocoa butter molecules won’t realign properly, resulting in a soft set chocolate even at room temperature).  Put a small dollop of chocolate on a lined cookie sheet, dip the balloon in the chocolate, and place it on the dollop of chocolate.  Then just let the chocolate harden, deflate the balloon, and you’re ready to fill it with cookie butter fluff!

Cookie Butter Apple Dip

Ingredients:

  • 1/2 cup chocolate
  • 6 Tbsp cookie butter
  • 2 Tbsp vanilla greek yogurt
  • apple slices

Directions:

  1. Blow up 7 water balloons to desired size (I did mine small).  Wash and dry balloons.
  2. Melt chocolate in the microwave or over a double boiler.  (Microwave in 15 second intervals, stirring in between, in a plastic bowl until smooth).
  3. Put a small dollop of melted chocolate on a lined cookie sheet (a little bigger than a nickle).
  4. Dip a balloon part way in chocolate until it’s the size you’d like.  If necessary, use a spoon to push the chocolate onto the balloon.  Place on the dollop of melted chocolate.  Repeat with all balloons.
  5. Let chocolate set.  Place in the fridge for 15 minutes if necessary.
  6. When chocolate is set, make a small snip with scissors near the knot of the balloon.  You want it deflate, not pop.  Peel deflated balloon out of the chocolate bowl.
  7. Thoroughly combine the cookie butter and yogurt.  Place in a sandwich bag, snip a corner, and pipe into chocolate bowls.  Serve with apple slices.

**********THIS GIVEAWAY IS NOW CLOSED**********

Mother's Day Gardening Giveaway And now for the Mother’s Day Giveaway!  We’ve teamed up with Bite of Delight to bring you this awesome gardening grab bag valued at over $55!  {It contains a pruner, trowel, trigger nozzle, garden shears, gardening gloves, kneeling pad, tote, and a black 3-pocket apron that will be custom embroidered with the winner’s name of choice!}  And we’ll ship it all to you in time for Mother’s Day!

a Rafflecopter giveaway
Giveaway ends 4/27/15, so don’t wait to enter!  Open to US residents only.
We are also running this giveaway on our Instagram account, so head there for even more chances to win!

And if that wasn’t enough, there are NINE more chances to win equally awesome prizes from these other fabulous blogs for yourself or a favorite Mother in your life.

Giveaway-Group
1- My Daylights 2- Eat It & Say Yum 3- Tastefully Frugal 4- The Things I Love Most 5- Bite of Delight and Western Gardens 6- Home Crafts by Ali 7- Gypsy Road School 8- Mom’s Bag of Tricks 9- Honest Harm 10- Happy 2BA Homemaker

Cookie Butter Apple Dip

Filed Under: Fruit, Giveaways, Recipes, Tips & How To's Tagged With: Fruit, giveaway, Mother's Day, recipe, recipes

Sugared Cranberries

December 23, 2014 by Becky

cranberries 4Sugared Cranberries are an easy, beautiful way to decorate your table, Christmas tree, cheese plate, mousse, or even cupcakes!  They are simple to put together, but I like to let them sit overnight, so start these the day before if you can.  You can still make them the day of if you don’t have the time, and all will be well, but the sugar tends to adhere better and give it a better sugar crust if you let them sit overnight.

cranberry collageIf you want a deeper molasses flavor, you can use raw sugar or brown sugar to make the simple syrup, but white sugar works great as well.  To roll the sugar, it works best to use a coarser-grained sugar, like an organic variety (but not as large as a raw sugar). If you roll it a second time in a fine sugar (just pulse your sugar a few times in your blender!), then it will cover any bare, sticky spots that the coarse sugar didn’t get.  This is optional, but gives the cranberries better coverage.

cranberries 3

Sugared Cranberries

Ingredients:

  • 1 (12 oz) bag fresh cranberries
  • 1 cup water
  • 1 cup sugar
  • coarse sugar (for rolling)
  • fine sugar (for rolling a second time, if desired)

Directions:

  1.  Wash cranberries and discard any that are bruised, damaged or shriveled.
  2. Combine one cup of water and one cup of sugar in a pot, and bring to a simmer.  Stir until sugar is dissolved and remove from heat.  Let cool until it is warm, and pour over cranberries.  {Do not pour hot syrup over your cranberries or they could burst.}  Let sit overnight, or at least until the syrup has cooled.
  3. Remove cranberries from syrup with a slotted spoon and let drain on a cooling rack for about an hour (I like to place mine over a cookie sheet to catch the drips).
  4. Working in small batches, roll the sticky cranberries in the coarse sugar, and place on a clean cookie sheet to continue drying.
  5. Once all the cranberries have been rolled in coarse sugar, roll again in fine sugar to fill in any spots the coarse sugar missed, if desired.  Place on cookie sheet to finish drying (give them a couple more hours if you can).
  6. Store in an air tight container at room temperature.

*My 6 year old niece came over for Thanksgiving and inhaled these cranberries!  So if you like a tart-sweet combination, this is a great snack!

cranberries 5

Filed Under: Fruit, Recipes Tagged With: cranberries, Fruit, Holidays

Garlic & Rosemary Mashed Potatoes

November 24, 2014 by Becky

Mashed potatoes are a Thanksgiving staple in nearly every home.  They are simple to prepare…but if you don’t do it quite right they can turn out gluey and stiff.  This is my favorite way to make them, and my favorite way to eat them!  They turn out perfectly delicious every time.
Mashed Potatoes mainIf you are in charge of mashed potatoes for Thanksgiving this year, these could make you a very popular person!  The garlic and rosemary give it a subtle flavor, so it will compliment your turkey and sides without overwhelming your guests’ palates.  They are creamy and delicious and the perfect texture…so light and fluffy that you won’t even realize that you’ve had three servings!

Print

Ingredients

3.1
https://westerngardens.com/garlic-rosemary-mashed-potatoes/

* I have made these mashed potatoes with raw garlic added to the boiling water, and I’ve made them with roasted garlic added right before they get mashed.  It’s delicious both ways, so do it the way that speaks to your mashed potato loving heart!

*This recipe doubles easily if you have a big crowd to feed.

*I have mashed this recipe by hand and using an electric stand mixer.  I prefer using a mixer because it’s so much faster and easier!

*Yukon Golds are another great variety for mashing.  I have also used Russets, but I don’t like the texture *quite* as much.  Many people love Russets for mashing though, so try what sounds best!  Stick with it if you like it, or try something else if you think they could improve.  No matter what you choose, you really can’t go wrong!

Mashed Potatoes 2If you need some flavored butter for your holiday spread, be sure to try this Chive Butter (pictured above) or Garlic-Basil Butter.  You can enjoy these flavored butters on mashed potatoes, steamed or roasted veggies, crusty bread or soft rolls.

Filed Under: Herbs, Recipes, Vegetables

  • « Go to Previous Page
  • Go to page 1
  • Go to page 2
  • Go to page 3
  • Go to page 4
  • Interim pages omitted …
  • Go to page 6
  • Go to Next Page »

Primary Sidebar

Shopping Cart

Items in Your Cart

Your cart is empty
Visit The Shop

Follow Western Gardens

  • Facebook
  • Instagram
  • Pinterest
  • YouTube

See what we’ve been pinning!

Follow Me on Pinterest
Followed by people.
?

Pinterest Badge by Skipser

Here’s What We’ve Been Up To!

Save water and money by Turf Training - train your lawn to grow deep roots
work at western gardens utah garden center
Senior gardening woman Edu Carvalho from Pexels
nursery center open to public

Copyright © 2025. Western Gardens - Privacy Policy