• Skip to primary navigation
  • Skip to main content
  • Skip to primary sidebar

Western Garden Centers

for what grows here

  • Home
  • How To
  • Gift Cards
  • Calculate Mulch
  • Locations
    • Store Hours
    • About
    • Garden Shop Employment Team
  • Weddings
    • Salt Lake City, UT
    • West Valley, UT
  • Blog
    • Gardening
    • Recipes

Blog

March 29, 2018 by Western Gardens

Welcome Friends! Glad you dropped in to learn about saving water and money by Turf Training.

Save Water and Money by training your lawn to grow deep roots

You can train your dog and train your lawn too!

You cannot teach a lawn to fetch the paper or to roll over. Even though some say that it can play dead, in the winter!  Now that your lawn is coming out of the dreary winter, it’s time for turf training. You can train your lawn to grow deep lawn roots, so that you can cut your water bill during the summer and your lawn can be happy during those hottest Utah summer weeks. Turf Training is more painful for the owner than the lawn itself, but by July, it is possible to be watering your lawn once every two weeks or less, depending on your soil type.  I know it works; I’ve lived it.  This plan is for established lawns; new turf requires other care.  Follow these steps and you too can have a well trained happy green lawn.

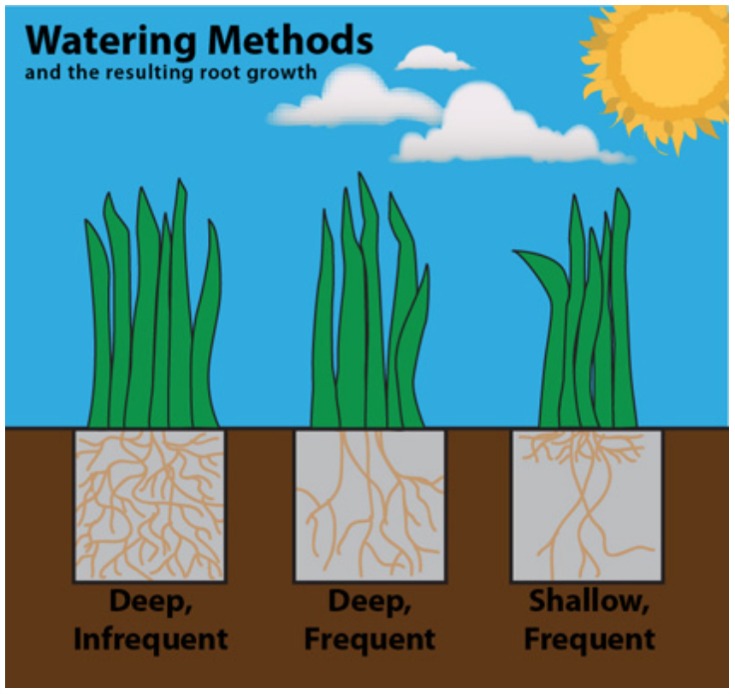
  1.  This month (April & into May), do not water your lawn!  Mother Nature is taking care of watering lawns for you.  DEEP INFREQUENT watering creates deep roots and thriving healthier plants.
  2. Aerate your lawn.  Perfect time is just before one of our spring rains.
  3.  Apply the proper spring fertilizer.  Follow the directions explicitly.  Again, the ideal time is just before a good rain to wash it into the turf.
  4. If you haven’t already, apply pre-emergent.
  5. Keep your finger OFF the automatic sprinkler system. Do NOT water your lawn.  You are in turf training mode.  I know it is painful because the sun is shining and spring is here, but don’t do it.  Your lawn is stretching its roots deep.  Let them go!
  6. In May, repeat #5 unless one of the following occurs…
    • Mother Nature hasn’t watered for 3 weeks. Time to water.
    • When you walk across your lawn, your footsteps don’t bounce back up.  Time to water.
    • When you look across your lawn, you notice a dull bluish green tone in spots.  Time to water.
  7. DEEP WATER – Put a good inch of water or so on your lawn.  Placing a tuna can on your grass will let you know when you’ve watered sufficiently.  All this water will soak down deep and you will train your lawn, by withholding watering cycle, to stretch deep for the water.  The roots will grow deeper and in the hot summer months of July & August, your lawn won’t get as stressed out.  Its roots will be cooler down deep.
  8. Repeat steps #6, #7 and #8.

As you can imagine, it will take time to train your lawn to grow deep roots.  That is why it is important to begin first thing in the spring.  For established Kentucky Blue grass, you may need to follow this method for two seasons, but it can be done. 

This method to train your lawn is not meant for flower beds, newly seeded lawns, newly placed sod, trees or shrubs.  Learn from our experts those proper watering techniques.

Watering Lawn Methods graphic by Texas Smartscape

http://www.txsmartscape.com/design_tools/water_conservation.asp

Watering your lawn in spring? Train your lawn to save water and money.

Article submitted by Wendy P

Filed Under: Lawn Care, Outdoors, Tips & How To's, Yard Care Tagged With: deep lawn roots, drought tolerant grass, spring lawn care, summer lawn, turf, turf training, turf watering, watering lawn, watering lawns, Western Gardens

March 28, 2018 by Wendy Pettit

Author: Maria Cannon (HobbyJr.org)

Bee on pink flower

Photo by: Agzam on Pixabay CCO

Since 2010, the United States has suffered a loss of 40 percent of local honeybees. Native bee species are dying off too, with many of them categorized as either endangered or significantly declining. Our food and economy, as well as the entire ecosystem, depend on bees to survive. Our survival depends on their survival. By creating a bee-friendly garden, you can do your part to help save our important bees.

Why Bees Are So Important

According to Greenpeace, “Since the late 1990s, beekeepers around the world have observed the mysterious and sudden disappearance of bees and reported unusually high rates of decline in honeybee colonies.” Bees are famous for making honey, but their most important role is the pollination of crops. A third of the food that we eat depends on pollinating insects, including zucchini, apricots, almonds, coriander, canola oil, and more.

Photo by: MyriamsFotos on Pixabay CCO

A world without pollinators would not only be devastating for food production, but it would also have a huge economic impact. The worldwide economic value of bees’ pollination work has been estimated at roughly $306.4 billion annually.  Obviously, they are important bees. In the United States, pollinators contribute more than $24 billion dollars to the economy, of which honeybees contribute more than $15 billion and native pollinators contribute $9 billion.

However, it’s not just the economy and our food that we should focus on. All pollinating insects play an essential role in ecosystems. Native bees may not pollinate as much of our crops, but they do pollinate wild plants, which are important to the larger ecosystem, creating food and habitats for other animals and insects. In essence, all bee populations are declining, and it’s important to help save them all.

Making Your Garden Bee-Friendly

Bees need nectar and pollen as food sources, so opt for flowers that provide both, such as goldenrod, asters, and sunflowers. You can also plant flowering vegetables and fruits. Bees need to eat until they retreat for the winter, so choose plants that bloom through multiple seasons or a variety of plants that will bloom at different times throughout the spring, summer, and fall. Aim to have at least ten bee plants in a grouping instead of spreading them out across the garden. Because bees also need water, you should add a pond, fountain, or other fresh water source.

While honeybees live in hives, native bees live in the ground. Provide a space in your garden for native bees to make their home by leaving an un-mulched space in your garden. A pile of undisturbed sand or wood will work too. Do not use pesticides and herbicides. Instead, introduce good bugs to provide natural protection against pests and weed your garden by hand.

If you live in an apartment or have limited space, you can easily grow pollinator plants in containers. Some pollinator plants that do well in containers include stinging nettles, asters, bee balm, purple coneflowers, and yarrow. You can incorporate more than one plant into a container to save space. Allow a tall plant, a rounded/full plant, and a trailing plant to share one container.  All sizes of flowering plants help our important bees.  Read our post on 8-tips for planting spring flower pots.

Photo by: Castlegaurd on Pixabay CCO

Starting Your Garden

When starting your garden, take the time to plan ahead. First, determine what you want to grow in your garden. There are many plants that attract pollinators, so choose the ones you like the best. As far as size, it’s best to start small and work your way toward a larger garden. When choosing the location of your garden, consider the position of the sun in your yard throughout the day and the quality of the soil.

Gardening doesn’t just help the bees. When you grow a garden, you can reap many of the health benefits it provides, including its calming effect. Gardening’s ability to calm the mind stems from it allowing you to center yourself, connect with nature, and take pride in creating something. It’s also a great form of exercise and has been proven to reduce the risk of osteoporosis and diabetes.

The rapid loss of bee populations is frightening. Not only will our food supply and economy take a big hit, but also the Earth’s entire ecosystem could be devastated. By planting a garden that’s full of pollinator plants that bloom in different seasons, you’re taking a big step in helping revamp the bee populations. Even if you simply provide a home for bees to nest, you can help do your part in saving the bees.


Filed Under: Gardening, Insects, Utah Gardening Tagged With: attracting bees, backyard garden, bee-friendly garden, bees, beneficial insects, gardens and bees, honey bee, Important bees, pollinating insects, pollination, save bees

October 28, 2017 by Wendy Pettit

cookie butter apple treats 
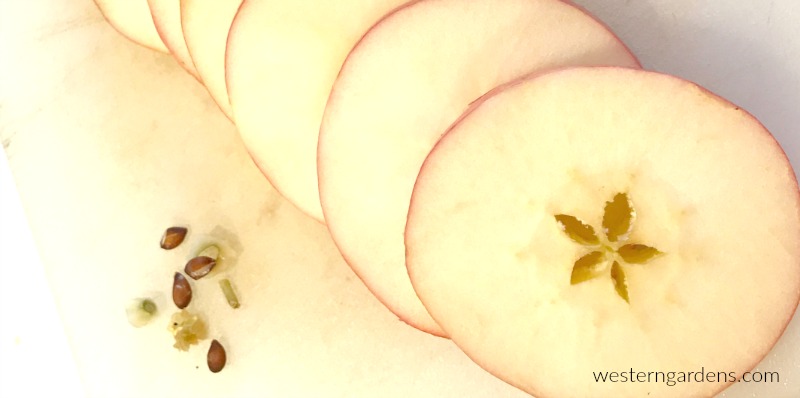
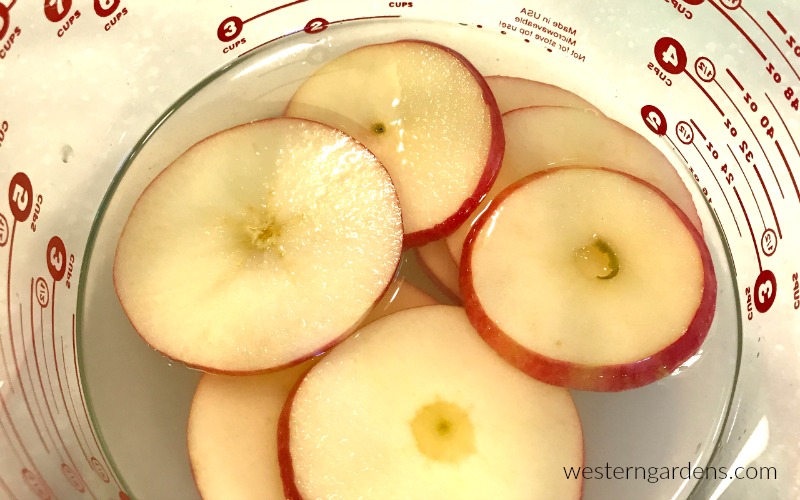
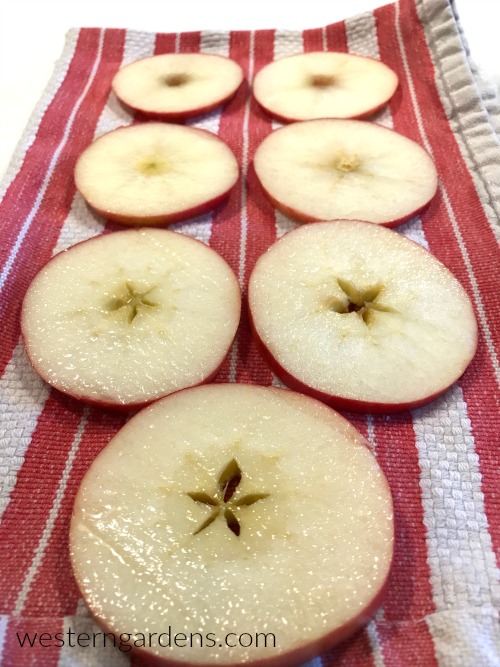
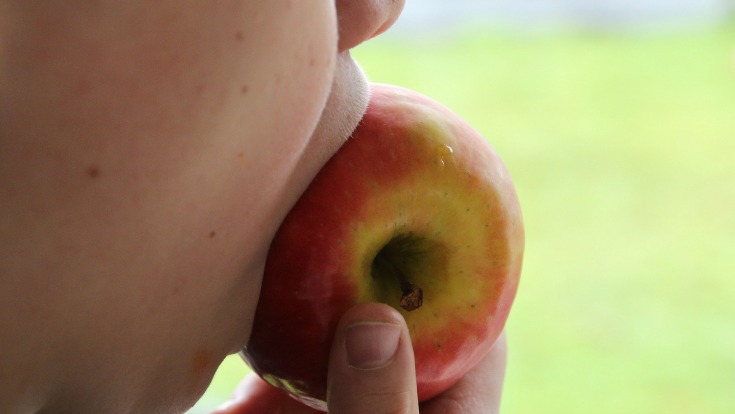
Harvesting your apples?  Been to your local farmer’s market and bought a bushel of apples?  Cookie Butter Apple Treats may be a new delicious treat to please the entire family while you are processing your apples for the season.  This simple 4-ingredient recipe is easy and yummy.  Any variety of apple tastes delicious with this cookie butter dip recipe, but we prefer Fuji, Gala, or Pink Lady (whichever is the best price or whichever apple is ripe on the tree).

Cookie Butter Apple Treats Ingredients

  • 8 Tbsp. cookie butter – room temperature (I prefer Bischoff Cookie Butter so I feel like I’m flying on an airplane)
  • 4 Tbsp. vanilla greek yogurt
  • apple discs – 2-3 apples, sliced crossways
  • 1/3 cup chocolate chips – melted  (optional)
  • brine – 2 cups water with 3 Tbsp. lemon juice or 1 Tbsp. salt

Directions:

  1. In a medium bowl, add lemon juice or salt into 2 cups water. Stir and set aside.
  2. In a second medium bowl, combine cookie butter and yogurt.  Stir mixing well and set aside.Mix cookie butter and vanilla yogurt together until smooth
  3. Take your whole freshly harvested apples and slice them crossway through the center of the apple.  Apple seed “star” should be in the middle of your circle or disk.  Remove the seeds or centers of each apple disk using a tiny round cookie cutter or a knife. Your apples now look like skinny flat discs or donuts.Slice your apples crossway so the seed stars are showing. Cookie Butter won't fall through if you don't put a large hole in the middle
  4. Place the apple slices into the lemon or salt brine.  Let soak for 1-2 minutes. (This will keep the apples from turning brown.)soak your sliced apples in salt water or lemon water so that they won't turn brown.
  5. Place apple slices on a clean dishcloth or paper towel.  Flip them over so both sides are now somewhat dry.Pat the apple slices dry.
  6. Using a large piping tool,  pipe the cookie butter mixture in swirls on top of the apple discs.  (I like to use the Pampered Chef Easy Accent Decorator)
  7. Refrigerate and serve.  Yum!
  8. Optional – Melt 1/3 cup chocolate chips.  (Use double boiler on stove or microwave 10 seconds at a time until the chocolate stirs smooth.)  Drizzle or flip with a stick the chocolate over the apple discs.  It is very wise to wear an apron for this task.Decorate the apple slices and drip or flip chocolate on top for a gourmet design.

If you don’t want to do the apple disks, you can simply place the cookie butter dip in a bowl surrounded by any variety of apple wedges reading to scoop.

Cookie butter apple treats are a real crowd pleaser!  And even more delicious and satisfying when you grow and harvest your own apples!  Let Western Gardens teach you how to choose an apple tree for your yard.  It doesn’t have to grow super big to have a delicious harvest.

Snitching your Cookie Butter Apple Treats is common. They are delicious!

cookie butter apple treats

Filed Under: Eat from Garden - Recipes, Fruit, Recipes Tagged With: apple cookie butter, apple dip, apple recipe, apple treats, cookie butter apple treats

October 11, 2017 by Wendy Pettit

Author: Maria Cannon (HobbyJr.org)

When many people think of getting fit or staying healthy, gardening probably isn’t the first thing that comes to mind. However, working in the garden can be hugely beneficial to one’s health, in many ways. Not only is it great physical exercise, it also helps people who don’t get a lot of time outdoors connect to nature, enjoy the sun and fresh air, and spend time doing something that helps them feel fulfilled.

“When you sit at a desk all day, there’s something about literally putting your hands in the dirt, digging and actually creating something that’s really beautiful. There’s something about just being out there that feels kind of elemental,” says gardener Gillian Aldrich.

In short, working in a garden can help you feel better and improve your emotional and mental health. Want to learn more? Read on to find out how you can boost your health in a variety of ways just by digging in the dirt.

Gardening Can Boost Your Mood

Gardening has been linked in several studies to lessening depression.  Although there have been no conclusive answers as to why, some experts believe it’s simply the ability to connect with something larger than ourselves without having to think about it too hard. It also involves physical work and being outdoors, both of which have been shown to improve mood and self esteem.

Healthy gardening means you'll be in a better more cheery mood.

Photo Credit via Pixabay by Vijayanarasimha

Gardening Can Relieve Stress

It can be difficult these days to enjoy the moment.  With all the distractions from smartphones, laptops, tablets, email, and social media, it can be hard to direct your energy to something for longer than a few minutes. Gardening requires a bit of focus but allows your mind to go where it wants, which can help you feel more positive and de-stressed. Stress relief and activity can help prevent heart disease, obesity, and diabetes, among other things.

A healthy gardening habit helps you destress and realize the beauty of a simple flower.

Photo Credit via Pixabay by Alexas Fotos

Gardening Can Be Good Exercise

There are several types of gardening and many different ways you can get in a workout. Kneeling on the ground and bending over to weed, digging in the dirt to plant, and hauling dirt, mulch and fertilizer are all ways to feel the burn. You can take off several calories by working in the garden a few times a week.

Gardening helps with exercise. Now that is healthy gardening!

Photo Credit via Pixabay by Mojpe

 Gardening Promotes Healthy Eating

Gardening can help promote healthy eating, especially if you’re putting on the table what you are taking what you grow from the ground. Plant produce you enjoy using to cook with–tomatoes, herbs, cabbage, carrots–so you’ll be more inclined to eat them and keep your diet healthy and nutritious.

Another wonderful benefit of growing food is that you can share it. If you don’t have family nearby, consider taking what you’re not going to use and donating it to food banks or shelters or neighbors.  Be a good neighbor!

Gardening promotes healthy eating.

Photo Credit via Pixabay by CongerDesign

 Gardening Can Help You Sleep Better

 Working outdoors and getting active several times a week helps you tire out physically, and keeps stress and anxiety at bay so you can have a restful night. If you’re a restless sleeper, consider working in the garden a few additional times.

sleeping in the garden or sleeping better because you worked in the garden

Photo Credit via Pixabay by Dawidx

Gardening Gets You Out in the Sun 

Working and playing in the sun exposes you to vitamin D, which can help boost your immune system and help improve your skin and bone health. Just be sure to wear plenty of sunblock to protect yourself from all those UV rays.

Garden out in the sun and fresh air.

Photo Credit via Pixabay by AKA Ralph

Gardening is one of the best ways you can get in a workout, improve your brain function, boost your mood, and get healthy overall. If you feel you don’t have a big enough space on your own property for a garden, consider many other options like vertical gardening, container gardening, raised bed gardens.  Western Gardens can help you be successful in growing your own food or just enjoying the beautiful blooms you cultivated.  You can also consider seeking out a community garden project where you can work on your own little patch of land.


About the Author: Maria has suffered from fibromyalgia along with depression and anxiety associated with the chronic illness for years. Her hobbies–gardening, quilting, sewing, and knitting–play a major role in maintaining her mental health. She enjoys writing about her hobby adventures on Hobbyjr.org.

Filed Under: Gardening, health Tagged With: destress, garden exercise, gardening health, healthy gardening, nutrition

October 5, 2017 by Wendy Pettit

Time to do your fall pruning in your Utah garden along the Wasatch Front.  Pruning your garden for winter is fairly simple. Follow two main basic pruning rules and then follow guidelines for various plants listed.


GENERAL Pruning Rules to Remember:

Rule #1 – Don’t prune plants until they are finished blooming.

Rule #2 – Prune dead or broken branches at any time of the season.

FALL Pruning Guidelines:

Fall Pruning of Flowering Shrubs

To keep with Rule #1, remember not to prune fall blooming shrubs until they are done blooming.  Examples of fall blooming shrubs include Rose of Sharon, Hydrangeas, etc. Spring blooming shrubs (forsythia, spirea, lilac, etc) should be pruned in the spring or summer after they are done blooming. Often, these shrubs bloom on new growth, so prune them early in the season to get some good growth for the next year’s blooms.

Before you get started pruning your flowering shrub, keep in mind to retain and enhance the shrub’s naturally graceful habit. Take care not to cut the shrub into a boxy or unnatural shape (unless you want to sacrifice flowers and make a hedge). Remove dead and crossing branches.  Cut ¼ of the oldest canes to the ground. This gives the plant renewed strength, letting light and air circulation into the center of the plant and provides growing space for new flowering stems.


Fall Pruning of Upright Evergreen Shrubs

Lightly prune to shape.  Shrubs like Arborvitae may need wrapping or tying with twine to keep the snow from breaking off the branches.

Fall Pruning of Rose Bushes

Pruning depth depends on the type of rose.  If a hybrid tea or a floribunda type, prune down to 24” above ground.  Otherwise, prune to shape the bush. Prune out dead and broken branches. May mulch around the base of the bush in case of unexpected sub-zero winter temperatures.  In the spring, if there has been winter damage, you will be able to prune off the winter-kill.  Click here for a good article on how to prune your roses.  

Fall Pruning of Vines

Pruning depends all upon the type of vine.  Some clematis need pruning, other clematis do not.  Follow the directions on the plant tag from a reputable local garden center, or ask the experts at the local nursery.

Fall Pruning of Berry Plants

Again, pruning requirements drastically vary depending on type of berry and cultivar.   Ever-bearing plants require different pruning techniques than main crop berries.  And even then there are different needs.  You don’t want to trim back too far in the fall if you need to leave that newer growth for next year’s berries.  Again, consult the expert gardeners at your reputable garden center.  Be sure to know what variety of berry you have.

Fall Pruning of Fruit Trees

Do not prune fruit trees until winter when they are dormant, i.e. leaves have fallen and temperatures are in 30’s & 40’s.  In northern Utah, we recommend pruning during January and February.  Follow proper tree pruning techniques in the winter.  Winter Pruning video.  Remember that at any time, you can prune away dead or broken branches.

Fall Mowing “Pruning” of Lawn/Turf

Mowing your lawn is actually a type of “pruning”.  Your last mowing of the season should be shorter than during the summer months when you want the shade of the blades to help retain moisture in the soil and more green for healthier roots.  When you are ready to put your lawnmower away, set your lawn mower to 1½” setting and give your lawn a good pruning!  WARNING:  Don’t be overly ambitious and “scalp” the lawn.  A nice short cut is desired, but you don’t want to injure the base of the plant.  

Additional Fall Lawn Note:  Now is a time to spread your fall fertilizer.  If you have had issues with fungus, now is the time to apply a fungicide treatment.  Also, weed control is still viable when daily high temperatures are higher than 55-60 degrees. Weeds love the forgotten fall lawn.


Fall Pruning of Perennials

Be sure to remember Rules #1 and #2 above.  Not pruning until the plant finishes blooming also applies to dividing and transplanting in the fall.  Don’t transplant until the plant is done blooming.  This means that your fall bloomers like Autumn Joy Sedum, chrysanthemums, etc., need to finish blooming before you divide and transplant or prune.  Be patient! You have plenty of other pruning and garden work to do.  These are the last ones to prune before the beds are done for the winter.  

Two Additional General Fall Pruning Rules for Most Perennials: 

  1. Prune when the plants begin to die back, leaving their greenery to continue feeding the roots as long as possible. 
  2. Cut them down to 3-4 inches above the soil. This is because most perennials die down to the ground in the winter.  Leaving 3 inches will mark the plants during winter.  Also in the spring the 3-4 inches is low enough you won’t need to go back and prune as the plant emerges.  

EXCEPTIONS to Pruning Perennial Rules:  Woody perennials like lavender need only light pruning to shape and evergreen perennials like candytuft should also only be lightly pruned.  If you question what to prune or how much, follow the guidance from your master gardener at the independent garden center like Western Gardens.  We would love to help you have a successful garden.

Fall Pruning of Ground Covers –

Simply trim lightly.

Fall Pruning of Ornamental Grasses

If you enjoy the silhouette of your grasses, leave them to admire throughout late fall.  Later trim to 6-8 inches above ground.

Fall Pruning Questions:

If you have any questions about fall pruning for winter, please feel free to stop by our Western Garden Centers and visit with one of our expert gardeners. We’ll be happy to answer any of your questions.

Fall Reminder:

While you are pruning and cleaning up, breathe deep the fresh autumn crisp air and admire the changes taking place in your garden.

What fall pruning do you enjoy doing in your yard?


SaveSave

SaveSave

Filed Under: Gardening, How To, Lawn Care, Tips & How To's, Utah Gardening, Yard Care Tagged With: berries, berry plants, evergreen shrubs, fall pruning, flowering shrubs, fruit trees, ground cover, ornamental grasses, Perennials, perennials pruning, pruning, pruning roses, rose bushes, roses, shrubs

September 30, 2017 by Wendy Pettit

A fun potluck party idea is to have a zucchini fest.  People can be so creative; you’ll discover zucchini dishes you never dreamed of.  I’ll never forget going to one several years ago and someone had thought ahead and brought a gluten free chocolate zucchini bread.  Too many times, we forget the many who don’t eat gluten (wheat products).

My busy gluten free neighbor Vanessa shares this recipe – gluten free chocolate zucchini bread.  It is so yummy and rich, it can be treated as cake.  This is a proven winner recipe; it won’t last long in the pan! Enjoy the zucchini season while it lasts…and lasts…..and lasts!

gluten free chocolate zucchini bread cake

Gluten Free Chocolate Zucchini Bread/Cake

INGREDIENTS

  • 1/2 cup  applesauce
  • 1/3 cup coconut oil 
  • 1 1/2 cup granulated sugar
  • 2 large eggs
  • 1 teaspoon vanilla extract
  • 1/2 cup coconut milk plus 1 tbsp white vinegar (this makes a dairy free buttermilk version)
  • 1 cup brown rice flour
  • 1 cup oat flour
  • 1 Tsp xanthum gum
  • 1/3 cup cocoa powder
  • 1 tbsp cacao
  • 1/2 teaspoon baking powder
  • 1 teaspoon baking soda
  • 1/2 teaspoon ground cinnamon
  • 1/2 teaspoon salt
  • 2 cups shredded zucchini 

Gluten free chocolate zucchini bread is easy to make with few ingredientsDIRECTIONS

  1. Preheat the oven to 325 degrees F. Lightly grease a 9X13-inch pan with non stick spray
  2. In a large bowl cream together the applesauce, coconut oil and sugar. Then add the eggs and vanilla and mix well.
  3. In a separate bowl, whisk together the brown rice and pat flours, cocoa powder, cacao, baking powder, baking soda, cinnamon and salt.
  4. Add 1/2 of the dry ingredients to the batter and mix, then add the coconut milk (with the vinegar) mix, and add the remaining flour mixture. Mix until well combined.
    mixing gluten free zucchini bread

    This is a good time to teach patience to little ones while the batter mixes. Good things come to those who wait!

  5. Stir in the shredded zucchini.
    Children can grate zucchini for your gluten free chocolate zucchini bread.

    With supervision and a little help, young children can take pride in helping make this delicious zucchini treat!

    Nothing like freshly grated zucchini for zucchini bread!

  6. Pour the batter in the pan. 

    Be sure to smell it as you examine your batter.

  7. Bake for 30-40 minutes until a toothpick inserted in the center comes out with moist crumbs. In my convection oven it takes about 34 minutes. 

This can be served with whipped topping or your favorite ice cream or ice cream alternative. 

gluten free chocolate zucchini bread is delicious! Yum!

If you have already pulled up your garden, don’t worry.  I’m sure someone has excess in their garden.  Just put out the word that you will make some gluten free chocolate zucchini bread for them if they will give you some of their zucchinis.  If you find this too late, make plans for various zucchini plants next spring.  There are many varieties to choose from at your local garden center.

Try out some other ZUCCHINI RECIPES:

Baked Zucchini Fries

Banana Zucchini Bread w/Chocolate Chips

Zucchini Chips

Delicious Roasted Zucchini

Oven Fried Zucchini

Prepare for April 25th – National Zucchini Bread Day

Prepare for August 8th – Sneak Zucchini Onto Your Neighbor’s Porch Day

gluten-free chocolate zucchini bread-cake recipe


Filed Under: Recipes, Vegetables Tagged With: kids in the kitchen, zucchini, zucchini bread, zucchini bread recipe, zucchini recipes

September 21, 2017 by Wendy Pettit

Breakdown of apple varieties and how to use them

Photo: Pixabay

Not all apples are the same.  With over 7000 varieties of apples, it is wise to learn which types are best for what you want the apple.  Some apples are more soft, some more crunchy and crispy, some mealy, some tart, some sweet, and so on.  Of course, which apple you use can be all subjective, but in the world of apple connoisseurs, there are some apples more suitable for different needs.

Here is a list of some of the more popular apple varieties and how to best use them.

Take a bite of a crisp apple from the apple tree

Photo: Pixabay

Fresh Eating Apple Varieties

There are so many different tastes for different people’s likings.  Here are some of the most popular.

  • Braeburn
  • Fuji
  • Gala
  • Cameo
  • Golden Delicious
  • Granny Smith (for a tart taste)
  • Honeycrisp
  • Empire
  • Pink Lady or Cripps Pink
Baked whole apples with cinnamon and raisins

Photo: Pixabay

Baking Apple Varieties

Popular apples for pies, apple sauce, apple butter, and baking whole.

  • Granny Smith  (in our opinion the BEST pie apple)
  • Braeburn
  • Golden Delicious
  • McIntosh
  • Rome Beauty
  • Cortland
  • Jonagold
  • Jonathan
  • Gala
  • Melrose
  • Honeycrisp
  • Winesap
  • Cameo
  • Avoid these apples in pie because they become mealy with baking:  Cortland, Gala, and Red Delicious
Hot apple cider tastes good on a cold fall day.

Photo: Pixabay

Cider Apple Varieties

It is proven that the best tasting cider comes from using a variety of all types of apples.  One neighbor who owns a press once told me “The more varieties, the better!”

  • Gala
  • Rome Beauty
  • Golden Delicious
  • Grimes Golden
  • Jonathan
  • Red Delicious
  • McIntosh
  • Fuji
  • Braeburn
  • Jonagold
  • Cortland

Realize that these lists are not complete by any stretch of the imagination. Remember the 7000 plus varieties?  Our shorter more concise list will be a good place to start!

As you decide what apple you want to have on your own lot, for a great harvest, be sure to check your local garden center for what apple trees do well in your area.  Not all apple trees like to be planted just anywhere. Temperature plays an important role in producing a worthwhile crop.  Read How to Choose an Apple Tree to learn more.


Filed Under: Fruit, Gardening, Trees, Uncategorized, Utah Gardening Tagged With: apple varieties, apples, baking, cider, fresh apples

September 21, 2017 by Wendy Pettit

Fall is a wonderful time to plant trees and the apple tree is one of the easiest fruit trees to grow.  Surprisingly, how to choose an apple tree is easy to learn as well.  Learn these three basic criteria as you prepare for this investment.  Nearly all apple trees require a second variety close by in order to pollinate.  So as you are considering, be sure to have a first and second choice.

How to Choose an Apple Tree – 3 Criteria:

  1. Right SIZE – Choose the right size of tree for your space.  You need to look at your space and maybe even measure the space so you know what you are purchasing.
  2. Right VARIETY – Type of fruit desired.  Do you want fresh eating apples, or just cooking apples?  You will be investing time and effort into you tree, so they may as well be apples that will please you and serve your purpose.
  3. Right TIME – When does it flower and when is harvest time.  Apples require a second variety to cross-pollinate, therefore you want 2 apples trees that will bloom about the same time.

SIZES of Trees:

  • Standard size tree – can grow to 25-30 feet tall along Wasatch Front with a spread of 25-30 feet.  You need a large area for the standard size tree.  Standard trees take 4-8 years to produce mature fruit.  These trees are very good in cold-climates, but be ready to prune every year.
  • Semi-dwarf (sometimes called half-standard) – can grow 12-15 feet tall along the Wasatch Front and same width if not pruned.  This tree will have mature fruit in 3-5 years.
  • Dwarf or Genetic Dwarf tree or Bush trees – Can grow 6-10 feet tall along the Wasatch Front and just as wide.  These trees produce mature fruit in 3-4 years.
  • Others:  There are several other types of fruit trees.  These would include espalier and columnar.  See your local experts at the neighborhood nursery for what will grow in your area and for availability.

Nearly all semi-dwarf and dwarf or bush trees are grafted.  Growers graft or attach the desired fruiting branch to a “rootstock” trunk.  The rootstock determines how big your tree will get.  Shopping your reputable local garden nursery will ensure that you are buying a quality product – good grafting onto a quality rootstock.  There are different rootstocks for different areas.  Your local nursery experts will only sell what will work here along the Wasatch Front, versus a big company back east somewhere that orders for their stores throughout the country.

VARIETY of Fruit:

There are literally over 7000 apple varieties.  Obviously many more than what you find at the local grocery market.  Visiting a good local farmers market can expose you to other varieties you can taste before you make an investment into your own tree.

Click HERE to see a basic break down of the more popular varieties and their best uses.


Remember that your tree is your investment, so you want to produce something you will use and enjoy for years and years to come.  Apples trees can live as long as 60 years or more.

TIMES for Blooming:

As mentioned above, nearly all apples need a pollinator apple tree in the general area.  If you have neighbors that have apples trees, planting one in your yard should still give you plenty of harvest.  But if you are the only one, then you may need to plant two different varieties of apples.  For example, in commercial orchards, farmers often plant some golden delicious apple trees along with their main crop.  Golden Delicious trees are known to be good pollinators.  Be sure to choose two varieties that overlap their flowering time.

Midseason bloomers:

  • Crimson Beauty
  • Gala
  • Jonamac
  • Jonathan
  • McIntosh
  • Golden Delicious
  • Jonagold
  • and others

Late bloomers:

  • Fuji
  • Granny Smith
  • Rome Beauty
  • Winesap
  • and others

Poor pollinators:  Jonagold and Winsesap (plus a few more), are considered poor pollinators.  Don’t plan on them being your pollinating tree.

Hardiness and Cold Requirements:  Be sure to check at your local garden center for those varieties that are actually hardy for your area.  You need to choose an apple tree that will survive your climate year round.  And on the other hand, realize that apples require a certain amount of cold temperatures to have the sugars set and the fruit to ripen properly.  If the fruit doesn’t get the required coldness, the fruit will be a disappointment for all the time and effort you’ve put into your harvest.

For example, my parents planted a Red Delicious apple down south in the area of St. George, Utah.  The fruit grew but never turned red and always had a mealy texture and flavor. The fruit never was like their Red Delicious apples from their trees up in northern Utah.  The tree eventually was cut out.

Conclusion:

Now you know the basic criteria for how to choose an apple tree.  You need to consider the right size of tree, the right type of apple, and the right blooming time for good pollination. What a great investment for your yard, yourself, and your family!

In future posts, we will go through proper planting procedures, learn about any pest control needed, and how and when to properly prune your tree.   Soon you will be enjoying the fruits of your labor.

Check out these recipes for apple goodies (submitted by Western Garden patrons):

Simple Apple Chips and Apple Pie Filling

Simple Applesauce and Apple Butter


Filed Under: Fruit, Gardening, How To, Trees, Utah Gardening Tagged With: Apple trees, blooming time, choosing trees, fruit trees, How To, how to choose, tree size, utah apple trees, utah fruit trees

September 14, 2017 by Marjorie Carter

I use different apples for applesauce and apple butter.  Here are ways to use a variety of apples or just Jonagold and Golden Delicious.

Applesauce

homemade Apple sauce

Photo by Taken at Pixabay

The best tasting applesauce is made using a variety of different apples.  This is a good opportunity to do some apple swapping with neighbors!  If only one apple is used for applesauce, then a sweet-tart variety is best, such as a Jonagold.  

Use jonagold apples for applesauce and apple butter

Photo by Marco Roosink at Pixabay


Apples have enough natural sweetness that I avoid adding sugar.  It’s really not necessary. The sauce maker is a big help if you’re trying to process lots of apples.

Photo: Canology/Norpro Click photo for link

Making applesauce is not difficult, especially if you have a sauce maker, but it can be sticky work.  I know there are lots of instructions on the internet.  I like this recipe by PickYourOwn because the writer explains all the steps and equipment needed. 


Cuisinart Smart Stick

Photo: Amazon/Cuisinart  Click Photo for Link

If you don’t own a sauce maker, you can peel the apples, remove stems and seeds, then use a stick blender or transfer to a blender jar to puree. Be careful because the apples and the resulting sauce will be hot.


That’s it.  Gobble it up fresh or preserve in bottles using proper canning procedures.


Apple Butter

Applebutter on banana nut bread

Photo by Jeffry W at Flickr license CC 2.0

golden delicious apples for applesauce and/or apple butter

Photo: Pixabay

My golden delicious apples, when used alone, make a bland tasting sauce that I don’t really enjoy eating.  However, they make great apple butter. So, if you make any applesauce that does not taste as good as you hoped it might, consider using it for apple butter.   Basically, you will use about 9 quarts of applesauce, slowly cook it down in your crock pot, add a spice blend part way through the process, and end up with about 9 pints of delicious, dark brown apple butter that you’ll want to eat by the spoonful straight out of the jar.  It’s also delicious on toast, biscuits, pancakes, waffles, etc., etc.  The only difference is I do not add any sugar.  Again, apples are sweet enough that they simply don’t need any help.  

I also like to use my stick blender to puree the final product a bit more so it is as smooth as I can get it.  This is purely optional but it makes for a very nice texture. 

FALL is a great time to plant your own fruit trees.  Your local nursery may still have some.  Otherwise, wait until spring for a great selection.

Click BACK to read my CHILDHOOD MEMORIES of APPLES

Click NEXT for APPLE CHIPS and APPLE PIE FILLING

Western Gardens | Utah

  Western Gardens | Utah


Filed Under: Fruit, Gardening, Recipes Tagged With: apple butter, apple recipes, applesauce, golden delicious, homemade, jonagold

September 14, 2017 by Marjorie Carter

We’ve eaten fresh long apple skin peels, made delicious applesauce, and rich apple butter.  Here are two other ways that I use to preserve my apples – apple chips and apple pie filling.  The tips I give are from my own personal experience.

Apple chips

Dehydrated apple chips

Photo by Cook Your Life at Pixabay

I love my food dehydrator.  The first time I needed one, I borrowed my Mom’s dehydrator that she bought back in the early 70s.  It worked very well but it was pretty loud.  I finally bought a newer dehydrator and I love how quiet it is.  It also has a larger capacity than the older one, so I can process more produce per batch.

dehydrating sliced apples

If you don’t have a food dehydrator, you can use your oven but you’ll need to be a bit more vigilant about checking on the apples so they don’t burn.  The dehydrator allows you to use lower temperatures than most ovens will permit so you can ignore them for a few hours before checking to see if they’re done.  


apple slices for drying into apple chips

Photo by Wolffsfa at Pixabay

There’s nothing fancy when it comes to apple chips. 

The biggest trick, in my opinion, for the best apple chip is to cut the slices as thin as you can manage.  That is why I like using a food processor.  It allows for a consistent thickness of all the slices and it also allows you to quickly slice a lot of apples.  If you have boxes of fruit to go through, speed is something that cannot be underrated.   You can also use a sharp knife to cut slices as thin as you can manage.  

Spread the slices out on a tray from your food dehydrator and follow your dehydrator instructions for the right setting.  If using your oven, place apple slices on a baking sheet lined with parchment paper.  Heat oven to 200 degrees and allow the apples to heat for 1.5 – 2 hours.  Or, for a little faster time, heat oven to 225 and cook apples for 45 minutes to 1 hour. 

Optional: Before baking or placing in the dehydrator, you can sprinkle the slices with cinnamon or another mixture of spices to give them extra flavor.  

Pumpkin spice mix is yummy:

  • 2 tbsp. ground cinnamon
  • 1 tbsp. ground ginger
  • 1 ½ tsp. ground nutmeg
  • 1 ½ tsp. ground cloves

Apple Pie Filling

apple pie lattice top

Photo by Dusty Toes at Pixabay

I don’t really have a recipe for apple pie filling.  I’m sure there are wonderful recipes around but my approach is to simply place as many sliced apples in a bowl as I plan to put in my pie, sprinkle with as much cinnamon as I think would be a good amount for a pie (a couple of teaspoons?), add a couple of teaspoons of sugar (have you noticed I don’t like adding much sugar to my apple products?), add a couple of tablespoons of flour, and then mix and place in pie crust.  

homemade apple pie

Photo by Snapwire Snaps at Pixabay

If I’m planning to preserve and bottle pie filling, I only add the cinnamon before packing and processing.  I save the sugar and flour to add later when I open the jars to use the apples.  That way I can use the apples for a variety of baked goods.  If I use them for apple crisp, I don’t add any sugar at all since the topping has enough sugar to make for a sweet dessert.

I love the fall for many reasons.  The cool weather, the falling leaves… and the delicious, fresh apples!  

Click BACK for how I make

APPLESAUCE and APPLE BUTTER

Western Gardens | Utah


Filed Under: Fruit, Gardening, Recipes Tagged With: apple chips, apple pie, apple pie filling, apples, dehydrated, dehydrated fruit

  • « Go to Previous Page
  • Go to page 1
  • Go to page 2
  • Go to page 3
  • Go to page 4
  • Go to page 5
  • Interim pages omitted …
  • Go to page 19
  • Go to Next Page »

Primary Sidebar

Shopping Cart

Items in Your Cart

Your cart is empty
Visit The Shop

Follow Western Gardens

  • Facebook
  • Instagram
  • Pinterest
  • YouTube

See what we’ve been pinning!

Follow Me on Pinterest
Followed by people.
?

Pinterest Badge by Skipser

Here’s What We’ve Been Up To!

Save water and money by Turf Training - train your lawn to grow deep roots
work at western gardens utah garden center
Senior gardening woman Edu Carvalho from Pexels
A Utah Guide to Vertical Gardening in square shape

Copyright © 2026. Western Gardens - Privacy Policy