• Skip to primary navigation
  • Skip to main content
  • Skip to primary sidebar

Western Garden Centers

for what grows here

  • Home
  • How To
  • Gift Cards
  • Calculate Mulch
  • Locations
    • Store Hours
    • About
    • Garden Shop Employment Team
  • Weddings
    • Salt Lake City, UT
    • West Valley, UT
  • Blog
    • Gardening
    • Recipes

Tips & How To's

How to cut Grape Tomatoes {Tip!}

June 17, 2014 by Becky

Today I have a great tip for you–how to cut grape tomatoes quickly and easily!  {Plus a to-die-for recipe that just happens to need grape tomato halves!}  With this simple method I can cut a dry pint of grape tomatoes in less than a minute!

Tomato Tip 9 main

…

Read More »

Filed Under: Recipes, Tips & How To's, Tomatoes, Vegetables Tagged With: how to's, recipe, tips, Tomato, vegan, vegetarian, veggies

How to Water Your Lawn

May 24, 2014 by Becky

Have you ever wondered how to water your lawn correctly?  Think you’re watering too much?  Not enough?  Not at the right time of day?  Or maybe you’ve never even thought about it!  We’ve put together some pointers for you to cut out the guessing and save you water and money this summer!  Because who doesn’t want to go green and save some green?!

how to water lawnClimate and soil and sprinklers are different everywhere you go.  When people ask us how long to water their lawn, it would be great to have a tidy, pat answer to give.  But because there is so much variation even within the same area, the answer usually starts with, “It depends.”  It depends on how well your soil drains, how much water your sprinklers put out, what time of day you water, and even how long your grass is!  Even though there isn’t a one-size-fits-all answer for everyone, it isn’t hard to determine how much water to give your grass.

How Much Water Does My Lawn Need? 
Lawns in the Salt Lake area need about 2 inches of water per week (not per watering).  An easy way to see how much water your lawn is getting in a watering cycle is to place some straight-sided containers around your lawn.  Empty tuna cans work great.  Check them after the watering cycle and measure how much water is in them.

How Often Should I Water My Lawn?
If your lawn is planted in loam or clay soil, it’s best to water twice a week with one inch applied at each watering.  Sandy and gravel soils won’t hold an inch of water in one watering, so they need to be watered a little more often (every other day works well with about 0.6″ applied each time).

When Should I water My Lawn?
Early Morning is the best time to water.  Watering in the evening or late at night is not a good time because the lawn remains wet overnight and is more susceptible to fungus,  and makes snails and slugs harder to control.  Never water during the heat of the day—most of that water will just evaporate.

What Else Can I do to Save Water?
Set your lawnmower height as high as you can stand it.  The longer the grass, the more shaded the soil will be, and the more moisture it will retain.  Shorter grass doesn’t shade the soil as well and the heat of the summer sun will evaporate all the moisture you just worked to get in there.

how to water your lawnFor more specific questions about your lawn or soil type, stop by one of our locations (Salt Lake, Sandy or West Valley) and talk to one of our helpful plant pros!

Follow us on Instagram for all the latest!

Filed Under: Tips & How To's, Yard Care Tagged With: grass, how to's, lawn, Lawn Care, tips, watering lawn

Raised Garden Beds

May 17, 2014 by Becky

Garden Box Collage Main

Raised garden beds have become very popular in recent years, and for good reason.  Growing more food in less space with less work sounds too good to be true, but it’s not!   If you are thinking about taking the plunge and building raised beds for your garden, we’ve included links to 12 different tutorials for raised beds.

Why Raised Beds?

Less Compacted Soil.  Roots (and worms!) need air space in the soil to grow, so if you’re stepping in your garden beds, you are compacting the soil and destroying that important air space!  For more information about compost and soil amending, see this blog post all about it.

Deeper Soil.  The deeper the roots can grow, the healthier your plants will be and the better your harvest.  It is often suggested to line  the bottom of your garden box with cardboard or black weed barrier cloth, but this will prevent your roots from growing as deep as they want.  Try it without and see how your garden grows!

Weed Control.  Your veggies will be further from the grass and weeds in your yard, but you will also be able to plant more densely…crowding out weeds that would otherwise grow.

Grow More in Less Space (with less work!)  Traditionally, our gardens have always had narrow rows for plants and wide rows for walkways.  There is no real reason to design your garden this way, except maybe because it’s how your grandparents gardened.  If you have wider rows for your plants, you can fit much more than if you were to plant single rows.  Utilize your space more efficiently and you can grow more in your garden than ever before!

Here is a great link to another good article about raised garden beds and on how to build a raised garden bed.

Check out these great tutorials for raised garden beds!

Garden Box Collage

 Rectangle Garden Boxes    |   Vinyl Garden Boxes

Garden Bed CollageU-Shaped Garden Box   |   Narrow Garden Box

Garden Box Collage 3Long Garden Boxes   |   Cinder Block Garden Box

Garden Box Collage 4Garden Box with Brick Border   |   Tall Garden Box

Raised Beds Collage 5Rolling Casters Patio Box   |   Painted Garden Box with Cage

Garden Box Collage 5Raised Garden Boxes   |   Vertical Pallet Planter

Let us know what kind of raised beds you have in your garden, or what you plan to try!

Happy Gardening!

Filed Under: Gardening, Outdoors, Tips & How To's Tagged With: Garden Boxes, Gardening, how to's, Raised Garden Beds, tips, veggies, Western Gardens

Companion Planting 101

May 10, 2014 by Becky

Companion planting can help your garden flourish in ways it never has before.  You can have healthier plants and a better harvest (and even control some garden pests!) by choosing with care which plants go together and which plants to keep apart.  Companion planting isn’t difficult once you have a few basics down.  This is, however, a very broad subject, so we’ll cover the basics here to get you started!  Through companion planting you can:

  • enhance the flavor of your harvest (plants like herbs can enhance the flavor of nearby plants)
  • increase your yield (some plants help others grow better)
  • improve nitrogen (some plants can make nitrogen available to other plants)
  • repel pests (the biochemicals of certain plants can repel insect and other pests)
  • attract good guys (beneficial insects are attracted to or like to inhabit certain plants)
  • divert pests (certain plants attract pests, which can keep them away from your garden)
Companion Plants

{The list looks small, just click on it to enlarge!}

companion plants
Other highly beneficial plants to consider for your garden:
  • catmint: deters ants
  • chamomile: helps keep nearby plants healthy
  • foxglove: lends strength and longer life to nearby plants
  • lavender: attracts bees and deters caterpillars, mice, ticks & rabbits
  • marigolds: deter pests
  • marjoram: repels insect pests, attracts bees
  • mint: repels insects pests, attracts beneficial insects
  • nettles: a weed, but it excretes nutrients into the soil and protects against aphids, black fly & mildew
  • pennyroyal: deters ants & burrowing insects
  • soybeans: nourishes and reconditions soil, and deters corn pests
  • tansy: repels pests
  • tarragon: beneficial to nearby plants
  • yarrow: good for veggies & herbs, attracts beneficial bugs

Bruschetta squareOne of our favorite combinations for the garden is one of our favorite combinations for the kitchen…tomatoes and basil!  Basil will add subtle flavor to tomatoes, makes it more disease resistant, and repel aphids, fruit flies & house flies, and it will attract bees!  If you missed last week’s recipe for
bruschetta, a simple but amazing combination of tomatoes and basil,  be sure to pin it so you can make it this summer!  We will keep bringing you weekly garden-fresh recipes to give some kitchen inspiration for all those delicious fruits and veggies!

Happy planting!

Filed Under: Flowers, Fruit, Gardening, Tips & How To's, Tomatoes, Vegetables Tagged With: flowers, Fruit, gardening, how to's, veggies

How to Plant a Flower Pot

May 3, 2014 by Becky

Flower pots are an easy, beautiful way to dress up your porch and yard.  They add a great pop of color and a lot of interest, and you can try something new without a commitment to your landscape.  We’ve put together a few tips to make your planters really stand out and look their best this Spring!

flower pots

Choose Your Pot

  • Pick something that will match its surroundings…or stand out and make a statement!

Prepare Your Pot

  • The first thing to add to your pot is a coffee filter.  This will let water drain through the hole, but keep all that potting soil where it belongs…in the pot!  This is especially helpful if your planters will be on a porch or patio, or other area you want to keep clean.
  • Add a couple of inches of small rocks over the coffee filter.  This will help your soil drain better, which will keep your plants healthier.
  • If your pot is large and you worry that it will be too heavy when filled, try placing a smaller pot inside your large pot and upside down over the layer of rocks.
  • Once your rocks (and smaller inverted pot, if necessary) are in place, add some potting soil.  Fill the pot about 2/3 full.  This way you can set each of the plants in the pot without digging individual holes…you will fill soil in between the plants once they are all in place.

Add some Drama!

  • The three types of plants for your pot are “Thrillers, Fillers & Spillers.”
  • When you remove the plants from their containers, gently tear the roots away from the soil so they will begin to grow into the soil, instead of circling  their root ball.
  • Thrillers add height and dimension.  Place in the center of your pot.  Grasses are a great choice for a center plant, anything from Purple Fountain Grass to Dracaena Spikes.
  • Fillers add rich color and interest.  Place around your “thriller” plant.  Choose your favorite flowers…the possibilities are endless!
  • Spillers add a special, dramatic touch as they begin to cascade over the side of your pot.  They stay beautiful all season long.  Sweet Potato Vines and Creeping Jenny are always popular!

flower pot 4

Make it Odd

  • Use odd numbers when you are adding plants to your pot.  One of those basic design principles…odd numbers are more pleasing to the eye.  Add them in 1’s, 3’s or 5’s.

Keep it Happy

  • Be sure to give your flowers pot the water they need, but don’t over-water!  Feel the soil…if it’s still nice and moist, don’t water.  If the soil is just barely moist, it’s time for water.  {A good rule of thumb is to stick to your finger in the soil about two inches to feel how moist it is.  Let the soil become just moist between waterings, but don’t let it dry out.}  Plants in full sun will need water more frequently than plants in full shade.  You will figure out quickly how often to water your pots, then just make it part of your gardening routine!

Check out our video, Mike will show you how to put it all together!

Flower pots are a gorgeous addition to any yard.  We would love to see yours!  Email your pictures to [email protected] for a chance to be featured on our Instagram account!  {Or use the hashtag #westerngardencenter}  Be sure to follow us @western_gardens if you aren’t already!

flower pot blog main

Filed Under: Flowers, Gardening, Tips & How To's Tagged With: dirt, flower pots, flowers, how to's

Edible Flowers

April 18, 2014 by Becky

Edible flowers are a fun addition to a summer salad, are gorgeous when candied, and make beverages more beautiful.  They are easy to use and add a special flare to your dish!

Edible Flowers

Some of the flowers on our list may surprise you.  You might already have them growing in your yard without even realizing the culinary excitement that awaits!  There are a few things to remember when cooking with flowers:

  • use flowers that are grown organically
  • make sure the flowers you want to eat are edible, as some flowers can make you sick
  • eat flowers in moderation, they can cause digestive or allergy problems if overusededible flower anatomy
  • if you know you are allergic to a certain plant, avoid eating its flower
  • eat the edible parts (usually just the petals) of edible flowers–remove pistils and stamens
  • Do not use non-edible flowers as a garnish, guests may reasonably assume that if a flower is in their food, they can eat it

 Top Ten Edible Flower Picks

Borage is an annual herb (also known as starflower).  Borage flowers are usually blue, but can also appear pink or white.  They have a faint cucumber taste and are well-suited to salads, beverages and desserts.

Chrysanthemums have a mild flavor.  Sprinkle the petals over a salad for a beautiful presentation.

Daylilies are slightly sweet with a mild vegetable flavor and work well for garnishes, desserts, or even deep frying!  Use only the orange daylily.

Lavender has a sweet floral flavor and lends itself well to both sweet and savory dishes.  Use it in desserts or stews, or simply use it as a beautiful garnish.

Nasturtiums are one of the most commonly used edible flowers.  They have a sweet, peppery flavor.  Beautiful as a garnish, in a salad, or even on an open-faced sandwich.

Pansies can be eaten whole (including violas and johnny-jump-ups).  They have a sweet flavor and are good for use in salads, drinks and desserts.

Dianthus has a clove-like flavor and adds lovely color to a salad.  Beautiful in an ice ring for a party, or freeze petals in individual ice cubes.

Roses are a staple in many yards, and perhaps soon in many kitchens!  All varieties are edible.  The flavor varies between types and colors, but they are generally fruity, with deep colors having a more pronounced flavor.  Great for salads, garnishes, beverages, and many other culinary uses.

Scented Geraniums are ideal in desserts, drinks, and even frozen in ice.  Flavor generally corresponds with variety.  The Citronelle variety may not be edible.

Squash is possibly the most surprising member of our list.  They can be eaten raw, sauteed in butter, or even deep fried!  This is a great way to prevent waste if your plants produce more than you (and all of your neighbors!) can use.

*Please note: this list is not exhaustive.  Many flowers are edible.  This list contains our ten favorites.  If you want to eat a flower that does not appear on this list, make sure to reference a reputable source to ensure its safety.  Some flowers can make you sick.

We are developing recipes for flowers and will begin posting when they are in season.  If you have a favorite flower recipe or idea that you would like to share, leave it in a comment!  We just might feature you in an upcoming post!

Filed Under: Flowers, Recipes, Tips & How To's Tagged With: flowers, gardening, green, recipe

Tips for Early Spring Gardening

April 11, 2014 by Becky

Haven’t started thinking about your garden yet for this year?  Still deciding if you should start your very first garden?  Looking for some inspiration?  Now is a great time to start, and we want to make it easier by giving you a few tips we’ve learned over the years.  Whether you are a beginner or a seasoned gardener, you should find something helpful!

Start Small

  • If you have never planted a garden before, start small so you don’t overwhelm yourself and give up.  Choose 3-5 of your favorite veggies or fruits.  If you have more favorites than that, choose the produce that is the most expensive to buy at the store or farmer’s market!

Make it Easy

  • If you are starting your garden from seed, you want to avoid regular soil, which can carry diseases that your tiny seedling won’t be able to combat well.  Use a seedling starter mix.  We like to add some water to the mix before pulling it out of the bag!  This way it stays evenly moist during the germination process.
  • Mike from our Sandy store demonstrated this on a great gardening segment for our local news channel.  You can see him adding the water here before they pull any potting mixture out of the bag.  We are working on getting a link to the actual video so we can show you his other great tips!

gardening news spot

Protect

  • If you want to get your veggies outside and into the ground right now, just be sure to protect them from frost.  A wall o’ water is a great way to protect individual plants, the wall of water surrounding the plant will insulate it from any cold nights that will hit.  The average last frost date in Utah is May 15th, so a good rule of thumb is to protect your tender plants until about Mother’s Day.
  • Ever tried to fill a wall o’ water?  It can be tricky!  Check out our quick video tip to see a fast & easy way to do it.  Subscribe to our YouTube channel for more great gardening tips!

Grow Boxes

  • If you are trying your hand at container gardening/grow boxes/raised beds, make sure they are the right size for you!  You should be able to reach into the middle with your hand…so when you are building them, measure with the span of your arm.  This is so when you are weeding, caring for your plants, and harvesting, you will be able to reach comfortably into the center of the bed.
  • If you are doing a vertical container garden, make your boxes a few inches smaller than this so you can reach the fruits & veggies that are growing up high.
  • Try to get 8-10 inches of soil in your grow box.  The roots of your plants will be happier if they can get this far down into the soil.

Compost

  • Add a 2-3 inch layer of compost to your garden beds, the nutrients will seep down into your soil, and weeds will be kept at bay.

Pace Yourself

  • Try to do a little gardening every day, rather than saving it all for the weekend.  Weekly gardening can seem overwhelming, but 15 minutes a day will keep the weeds down and spirits up!

There are as many good gardening ideas as there are gardeners.  If you have a great tip you want to share with us, please leave us a comment!  We might just feature you in an upcoming blog post!

Happy Planting!

FOLLOW US  on  Facebook  Instagram  Pinterest  Twitter  Google+  YouTube

Filed Under: Gardening, Outdoors, Tips & How To's, Vegetables, Yard Care Tagged With: gardening, how to's, in the news, tips, veggies

Tips For Picking Ripe Cantaloupe

September 27, 2012 by Becky


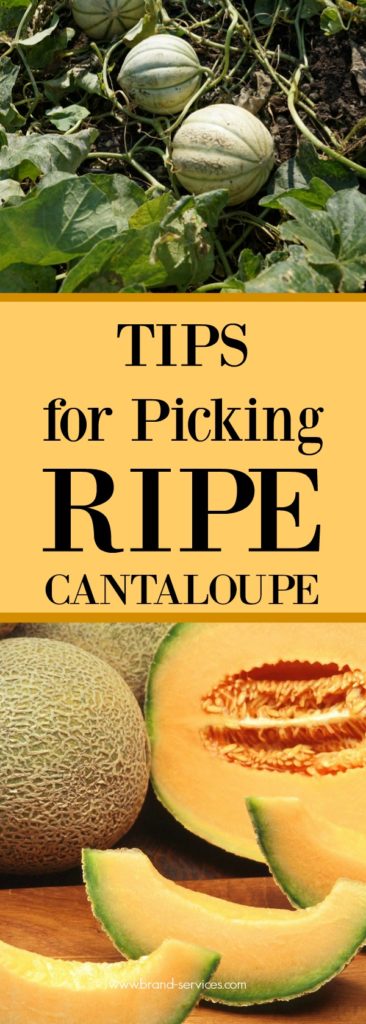
If you’re like me, you can use some tips for picking ripe cantaloupe, because it can be hard to tell when it’s ready to eat!

I used to think I didn’t like cantaloupe very much.  And I guess I didn’t really.  My problem was that I was eating bland, dry, flavorless cantaloupe that I bought on sale somewhere.  I learned my lesson and discovered how to choose or pick a cantaloupe that is ripe and ready to eat.  Now when I’m either picking fruit at the store or from my own garden, there are some simple tips to help you spend your money and time wisely.


Follow these simple tips to choose a melon that is ripe and ready to eat.

  1. LOOK – Cantaloupe should be a nice golden yellow color.  Don’t pick cantaloupe that are greenish.  They are not ready!  Don’t worry about rough spots that may be on the outside of your cantaloupe.  They don’t mean anything as to the ripeness.
  2. FEEL – You should be able to feel the edges of the outer skin.  A smooth skin means it is not ripe.  The flower end (the end not attached to the vine) is soft.  You should be able to press it gently in.  If it springs back out after pressing, your cantaloupe is ready.
  3. SMELL – Place that blossom end or the “button” of the cantaloupe just under your nose and take a whiff.  A strong sweet aroma indicates the cantaloupe is ready.  Sometimes you will smell the strong aroma without smelling the button.  If it doesn’t have a scent, don’t pick it or don’t buy it.  It is not sweet.

Now when I eat cantaloupe, it is like a little slice of heaven.  Fresh from my garden, picked right off the vine.  It is heavy, fragrant, so very juicy, and still warm from sitting in the sun in my happy little weed-filled corner of the world.  This is what makes me love to garden.  And what makes me love to eat!

Perfection!

Filed Under: Fruit, Gardening, Tips & How To's Tagged With: Cantaloupe, Fruit, Gardening, melon, ripe fruit, tips

Get the Kids Involved!

May 3, 2012 by Becky

We asked for ideas to involve kids in the garden, and had such a great list of thing to do that we had to share!  I’ll definitely be using some of these to get my kids excited about gardening.  Thanks to everyone who contributed!!

  • kids in the gardenBecky–I pay my kids a penny per rock to get all the little rocks that creep into our garden from our neighbors yard.  Sometimes I pay them a penny per dandelion head too!
  • Laurie–When my kids were little I paid them a penny per snail—solved our garden snail problem in a hurry!
  • Jami–We have a million pine cones in our yard, so I give each kid a grocery bag and tell them to see how many they get. The winner gets a treat…the winner always gets 3 treats so they can share with their brother and sister!!
  • Solducky–Going on bug hunts! A good chance to teach the difference between good bugs and pests in the garden too. And then I can squish the squash beetles or other pests.
  • Renee G–I used to have my boys make veggie pictures and then we stapled them to wooden popsicle sticks to label the rows in our garden.
  • Ruthann H–My four year old helps me by pointing out all the “nasty” weeds (goat head thorns) he also points out all the poop in the yard. Such a helper!!
  • Sarah B–I got a set of child-sized garden tools for my 4 year old and gave her her own little patch to work in. She chooses what to plant and gets to learn the ins & outs by working her “garden!”
  • Jenette–I let the kids pick what kind of garden they want to plant. My daughter did a pizza garden and my son did a ratatoulli garden. They each have their own grow box and take care of their garden from seed to harvest and preparation. They have so much fun doing it! They are very possesive of their gardens and make sure the weeds stay out and the plants get the water they need. Great way to teach responsibility and a self-sufficiency skill!
  • Kammi B–We give our kids plants and seeds as gifts, like at Easter time or for birthdays. They sometimes will get a little hand shovel or gloves to go with them. Each year they get a spot to plant their own garden items. Sometimes their spot requires a little bit of weeding so we make that a family activity. I have to remind them to water their plants every once in a while, but it’s so rewarding for them to see that they grew something all by themselves. Even more rewarding when they can eat what they grew! Also, in the summertime we have fun making an “only from our garden” dinner. We eat only what we pick from the garden. Gets us to go out and pick our veggies and fruit, and plan a meal together. My kids are much more interested in what we plant, and how we take care of our garden now.
  • Jane C--I remember as a kid getting paid at an aunt’s house a penny a weed. But my favorite thing was picking raspberries! It is always fun to know you are helping to grow something you can eat later!
  • Melissa–We have weeds that grow from bulbs in our garden. In order to get my little brother to dig out the bulbs as well as the plants, we have hidden arrowheads and other fun things in the dirt by the plants.
  • Paula–We got our kids interested in gardening by letting them pick seeds and plant them on the condition that they had to help water and weed. And they were excited to see their results. My daughter started by helping with planting a watermelon, she was 4 at the time.
  • Deanne–Our favorite Primary teacher Lani gave her little 3 year old class a lesson on water and what a gift it is from Heavenly Father. She gave the kids each their own watering can, I can’t tell you how many times our little grand-daughter is bringing it to me to help me water outside. When my girls were little each had their own row in the veggie garden, some wanted to plant veggies, but one liked flowers the best so she planted those. We would go on snail hunts and stick them in a big ziplock and leave in the sun to cook. The kids got a kick out of that.  They foam up, sick I know, but kids like that kind of stuff. Two out of the three are great gardners in their own homes now.
  • Katie–I have my boys see if they can get up to 100 weeds…we have a very weedy patch of gravel. The 7 year old easily made it and then decided he wanted to go to 1000! He got up to 475 in one day. My friend asked what they get for doing this. I said, “Um, the satisfaction of pulling 100 or 1000 weeds.” No prizes necessary, but I might copy the penny per rock idea for rocks that make their way out of a pathway into the lawn.
  • Tobi S--I worked in the front yard weeding, but this time I had my three little granddaughters help me. They picked up about 100 pinecones and made a bundle of money. After that, they got right into the dirt with me. I gave them a spade or fork and boy did they have a ball kicking up the dirt. At one point, Bella started to collect Rolly Pollys. A little later I asked her where the Rolly Pollys were and she opens her little sweaty hand and had about 20 poor little guys in her palm. I had her put them back into the dirt. I worked in the yard for over 2 hours and they never left me, sweet little darlings.
  • Eric F–While we were out working in the yard the other day our sweet 2 year old decided to make a beautiful bouquet of pretty yellow dandelion flowers. She is not quite old enough to really understand what is a weed and a planted flower so we are happy to let her wander around the yard gathering her “beautiful” dandelions while we do the dirty work.
  • Melissa W–Heres an idea: Give the kids a bucket or bag, whatever is easy to hold, and whoever can collect the most unwanted garden/yard items in 10 minutes gets a prize :)
  • Jeremy–Make a game of “HORSE” out of it, like the basket ball game. 1st kid does something, say like pick 10 weeds in 30 seconds. Kids after have to do that. If they don’t complete the task in the set amount of time, they earn a letter, and so on…..
  • Tisha–We split our family up and see who can fill their buckets full of weeks first. My girls LOVED that. I think they loved that we got rained on too. They keep asking to do it again and we shall, the weeds in my parking strip are fierce.
  • Megan–I have always thought that involving kids in the whole growing process is neat. Start by giving them a choice of plant/flower/veggie, etc. they want to plant, then that can be “their” plant to take care of, weed, water (with guidance), and see how it grows and develops. It gives the child purpose and responsibility.

Filed Under: Gardening, Outdoors, Tips & How To's, Yard Care

  • « Go to Previous Page
  • Go to page 1
  • Interim pages omitted …
  • Go to page 3
  • Go to page 4
  • Go to page 5

Primary Sidebar

Shopping Cart

Items in Your Cart

Your cart is empty
Visit The Shop

Follow Western Gardens

  • Facebook
  • Instagram
  • Pinterest
  • YouTube

See what we’ve been pinning!

Follow Me on Pinterest
Followed by people.
?

Pinterest Badge by Skipser

Here’s What We’ve Been Up To!

Save water and money by Turf Training - train your lawn to grow deep roots
work at western gardens utah garden center
Senior gardening woman Edu Carvalho from Pexels
A Utah Guide to Vertical Gardening in square shape

Copyright © 2026. Western Gardens - Privacy Policy