• Skip to primary navigation
  • Skip to main content
  • Skip to primary sidebar

Western Garden Centers

for what grows here

  • Home
  • How To
  • Gift Cards
  • Calculate Mulch
  • Locations
    • Store Hours
    • About
    • Garden Shop Employment Team
  • Weddings
    • Salt Lake City, UT
    • West Valley, UT
  • Blog
    • Gardening
    • Recipes

Yard Care

How To Reseed Bare Patches in a Lawn

May 21, 2016 by Heather Leister

Welcome, thanks for stopping by!

Do you have bare patches in your lawn? Check out these easy steps for reseeding your grass!

landscape grass

Have you ever had bare patches in your lawn that you weren’t quite sure what to do with?  I’m here to help!  I’ve put together a list of easy instructions to help get your lawn back in shape.

I’ve decided that lawns, like people, have unique personalities. I’ve had lawns that were resilient, with turf that endured kids and a dog, yet still came back lush and full each spring.

Our current lawn is the exact opposite. It’s moody, and reactive, affected by the slightest change in the environment. We’ve reseeded every year, but our lawn is stubborn and resistant, always leaving just enough bare patches that we must repeat the practice the following year.

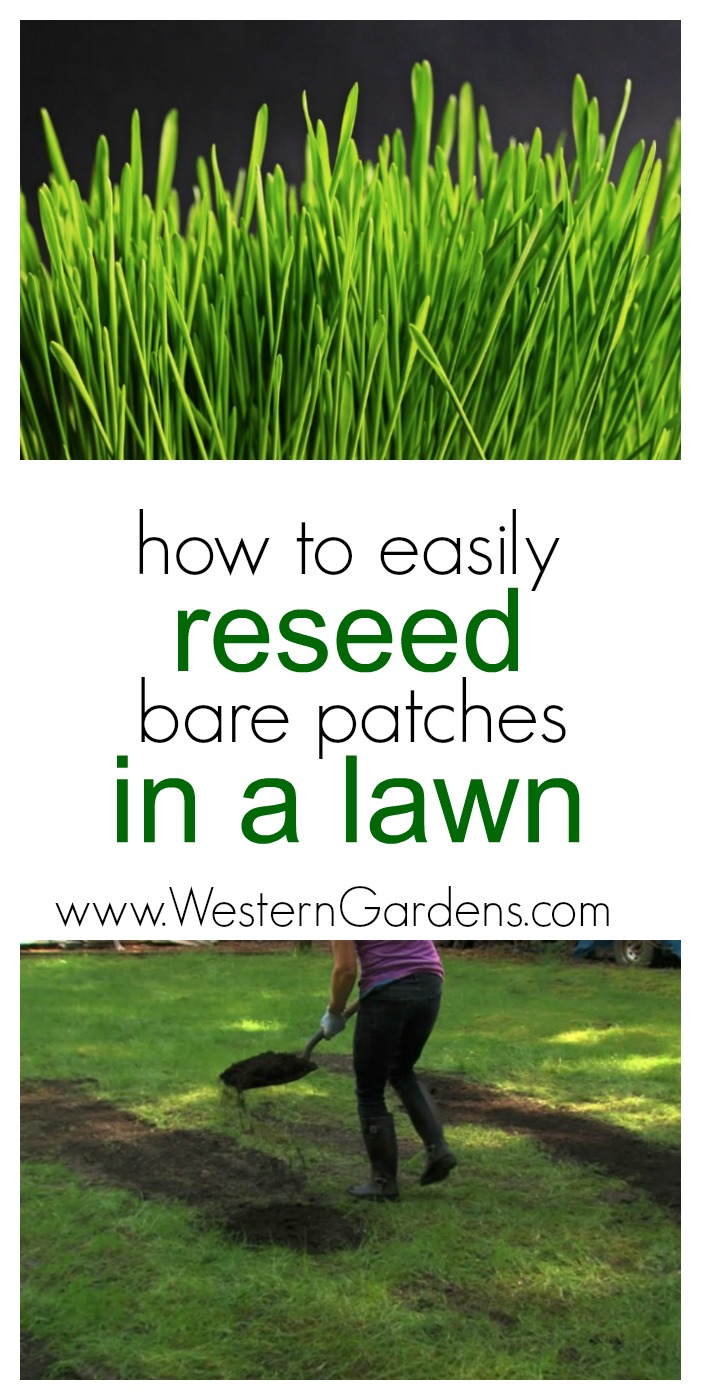
If you’re dealing with a stubborn, angsty lawn with bare patches, I’ve put together my best tips for reseeding it!

lawn topsoil

How To Reseed Bare Patches In A Lawn:

  • The best time to reseed and repair bare spots in the lawn is in the spring, when the ground temperature is approximately 52 degrees.
  • Before you lay down any seeds, make sure that fungi, grubs, or other pests aren’t the cause of your bare patches. If they are, then address those problems first.
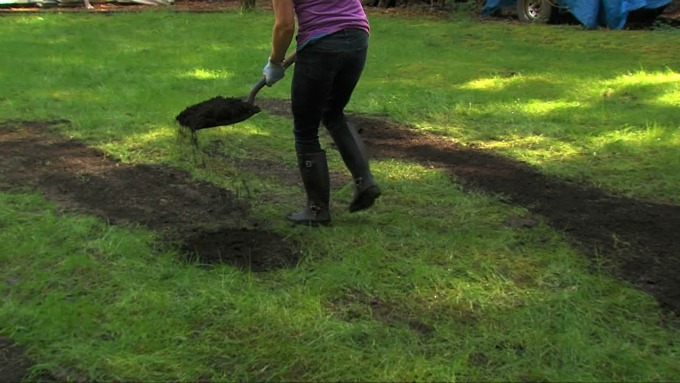
  • After determining that the area is free from pests, use a spade to dig approximately 6” into the dirt where you you want to seed. Break up the soil and dirt clumps.
  • Mix a quality topsoil into the area. This will improve the soil quality and give the seeds a healthy head start.
  • Rake the soil and dirt together, then tamp it down so that the repair area is level with the rest of the lawn.
  • Apply your grass seed in a thin layer over the area. Seed may be applied on its own, or in combination with a fertilizer (do NOT use a pre-emergent fertilizer, it will prevent your seeds from germinating). You may also consider a lawn patch product that combines seed, fertilizer, and mulch in one.
  • If you apply seed on its own, cover it with mulch to retain moisture and protect it from birds. Straw is an excellent, inexpensive choice.
  • Water the area well.
  • Continue to water the area regularly, once or twice daily. You will want to keep the area moist, but not drenched.
  • After the new grass is well established, apply fertilizer.  When grass is approximately ⅓ higher than your normal mowing height, include the area in your lawn mowing routine.
  • Monitor the area for the rest of the season to ensure no further problems.lawn care

Have you ever had to reseed bare patches in your lawn?  Tell us about it in the comments below!

bare-feet-in-the-grass

Images:
Barefeet in Grass: Public Domain Pictures
Lawnmower & Grass: Pixabay
Topsoil on Grass: YouTube

Filed Under: How To, Yard Care Tagged With: lawn, Reseeding, Yard Care

10 Deer-Resistant Plants

April 27, 2016 by Heather Leister

Welcome, I’m so glad you stopped by!

Are deer eating everything you plant? Try these 10 deer-resistant plants, your landscape will thank you!

Do you have frequent visitors to your yard?  Visitors that may not be very welcome…because they’re eating your landscape?!  Oh, deer!  If you get these visitors like we do, we are here to help!  We’re sharing 10 beautiful plants you can add to your flower beds and containers, that deer will leave for you instead of taking for a snack.

Several years ago we moved to a new area with a well-known urban deer population. The city’s deer herd was notorious for visiting yards and sampling the local landscaping. In the beginning, being in the midst of the deer was a treat. We had never lived in an area with this much access to wildlife.

The novelty quickly wore off as our plants began to vanish.

Plants that had thrived for years in our old yard were no match for the deer’s appetites. It became clear that we had to adapt our landscaping or our yard would continue to serve as a 24-hour deer buffet.

Through research, trial and error, we found deer-resistant plants that grow in our area. There are still a few deer delicacies planted in the yard (I just can’t give up my hostas!) but for the most part we’ve been successful in keeping them away.

When looking for a deer-resistant plant, a good rule of thumb is to choose something fragrant, prickly, or poisonous to the deer. The deer won’t always obey this rule, especially if they’re hungry and food is scarce, but this is a good place to start. Here are 10 deer-resistant plants that thrive in a variety of environments.

10 Deer-Resistant Plants

FRAGRANT PLANTS

1. Lavender

Are deer eating everything you plant? Try these 10 plants that are deer-resistant, your landscape will thank you!

Lavender is always an excellent choice for a deer resistant plant. This hardy, fragrant perennial requires little water and maintenance.

2. Salvia

Are deer eating everything you plant? Try these 10 plants that are deer-resistant, your landscape will thank you!

Salvia is another perennial that produces a strong fragrance which deer find extremely unpleasant. The plant comes in a wide variety of colors and is a strong perennial that will be easy to care for year after year.

3. Yarrow

Are deer eating everything you plant? Try these 10 plants that are deer-resistant, your landscape will thank you!

Yarrow plants are not overly picky about soil requirements, making them an excellent choice for many people. Bright, colorful flowers bloom throughout the summer, but the deer won’t be tempted to snack thanks to the strong aroma produced by the yarrow leaves.

4. Butterfly Bush

Are deer eating everything you plant? Try these 10 plants that are deer-resistant, your landscape will thank you!

 Another fragrant, drought-resistant perennial, Butterfly Bush is an excellent choice if you are looking for a flowery, deer resistant shrub. It grows quickly, produces a large amount of blooms, and does well in almost any type of soil.

Click NEXT to see which beautiful prickly plants will keep deer away! Western Garden Centers | Salt Lake City | Sandy | West Valley UTAH

Salvia image courtesy of Rawich at FreeDigitalPhotos.net
Lavender and Yarrow images courtesy of wikimedia commons
Butterfly Bush image courtesy of staticflickr

Pages: Page 1 Page 2 Page 3

Filed Under: Flowers, Gardening, Outdoors, Perennials, Tips & How To's, Yard Care Tagged With: flowers, Gardening, how to's, tips, Western Garden Centers

Compost and Amending Soil

February 23, 2016 by Becky

Compost | Amending Soil | Why you should STOP tilling your garden!  www.westerngardens.comCompost | Amending Soil | Why you should STOP tilling your garden!

Compost and amending soil can seem tricky and intimidating if you’re not sure where to start.  It’s actually a simple process that will give you great results in your garden and better nutrition in your harvest.  We’re breaking it down for you and explaining why we recommend {or don’t recommend!} different products and processes.  Let’s get started!

compost and soil ammendments | gardening | how toAmending Soil–What is it, Why and How Often?

Amending soil means adding organic matter to your garden in order to give back the nutrition your fruits & veggies took from it last year to grow your healthy, beautiful plants.  Without soil amendments, your garden could be deficient in different nutrients necessary to grow healthy plants and yield a strong harvest.  You should amend your soil every year by placing a 2-3″ layer of compost over your garden beds.

Why Compost?

Also called Gardener’s Gold or  Black Gold, compost is both partially decomposed organic matter {mostly plants and the manure of plant-eating animals} and the microbes that do the decomposing.  Because it is made up primarily of plant matter, compost contains the right proportion of the elements needed for plant growth.  Compost does many things for your soil, including:

  • Provides Nutrition  It’s the source of all basic nutrition for plants.
  • Improves Soil Structure  It separates soil particles and creates aeration, and nurtures the organisms that build and maintain it.
  • Increases the Ability of Soil to Retain Water Compost can hold up to 6 times its weight in water.
  • Contributes to the Health of Plants  May help prevent some diseases and promotes plant growth.
  • Moderates Soil pH  Most compost is already the ideal pH for optimal plant growth, and will help moderate the pH level in the soil.
  • Feeds Soil Organisms  Compost is the food source for many, many organisms whose activities greatly improve soil structure, increase aeration and water retention, and make it easier for plant roots to grow.  Compost feeds not only worms, but also soil bacteria and fungi, protozoa, nematodes, and more.  (The Vegetable Gardener’s  Bible, 142)

compost and soil ammendments | gardening | how to

Bumper Crop

Bumper Crop Organic Soil AmendmentNot everyone can compost because of space, time, location, or other reasons.  You can still amend your soil even if you don’t save your kitchen scraps and lawn clippings!  Our favorite soil amendment is Bumper Crop, a compost with an organic fertilizer, mycorrhizae (a beneficial bacteria that supports stronger root systems), worm castings (lots of plant-ready nutrients), and kelp meal (filled with micro-nutrients).  This is what we use in our own gardens, and recommend to our customers.

Click NEXT to find out why you might NOT want to till your garden!

Next Button


Images courtesy of winnod and posterize at FreeDigitalPhotos.net

Pages: Page 1 Page 2

Filed Under: Gardening, Tips & How To's, Yard Care Tagged With: compost, dirt, flowers, gardening, how to's, soil, tilling, veggies, Western Gardens

How to Plant a Spring Flower Bed

April 1, 2015 by Becky

Planting a Spring flower bed may seem like a daunting task if you’re new to gardening, but we have 10 easy tips and tricks to help you create a beautiful, inviting  space in your yard.

Planting Spring Flowers1 -Lay Out Your Plants Before You Buy.  Today’s planting actually started out on the floor in the nursery of Western Gardens.  I laid out all of my plants on a cement square to help me decide how much I needed for the space to be planted.  Once I had what I needed, it was easy to load up and head to the flower bed!

Planting Spring Flowers2- Clean Up Your Flower Beds.  I always start every planting by cleaning up what’s already there.  It seems simple, but it makes a big impact to just clear away old debris. 3- Add 2 Inches of Compost Over Top of the Flower Bed.  No need to work it into the soil, the nutrients will work their way down to your plants’ roots.  We could almost just stop here, at this point the bed already looks so much fresher and cleaner!  The fun part is next though, so let’s get planting!

Planting Spring Flowers4- Use an Auger to Plant Bulbs.  One of my favorite tools is a bulb planting auger.  It’s an attachment that fits a standard-size drill, and it makes planting bulbs SO easy and fast!  {You can pick one up at your nearest Western Gardens.}  Just drill down about 6 inches, drop your bulbs in, and fill back in with soil!  Bulb planting at its finest.  And simplest.

Planting Spring Flowers5- Add Unique Plants like Veggies!  I am always looking for ways to plant veggies in a landscape, so I took some along.  Lettuce for some extra green, and some sugar snap peas to put on the trellis.  It’s a great addition because it’s unique and beautiful, and who doesn’t want a sugar snap pea on their way out the door?

Planting Spring Flowers6- Incorporate Unique Elements that you might not always see in a flower bed.  I found a trellis at Western Garden Center that went perfectly with the yellow front door and bistro table on the patio.  Always try to find cool things to throw in a landscape, but never force it.  If it doesn’t go with the flow, don’t try to make it work.

Planting Spring Flowers7- Adjust Flowers Prior To Digging.  Before I dig any holes for my flowers, I lay them all out in the bed still in their containers.  This is the time to make changes and play around with design.  One important tip I always give is, take 10 steps back, take a deep breath, and look at what you are about to do.  Adjust now before it’s too late!

Planting Spring FlowersIf everything looks perfect, take your hand shovel, and dig into that bed!  All the hard work is over now, so it is time to get everything into the ground.  8- Before the flowers go in the ground, gently tear part of the plants’ root systems…it will encourage the roots to grow into the surrounding soil instead of circling itself (like it’s been doing in the container).  9- Once all your flowers are planted, quickly give it a drink of water.  If you’re planting when it’s hot outside, there’s a good chance those plants are in shock.  Watering them right away will help them get established in their new home.

Planting Spring Flowers10- Don’t Be Afraid To Try Something New!  We can’t wait to see those Sugar Snap Peas on that trellis!  Now grab a lemonade,  pull up a chair and enjoy your beautiful new flowers… and enjoy a sugar snap pea for me!

Planting Spring FlowersPlants in this post’s flower bed include:   Sugar Snap Peas, Lettuce, Pansies, Prim Rose, Ornamental Cabbage, Ranunculus

{We are often asked what kind of compost we use in our own gardens.  We recommend Bumper Crop all natural organic soil builder.  It’s great for veggie gardens, flower beds, planter boxes, and pretty much anywhere else you want to put it!}Planting Spring Flowers

Filed Under: Flowers, Gardening, Outdoors, Tips & How To's, Yard Care Tagged With: flowers, garden tools, gardening, how to's, tips, Western Garden Centers, Western Gardens

Deadhead Flowers

June 21, 2014 by Becky

You want your garden to always look it’s best, so don’t forget to deadhead your flowers when the blooms are spent!  It’s easy, quick, and gives your plants a fresh look.  It will also encourage more blooms on your flowers, so you get more bang for your planting buck.

deadhead flowers Collage main

Why Deadhead?

Plants want to ensure the survival of their species, so they produce seeds to grow the next generation.  Flowers produce blooms, which will typically develop seeds.  Once the plant has gone to seed, it will stop producing blooms because it has already done its job…it doesn’t need any more flowers.  To get your flowers to keep producing beautiful blooms, remove the dead ones so they can’t produce seeds, and it will continue flowering in an effort to get those seeds! {THIS BEING SAID HOWEVER, most flower plants that are sold in stores are hybrids.  They are bred by growers to develop different traits like color and hardiness.  These flowers generally DO NOT produce seeds that should be replanted.  Do not save seeds from hybrids, they will not produce a plant that is the same as the parent plant.  Check with your local garden center if you aren’t sure about your particular plants.}

How Often?

How often you deadhead really depends on the size of your garden and how much you are in it.  A small garden can go a couple of weeks in between deadheading, while some gardeners deadhead every day.  You will quickly figure out how often you need and want to deadhead as you spend time in your garden.

How do I Deadhead a Flower?

It’s easy to deadhead flowers!  You can pinch off the expired bloom between your thumb and forefinger, or go down to the first leaf below the flower and pinch it off there to hide the cut stem.  If you don’t want to use your fingers, or the stem is too tough, use garden shears or even scissors for a nice, clean cut.

deadhead flowers Collage

My 7 year old wanted to paint my nails sparkly green. Not sure if it’s coincidence or fate that I have a green thumb in these pictures!

As you deadhead flowers in your garden, you will notice more blooms and get more mileage out of your beautiful flowers.  It only takes a few minutes to clear the dead flower heads away, but it will give you (and everyone else who sees your garden) more enjoyment as you spend time in your lovely space.

Happy Gardening!

Filed Under: Flowers, Gardening, Tips & How To's, Yard Care Tagged With: deadhead, flowers, gardening, how to's, tips

How to Water Your Lawn

May 24, 2014 by Becky

Have you ever wondered how to water your lawn correctly?  Think you’re watering too much?  Not enough?  Not at the right time of day?  Or maybe you’ve never even thought about it!  We’ve put together some pointers for you to cut out the guessing and save you water and money this summer!  Because who doesn’t want to go green and save some green?!

how to water lawnClimate and soil and sprinklers are different everywhere you go.  When people ask us how long to water their lawn, it would be great to have a tidy, pat answer to give.  But because there is so much variation even within the same area, the answer usually starts with, “It depends.”  It depends on how well your soil drains, how much water your sprinklers put out, what time of day you water, and even how long your grass is!  Even though there isn’t a one-size-fits-all answer for everyone, it isn’t hard to determine how much water to give your grass.

How Much Water Does My Lawn Need? 
Lawns in the Salt Lake area need about 2 inches of water per week (not per watering).  An easy way to see how much water your lawn is getting in a watering cycle is to place some straight-sided containers around your lawn.  Empty tuna cans work great.  Check them after the watering cycle and measure how much water is in them.

How Often Should I Water My Lawn?
If your lawn is planted in loam or clay soil, it’s best to water twice a week with one inch applied at each watering.  Sandy and gravel soils won’t hold an inch of water in one watering, so they need to be watered a little more often (every other day works well with about 0.6″ applied each time).

When Should I water My Lawn?
Early Morning is the best time to water.  Watering in the evening or late at night is not a good time because the lawn remains wet overnight and is more susceptible to fungus,  and makes snails and slugs harder to control.  Never water during the heat of the day—most of that water will just evaporate.

What Else Can I do to Save Water?
Set your lawnmower height as high as you can stand it.  The longer the grass, the more shaded the soil will be, and the more moisture it will retain.  Shorter grass doesn’t shade the soil as well and the heat of the summer sun will evaporate all the moisture you just worked to get in there.

how to water your lawnFor more specific questions about your lawn or soil type, stop by one of our locations (Salt Lake, Sandy or West Valley) and talk to one of our helpful plant pros!

Follow us on Instagram for all the latest!

Filed Under: Tips & How To's, Yard Care Tagged With: grass, how to's, lawn, Lawn Care, tips, watering lawn

Tips for Early Spring Gardening

April 11, 2014 by Becky

Haven’t started thinking about your garden yet for this year?  Still deciding if you should start your very first garden?  Looking for some inspiration?  Now is a great time to start, and we want to make it easier by giving you a few tips we’ve learned over the years.  Whether you are a beginner or a seasoned gardener, you should find something helpful!

Start Small

  • If you have never planted a garden before, start small so you don’t overwhelm yourself and give up.  Choose 3-5 of your favorite veggies or fruits.  If you have more favorites than that, choose the produce that is the most expensive to buy at the store or farmer’s market!

Make it Easy

  • If you are starting your garden from seed, you want to avoid regular soil, which can carry diseases that your tiny seedling won’t be able to combat well.  Use a seedling starter mix.  We like to add some water to the mix before pulling it out of the bag!  This way it stays evenly moist during the germination process.
  • Mike from our Sandy store demonstrated this on a great gardening segment for our local news channel.  You can see him adding the water here before they pull any potting mixture out of the bag.  We are working on getting a link to the actual video so we can show you his other great tips!

gardening news spot

Protect

  • If you want to get your veggies outside and into the ground right now, just be sure to protect them from frost.  A wall o’ water is a great way to protect individual plants, the wall of water surrounding the plant will insulate it from any cold nights that will hit.  The average last frost date in Utah is May 15th, so a good rule of thumb is to protect your tender plants until about Mother’s Day.
  • Ever tried to fill a wall o’ water?  It can be tricky!  Check out our quick video tip to see a fast & easy way to do it.  Subscribe to our YouTube channel for more great gardening tips!

Grow Boxes

  • If you are trying your hand at container gardening/grow boxes/raised beds, make sure they are the right size for you!  You should be able to reach into the middle with your hand…so when you are building them, measure with the span of your arm.  This is so when you are weeding, caring for your plants, and harvesting, you will be able to reach comfortably into the center of the bed.
  • If you are doing a vertical container garden, make your boxes a few inches smaller than this so you can reach the fruits & veggies that are growing up high.
  • Try to get 8-10 inches of soil in your grow box.  The roots of your plants will be happier if they can get this far down into the soil.

Compost

  • Add a 2-3 inch layer of compost to your garden beds, the nutrients will seep down into your soil, and weeds will be kept at bay.

Pace Yourself

  • Try to do a little gardening every day, rather than saving it all for the weekend.  Weekly gardening can seem overwhelming, but 15 minutes a day will keep the weeds down and spirits up!

There are as many good gardening ideas as there are gardeners.  If you have a great tip you want to share with us, please leave us a comment!  We might just feature you in an upcoming blog post!

Happy Planting!

FOLLOW US  on  Facebook  Instagram  Pinterest  Twitter  Google+  YouTube

Filed Under: Gardening, Outdoors, Tips & How To's, Vegetables, Yard Care Tagged With: gardening, how to's, in the news, tips, veggies

Priming Your Utah Garden Rake!

September 7, 2013 by Becky

Necessity is the mother of invention!  I believe it!  Check out this fun idea of how to utilize your garden rake while you are waiting for the leaves to fall!  We suggest a leaf rake without painted tines.  Of course, you will want to begin with a clean sterilized rake; you know how to do that.  Gather your ingredients.  Get your fire-pit going with just the right coals.  Now you are ready to assemble, roast, and enjoy your s’mores.  Follow the photo – a picture is worth a 1000 words!

Call your local Western Gardens store to check on current stock of these rakes; these are a most popular garden tool, now for several purposes!  Happy s’moriing while you wait for the raking to begin!

Fall store hours – 10am-6pm


Leaf Rake Smores

Filed Under: Gardening, Recipes, Uncategorized, Yard Care Tagged With: garden rakes, garden tools, s'mores, Utah Garden rake, Western Gardens

Utah Garden Centers – Planting Trees in the Right Spot

June 11, 2013 by Becky

Planting trees is a long term investment.   Initially, it costs you time and money and then years of watering and tending.  Your tree can become priceless to you and so worth your time and effort.  However, don’t let your investment go to waste by planting your favorite trees in the wrong spot.  You’ll end up ripping out your tree, fixing house and sidewalk problems, or experience a ghastly sight if the power company has to come and trim your branches away from the power lines.  Avoid these potential problems by planning ahead.  Even if you start a one-gallon sized tree, following these simple guidelines before you dig your hole, will save you time and money and heartache in the future.  Planting trees in the right spot is very important!

The most important overriding rule is know the final/adult size and shape of your tree.  All little babies grow up, even cute little baby saplings.  Good independent garden centers in Utah, like Western Garden Centers, will provide excellent quality material and you’ll have the information you need for these guidelines.

#1 Plan where you plant your tree in relation to your house or buildings.  We have a friend who moved into a neighboring house.  The previous owners liked a little blue spruce and wanted to frame their home with it.  Well, they actually did frame it, about 2 feet away from the home.  They didn’t plan ahead for a potentially 40 foot blue spruce to be so close to the home.  In a few more years, even the trunk itself could be up again the rain-gutter.  Eventually, the new owners will have to take out the tree to save on expensive eave and roof repairs.    Misplaced trees can also have their roots damage your home’s foundation, sidewalk, and driveway.  Know your tree’s potential, above ground and below! 

#2 – Do not plant under power lines if your tree will become too tall or big!  If your tree looses a branch and cuts the electricity during a Utah heavy snow storm, then remember that all your neighbors will be ticked off as they rush to save the food in their freezers and hope that their computers didn’t fry on the disruption.  Know that eventually, the power company does have the right to keep clear any branches of residence and business’ trees.  It’s part of living in a community!  They will come and clear away any and all branches within a certain amount of feet from the lines.  Plus, anything directly above the lines have to be pruned also.  Your trees won’t get the tender loving care of a good arborist, the power company will cut away like a marine hair cut!   Know your tree and be responsible!

#3 – Don’t plant too many “baby” trees together just because you like the look of a lot of material.  Again, eventually you’ll be ripping out your good money.  They will grow and crowd each other, also causing disease and basic illness of some of your trees.   Know your tree and don’t overplant!

Last week I went driving within a 4 mile radius of our home and took photos of trees that were not well thought out before they were planted.   Carefully examine and don’t become a victim of this common error.  Know your Tree!

Filed Under: Gardening, Yard Care Tagged With: garden centers in Utah, Independent garden centers in Utah, plant under power lines, Planting trees, Planting trees in the right spot, Western Garden Centers, Western Gardens, where to plant trees

Flower Pots

May 12, 2012 by Becky

Flower pots are a big commitment for someone like me. Throw them together in April or May, and then my neighbors and I have to look at them until September or October.  That’s a long time…and that’s slightly terrifying to a person like me. What if they’re ugly? What if I hate how they turn out? Ugh. My solution used to be to opt out and make my poor, tired husband do it. I kinda did that…for years. I water, dead-head, and make sure they don’t die, but for a long time I just couldn’t handle the pressure of creating something that needed to be beautiful.

Well, I finally got brave a few years back, and now I plant the flowers!  This is a big deal.  I usually stick to the same basic flowers every year, but I always try something new that I haven’t seen before.  Like I said, brave!

So this is one of those things that I show ONLY to illustrate that I am still learning how to garden (and manage my time with 4 busy kids).  Since our last baby came in the Fall, all I had the time/energy/mental capacity to do was stick my pots in the garage.  They had been sitting under a honey locust tree, so they were full of leaves.  Not so beautiful.  {The upside down bottles are my plant nannies.  I love them!  You attach the long plastic cap to an old water bottle, fill it with water, and then stick it in the terra cotta spike (which you sink into the soil in your pot).  The terra cotta (which stays moist from the bottle of water) keeps the soil moist, which keeps my plants a lot prettier on hot summer days.  Moist soil also absorbs water better than dry soil, so it’s easier to water them.}

This is what the terra cotta looks like

This is my house plant nanny.  Just push the terra cotta down into the soil, and you’re in business!

Back to flower pots…this is what I went home with to make my porch more beautiful!  I also ended up with some veggies for my garden.  I couldn’t resist!

I always like to do a pot with orange and blue flowers.  Probably my favorite flower combination.  Ever.

And then I did a pink pot for Princess Sassy Pants because she helped me pick out flowers and pink is her favorite color!

I tried a yellow and white combo this year.

Osteospermum is probably my all-time favorite flower to put in my pots!!

So here are my before and afters!  This doesn’t look like a big deal, but I’m excessively proud of myself.  Just like every year.  And if you knock on my door, I will probably make you tell me how lovely my pots are.  It’s amazing how much they really do add to a space.  I’m not cutesie and with-it enough to put out fun decor for every holiday, so my porch looks kind of bleak and barren in the winter.  I love Spring!


Filed Under: Yard Care

  • « Go to Previous Page
  • Go to page 1
  • Go to page 2
  • Go to page 3
  • Go to Next Page »

Primary Sidebar

Shopping Cart

Items in Your Cart

Your cart is empty
Visit The Shop

Follow Western Gardens

  • Facebook
  • Instagram
  • Pinterest
  • YouTube

See what we’ve been pinning!

Follow Me on Pinterest
Followed by people.
?

Pinterest Badge by Skipser

Here’s What We’ve Been Up To!

Save water and money by Turf Training - train your lawn to grow deep roots
work at western gardens utah garden center
Senior gardening woman Edu Carvalho from Pexels
A Utah Guide to Vertical Gardening in square shape

Copyright © 2026. Western Gardens - Privacy Policy