• Skip to primary navigation
  • Skip to main content
  • Skip to primary sidebar

Western Garden Centers

for what grows here

  • Home
  • How To
  • Gift Cards
  • Calculate Mulch
  • Locations
    • Store Hours
    • About
    • Garden Shop Employment Team
  • Weddings
    • Salt Lake City, UT
    • West Valley, UT
  • Blog
    • Gardening
    • Recipes

Gardening

Phone Email Orders with Curbside Pickup Only

April 2, 2020 by Wendy Pettit

utah garden center does curbside pickup during covid-19 crisisDue to Covid-19, we are now temporarily taking Phone and Email Orders with Curbside Pickup ONLY.  The health of our employees and you, our loyal customers, is very important to us, hence our decision. 

If you already know what you want to order, give us a call during regular business hours 10-6pm Mon-Sat. 

SL store: 801-792-3161 or 801-364-7871.  WV store: 801-968-4711. 

If you can’t get through, please leave a message or call again.  Know that we are busy inside the store fulfilling orders as fast as we can.  We really appreciate your patience. 

Order requests can be submitted ONLINE by emailing the addresses below.  Please include your name and phone number.  We will contact you to confirm your requests.  We will get back to you within 24 hours.

Salt Lake Store:  [email protected]

West Valley Store: [email protected]

Our most popular April product lists can be found below:  

April 2nd Product List – PAGE 1   CLICK HERE (Double-click on the thumbnail that will appear.)     

April 2nd Product List – PAGE 2  CLICK HERE   (Double-click on the thumbnail that will appear.)

No Garden Consulting available at this time.

Deliveries: minimum $60 – drop-off only at the garage door.

Please know that as your local small business independent garden center, we really appreciate your business and your support during this very troubling time. We hope to serve you the best we can during this challenge and throughout this growing season.  We will open our doors to walk-ins as soon as we are able.

Here are some photos for INSPIRATION or browse our blog posts.  Get out of the house, to our parking lot, then to your yard!

Eat peas straight out of the garden

plant seeds and trays are easy to get with curbside pickup

phone order your utah pansies today for curbside pickup

covid-19 gives planting ideas to salt lake gardeners

seeds are in for cold crop planting now or summer crops later

utah garden landscape idea

Image credit Pixabay


phone order what you need, pick up at garden center, get out in the garden

Photo Credit via Pixabay by AKA Ralph

easy to phone order grass seed and pickup at the curb at utah western gardens

Photo Credit: WensLens

western garden centers have the best roses in the valley

utah grown tomatoes vine ripened in your garden

Photo Credit: Pixabay

perennials along the sidewalk

peas for utah spring garden

zucchini plants make all kinds of delicious dishes. phone order with curbside pickup

western gardens has a wide variety of succulents

plan your vegetable garden now for a great harvest later

Mother's Day Flower Pots are the perfect gift for all the mothers in your life! A sweet and simple gift to bring a pop of color to her home and a smile to her face.


Filed Under: Covid-19 updates, Gardening, Utah Gardening, Veggie Gardening

Coronavirus-19 Statement from Western Gardens

March 28, 2020 by Wendy Pettit

Due to an uptick of new coronavirus cases sweeping the nation, many states have issued stay-at-home orders, along with temporary shutdowns for non-essential businesses. Green industry businesses, however, have been deemed as “essential” and remain open in every state, if they follow state and federal guidelines on sanitation and social distancing. Western Garden Center is entirely in support of sensible steps public health officials may deem necessary to combat COVID-19.

Americans are resilient and resourceful. Faced with adversity, the opportunity to produce our food and manage any shortages, we join millions of Americans engaged in food production at home, and more are sure to follow as the COVID-19 crisis unfolds.

With thousands of garden retailers serving communities across North America, Western Garden Centers provides much-needed services. Whether helping you produce home-grown fruits and vegetables, as Americans did during WWII as Victory Gardens, as a mental and physical health relief. or providing wholesome activities for children. We offer products and support that individuals and communities can utilize during these stressful times.

Many of the products carried by Western Garden Center are agricultural, like seeds and edible plants. Others are necessary tools and supplies. Together they are essential to maintaining a healthy living environment.

We are here to serve our wonderful community.

All the best,  Western Garden Centers


Filed Under: Gardening, health, Utah Gardening Tagged With: coronavirus, covid-19, essential business

guide to low-maintenance indoor gardening

March 1, 2020 by Wendy Pettit

by Connie Pelton

indoor gardening on windowsill

Photo by Flickr

Indoor gardening is a growing trend in more ways than one. Not only is gardening good therapy, but it also gives you the chance to eat food picked at its most flavorful. Not everyone has space or energy to maintain a traditional outdoor garden plot. If you want the satisfaction of growing your fruits and vegetables on a more manageable scale, indoor gardening is the solution. Here are our tips for creating an indoor garden that will produce plenty without the upkeep of an outdoor plot.

sunlight for the indoor garden

Photo by Piqsels

Let There Be Light

The biggest hurdle for indoor gardening is usually finding adequate light. Plants need sunlight to grow. If there’s insufficient light, nothing else you do will matter much. “Full sunlight” means six or more hours per day of direct sun. An enclosed patio or any space with lots of large picture windows is a perfect place for an indoor plot. A kitchen windowsill also works. If you aren’t sure whether a location receives enough sun, try tracking the amount of light it gets using photos.

indoor garden pests

Photo by Piqsels

Indoor Garden Pest Control

Bugs and gardens have a complicated relationship. Grubs, aphids, and larvae can wreak havoc on a garden. But bees and other pollinators provide a service that plants can’t live without. Since some garden visitors are beneficial, you need to avoid any pest control that kills the helpful along with the harmful.

Even though your garden is indoors, you still have to worry about pests. It’s true that you won’t find rabbits or deer munching on plants in your kitchen. But, some insects can still make their way into your house. Biological pest control efforts are ideal for indoor use. Nematodes and natural repellants can safely stop unwanted pests without risk to pets, kids, or the helpful insects you want to keep around.

bee pollinating flowers

Photo by Pixabay

Paintbrush Pollination

While most common indoor plants will grow fine without pollination, some must be pollinated for them to produce food. Unless you’re willing and able to bring them outdoors and give them access to bees, you’ll have to pollinate them yourself. Paintbrush pollination is just what it sounds like. You rub the bristles of a tiny paintbrush around the inside of each blossom on your plants. Since indoor gardens are usually small, this is viable, though a tedious option.

person planting a clay pot

Photo by Pikrepo

Water, Soil, and Fertilizer

One advantage of indoor gardening is that you can control your growing conditions. Unlike outdoor plots that are subject to wind, drought, and downpours, your indoor garden is only exposed to the things you choose. This means you can tailor the soil composition and watering schedule to individual species. 

You’ll want to use a potting mix rather than plain soil. The mix contains vermiculite or perlite, and some bark to provide your plants with better drainage. It’s less compact than outdoor dirt, giving your plants the air and moisture they need. With the right soil mix, you should only have to water your plants once a week. Additionally, you’ll want to use plant fertilizer, which depends on which type of plant you are growing.

About every seedling or seed packet you encounter has a small section on the label detailing the needs of the specific plant. One of the most useful things you can do to ensure a good harvest is to read these instructions. Most herbs, including parsley, sage, mint, and rosemary, are easy to grow and don’t take up much room. Plan early and follow the instructions as carefully as you can. That way, each species you grow is in the kind of soil it prefers and getting the amount of water it needs to thrive. Now, combine that with the right amount of sunlight. You’ll soon have an indoor garden you’ll want to show off to everyone who visits.

Connie Pelton is a retired teacher who spends most weekends gardening with her grandchildren. Together, they built and planted an indoor vertical garden wall taller than both of them.


Filed Under: Container Gardening, Gardening, Tips & How To's, Uncategorized, Utah Gardening Tagged With: indoor garden, indoor gardening, indoor herbs, organic pest controls, pest control, window boxes, windowsill garden

How to Plan a Vegetable Garden

February 13, 2020 by Wendy Pettit

by Kevin Jefferson

You’ve come to the right place to learn some important tips on how to plan a vegetable garden. Planting a vegetable garden might not be the easiest hobby in the world, but it’s definitely among the coolest ones. This is a way to do something good for your family and keep providing them with healthy veggies every single day, and that’s what we all want. But, planting a garden requires some planning and thinking things through, so here are a few tips that might help you do that more easily.  

vegetable garden with carrots and green onion

Photo by Pixabay

Pick the Spot

There are lots of factors that will determine the success of your garden, and its location is one of the most important.  Living in a house with a yard makes your vegetable garden plan easier to formulate.  Find the sunniest part of your yard – front or back.  Partial shade is okay but you will have the most success if your plants can get 6-8 hours of direct sun. Look at all the possibilities.  You may have a corner you’re not using or a plot you could clear and turn it into a vegetable garden. 

To plan a vegetable garden when you may live in an apartment or a condo, can be more challenging.  However, many small apartment dwellers find success utilizing a sunny porch or balcony in their cozy space.  Planning the right plants for an apartment space is very important.  Your local garden center, like the well established Western Garden Centers in Utah, can give you suggestions that will do okay growing in a planter or large pot.  Not all plants like the confinement of a pot.

plan your vegetable garden, then dig in

Photo by Pixabay

Determine the Size

Bigger backyards will give your new garden more space, but don’t worry if you’re stuck with a tiny backyard – you can still make this work if you put your mind to it.  Even with a large yard, a designated 8 foot by 4 feet spot of earth, maybe the best for your first garden experience.  Four boards from the lumber yard, nailed together, and set on the ground may be the only size you can deal with at first.  Get your hands dirty and the next year, you’ll be eager to expand and try new plant material.  Again, don’t start with a massive vegetable garden if you’re doing this for the very first time.

Starting small and expanding your garden as you gain experience makes more sense in the long run. Pick a few low-maintenance plants to start with such as tomatoes, zucchini, and cucumbers.

plan a vegetable garden that looks great

Make it Visually Appealing

The main purpose of planting a vegetable garden is to give your family lots of healthy vegetables, but there are a few other benefits you should keep in mind. A nice tidy little garden will boost the value of your property and lots of greenery is great for making your backyard look more inviting. Plus, foliage helps keep a yard cooler in the summertime.  So visually appealing doubles for your little climate control.

Plant a variety of vegetables paying attention to their different shapes and sizes. Plant colorful flowers or herbs along with your vegetables to add interest and help attract beneficial insects too.

vegetable garden plan with lettuce and onion

Photo by UnSplash

Choose the Layout

Even though most people don’t think you need a particular plan when planting a veggie garden, this couldn’t be further from the truth. Unless you make a proper plan and know where everything is, your garden is going to be messy and cluttered, and that’s never good. Instead, work on your layout. Plan the vegetable garden with taller plants in the middle or all together and lower growing root vegetables on the outer edges. For example, a row of carrots between zucchini plants or cabbage heads will make it difficult to work those carrots. Be sure to determine your planting zone. Choosing the proper plants for your climate area will determine your garden’s future success.  Visit a reputable local garden center like Western Gardens.  They won’t try to sell you plants that will not do well in your area.  They also will direct you how to protect certain seedlings from unpredictable early frost we often experience along Utah’s Wasatch Mountains.

plan a garden and eat fresh peas soon

As outlined above, the effort you do to first plan your vegetable garden, you will find more success.  Now it’s time to prepare your soil, plant it, care for it, and soon you will harvest the many fruits of your labor.  It’s really not that difficult, but it brings great satisfaction to you and your family’s life.  Therefore start small and simple, define every task to be accomplished, and then stick to your plan every step of the way. Your garden center experts would love to help you find success!  Remember that success doesn’t come overnight with a garden; so stay patient, stay focused, and stay dedicated to your vegetable garden.  Before you know it, you’ll be picking and munching on those delicious fresh vegetables!

Harvesting your vegetable garden

how to plan a vegetable garden

About the Author

Kevin has gone through an extensive home renovation with his son, which he has both thoroughly enjoyed, and dreaded every morning. He is now the proud owner of half his dream house (the other half has been waiting for spring). You can read more of Kevin’s work on PlainHelp.

Filed Under: Gardening, How To, Utah Gardening, Vegetables, Veggie Gardening Tagged With: plan a garden, plan a vegetable garden, planting a garden, vegetable garden, vegetables

Tips for Gardening in Small Spaces

February 5, 2020 by Wendy Pettit

by Rachael Elizabeth
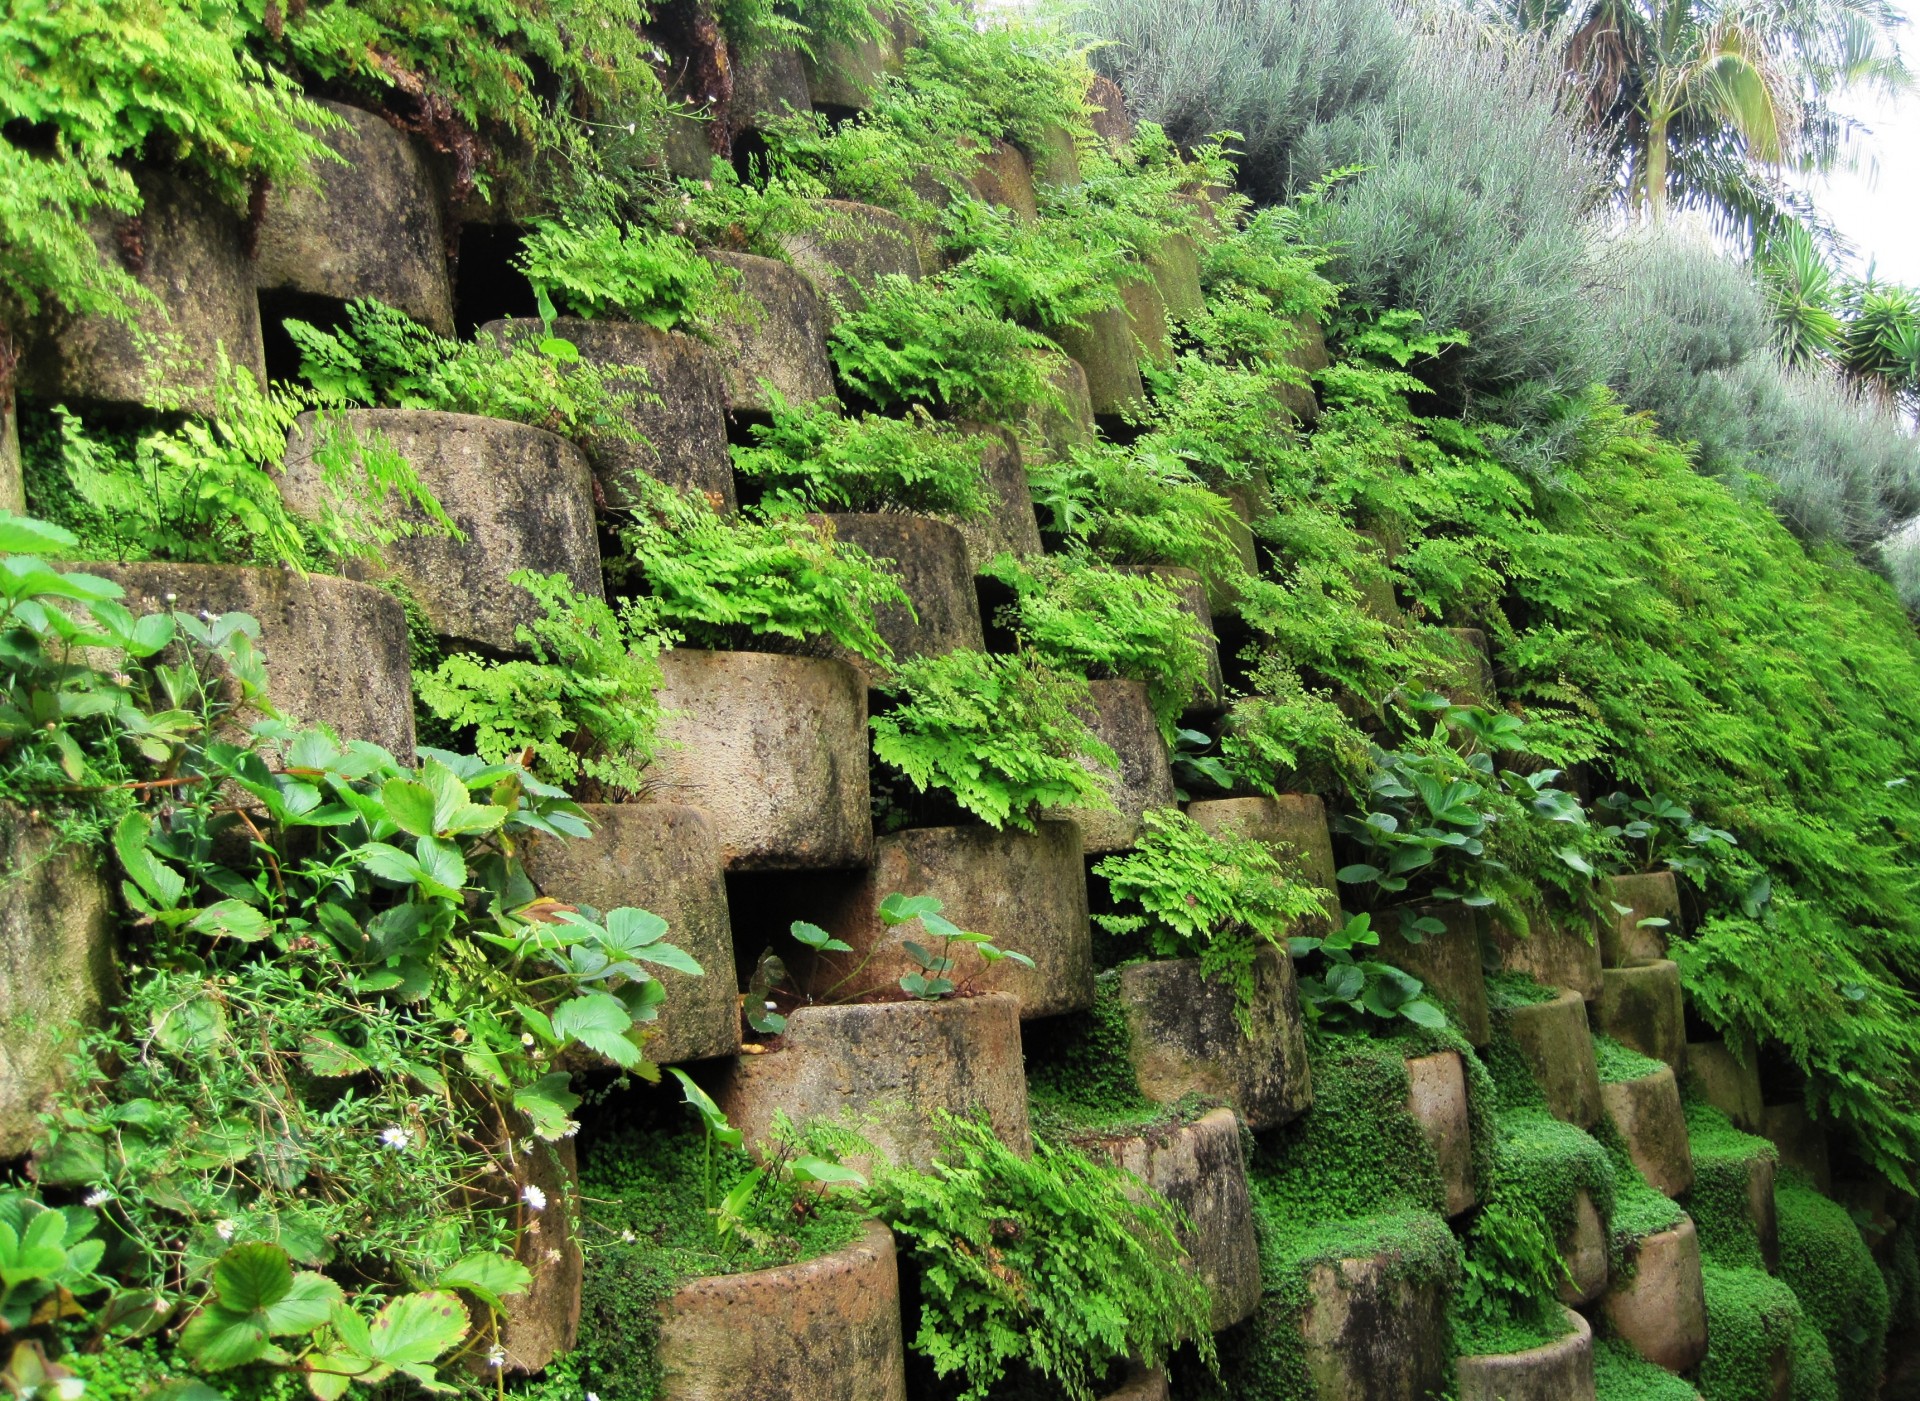
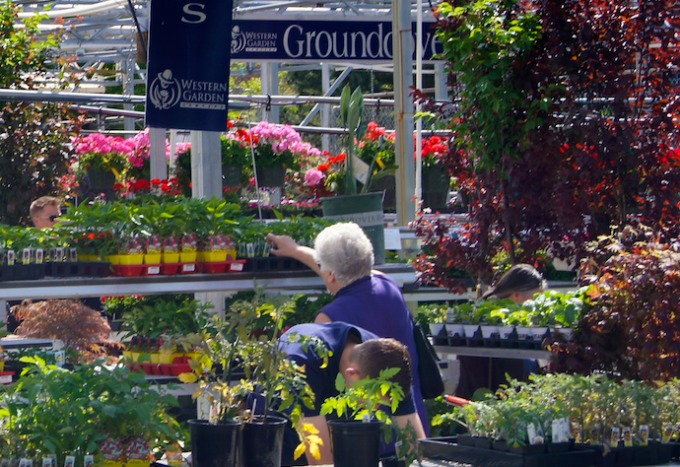
Wall step gardening for small utah gardens

Photo from Needpix

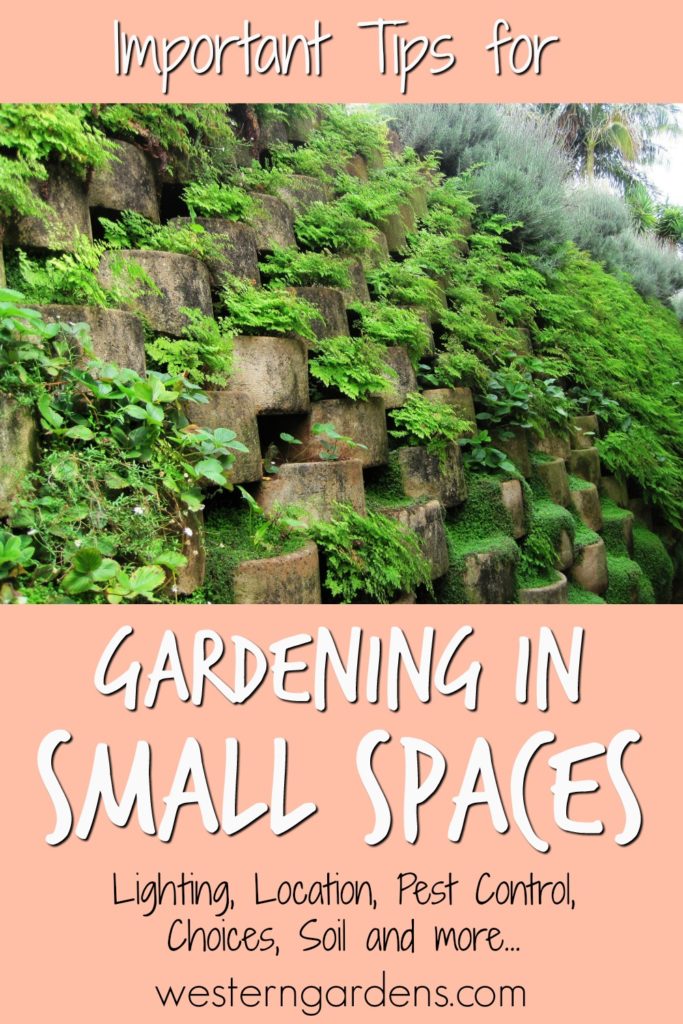
There’s nothing like picking a ripe, red tomato from the vine and popping it in your mouth … yum! Garden-fresh vegetables are a treat, especially when you grow them yourself. You don’t need a large plot of land or lots of tools to spread your seeds. You can do your gardening in small spaces.  Plant Utah flower and veggie gardens in small nooks or pottery — as long as they receive direct sunlight for most of the day.
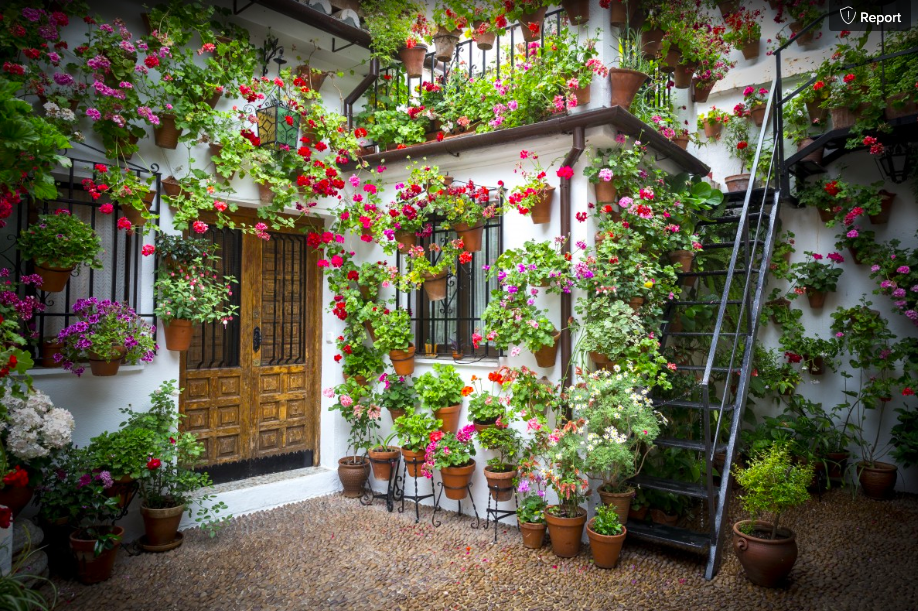
gardening in small spaces with geraniums on wall

Photo from PxHere

Light in Small Gardens

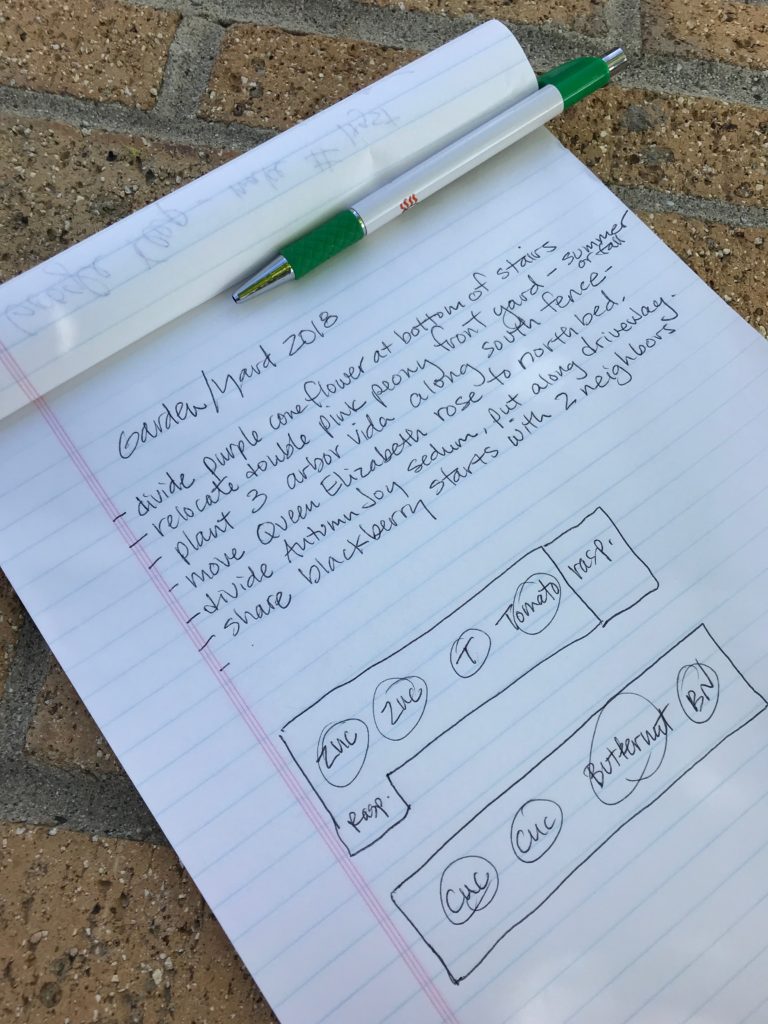
When it comes to plants, “full sunlight” is defined as six or more hours of direct sunshine per day. Before choosing varieties for your garden, you’ll first want to assess the growing space for light. Light-measuring instruments are available, but you can do this yourself by drawing a diagram of the plot. Upon each hour beginning at 7 a.m., jot down on paper, or use your smartphone’s camera to record which areas have sun or shade. Remember that each hour, the angle of the sun determines the direction of light, and it changes as summer begins to fade into fall.

Soil

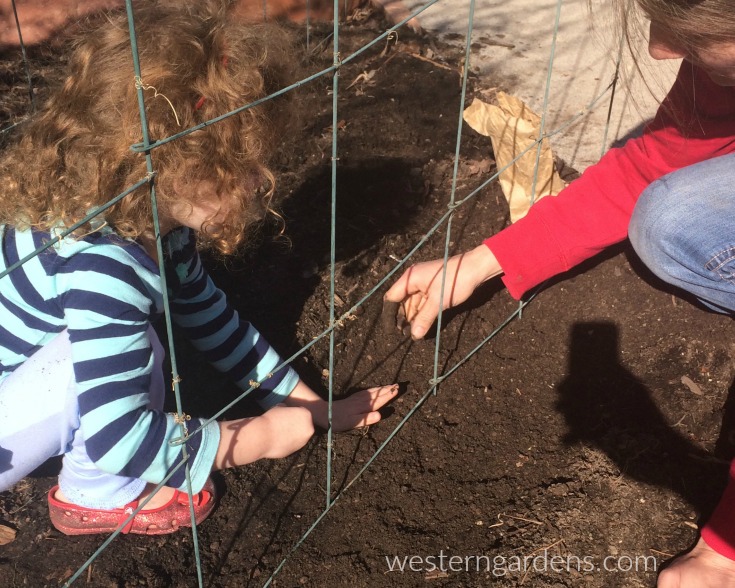
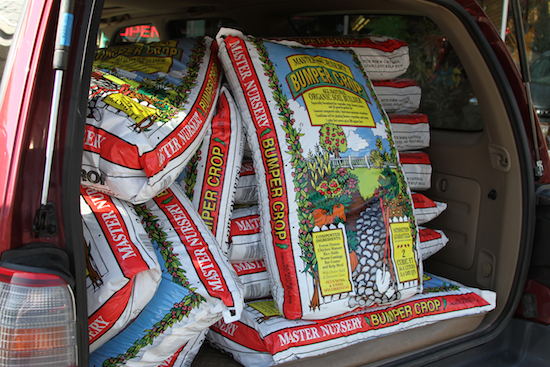
Now that you know how much sunlight your garden space receives, all you need is soil, seeds (or seedlings) and water. Garden soil in Utah should be well-draining, loose, fertile, and have a pH balance between 6.0 and 8.4. Decaying organic matter in the soil helps plants absorb natural nutrients for feeding. Test the soil and then amend it as necessary with products from your local nursery.

Small Garden Choices

Cucumber on vine in vertical garden

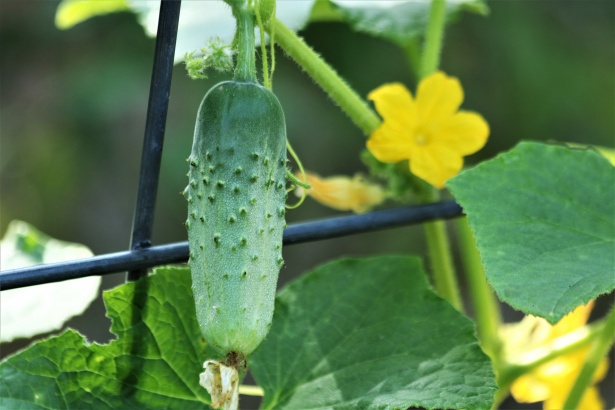
Photo from PublicDomainPhotos

Gardening in small spaces means choosing varieties of flowers, fruits, and vegetables that don’t spread sideways.

Tomatoes, eggplant, zucchini, and lettuce don’t take a lot of space in gardens, and you can plant these vegetables in containers. If you like cucumbers, there are two kinds; vining and bush. Vine cucumber plants will spread; crawling along the ground or climbing trellises. Bush cucumber plants are more compact and better suited for containers and small gardens.

Creative Small Gardening Locations

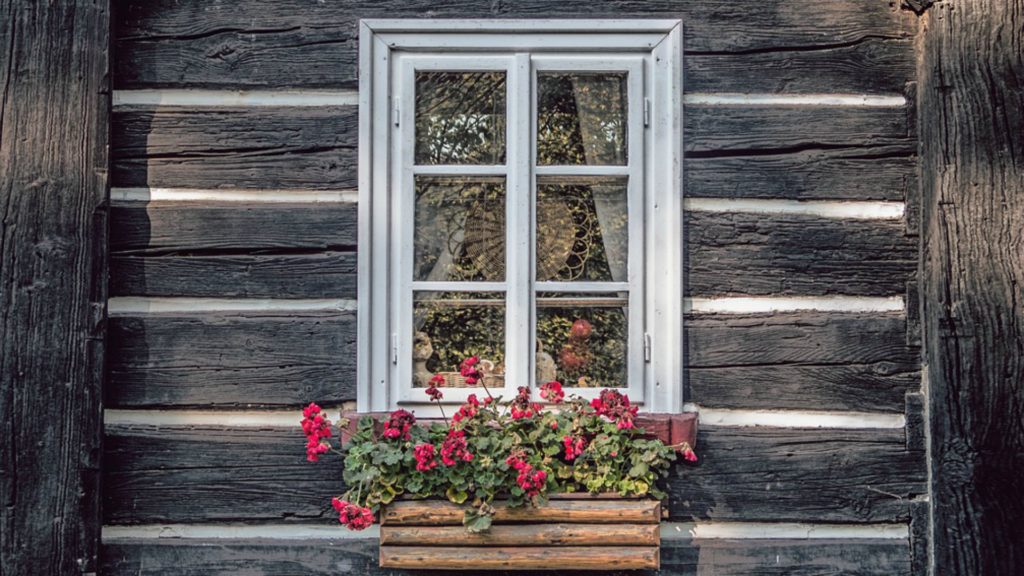
Why limit yourself to the backyard? Plant your small garden along the driveway; in some old, rehabilitated wall shutters; on a vertical tower; on a flat rooftop; — even on a bird feeder! Anywhere you can place a soil bed that’s in direct sunlight can be a garden. Window boxes, trellises, arbors, potted patio umbrella stands, and framed boxes are just a few ideas to bring your garden to life.

Little Patio Gardens
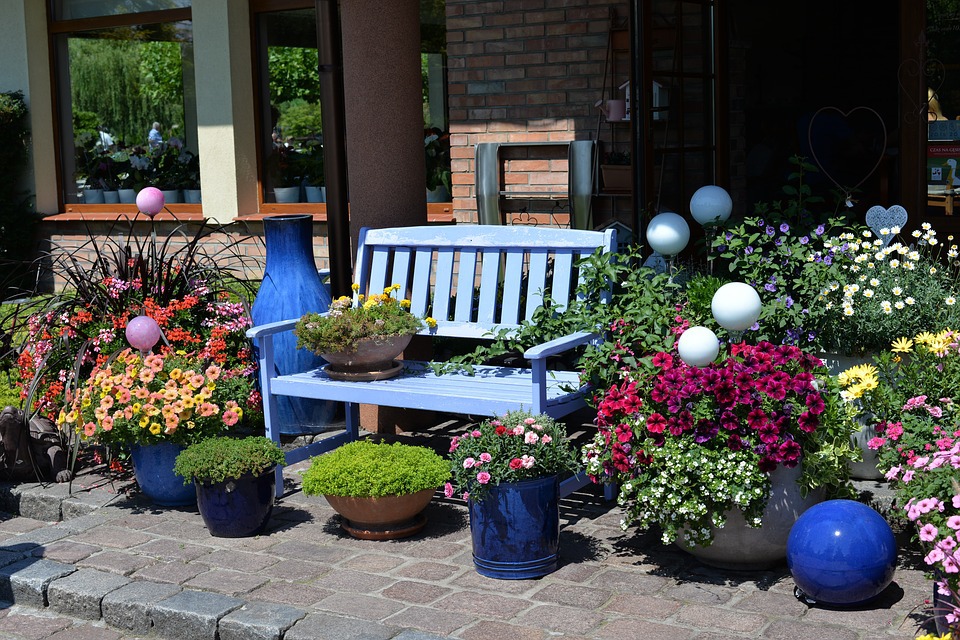
small patio garden for Utah

Photo from Pixabay

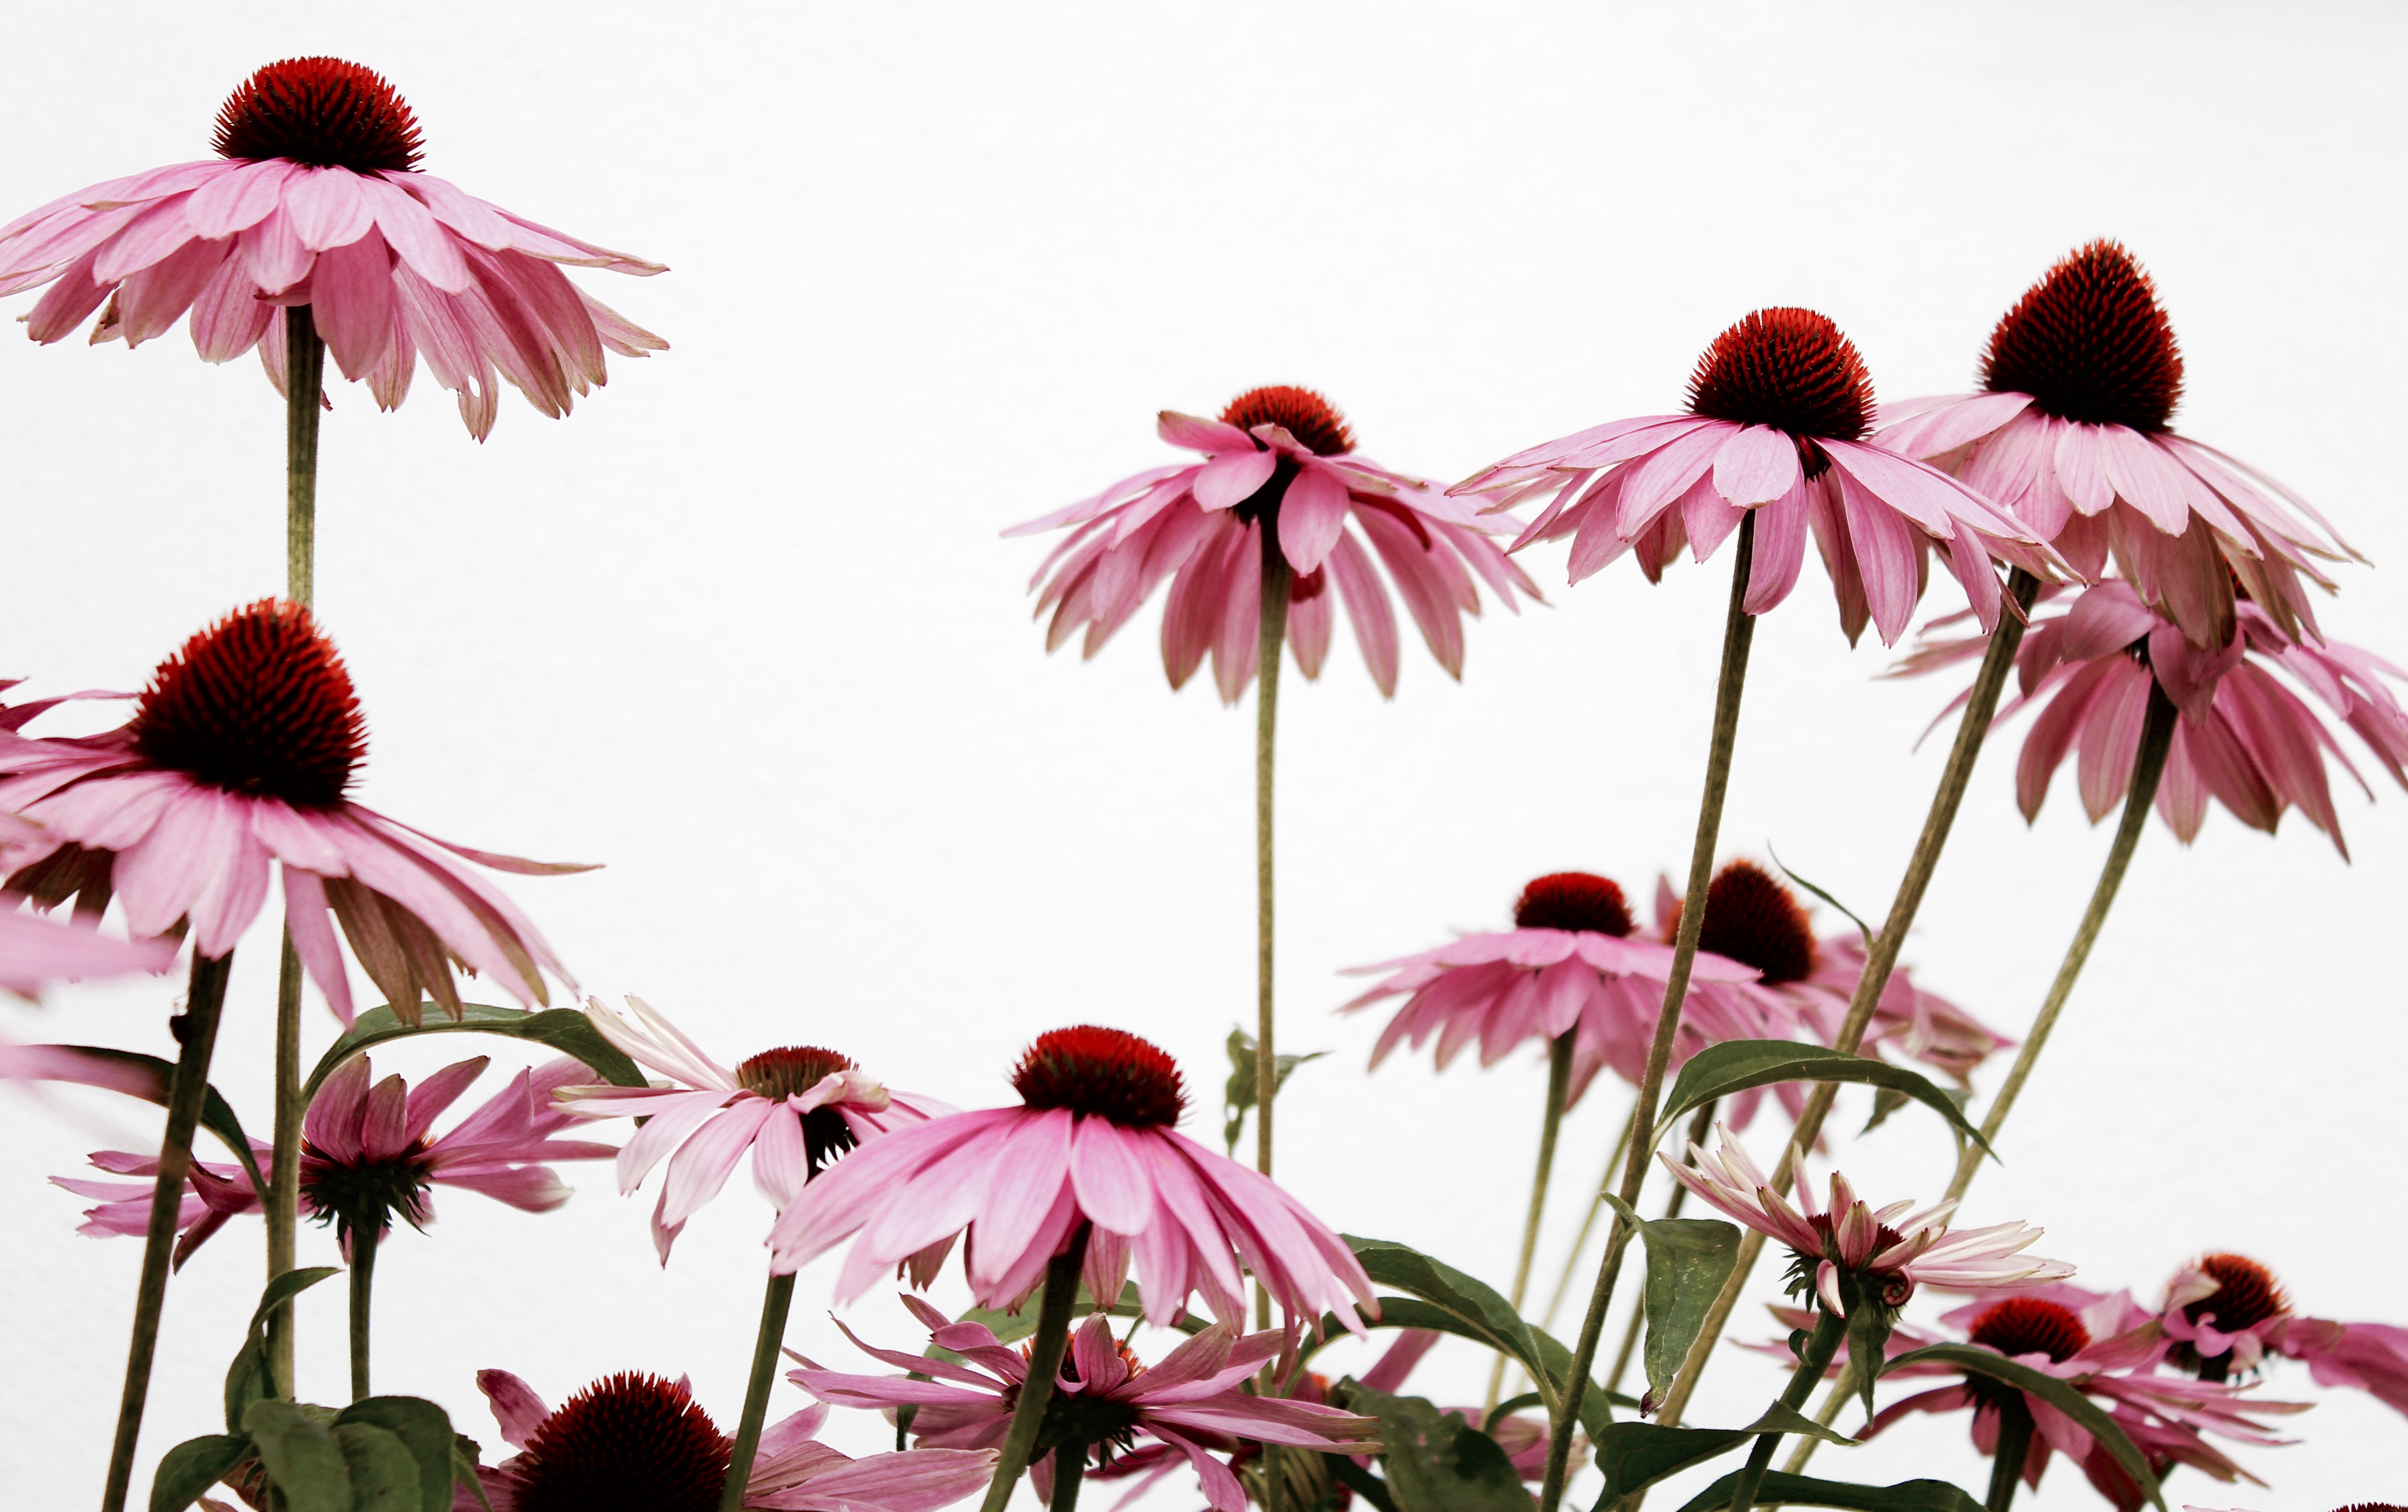
Large containers are just as effective as dirt bed gardens, as long as there’s enough sunlight and water available. A mini-garden won’t be overflowing with veggies but, there will be enough for snacks and to add to salads. Beans, tomatoes, peppers, kale, and herbs are perfect for growing in containers. Flowers are also great. Choose some of Utah’s favorites: showy goldeneye, hummingbird, golden currant, or curlycup gumweed.

Pest Control When Gardening in Small Spaces

Much like your Utah lawn, small-space gardens benefit from natural products and predators to control pests. Beneficial nematodes are micro-organisms that feed on grubs and larvae — those tiny worms that eat plant roots. These beneficial nematodes feed on more than 200 species of insects, but they don’t damage plants or roots, and they are not harmful to people or animals.

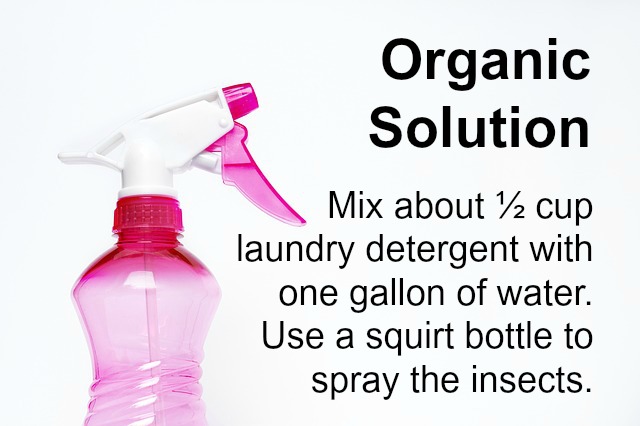
Slugs and snails are garden-loving pests that enjoy chewing on lettuce, cabbage, strawberries, and other leafy plants, but “normal” pesticides usually don’t work on snails and slugs.  Therefore, you have to get creative.

A beer trap is just what it sounds like — snails and slugs like to belly up to the bar. Fill a small, flat container with beer but don’t let the liquid spill into the soil. Slugs and snails are attracted to the beer, go for a sip, and then fall in and drown. Place a beer trap every 3 feet or so in the garden for this method to be effective.

When gardening in small spaces, don’t forget that natural predators such as those microscopic nematodes will destroy slugs and snails in their early stages. Birds eat them, too!

Gardening space is all relative.  You don’t need more than a few basic tools and a little bit of space to experience the wonderful benefits of gardening.  Make the most of your limited growing area with color, scent, and taste. That small space is waiting for your green thumb!

tips for gardening in small spaces

About the Author

Rachael Elizabeth is a gardening guru and writer. She takes pride tending to her small space garden that is constantly flourishing with fresh herbs and florals. When she’s not practicing her green thumb she can be found exploring nature on a hike or swimming in the lake.
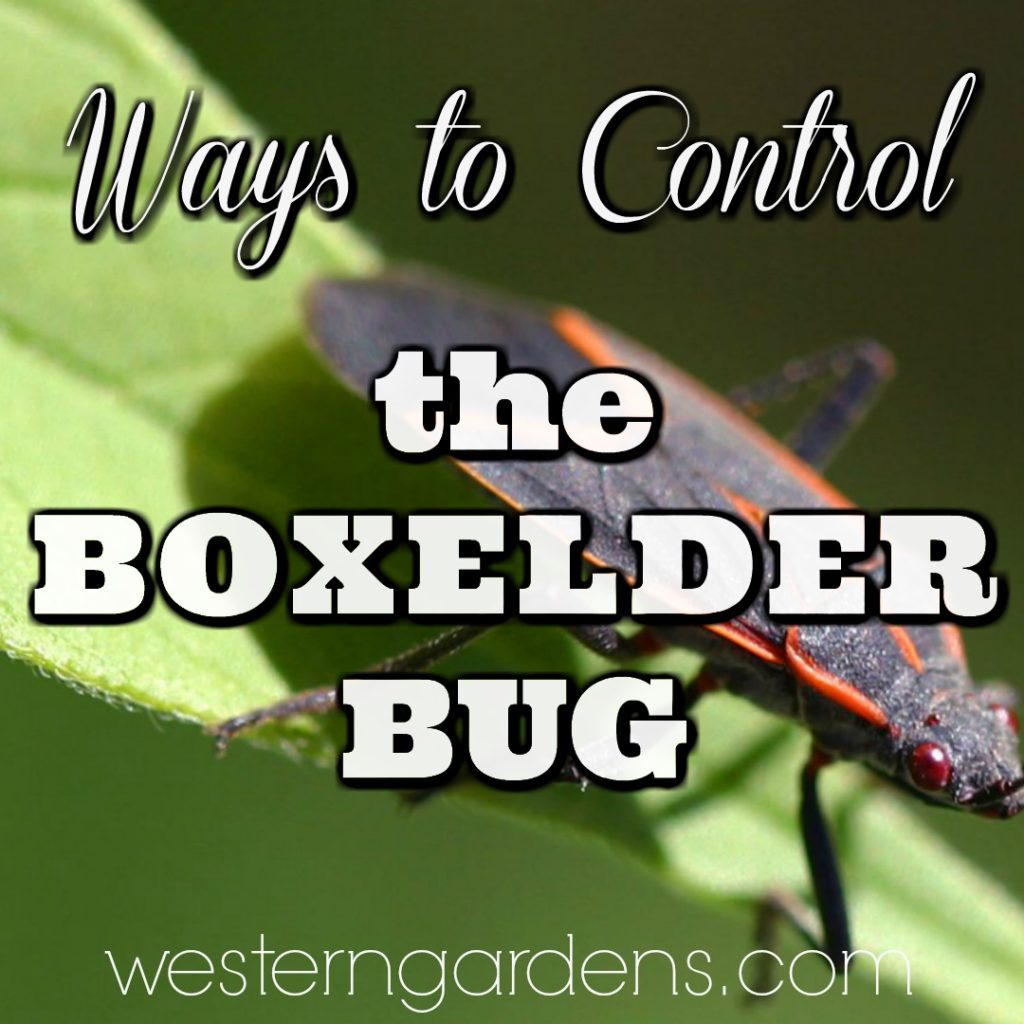
Filed Under: Container Gardening, Flowers, Gardening, How To, Outdoors, Utah Gardening, Veggie Gardening Tagged With: gardening in small spaces, small gardens, small space garden, small utah gardens, vertical gardening

Get Better Sleep with Houseplants

October 4, 2019 by Wendy Pettit

better sleep with utah houseplants

Utah gardeners enjoy breath the “fresh air” in the yard and watching nature in the garden or patio. We find it adds to a healthy living. But have you thought about the 6-8 hours that pass in the night? Can we get better sleep with plants in our bedrooms? The answer is yes!

I used to think that the mattress, the sheets, and pillow I used was what affected my sleep. I later learned that room temperature and personal stress are also factors to the quality of my sleep. But now I consider another one, plants!

snake plant for better sleep

Have you ever linked the tradition of taking a flowering plant to a hospital patient in  recovery? Now I understand why. Flowering plants have significant benefits for patients. If it can help patients with their recovery, then logically, and biologically, placing plants in your bedroom can make a difference.

Houseplant Studies

Many comprehensive studies have been conducted by NASA and others to explore this phenomenon. Scientists have discovered individual plants can clean the air more than others. Some plants help people sleep longer, and different plants are better at cleaning certain toxins from the air. Toxins like formaldehyde and carbon monoxide. For example, one “study suggests Gardenia is as effective as valium.”

I read several articles about getting better sleep, including 10 Plants That’ll Help You Sleep Better by Martha Stewart, 7 Bedroom Plants that Improve Your Sleep, and my favorite article on the topic – 10 Plants that Help Sleep by Tuck. Tuck is a very comprehensive resource on sleep. They are worth the read. The articles discuss the qualities of several houseplants and how they can influence your rest. Did you know that English Ivy is known to help with sleep apnea or reduce allergens like airborne mold! Some of the tests could be great science projects for young ones.

Care and Access to Houseplants

Most of these houseplants are easy to care for inside a home or apartment. Of course, remember the general rule of the Finger Tester.  Water your plant when you can stick your finger in the soil and it comes out dry.  Over watering is often the culprit for disaster. Find houseplants for sleeping at your local garden center like Western Gardens. They have a fantastic selection of these and other houseplants.  

Better Sleep is Around Corner 

We gardeners realize the immense satisfaction of getting our hands dirty to create a piece of heaven to view or taste the fresh grown foods all summer.  That endorphin created with labor are real and do help us be more healthy.  Therefore, this fall, while you are putting your Utah garden to bed, consider what you can bring into your bedroom to help with your winter sleeping hours! Outdoor gardens and indoor houseplants truly can be medicine for the soul and body all year round.

Recommendations of Houseplants for Better Sleep


TipsBulletin.com has another list of wonderful hanging houseplants.

Filed Under: Container Gardening, health, Utah Gardening Tagged With: allergens, better sleep, gardening health, healthy gardening, house plants, mold, sleep, utah gardeners, Utah gardening

Garden To Do List for May 2018

May 1, 2018 by Wendy Pettit

GETTING OFF TO A GREAT START  

This year the weather is cooperating with Utah’s gardening plans.  While the weather is good, it’s a great time to go through this garden to do list for May.  Do as much as you can before the heat of summer is here.

You may not need to do everything on this list.  Choose what applies to your yard and plan out when you will do it throughout the month!

PLAN and PLANTING

Make a list of tasks for your own utah garden

Plot and Plan – If you didn’t get your plot planned or your own yard to-do list in April, do it now.  Sometimes there are so many things to do in the yard, if you write down a list or draw a map, your tasks will seem more manageable as you’ll more clearly see what should be done first.  

Plant Trees & Shrubs – In the last 2 weeks, Western Gardens has  received all the prime plant material they ordered for you.  Selection is the best now before certain items sell out.  May is a wonderful time to plant.  Be sure to ask your Western Garden’s expert or observe store signage if the new plant needs to be hardened off for cooler temperatures. 

Save Water and Money by training your lawn to grow deep roots

Article on training your lawn to grow deep roots

TURF CARE (LAWN) 

Turf Training – Now is the time to really resist the temptation to flip the automatic sprinklers on your lawn.  Fine for pots and flower beds, but you can train your grass roots to grow deep for a healthier lawn that uses less water.  Read the article.

Turf Weed Protection – Broadleaf weed control (liquid application) for dandelions, violets, spurge, etc.  We recommend Fertilome Weed Free Zone concentrate. It is a newer formula that works really well temperatures above 40 degrees. If our temperatures are going to be in the 70’s, the Fertilome product “Weed Out” will work too.  Spot treat or apply to big areas of lawn where needed. ALWAYS follow manufacturer’s application instructions.                                             

Turf Aeration – May is still a good time to aerate. Remember you do not need to aerate new lawns for a couple of years.    

Turf Fertilizing –  If you didn’t get to it in April, apply that first round of weed and feed fertilizer.

Turf seeding or over seeding – You are not too late if you need to over seed or seed a new lawn.  You won’t want to wait much longer as our Utah summer heat isn’t good for starting new lawn. If you can’t do it this month, you’ll want to wait until fall.  Here is our good article about over seeding bare patches of your lawn.  Visit Western Garden professionals to learn the best way to seed a new lawn and with what drought tolerant seed.  It is much cheaper than sod and will give you a better product, but you will need to tend it in the beginning.  

Lawn Mowing –  Time to get that lawnmower out and going, if you didn’t already!  Be sure to set lawnmower height to 2½-3 inches. This allows the lawn to “shade” its soil, making for a healthier lawn.

care for trees and shrubs in utah gardens

TREE & SHRUB CARE 

Deep soak ALL trees & shrubs – If you didn’t get your trees and shrubs deeply watered, do it now.  Your trees will love you, and you’ll love your trees!

Fruit & Shade Trees – If you haven’t already, fertilizing your trees and shrubs is good to do this month.  Tree stakes work well, or you can even use a water soluble fertilizer mixed with your hose water.

Marigold flowers for your utah garden

FLOWER BEDS

Soil Amendments – Perfect time to mix your soil with our gardener’s favorite “Bumper Crop.”  Discover for yourself why this is one of our most popular products. You will love the results!

soil amendment called bumper crop

Perennials – May is still not too hot to divide and transplant any of those summer and fall blooming perennials. Share with your family and friends. Do not divide or transplant those that bloom in spring.  They won’t like being divided or moved until they are finished blooming.

Annuals & Bedding Plants – After Mother’s Day is the safe time to plant your Petunias, Marigolds, Impatiens, Lobelia, Alyssum, and your summer bulbs such as Calla Lily, Canna Lily, Dahlia, and others.  

Bulbs – As your tulips and other spring blooming bulbs finish their display, only deadhead the flower.  Leave the green leaves.  During the next couple of weeks, the greenery is taking nourishment down to the bulb so you will have color again next spring!  Bone meal can also be applied during this time.  Do not trim back the greenery/leaves until they are faded and brown.  Kids in the Garden Idea: Cutting off the flower stems can be a great job for children who can safely use regular or child scissors. Pay them a penny for each stem they plop into their bucket.  They’ll have fun counting their long stems as well. You don’t have to do hardly anything!   

daffodils leaves bent over to finish dying

Bent over daffodil leaves waiting to be pulled up after they are faded and brown.

hyacinth bulb leaves bent over to finish dying

Hyacinth bulb leaves bent over to finish dying. Tied with a long stem.

Gardener’s Tip:  After the stiff stems are cut, fold over the leaves of the plant and wrap with a rubber band or other long leaf.  The leaves are still attached to the bulb in the ground, but your spring garden will look more tidy and kept. When the clumps turn brown, the clump will easily pull out from the ground, leaving the bulb to sleep until next spring.

Containers/Planters – Sift out old roots from the year before.  Amend your soil with Bumper Crop (one of our client’s and our favorite products).

Carrots and onions for your utah vegetable garden

VEGETABLE GARDEN 

Planting Outside Schedule –   You can begin planting your vegetables. At our garden centers, we put out a sign for those tender plants that need protection from the cold.  You can always ask one of our experts too.

Here is a schedule of a few favorites:  

Until May 15th: onions & peas  

After last frost until June 1st: dry beans, snap beans, eggplant, peppers

After last frost until June 10th: watermelon & winter squash

Until July 1st: cauliflower, parsley, swiss chard

Until July 15th: beets & broccoli

After last frost until July 20th: cucumbers and summer squash

Until Sept 1st: radishes

and so much more…. Come in and see us!

Seedlings – When your seeds have sprouted and are up a few inches, thin them to allow vegetables to develop into larger produce.  You are giving the strongest starts the room to grow.  This is most important for those root veggies like carrots and radishes.  However, even zucchini, pumpkins, cucumbers, etc. need to be thinned out so that the healthiest plant can have room to spread out as it grows.

Garden Grow Box DIY with kids

Article for Kid Friendly DIY Garden Grow Box

Raised Beds / Grow Boxes – Pull out any dead debris you missed in the fall.  Amend your soil with some good “Bumper Crop” if you didn’t get to it in April.  Your bed is ready for planting.

Vertical Gardening – Be adventurous and try some “vertical” gardening.  

Garden Tools – Add one new quality tool to your arsenal of garden tools.  Our gardeners can give you some worthwhile advice.

grasshoppers need to be controlled when young

PEST CONTROL 

Snails and Slugs – Continue the war against your snails and slugs.  They can devour several newly planted marigolds in one night.  Read this article of some ways to control snails and slugs.  If you are persistent this month, you will have less plant damage during the season.

Grasshoppers – Best controlled when they first hatch.  May is the time to watch for them!  Once they are bigger, it’s almost impossible to rid them from your crops, except with a shoe smashing when you can catch them.  On the first sighting of these little ones, we recommend sprinkling Nolo Bait (a biological Insecticide) strictly as directed on the package.  It takes time to take affect on the grasshopper, so apply it early on the first sight of those seemingly cute little beasts.  A little of Nolo Bait goes a long way.  

Insecticides – Closely follow directions on labels when using insecticides as not to harm bees.

Field bind weed morning glory

WEED CONTROL 

Remove or spray for weeds – especially Bind Weed (aka Morning Glory) and Puncture Weed (Goat’s Head) – Be on the lookout for when they are just beginning to grow.  These two are the most difficult to rid from your garden and yard.  Be vigilante and use “KillzAll” on their leaves to kill their roots.  It may take several applications if you let them begin to spread.  Do NOT use KillzAll on your lawn.  It kills any greenery it touches.  Use “Weed Free Zone” for the lawn broadleaf weeds.  

Puncture weed or goats head weed in Utah gardens

Gardener’s Tip:  Mix up a regular squirt bottle of KillzAll. When you go on “weed patrol”, you’ll have it with you so you won’t be tempted to “pull” the weed, because it will just grow back. Plus you won’t have to remember later where you saw it.  Carefully follow the instructions for mixing, divide the amount of product to water for the size of squirt bottle you have. DO NOT MIX ANY OTHER PRODUCT in that squirt bottle and clearly label it for safety.  You can do the same squirt bottle method for Kill Free zone for the lawn.  Label bottle clearly and do not mix anything else in the bottle, even the KillzAll.  Keep the products separate in their own squirt bottles, or even larger pump sprayers.

utah gardening mother's day gift idea

HOLIDAY GIFT GIVING 

Mother’s Day – Mother’s day is just about here.  Western Gardens has beautiful planters already for you to surprise her with.  Or maybe getting her own hand pruners would make her day.  Put her name on them!  We have expert experienced gardeners to help you know what tools are worth your time and money.

Father’s Day – Keep dad in mind of what he would enjoy in the garden.

shop local independent garden center in Utah

Buy from your local independent experts! They ARE gardeners!

SUPPORT REPUTABLE INDEPENDENT GARDEN SHOPS –  Why?  Because they give you the best service and knowledge.  Plus they take care of their product, rather than letting them die in the cold.  Sometimes plants perk up after a cold or even snowy night, but they are very stressed and less likely to give you success.  Your local independent shops own the product and take care of them so you can have the best chance at success.  Also, your dollars spent will stay within the local economy, rather than off to a distant corporate office.

MAY’s MOST IMPORTANT TASK –  Work hard on this garden to do list for May, but along the way, enjoy the satisfaction of beautifying your little spot on earth.

enjoy your utah garden


Filed Under: Gardening, To-Do List, Utah Gardening Tagged With: beginning gardening, garden to-do list, may garden to-do list, may gardening, Monthly To-Do List

How to Prepare the Ground for your Garden

April 28, 2018 by Western Gardens

Prepare your soil for your vegetable garden

So you want to grow a vegetable garden?  The first step is to prepare the ground for your garden.  Growing a vegetable garden is like painting a room.  The actual painting the room is the “fun” part.  All the preparation before the roller hits the smooth wall is the most important part of painting a room.  Washing, puttying holes, sanding, and priming the walls may seem tedious and unglamorous, but it is very important to create the ultimate finished nicely painted wall.

Preparing the ground for your vegetable garden is just as important as picking the fruits of your labor.  You’ve come to the right place to get started.  Welcome!

5 steps to prepare the ground and soil for your garden

You can do it!  Here are some steps to get you started in the wonderful world of gardening:

  1.  Start Small – You don’t want to bite off more than you can chew.  It’s like a new exercise program.  In the beginning you may be overwhelmed, tired, and want to quit.  Start smaller.  A plot of ground 8′ x 10′ is plenty big.  You may want to just start with growing a few items in large planters (but there are some vegetables that don’t like the confinement of planters).  Maybe just begin with a small strawberry bed.  Sweet rewards await you.  Find success with a little garden. You can always expand as you get the hang of it.Small garden to begin with
  2. Choose a Sunny Location for a Vegetable Garden –  Vegetables like sunlight.  Most vegetables like 8-10 hours of sun in 24 hours.  Trimming overgrown unwanted bushes or trees could be done to create more sunlight for your garden.  If you are doing a flower bed, decide whether it will be for shade loving plants or full sun plants.Shovel in dirt digging vegetable garden
  3. Clearing the Space – Now that you have your area chosen, it’s time to prepare the ground for your garden.  Clear the ground of weeds, rocks, sod, etc. All you want is dirt!  A shovel works well to dig up roots and to turn over your dirt.  If you have sod, you can dig it up with your shovel, but be sure to shake off all the dirt from the roots of the pieces you lift.  You don’t want to rob your garden of the awesome soil.  You can throw the sod into a compost pile.  Some people go to the expense of buying or renting a tiler to work up the soil and sod.  Do what you can afford.  The idea is to get the soil free from weeds, grass, rocks, roots, and other things to hinder your garden growth.  You are “clearing the land” like our forefathers had to do.a good loam soil is what we want to plant in
  4. Soil Preparation – Here along the Wasatch front in Utah, we have pockets of all types of soil.  Just in the Salt Lake Valley alone, you could have very sandy soil that doesn’t hold the water well at all, or you may have clay, which holds the water too much and drowns the plants.  Our ultimate goal is to have a good “loam” – a mixture of sand, clay, and good organic matter.  Back to your soil – you must determine what type of soil you have.  If you have very sandy soil, you’ll need to add amendments to the soil to get it more to the “loam” we are after.  If you have more heavy clay soil (like mine), then you will need to amend the soil with different products, again to bring it to that balanced loam we seek.   If you are not sure what kind of soil you have, take a gallon size baggie with about 2 cups soil from your garden plot and visit your local garden center like Western Gardens.  Inquire of their garden experts and they can identify what type of soil you have.  They will also identify what soil amendments you may need to add to your dirt.  Lots of times it’s just needing to add more organic matter to the soil.  They’ll tell you the method you should follow for your situation and your soil.  You may just need to top dress your bed with some bags or a load of topsoil.  But ask the garden experts and they’ll help you.  They want you to be successful too. dog with hose in mouth
  5. Watering Method – You will want to at least know how you are going to water your first garden.  To start off this year, you may just want to purchase a soaker hose to attach to your existing hose and faucet.  Run the hose along your plants or seeds once they are in the ground.  After you get the hang of gardening, you can invest in more elaborate watering methods.  Watering with a hose from above could also be an initial plan.  Just as long as your plants get the proper water needed, you should find success.

Now you are ready to plant!  Easy-to-grow crops like onions, peas, beets, carrots, and zucchini are a great place to start, especially in small gardens.  There are many vegetables that are easy and will save you money throughout the season. If you would like advice on the best vegetables to start with in your garden, and for what varieties work well in our Salt Lake climate, you can always stop by Western Gardens and talk to one of our helpful gardeners.  Here is an article about Warm Season vs Cold Season Vegetables to plant, depending on when your soil is ready to plant up.  They are always ready to help you with organic pest control suggestions, fertilizer recommendations, and their opinions for the best time to plant.

Also, this article from Gardener’s Path is very good and goes into more details.  Planning and Planting Your First Vegetable Garden  Check it out!

Filed Under: Gardening, How To, Utah Gardening, Veggie Gardening Tagged With: dirt, first garden, garden soil, prepare the ground, prepare the soil, soil preparation, soil types, utah soil

How to Compost Your Kitchen Scraps

April 25, 2018 by Marjorie Carter

by Marjorie Carter

Alchemists are famous for their efforts to turn lead in to gold.  It was thought that a “base metal” could be purified or perfected so that it transformed in to something more valuable.

While their efforts were always in vain, it is possible to transform much of your daily waste from food preparation in to something more valuable than it’s original form.  Put in some grass clippings, add in your apple cores, roll together with your potato peelings, onion skins, watermelon rinds, and shredded paper bags.  Let it heat and stir once in a while.  Voila! You end up with black gold (aka compost)!

MY COMPOST EXPERIENCE

The house we bought a few years ago has a large yard (meaning space for a garden) and a few fruit trees.  This is exactly what we were looking for and we have enjoyed trying to keep up with maintaining it.  Our first fall in the house, we were generating a lot of waste as we processed apples, pears, and tomatoes that we’d grown.  We also were looking at all the green waste from pulling up the tomato plants and raking the leaves.  It dawned on us that we could be doing something much more useful and conscientious with all that biodegradable material.  We had spent some money earlier in the year to buy compost from the landfill to amend our soil to make it better for gardening.  Why not make some of our own compost to add to our garden?

We started by making a big pile in the back corner of the yard but realized quickly that, while this would eventually work, it was sort of unsightly and not as effective as it could be.  We then turned to a store bought composter with two plastic barrels mounted on a frame to allow the user to easily spin the barrels once in a while to mix up the contents.  We quite like this composter but quickly realized that this set up was better suited to someone with a smaller amount of material to compost. We needed something bigger to accommodate the amount of material we were generating with all the green waste from our canning and from our yard.

My husband knew someone who was moving and getting rid of a couple of 50 gallon water barrels.  We decided to pick them up to try using them to capture rain water for watering our garden (that’s a conversation for another blog post!) and then it occurred to us that these would make good composting bins.  My husband removed the top from one of them so we could easily put material in to the barrel and then drilled holes down the sides all around (easy and quick job with a power drill).  Suddenly we had much more space to fill. We’ve since added a second 50 gallon bucket in to the composting bin family.

So far we’ve had a couple of ‘batches’ of compost and it is surprisingly satisfying to see the rich black earth that was once a bunch of scraps and leavings.


STEPS FOR COMPOSTING

There are a few tricks to composting but, overall, it’s quite a simple task.

STEP 1:  The first thing is to pick a spot for your composting. Pick a spot that gets plenty of sun since heat is an important factor in getting all that green waste to break down.

STEP 2:  Next you need to pick a container. There are lots of commercially available options out there, you can build your own enclosure, or repurpose something the way we did.

STEP 3:  Once you’ve got things set up, you can start adding the organic material.

MATERIALS TO COMPOST

GREEN WASTE: Green waste includes grass clippings and the fruit and vegetable waste you would normally put in the trash.  Try keeping a metal bowl on the counter to hold your orange peels, wilted spinach leaves, banana peels, coffee grounds, etc.  Empty it daily to keep from attracting fruit flies.  They also sell little counter top buckets with lids for holding your compost.  I own one but I find that I tend to ignore it, even once it’s filled (out of sight out of mind!), and then end up with a smelly mess that is harder to get out of the container.  A bowl keeps things visible so I don’t forget to dump it out regularly.

BROWN WASTE:  Brown material can include dried leaves from your trees, cardboard egg cartons, paper bags, sawdust, and tree bark or cuttings.  As with the green waste, breaking this material in to smaller pieces will speed up the process – shred the paper bag or egg carton, use a wood chipper to chop up large branches, and so on.

AIR: There are steps to composting that include making sure the pile gets air, turning it, and making sure it stays moist.  These will help speed the process.  If you have the space for your compost to sit and do its thing for months, rather than weeks, then these steps can be more intermittent.  I have been a slow composter from the start (mostly due to laziness! Turning is something I just don’t remember to do very often). If you want your compost churned out at a faster pace, then you’ll need to be more mindful of these steps.

HEAT: Heat is important to composting, too, but don’t let that stop you from putting organic material from your scrap bowl in to the composter (rather than sending it to the landfill) during the winter. The decomposition process still occurs during the winter but at a slower pace and will pick back up once it starts to warm up.

It is important to remember that you need a mix of green and brown waste to make good compost. The green waste will provide nitrogen for the final product and the brown waste will provide carbon.  Both components are essential. Too much nitrogen in the compost will make it a smelly mess.  Too much carbon and the compost will take a very long time to decompose in to that black soil you’re hoping for.

TIPS ABOUT YOUR COMPOST

A few tips about the things you throw in to the compost pile/bin –
– large pieces of watermelon rind will take longer to break down than small ones so try chopping them up in to pieces no bigger than 1 inch by 1 inch.
– Egg shells can be added to your compost bin BUT they won’t break down as quickly as the green waste.  If you add egg shells, crush them as small as you can before tossing them in the compost bin
– Don’t put cherry pits or nut shells into the composter.
– Don’t put in bones or meat or dairy or oily materials
– Don’t add weeds with seeds (unless you are diligent with temperatures reaching 160 degrees)
– Don’t add diseased plant material (again, temperature issue, and the last thing you want to do is spread disease throughout your garden)


According to the experts at Utah State University, during the growing season, 30% or more of landfill waste is organic yard refuse (https://extension.usu.edu/htm/publications/publication=4955). Home composting eases landfill problems and helps “reuse, reduce, and recycle” this organic material into a valuable soil amendment.

For me, the thing that is most satisfying about composting is this last point.  My efforts may be small in the grand scheme of the trash scene, but I’m doing my part to keep as much waste out of the landfill as I can.  It also just so happens that doing this is actually beneficial to me.  When I dig into my garden, I know that some of that earth was once on my kitchen countertop as scraps and are now contributing to my delectable tomatoes.

Pin me – composting kitchen scraps!

Basic steps to composting kitchen scraps into rich soil

Filed Under: Gardening, How To, Tips & How To's, Uncategorized, Utah Gardening, Yard Care Tagged With: compost, compost kitchen scraps, composting, kitchen scraps

Pest Control – the Annoying Box Elder Bug

April 19, 2018 by Western Gardens

Boxelder bug on green leaf. CC-BY-SA-3.0 (http://creativecommons.org/licenses/by-sa/3.0/) or CC BY 2.5 (https://creativecommons.org/licenses/by/2.5)]

By Tom Murphy VII on WikimediaCommons

Have you already found a boxelder bug inside your house this spring?  They are often the first bug of spring, at least in my yard. Boxelder bugs (Leptocoris species) are very common over most of the United States. They are considered more of a nuisance than a destroyer.  

Boxelder bugs are most numerous in areas where boxelder, silver maple, ash, and fruit trees grow.  Their main source of food is from sucking the juice from the boxelder tree, which does not damage the tree. In the early spring, the female bugs lay their eggs on the bark of these trees.  The new little hatchlings are called nymphs and are about ¼ inch long and have bright red wingless bodies with black legs. Nymphs congregate in mass, so it’s easy to spot them on the trunk of a tree, building foundation, or wherever. The young feed on tender twigs, foliage, pollen, and seeds through the spring and summer. Controlling the nymphs is easier than controlling the adults so watch this spring to get a jump on them.     

Boxelder adult and nymphs

Boxelder bug Nymphs & Adults – Photo by Viking6 at Wikipedia, CC by 3.0

The Boxelder bug adults grow to be about ½ inch long.  They are red or black with reddish lines on their wings.  In the fall, especially on bright sunny days, the bugs migrate to locations to hibernate through the winter.  In the spring, they emerge to look for host trees so they can eat and lay their eggs, completing the cycle.  

boxelder bug adult on flower

Photo by Bruce Marlin on WikimediaCommons


How to Control Boxelder Bug and/or Prevent their Annoyance

  1. For home invasion prevention, keep sealed doors, windows, foundation cracks, around plumbing, gas, and electrical conduits.  Weather strip around doors and windows plus screen off attic vents and repair broken windows and screens. Expanding-foam sealants may be helpful too.  
sealed window and door keeps bugs out

Photo by Pixxl Teufel on Pixabay

  1. Vacuum the bugs with a “shop” type vacuum, empty the vacuum and seal and dispose of the collected bugs, as they can live through the vacuuming process and will continue to creep around otherwise.
vacuum up boxelder bugs

Photo by Jarmoluk on Pixabay

  1. Avoid smashing the bugs. They don’t feed on fabric or furniture, but when crushed, they do stain household items.  They also release a strong, unpleasant odor.
shoes to squish boxelder bug

Photo by Took-a-Pic on Pixabay

  1. Boxelder bugs, especially the nymphs, are easily drowned.  When watering your plants with a garden hose, it’s also a good time to water-down congregations of bugs on buildings.  
  2. Reduce bug populations by removal of female boxelder trees. Realize that even if you don’t have a boxelder tree on your property, chances are great that there is a Boxelder tree nearby.

Boxelder trees are often called “trash” trees. They may seem pretty and provide shade, but there are many other better choices for shade.

Boxelder tree leaves

  1. Boxelder bugs do not have many natural enemies.  No major insects or birds like to eat them, probably because they can emit an offensive odor, which probably makes them taste bad too.  Spiders could be considered a minor predator.  
  2. Chemical control of boxelder bugs is difficult because these bugs are tolerant of most insecticides.  There are some residual insecticides that can be sprayed around the outside of the building.   Oil based sprays can stain building surfaces, so try to control on the host plants, not the building.  Be sure to check with your local independent garden center, like Western Gardens, to know the latest and best product recommended.   Always follow current label instructions of any pesticide used, as label changes occur and must control application procedures. This or any other instruction must be adjusted/disregarded so application conforms to the current pesticide container label.
  3. For an organic alternative to using synthetic insecticides.  Mix about ½ cup laundry detergent with one gallon of water.  Use a squirt bottle to spray the insects. There is no residual value so you must spray thoroughly and often.  
Organic solution of spray bottle and detergent to kill boxelder bugs

Organic Solution

Resources:  Thanks to Ortho Publications, Utah State Extension, Chuck Solomon, and G. Rex Buys of Western Garden Centers

ways to control boxelder bug

Filed Under: Gardening, Insects, Tips & How To's, Utah Gardening

  • « Go to Previous Page
  • Go to page 1
  • Go to page 2
  • Go to page 3
  • Go to page 4
  • Interim pages omitted …
  • Go to page 18
  • Go to Next Page »

Primary Sidebar

Shopping Cart

Items in Your Cart

Your cart is empty
Visit The Shop

Follow Western Gardens

  • Facebook
  • Instagram
  • Pinterest
  • YouTube

See what we’ve been pinning!

Follow Me on Pinterest
Followed by people.
?

Pinterest Badge by Skipser

Here’s What We’ve Been Up To!

Save water and money by Turf Training - train your lawn to grow deep roots
work at western gardens utah garden center
Senior gardening woman Edu Carvalho from Pexels
nursery center open to public

Copyright © 2023. Western Gardens - Privacy Policy