• Skip to primary navigation
  • Skip to main content
  • Skip to primary sidebar

Western Garden Centers

for what grows here

  • Home
  • How To
  • Gift Cards
  • Calculate Mulch
  • Locations
    • Store Hours
    • About
    • Garden Shop Employment Team
  • Weddings
    • Salt Lake City, UT
    • West Valley, UT
  • Blog
    • Gardening
    • Recipes

Utah Gardening

How to Choose an Apple Tree in Utah

September 21, 2017 by Wendy Pettit

Fall is a wonderful time to plant trees and the apple tree is one of the easiest fruit trees to grow.  Surprisingly, how to choose an apple tree is easy to learn as well.  Learn these three basic criteria as you prepare for this investment.  Nearly all apple trees require a second variety close by in order to pollinate.  So as you are considering, be sure to have a first and second choice.

How to Choose an Apple Tree – 3 Criteria:

  1. Right SIZE – Choose the right size of tree for your space.  You need to look at your space and maybe even measure the space so you know what you are purchasing.
  2. Right VARIETY – Type of fruit desired.  Do you want fresh eating apples, or just cooking apples?  You will be investing time and effort into you tree, so they may as well be apples that will please you and serve your purpose.
  3. Right TIME – When does it flower and when is harvest time.  Apples require a second variety to cross-pollinate, therefore you want 2 apples trees that will bloom about the same time.

SIZES of Trees:

  • Standard size tree – can grow to 25-30 feet tall along Wasatch Front with a spread of 25-30 feet.  You need a large area for the standard size tree.  Standard trees take 4-8 years to produce mature fruit.  These trees are very good in cold-climates, but be ready to prune every year.
  • Semi-dwarf (sometimes called half-standard) – can grow 12-15 feet tall along the Wasatch Front and same width if not pruned.  This tree will have mature fruit in 3-5 years.
  • Dwarf or Genetic Dwarf tree or Bush trees – Can grow 6-10 feet tall along the Wasatch Front and just as wide.  These trees produce mature fruit in 3-4 years.
  • Others:  There are several other types of fruit trees.  These would include espalier and columnar.  See your local experts at the neighborhood nursery for what will grow in your area and for availability.

Nearly all semi-dwarf and dwarf or bush trees are grafted.  Growers graft or attach the desired fruiting branch to a “rootstock” trunk.  The rootstock determines how big your tree will get.  Shopping your reputable local garden nursery will ensure that you are buying a quality product – good grafting onto a quality rootstock.  There are different rootstocks for different areas.  Your local nursery experts will only sell what will work here along the Wasatch Front, versus a big company back east somewhere that orders for their stores throughout the country.

VARIETY of Fruit:

There are literally over 7000 apple varieties.  Obviously many more than what you find at the local grocery market.  Visiting a good local farmers market can expose you to other varieties you can taste before you make an investment into your own tree.

Click HERE to see a basic break down of the more popular varieties and their best uses.


Remember that your tree is your investment, so you want to produce something you will use and enjoy for years and years to come.  Apples trees can live as long as 60 years or more.

TIMES for Blooming:

As mentioned above, nearly all apples need a pollinator apple tree in the general area.  If you have neighbors that have apples trees, planting one in your yard should still give you plenty of harvest.  But if you are the only one, then you may need to plant two different varieties of apples.  For example, in commercial orchards, farmers often plant some golden delicious apple trees along with their main crop.  Golden Delicious trees are known to be good pollinators.  Be sure to choose two varieties that overlap their flowering time.

Midseason bloomers:

  • Crimson Beauty
  • Gala
  • Jonamac
  • Jonathan
  • McIntosh
  • Golden Delicious
  • Jonagold
  • and others

Late bloomers:

  • Fuji
  • Granny Smith
  • Rome Beauty
  • Winesap
  • and others

Poor pollinators:  Jonagold and Winsesap (plus a few more), are considered poor pollinators.  Don’t plan on them being your pollinating tree.

Hardiness and Cold Requirements:  Be sure to check at your local garden center for those varieties that are actually hardy for your area.  You need to choose an apple tree that will survive your climate year round.  And on the other hand, realize that apples require a certain amount of cold temperatures to have the sugars set and the fruit to ripen properly.  If the fruit doesn’t get the required coldness, the fruit will be a disappointment for all the time and effort you’ve put into your harvest.

For example, my parents planted a Red Delicious apple down south in the area of St. George, Utah.  The fruit grew but never turned red and always had a mealy texture and flavor. The fruit never was like their Red Delicious apples from their trees up in northern Utah.  The tree eventually was cut out.

Conclusion:

Now you know the basic criteria for how to choose an apple tree.  You need to consider the right size of tree, the right type of apple, and the right blooming time for good pollination. What a great investment for your yard, yourself, and your family!

In future posts, we will go through proper planting procedures, learn about any pest control needed, and how and when to properly prune your tree.   Soon you will be enjoying the fruits of your labor.

Check out these recipes for apple goodies (submitted by Western Garden patrons):

Simple Apple Chips and Apple Pie Filling

Simple Applesauce and Apple Butter


Filed Under: Fruit, Gardening, How To, Trees, Utah Gardening Tagged With: Apple trees, blooming time, choosing trees, fruit trees, How To, how to choose, tree size, utah apple trees, utah fruit trees

Six Favorite Shade Trees to Beat The Heat

August 17, 2017 by Vanessa Roush

Welcome Gardeners! Looking for a good shade tree?

Discover favorite shade trees to cool you off.

With the heat of summer quickly approaching, check out our six favorite shade trees that will help you stay cooler as you enjoy being outside longer. These favorites are easy to care for and do well in our mountain desert climate once established.

Favorite Shade Trees List:

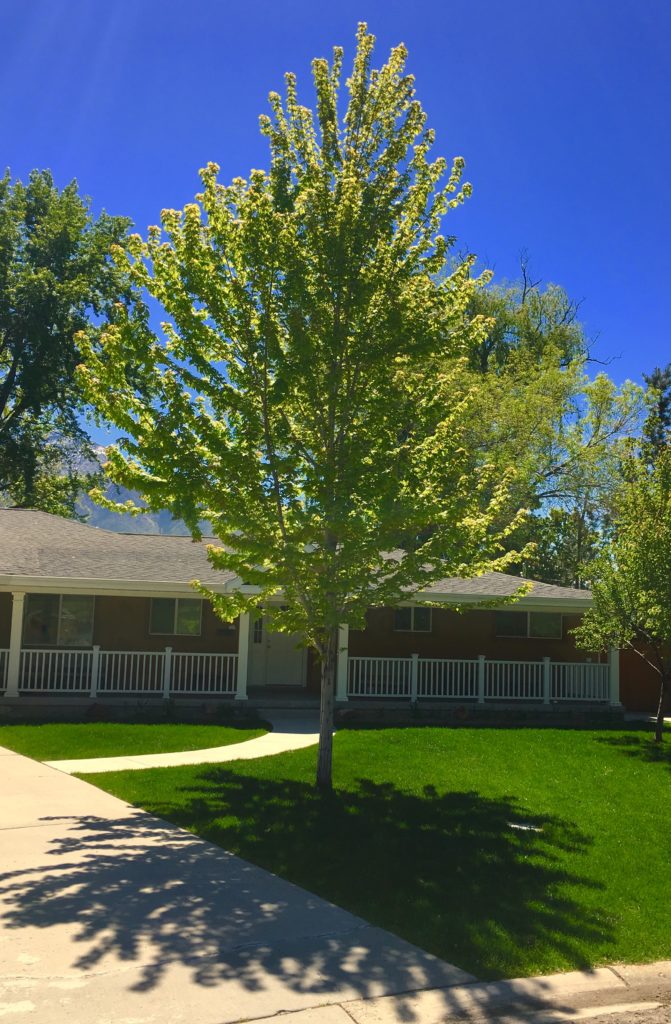
Autumn Blaze Maple (Acer x freemanii)Another of our favorite shade trees is Autumn Blaze Maple

Our number one favorite shade tree Autumn Blaze Maple is a cross between a red and a silver maple. It is fast growing (up to 3ft per year), tolerates a variety of soils and is easy to care for. In the fall, the leaves turn bright red for which it gets the name “autumn blaze”.  This maple variety can grow up to 50 feet tall and 40 feet wide and prefers full to part sun. This tree is a great option if you’d like a fast growing, easy to care for tree with show stopping colors in the fall.  An easy pick for our top favorite shade trees list.

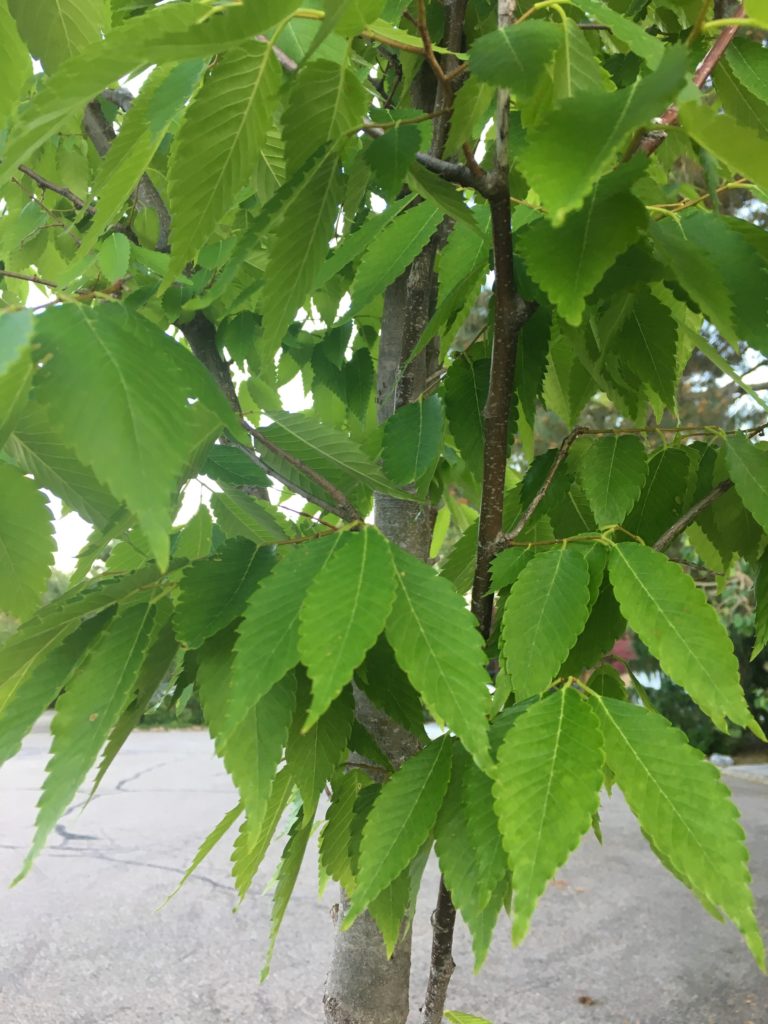
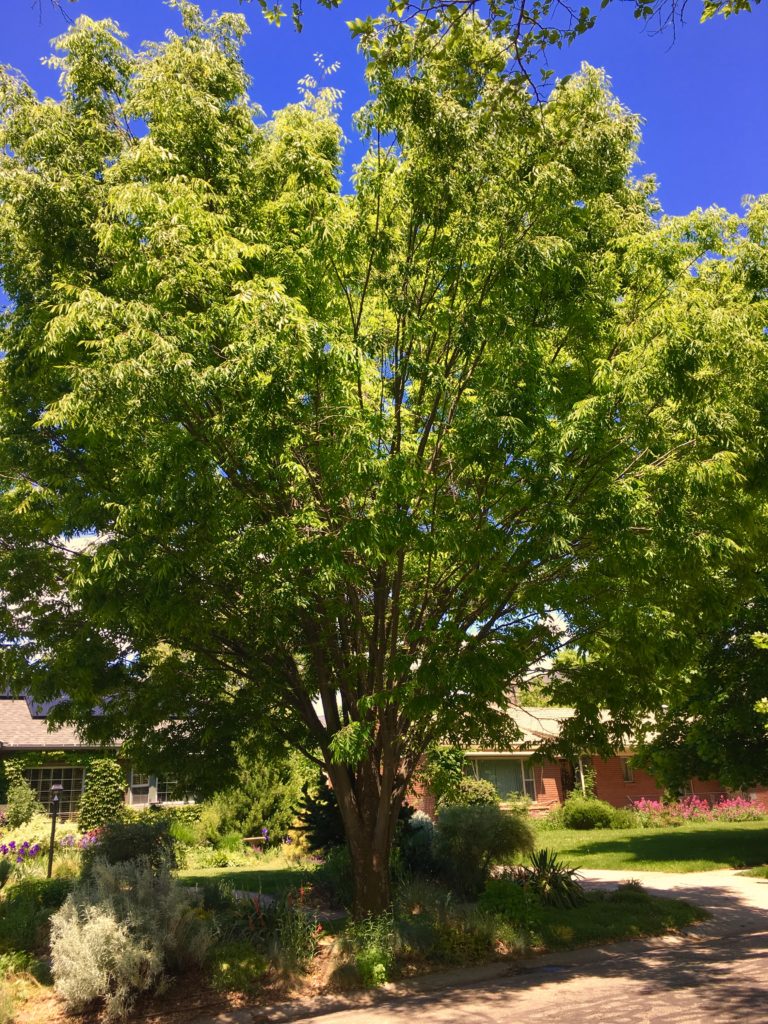
Japanese Zelcova (Zelkova serrata)Leaf of the Japanese Zelcova looks similar to Elm leaf, but is more disease resistant.Japanese Zelcova tree is one of our favorite shade trees

The Japanese Zelcova is an underutilized species that has started to become more popular. It is considered a shade tree, but also showcases an ornamental quality with its vase like shape. Zelvocas look similar to an elm, but are disease and pest resistant. Once they are established, they are also drought tolerant. Mature height is around 60 feet tall with yearly growth between 1-2 feet. It does best in full to part sun. Zelcovas are ideal for planting by driveways or side walks because their roots will not disrupt the concrete like other trees root systems. The leaves also showcase deep red and orange hues in the fall.  A beautiful choice and will be part of your favorite shade trees to have in your yard.

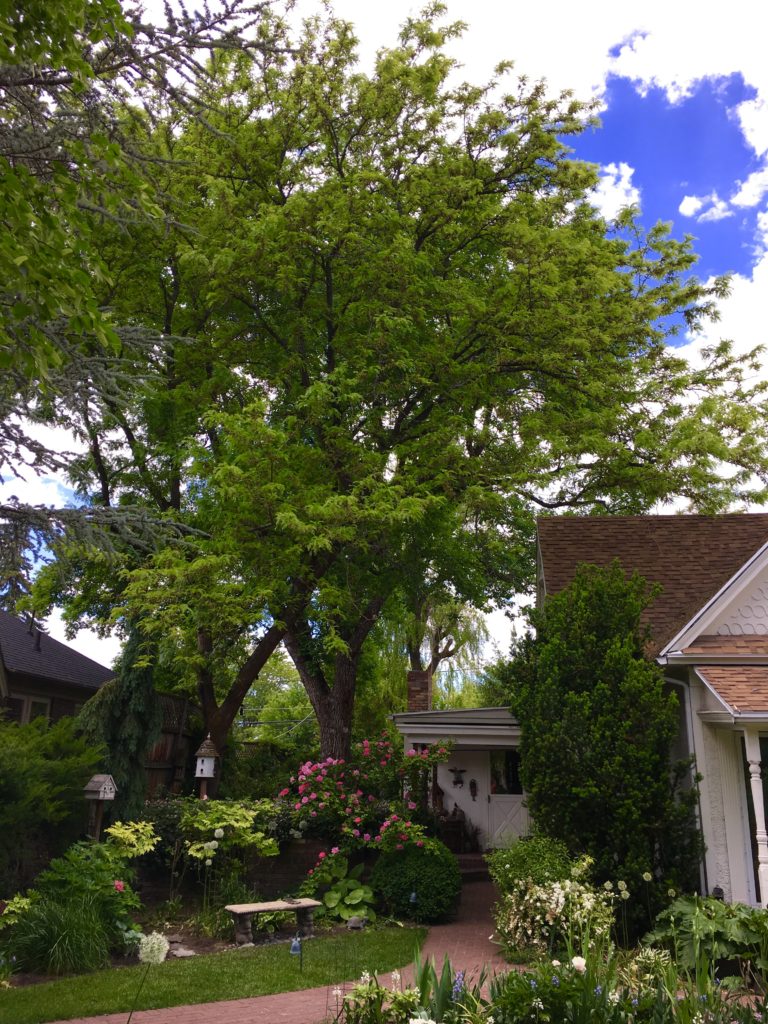
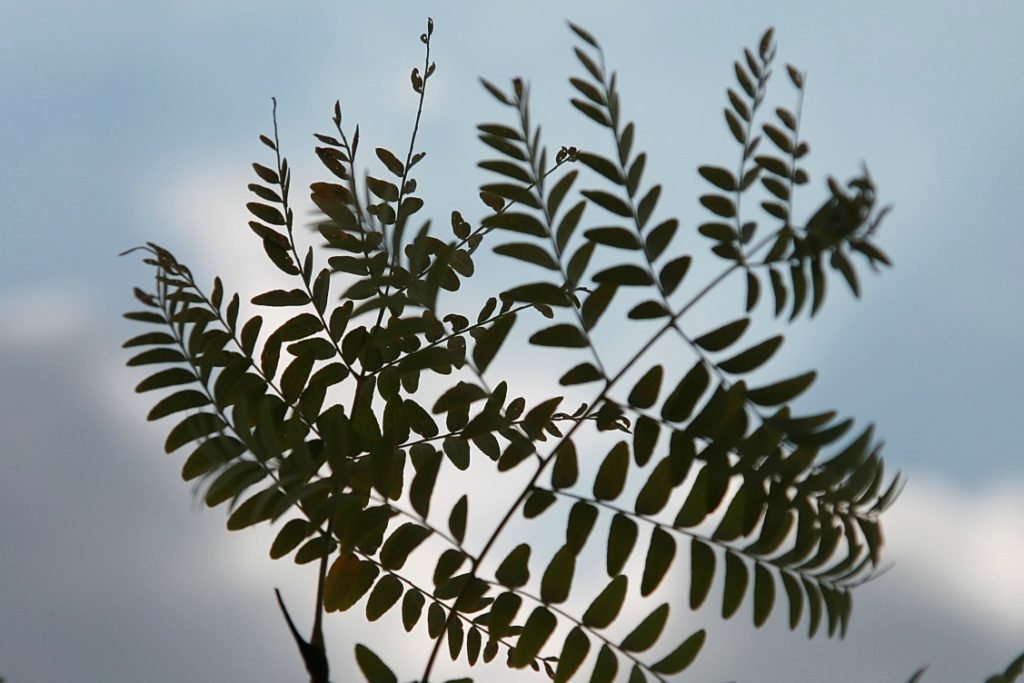
Honeylocust (Gleditsia triacanthos)

honeylocust leaves are small, light, and airy.

Photo by: David J. Stang – WikimediaCommons

Honeylocust, both thorn and thornless, is yet another tree that is fast growing and tolerant of many soil types. Mature height is between 30-70’ tall, and grows up to 2 feet per year.  It provides lightly filtered shade.  Honeylocust have small delicate leaves that turn a bright yellow in the fall and then blow away, leaving very little to rake up.  They can also be used to stabilize hillsides and control erosion.

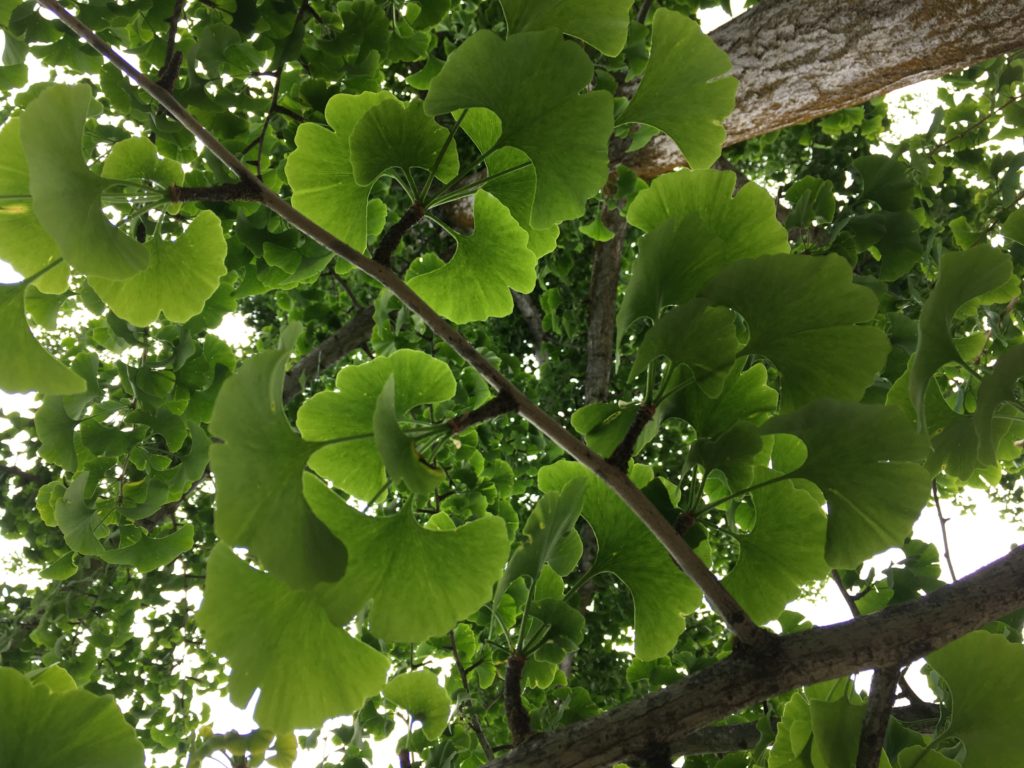
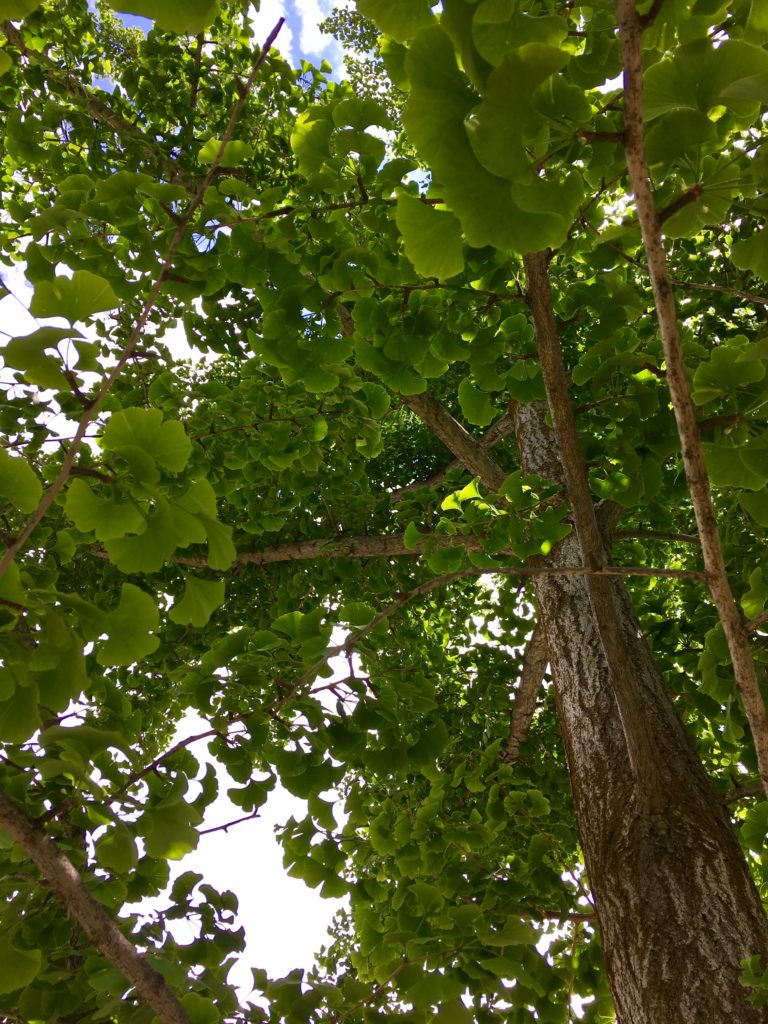
Ginkgo (Ginkgo biloba)

The Ginkgo is an underutilized species here in Utah, and has many unique characteristics to it. It is actually considered a living fossil, and some trees can live as long as 3,000 years! It grows 25-50 feet tall in maturity with a vase-like canopy reaching 25-30 feet wide. Yearly growth rate is 13’’-24’’ per year and tolerates a variety of soils. It is best if planted in full sun to part shade. This is another tree that grows well next to driveways and concrete. One of the unique features of this tree is its fan shaped leaf. Female trees do bear a fruit that can be messy, so ask your local gardening expert to pick out a male tree.

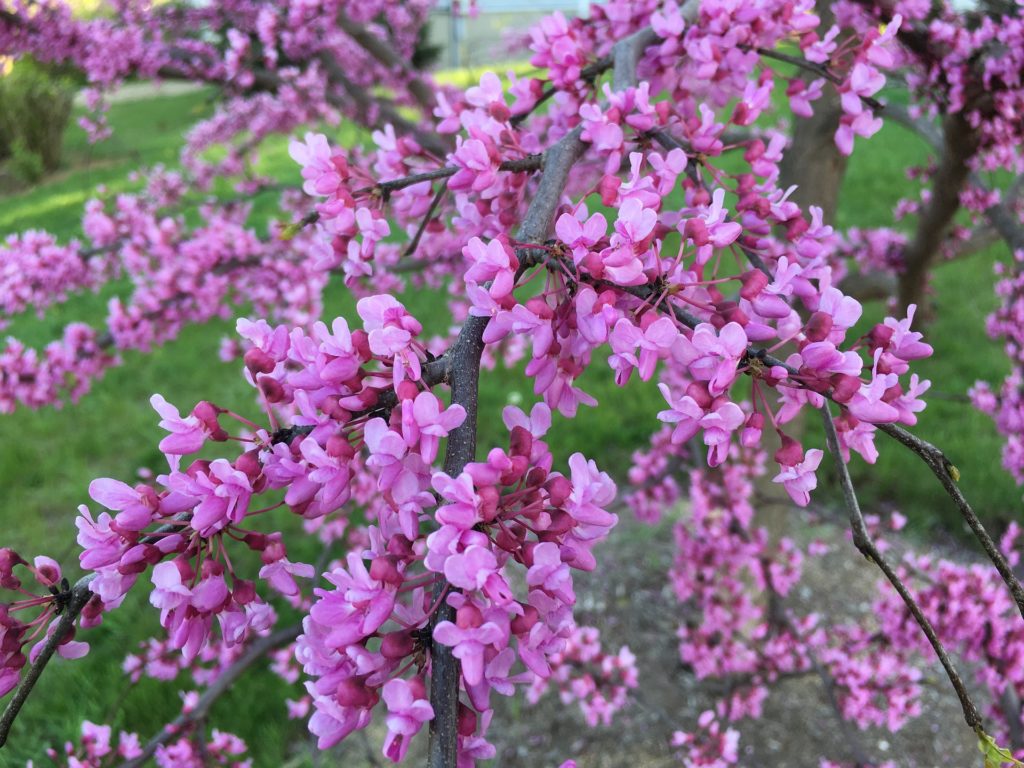
Eastern Redbud (Cercis canadensis)Eastern Redbud is a great tree to create shade and it is beautiful in all four seasons.

The Eastern Redbud is the magenta flowering beauty blooming in spring.  It’s the first tree we see in spring which makes people say, “Wow! Look at that tree’s color.”  It’s unique green heart shaped leaf turns yellow in the fall.  As a moderate grower, it will peak up to 20-25 feet tall and 20 feet wide. It is tolerant of most soils and likes even moisture throughout the season, being less drought tolerant than our other favorite shade trees. This native Eastern American tree offers four seasons of unique beauty, following up in winter with a beautiful branch structure and course bark.

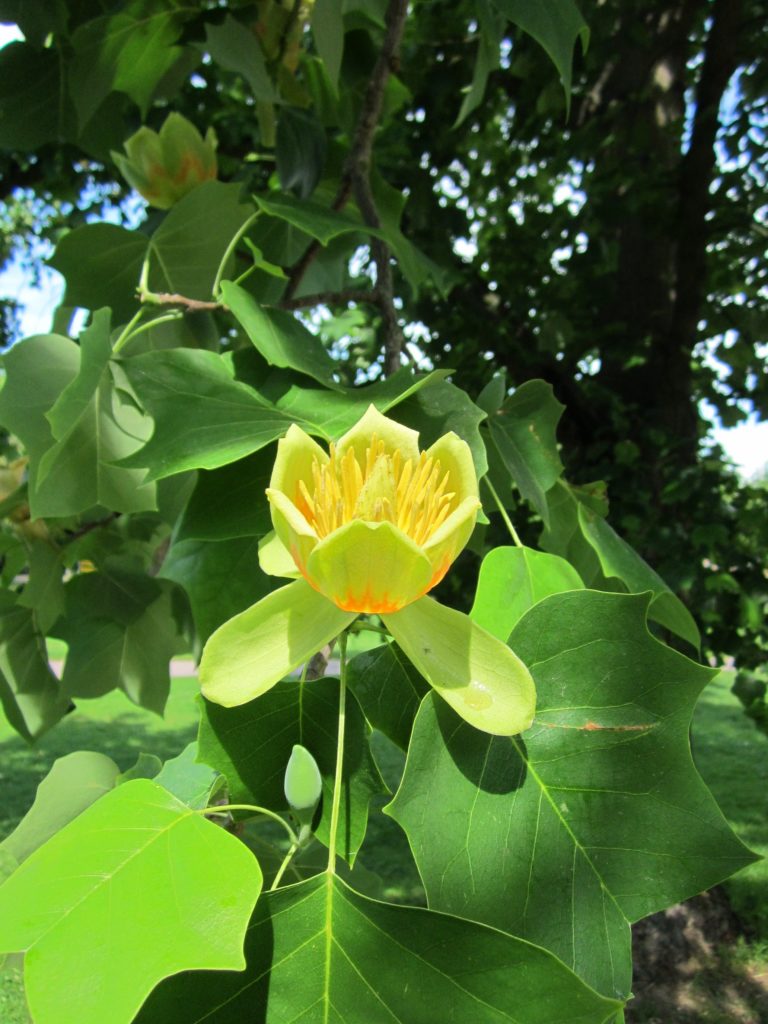
Tulip Tree  (Liriodendron tulipifera)

The unique Tulip Tree is another shade tree for your yard.

Photo: Pixabay

Another native North American tree, the Tulip Tree is a wonderful majestic beauty.  Considered a perfect stand-out front yard tree, it also is often used for shade in the back yard.  The wonderful shade tree is long lived, fast growing, tolerant of most soils, and very cold hardy.  The yellow tulip like bloom opens in late spring and it’s leaves turn yellow in autumn.  Be ready for its unique structure to reach 40-60 feet high and be 15-25 feet wide.  Once established it is drought tolerant.

Filed Under: Gardening, Trees, Utah Gardening Tagged With: autumn blaze maple, eastern redbud, ginkgo, Japanese zelcova, shade trees, tulip tree

Favorite Edible Flowers from the Garden

August 3, 2017 by Marjorie Carter

Welcome Friends! Glad you are here.

Favorite edible flowers you probably already have in your yard

Edible flowers from the garden are an often overlooked delicious treat.  As a young child, each summer we would visit family living in California.  In the yard was a giant honeysuckle with beautiful red-gold flowers.  My cousins showed me how to pluck the flowers, pull off the green at the base of the blossom, and suck out the sweet nectar; hence, the name honeysuckle.  My young taste buds looked forward each summer to that sweet taste. 

As an adult, I have since learned that there are many kinds of flowers that are edible.  For example, many people know that dandelion blossoms and greens are edible.  However, there are a number of commonly grown flowers that are generally overlooked as a possible addition to a salad. 

Recently, I’ve experimented with flowers that are not simply beautiful but are also edible, with some surprises along the way.

Important points to remember about edible flowers:

  1. Pesticides – If you are going to eat any of your flowers, be sure you never use pesticides or other chemicals on any part of the plant that produces them. Your edible flowers could become not so edible.
  2. Research – Before sampling something, please be sure you research whether or not it is safe to ingest. Not all blossom are edible flowers.  Also, even if the flower is edible, it does not automatically follow that all other parts of that plant are also edible. Those honeysuckles blossoms I loved to taste as a child are safe, but the berries produced by the same vine are not.
  3. Allergies – As with any other food, be aware that some people are allergic to some flowers. If you already know you are allergic to a particular plant, avoid eating the flowers.
  4. Birds vs Humans – Just because birds can eat a berry, doesn’t mean that they are safe for human consumption.
  5. Cleanliness – Remember to wash the blossoms before eating them.  This will help remove any dust, dirt, or small insects that may be hanging out on the petals.
  6. Environment – The flavor of flowers will be impacted by how much water the plant receives, the timing of when you harvest it, the soil conditions, and the variety (and sometimes even the color of the flower). 

A few Edible Flowers to Try:  

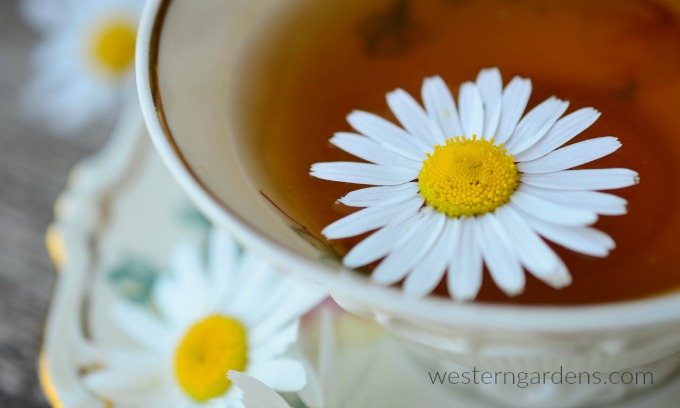
Chamomile can make a tasty tea

Chamomile – Photo Credit: Pixabay

Chamomile – These simple white flowers are lovely and they also make good herbal tea.  I’ve grown them a few times and had to learn to harvest the flowers while the plant was young or the flavor became less to my liking.  Plus, my home grown chamomile had a more “wild” taste than the product I buy in teabags at the grocery store.  It was a bit of an adjustment.

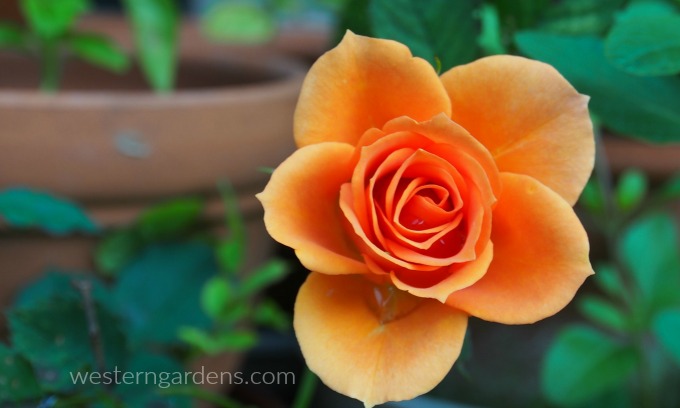
Roses are edible flowers.

Rose – Photo Credit: Pixabay

Rose – Roses are not only a beautiful and dramatic garden favorite, they are edible.  I’ve heard of sugared rose petals, though I’ve never personally tried one.  Rose water is a popular ingredient in a variety of dishes, from cakes to beverages. 

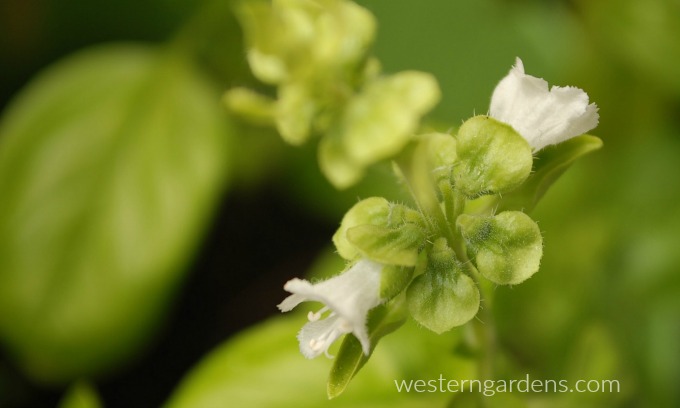
Herb blooms like basil blossoms are edible flowers.

Basil Flowers – Photo Credit: Pixabay

Herbal Flowers (dill, basil, thyme, mint, etc.) – Eating the flowers from your herb garden can provide new options for seasoning your foods.  The flowers generally taste much like the leaves but can be a milder flavor, or a spicier flavor, or different enough that maybe you don’t like it as much as the leaves.  Give them a try and see what you think! 

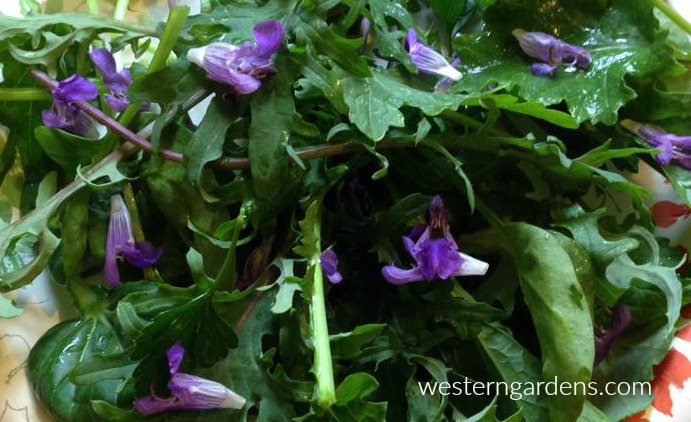
Sage blossoms in a green salad.

Sage blooms in salad – Photo Credit: Marjorie C.

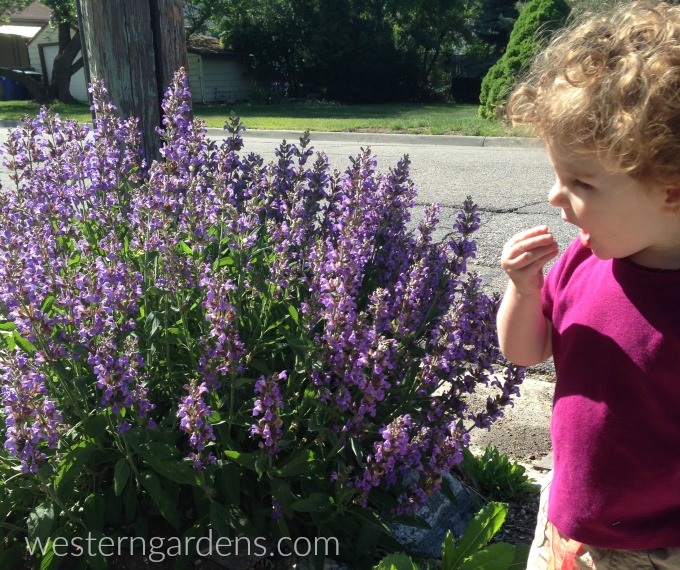
I personally love the flowers from sage.  They remind me of honeysuckle because of their sweetness, which was a surprise to experience.  We add edible flowers to salads or eat them straight off the plant.

Sage edible flowers

Sage – Photo Credit: Marjorie C.

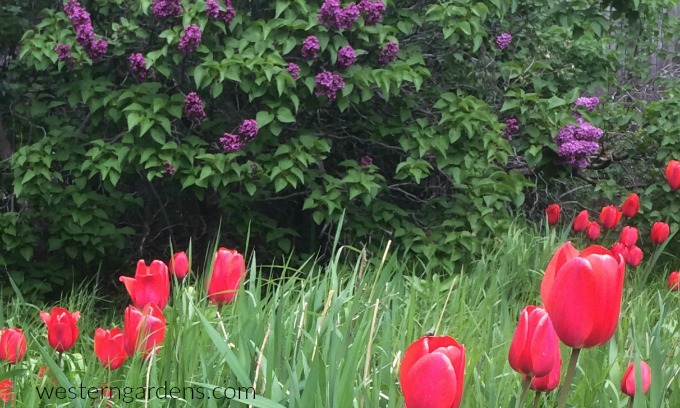
Tulip – This spring we tried eating our tulips.  They basically grow wild in our back yard. My daughter described the flavor perfectly, “sweet red lettuce”. 

Lilacs and tulips are common flowers we can eat.

Lilacs and Tulips – Photo Credit: Marjorie C.

Lilac – I learned only recently that lilacs are edible, too!  I have about half a dozen lilac bushes on my property (thanks to the previous owner).  I love their scent and now look forward to trying out the taste next spring.  I will have purple, pink, and white lilacs to sample.  I think I’ll try a blind taste test to see if I can identify the color of the blossom from its flavor. 

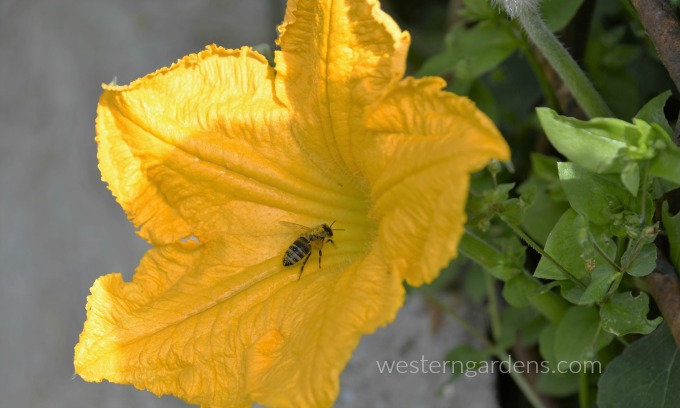
Squash blooms are edible.

Squash Bloom – Photo Credit: Pixabay

Squash – The blossoms from pumpkin vines, zucchini plants, and all other varieties of winter and summer squash are edible. Everyone knows that we all end up with more zucchini than we know what to do with by the end of the summer.  Consider plucking some of the flowers earlier in the growing season and stuffing them, frying them, or making them into soup.

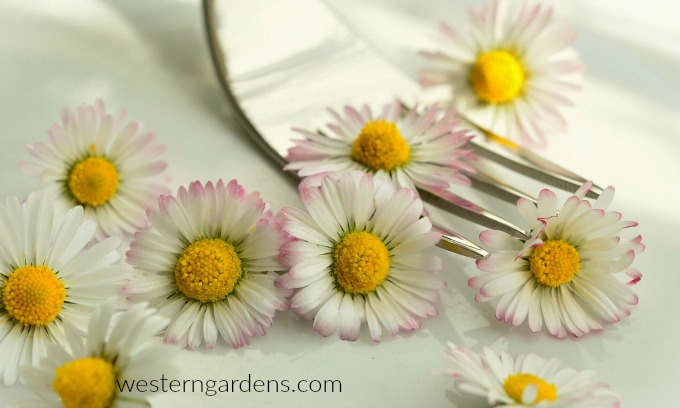
Eat some tasty daisies.

Daisies – Photo Credit: Pixabay

Others – A few other varieties of edible flowers that are common across Utah include: lavender, pansy, peony, marigold, nasturtium, violets, hibiscus, dandelion, clover.   Read about additional  Favorite Edible Flowers.

Finally, just because a flower is edible doesn’t mean it will taste good to you!  Some will taste better to you than others.  Be safe and have fun sampling!

Filed Under: Eat from Garden - Recipes, Flowers, Gardening, Utah Gardening Tagged With: chamomile, edible flowers, edible garden flowers, flowers safe to eat, flowers to eat, garden flowers to eat, herbal flowers, lilac blossoms, rose petals, safe to eat flowers, sage blossoms, squash blooms, tulips

Planting New Trees 101- Secrets to Help Your New Tree Thrive!

July 26, 2017 by Vanessa Roush

Welcome Friends! Glad you dropped in.


In Utah, spring and fall are the best times for planting new trees.  Here are a few secrets to help you find success with your new investment that will beautify and make your yard and home more enjoyable for a long time.

Planting New Trees Begin With Buying an Appropriate Healthy Tree

The first step to a healthy tree is to purchase from a quality local independent garden center or nursery. Big box stores tend to get trees that look okay for a season but suffer down the line because of poor soil, crowding, root chopping, inadequate root ball size, rough handling, and poor care.  Often these warehouse stores don’t own the plant inventory; it is on consignment, so less care is given to the material.  A local independent store, like Western Gardens, also has experts who can help you pick the right tree for the conditions at your house and your growing Zone. Check for trees that have 10’’-12’’ of root ball per inch in diameter of the tree trunk. When selecting a tree, take into account the mature height and width. Material from a quality grower usually has a tag indicating the mature height of the tree.  Some trees may look cute now planted a few feet from the house and close to another one, but after a few years this can become very problematic. Also consider planting a tree of an underutilized species in your area.

Planting new trees can be easy and satisfying.

Transport Your New Tree Home

Local independent gardening stores can deliver your tree for a nominal fee, and you can have the peace of mind knowing that it was transported carefully. If you are transporting your tree home yourself, make sure that it is properly secured and avoid going on the freeway or driving at high speeds. It’s preferable to transport them on their side in the back of a truck so that the leaves aren’t taking the brunt of the air flow as you drive. This can desiccate the leaves and put the tree into shock. As the tree is lifted in and out, be careful to handle gently. Dropping or rough handling can also put your tree into shock.

Evaluate the Branching of Your Tree and Decide Which Way It Should Face

This is often an overlooked step, or an after thought most of the time. Every tree has different branching and some have a better side than others when it comes to aesthetics. First place the tree in the spot where you’d like to plant it and turn it until the branching is how you like it . Take a few steps back, walk around, and look at it from different viewing angles. Consider the main viewing point for the tree, or other things like proximity to fences, driveways, side walks, and power lines.

Evaluate the branching of the tree before planting new trees.

Dig the Hole and Fill with Water

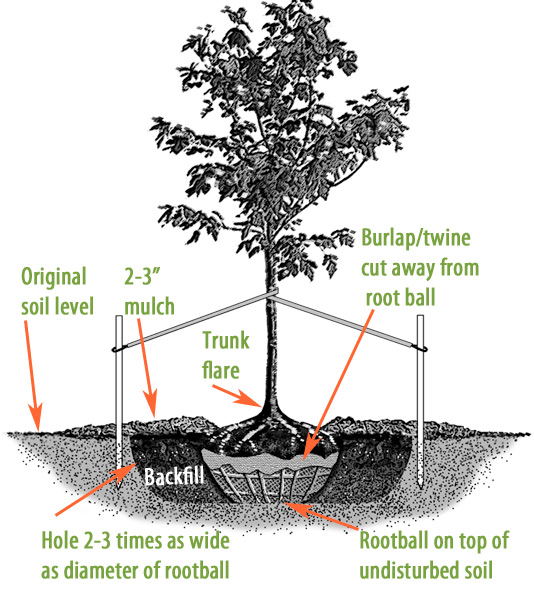
Dig the hole twice as wide and twice as deep at the root ball. If you are planting a tree that likes well drained soil, but you have clay soil, then be sure to dig the hole much wider and supplement with some good soil.  Bumper Crop mixed in with your soil is one of our favorite recipes.  The hole should not be deeper than the root ball itself.  Use your hose to fill the hole with water and let soak down a bit.  This insures that there will be good moisture deep down for the roots of your tree to take hold.

Planting New Tree in Hole – Rotate and/or Straighten

If your tree came out of a bucket, check to make sure the roots are not root bound, or circling around itself. If they are, take a razor blade or knife and cut an X on the bottom and make 4 cuts along the sides. If it was wrapped in burlap and/or with twine, remove any plastic twine because this will not decompose. Loosen the burlap.  These steps are important so that the roots do not become wrapped around itself causing the tree to girdle itself and die.  Place the tree in the hole and backfill it around the sides. Around the trunk, mulch can be 1’’ thick and then increase in depth up to 4’’ toward the outer edge of the rootball. Check and make sure the tree is straight. Also make sure that you can see the flare of the trunk; it should not be covered.

http://www.gardeners.com/how-to/tree-planting/8741.html

Image Credit: Gardeners.com

Watering A New Tree

Planting new trees into the ground isn’t the end.  Watering is very important.  The amount of water varies on the type of tree and soil conditions at the planting site. If you are unsure, ask your local gardening expert. Trees should be watered when planted and also the following day. Then follow with every 3 days or so. The first 2 years of the tree’s life are the most important for establishing roots. When you water, try to do a slow drip so that it can soak down deep and encourage deep roots. Some sprinkling systems may provide adequate watering, but try to avoid high pressure sprinkler heads from spraying the trunk of your tree. It’s not necessary to fertilize trees during their first season.

Monitoring Tree Growth and Health

Don’t forget to monitor the health of your tree as time passes by. If you notice the leaves or needles look sick, take a sample of the problem or at least a photo to Western Gardens where their experts there can diagnose most problems just by examining your sample. They can give you suggestions for chemical and/or organic methods to resolve the issue.

Planting new trees is a wonderful experience because you are investing in the future.

Filed Under: Gardening, How To, Tips & How To's, Trees, Utah Gardening Tagged With: fall planting, planting new trees, Planting trees, Planting trees in the right spot, spring planting, tree planting, Utah gardening

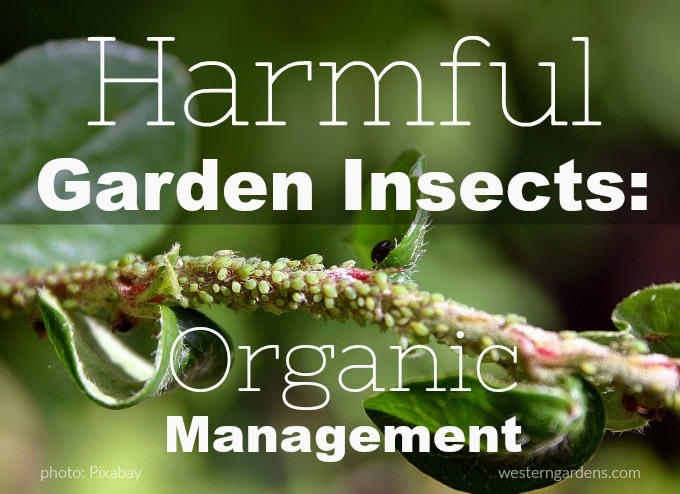
Harmful Garden Insects: Organic Management

July 18, 2017 by Marjorie Carter

 Welcome, Friends! Glad you’re here for some tips to organically manage those pesky harmful garden insects so you’ll have produce left to harvest!

Harmful garden insects can be managed organic methods

All yards and allotments will have harmful garden insects every year; it’s part of nature.  These insects need to eat in order to feed the beneficial insects.  Eliminating ALL the harmful insects from your garden would be time, labor, and resource intensive. You also run the risk of depleting the food source for beneficial insects and other animals that feed on the harmful critters.

Wise Goal – An important and wise goal is to control the harmful garden insects enough to reduce the damage to your garden to a manageable level.  Meaning that by harvest time, there is something left for you to eat.  Losing one or two tomatoes is manageable and probably hardly noticed, but an entire decimated crop means there’s a problem to address. 

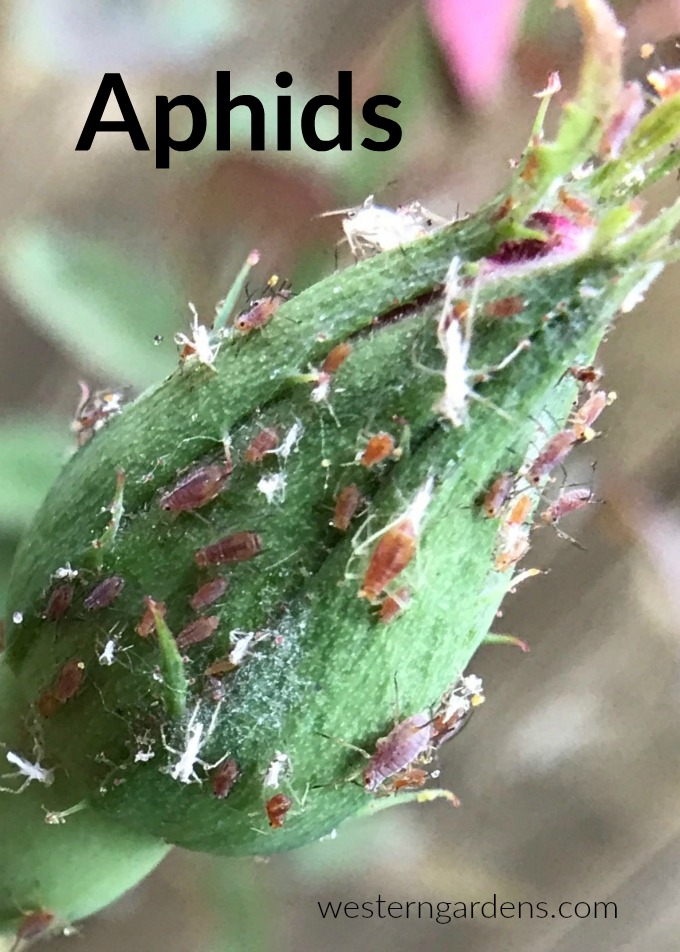
aphids are harmful garden insects that can be easily controlled

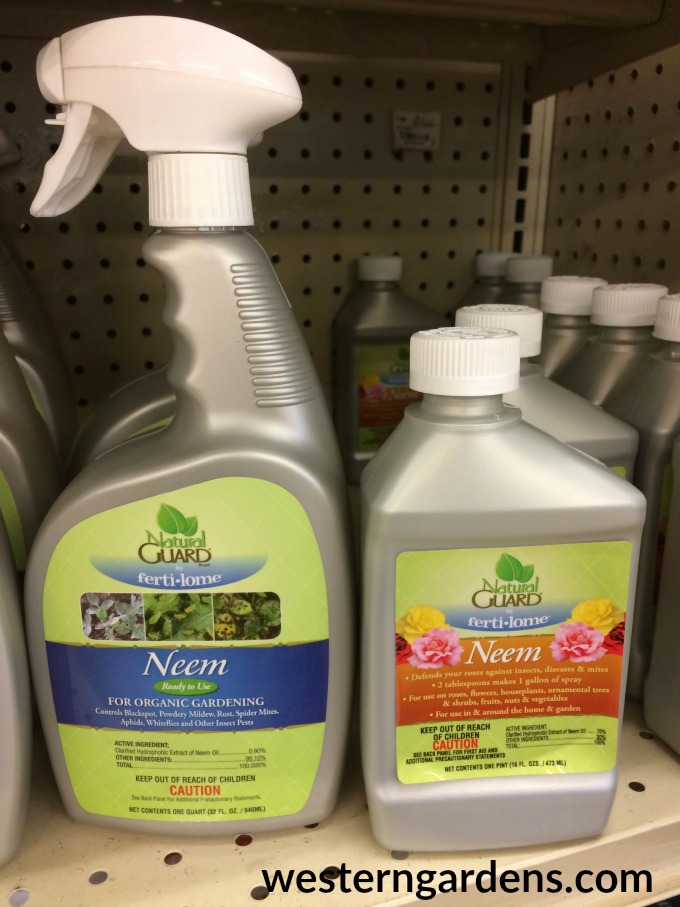
Aphids – One year we had aphids on our herbs which was easily treated by spraying the affected plants with neem oil, a wonderful organic product found at Western Gardens.  This significantly reduced the number of bugs.  They were further kept at bay by some helpful ladybugs, also found at your garden shop. 

Neem Oil is safe organic product. Read label

We were careful to thoroughly wash our herbs before eating them to remove any remaining aphids. Washing anything you harvest before eating it is always a good idea anyway.

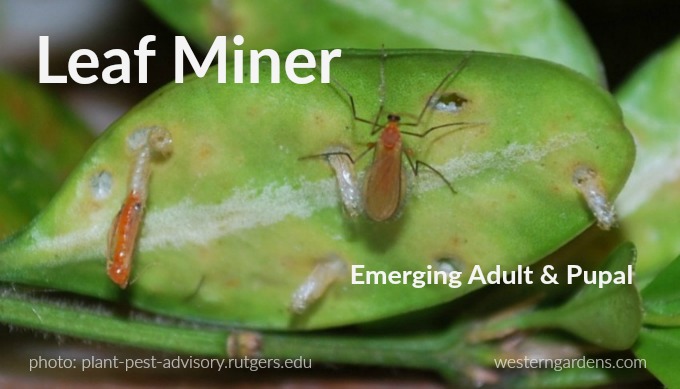
Harmful garden insects include the Leaf Miner

Leaf Miner – Last year, our challenge was leaf miner larvae on our Swiss chard.  In this case, we simply discarded any leaves that had been extensively chewed.  Otherwise, we snipped off the parts that didn’t look as appetizing, like anything that had a visible egg attached to it (usually on the underside of the leaves), washed everything, and then enjoyed our tasty green salad.

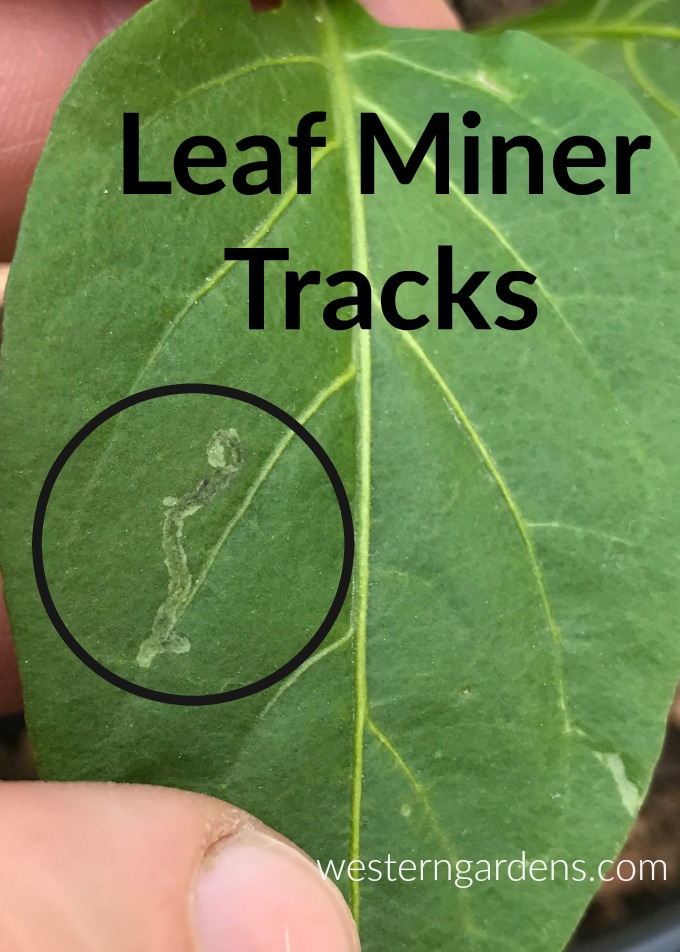
tracks of leaf miner on pepper plant leaves

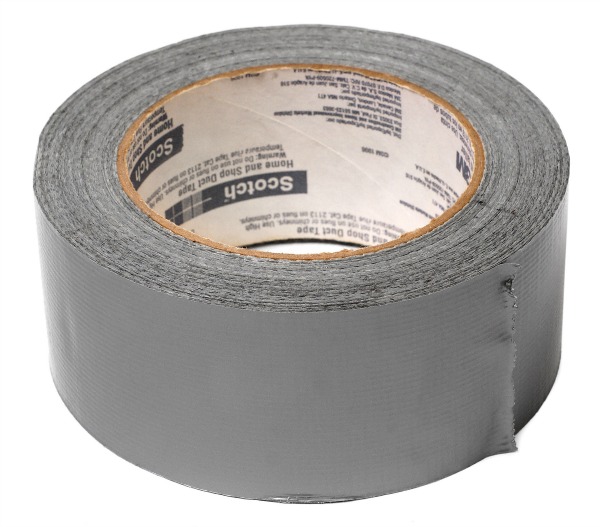
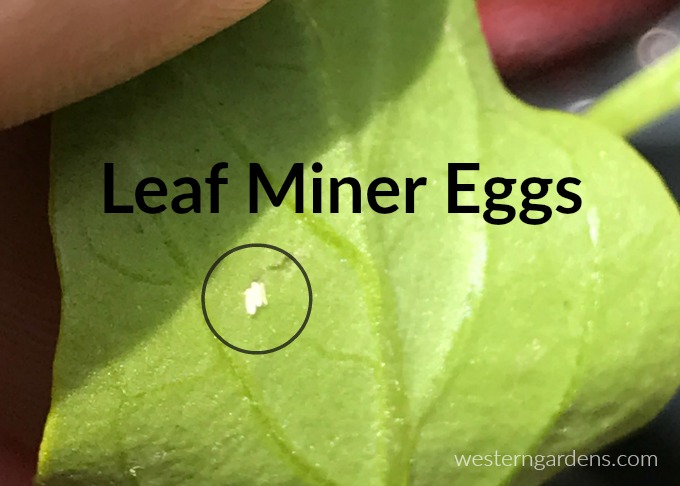
This year, now that we know to look for the leaf miner eggs on the leaves, we were more attentive with our starts for our garden and inspected them daily, looking for them or other harmful garden insects.  We found eggs on our pepper plants and did our best to remove them when the plants were small.  We used a piece of duct tape wrapped around a finger to remove the eggs.

duct tape wrapped around one finger helps lift off insect eggs from plants

We found that using a gentle fingernail was still too rough for the tender young leaves, so gently touching the tiny eggs with the sticky duct tape easily lifted them off.  

Eggs of the leaf miner on pepper plants

Once the plants were more mature and could withstand a little insect activity, we were less vigilant at egg removal, but still mindful of looking for eggs once in a while.  Read more on homemade remedies for treating leaf miners by clicking here.

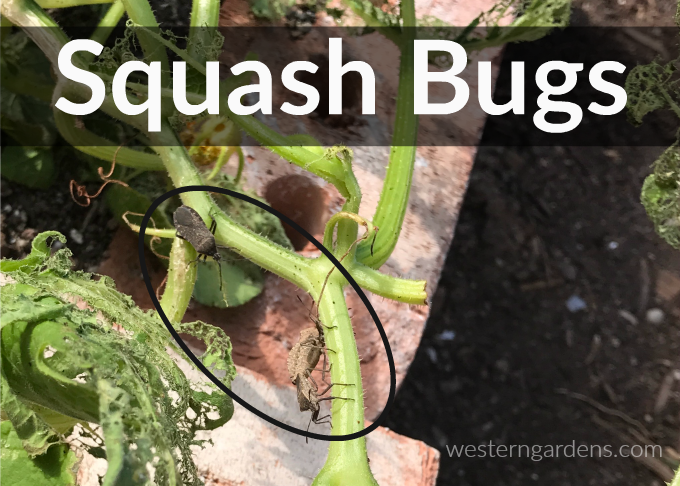
harmful garden insects also include squash bugs

Squash Bug – This year, we planted pumpkins for the first time.  We had heard of the dreaded squash bug and had been looking for them but hadn’t seen any damage to the plants.  Then, just last week (late June), one of our pumpkin plants was nearly devoured overnight by something.

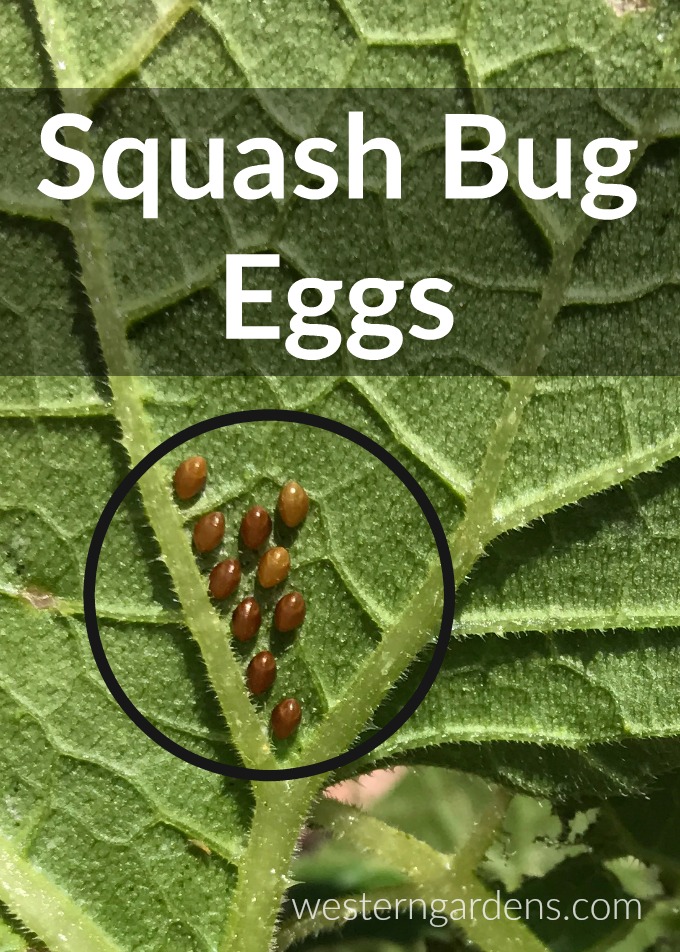
Squash bug eggs are easy to spot and remove.

We assumed it was the infamous squash bug.  This assumption was reinforced when, upon closer inspection of the plant, we found a mating pair of squash bugs with a third one waiting on the side-line and eggs attached to the underside of the remaining leaves and the stem. We posted photos of the damage to a Facebook gardening group and learned of some other likely culprits.  That night my husband went out with a headlamp and a bottle of neem oil to investigate.

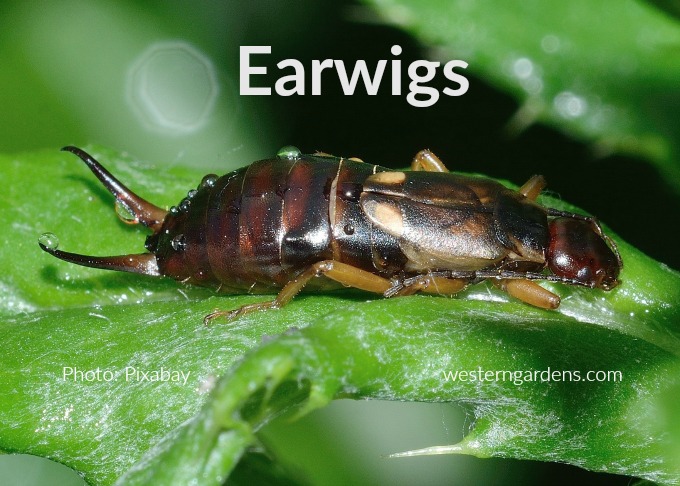
earwigs are harmful but also beneficial

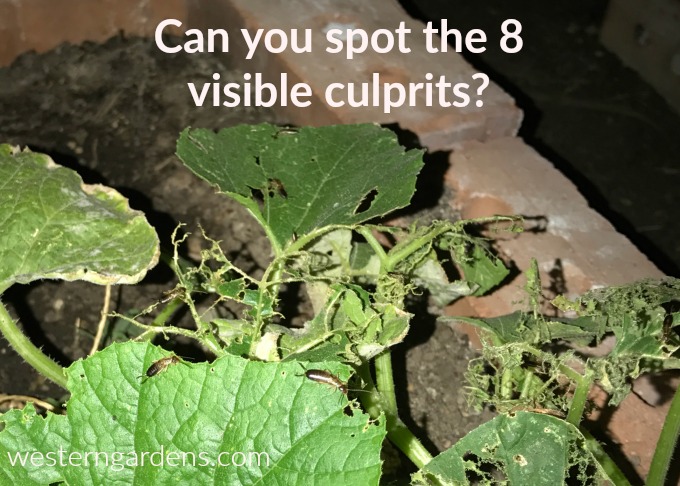
Earwigs – Someone suggested the damage looked like the work of earwigs.  My husband found several earwigs eating on the plant and a swarm of them hiding in a nearby crevasse. Earwigs are a complicated insect in the garden.  They are not only harmful, but also beneficial.  They aid in breaking down organic matter (composting) and they also eat aphids and other harmful insects. However, when there are too many of them around a young susceptible plant, they can be very destructive.  We could also see evidence of earwigs damage on a few leaves of nearby tomato plants.  This minimal damage doesn’t pose a risk to a plant that has hundreds of leaves to perform.  In comparison, the pumpkin plant had only a dozen leaves to start with and most of those were very damaged. 

earwigs eating pumpkin plant leaves

My husband sprayed neem oil on the earwigs on the plant, in the swarm nearby, and even in their nest. It’s still uncertain whether the plant will survive though it already shows signs of new growth. We monitor it closely to prevent another insect attack that would probably kill it.

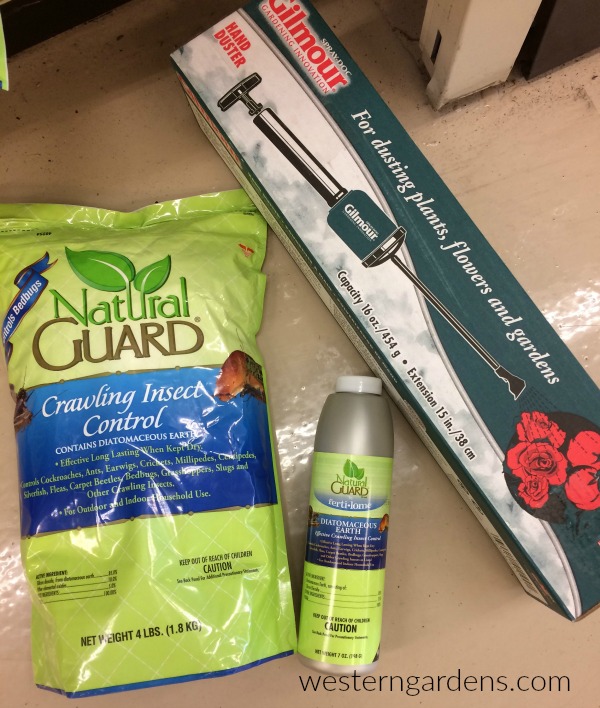
Another organic alternative that works to kill earwigs is diatomaceous earth, which also now offers a nice dispensing bottle which helps cut down on waste and mess.  Check it out at Western Gardens.

diatomaceous earth is a natural organic product to control crawling insects in the garden.

As for the squash bugs, not the main culprits to the pumpkin plant, they were probably snacking on it also.  We’re still removing eggs as we find them (using the duct tape trick mentioned above) and killing any adults.  Their numbers can quickly get out of hand. Again, diatomaceous earth works well to control squash bugs.

Beneficial vs Harmful Insects – Lady bugs, praying mantis, and birds are a few examples of creatures that feed on the harmful garden insects; hence, we like to see these around around the yard.  When considering how to handle any harmful garden insects, the first reaction should generally not be total annihilation.  Rather, try to reduce their numbers and also allow the beneficial insects and animals to do their part until the plant is mature enough to withstand the damage. 

Good luck and happy hunting!

CLICK HERE to read about beneficial insects you want in your garden.

10 beneficial insects you want in your garden! If you spot these in your yard, you're in good shape!

Filed Under: Flowers, Gardening, How To, Insects, Tips & How To's, Utah Gardening, Vegetables, Veggie Gardening, Yard Care Tagged With: Gardening, harmful garden insects, harmful insects, How To, organic management, organic pest controls, Utah gardening, Western Gardens

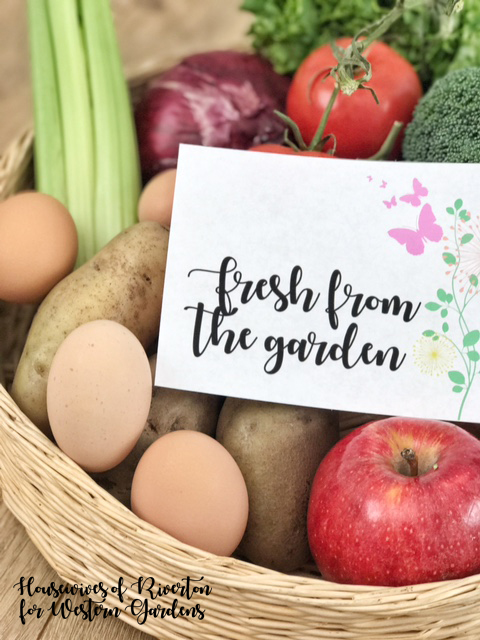
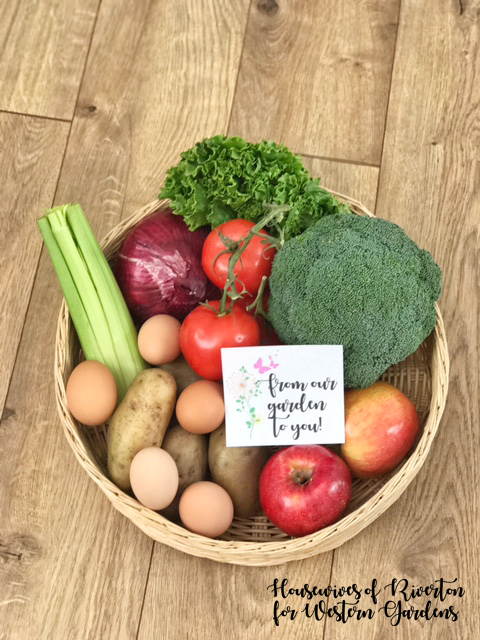
Fresh From The Garden Gift Tags

July 12, 2017 by Jenn Crookston

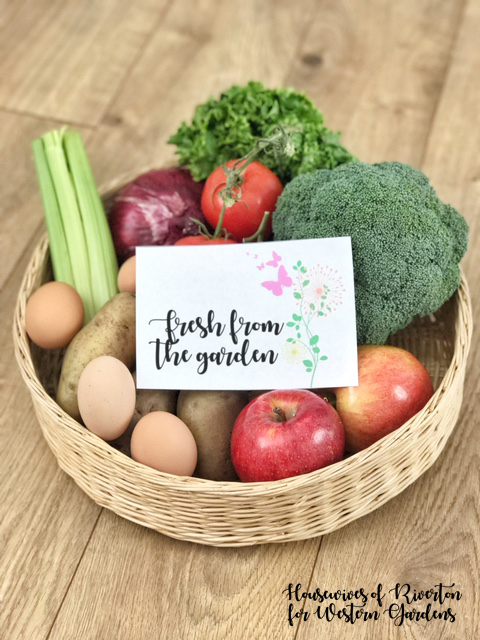
gift tags for garden produce for neighbor gifts
We’re heading into the very best time of the year when it comes to fresh fruits and vegetables.  If you’ve got a garden you know how quickly, once things start to ripen, you can end up with lots of extras.  These Fresh from the Garden gift tags may be incentive to get out and share your joy!

I have loved sharing my bounty with friends and neighbors over the years.  It’s always nice when something I’m not in need of brings a smile to someone else’s face.

July 15th is National “Give Something Away” Day.  I created these bright “Fresh from the Garden” and “From our Garden to You” printable tags to celebrate this fun day.  Grab a small basket (or large, depending on your bounty), fill it with garden fresh fruits and veggies, print off a cute tag and deliver to one of your favorite people.

This would also be a cheerful tag to use with a fresh loaf of zucchini bread or other garden fresh treat.
Ready to print garden gift tag for giving fruits and vegetable away from your garden.

Click HERE for the Fresh From the Garden tag.

Garden gift tag "From Our Garden to You!" - ready to print

Click HERE for the From Our Garden to You tag.

I think sharing is one of my favorite things about having a garden (and having chickens, I love sharing fresh eggs).  In the past, a few neighbors and I were very intentional with our gardening.  We looked at the things we knew we wanted to grow and used a lot of and then sort of split up the planting.  Why would everybody in the neighborhood plant zucchini plants when we knew a couple well maintained plants would supply more than enough for us all.  Same with tomatoes and cucumbers.  As I’m trying my hand more at canning having a couple plants each of my own has been awesome and there is still plenty to share.
Fresh from the garden gift tags to use on a basket of produce for someone in need.
I hope you take advantage of National Give Something Away Day this July 15th.  Remember while these fresh from the garden and from our garden to you tags are created for you to gift something from your garden this is also an opportunity for other ways to give something away.

Give Something Away Idea – Go through your home, find those items that are still in good repair that are just not being utilized by you or your family, then donate them as well!

Give Something Away Idea – Put together your own little farmer’s market where neighbors can gather and share their bounty.

Give Something Away Idea – Create a little swap-n-shop where people can bring things they no longer need and look through things others have brought that might be a perfect fit in their home.

You can download the free printable tags here and here.  We’d love to see how you use them!
Happy Summer!!

Filed Under: Crafts, Gardening, Holidays, Tips & How To's, Utah Gardening Tagged With: DIY, eat your garden, fresh produce gifts, garden gifts, Gardening, national holidays, tips, Utah gardening, Western Garden Centers

Can You Grow Blueberries in Utah?

July 7, 2017 by Vanessa Myers

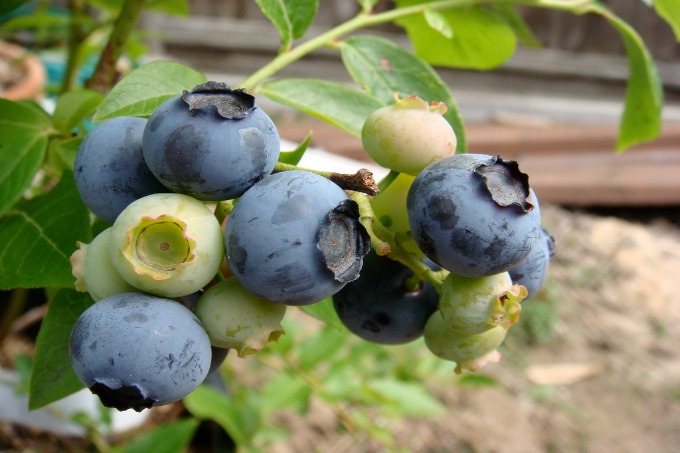
July 10th is National Pick Blueberries Day!  Read this article to help you decide whether to grow and “pick” your own in Utah or just “pick” them up at the grocery store.

Perhaps you have heard about all of the health benefits of blueberries like antioxidants and Vitamin C and would like to start growing them. Residents here, however, may find them to be quite a challenge to raise successfully. Why would we have a hard time growing blueberries in Utah?

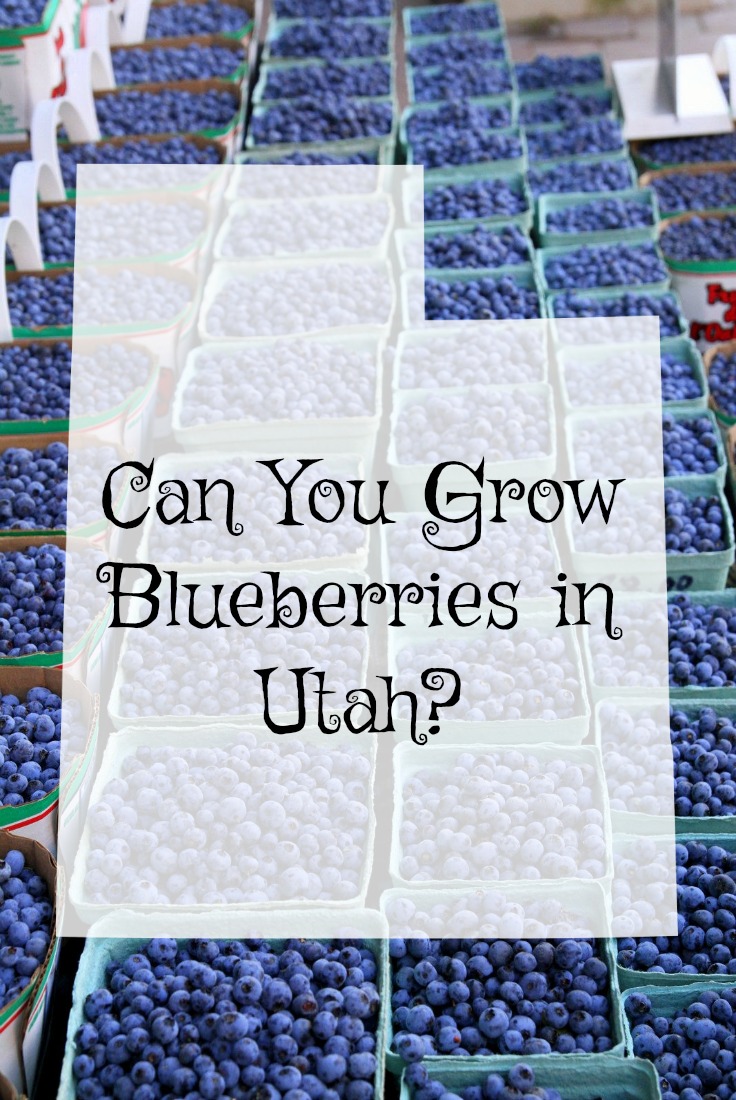
Can you grow blueberries in utah?

Blueberry Image by Fixed in Silver under a Flickr Creative Commons Attribution – ShareAlike License

What Kinds of Conditions Do Blueberries Need?

Blueberries belong to the Ericaceae, or heath family. Other members that you are likely familiar with are azaleas, rhododendrons, cranberries, and heather. As a general rule, they need acidic conditions in order to grow and thrive.

Conditions in Utah, however, are quite the opposite. In many areas, the soil registers on the alkaline side of the pH scale, as does the water. If you tried to plant blueberry bushes straight into your garden without any adjustments, they might try to valiantly struggle along for a while, but won’t be able to grow well and will likely just die in the end.

There’s also the matter of the texture of our soil. Blueberries like to have looser/coarser soils like sand since they form a network of thinner roots instead of a large one. Many areas around here are the finer clays that would make it harder for the bushes to properly spread out their roots and get all of the water and nutrients that they would need for success.

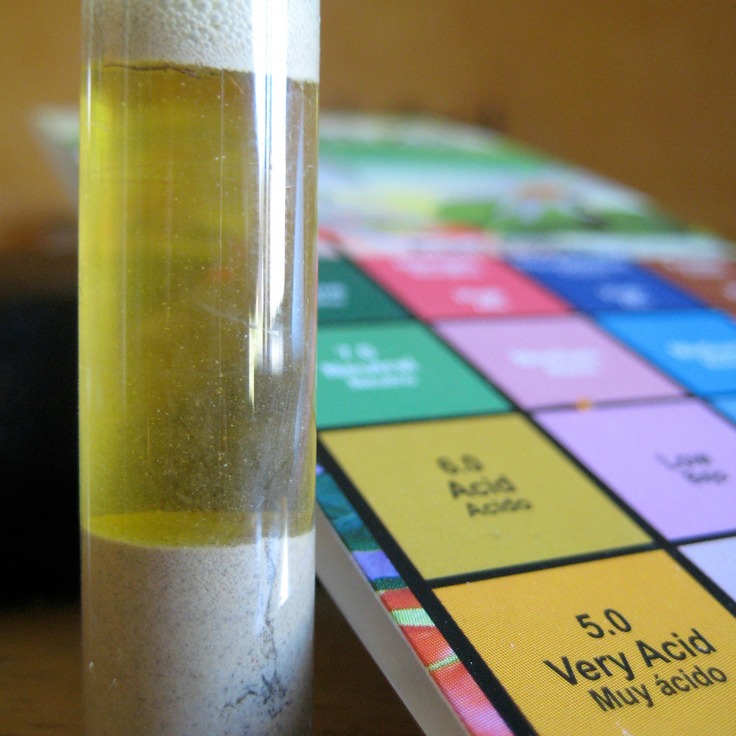
Test your soil before you try to grow blueberries in Utah

Soil pH test Image by michaelstyne under a Flickr Creative Commons Attribution – ShareAlike License

So How CAN You Grow Blueberries in Utah?

You would need to acidify your soil in preparation for planting these and plan on the possibility of needing to repeat the process in the future. Start by buying a pH test kit or send off a sample to the Extension service to gauge how much change would be needed.

The easiest way would be to get a large container that you could fill with acidified potting soil. You could also try preparing special planting beds with soil that has had materials like peat worked into it to make it more acid. Over time, though, it will continue to move back towards alkaline here in Utah (especially if you use untreated water) and you will have to fuss over it.

University of Utah’s Extension service offers a more extensive discussion on the specific ways that you can work on acidifying soil and water found in Utah, along with the challenges that can come along with it.

Blueberries in Utah can be a pain to grow

Image by words under a Flickr Creative Commons Attribution – NoDerivatives License

Is It Worth It?

I am always up for a challenge and like to see if I can grow plants that are a bit more work. You may feel that way, too. However, if you’re just wanting to enjoy some fresh blueberries, it would be easier to concede in this case and buy some at the local store, saving your space for all of the other fruit trees, shrubs and plants that do just fine in Utah.

Have you tried to grow blueberries in Utah?

Filed Under: Fruit, Gardening, How To, Utah Gardening Tagged With: blueberries in Utah, growing blueberries in utah, Utah fruit

June Gardening To-Do List

June 8, 2017 by Western Gardens

Welcome gardening friends!  So glad you stopped by!

Not sure what to do in your yard & garden this month? Check out our June to-do list on www.westerngardens.com

Do you love to work in your yard, but aren’t sure of all the things you should be doing?  Then you’re in luck!  We’ve put together a list of things to do in June!

Not sure what to do in your yard & garden this month? Check out our June gardening to-do list on www.westerngardens.com

You may not need to do everything on this list.  For example, if you don’t have a cherry tree, you won’t need to worry about treating for Cherry Fruit Flies.  Just pick what applies to your yard and plan out when you will do it all throughout the month!

June Gardening To-Do List

➺Plant shrubs, trees and evergreens

➺Fertilize vegetables every 4 weeks with a slow-release fertilizer, and
fertilize roses

➺Watch For Insects show a sample in a clear plastic bag to a garden expert if you suspect a problem

➺Fertilize Lawns and apply iron sulfate if needed (to green up your grass)

➺Watch For Insects like grasshoppers, potato bettle, squash bug & spider mites.  If you suspect a problem, take a sample in a clear plastic bag to a garden expert.

➺Thin Out fruit trees for a better yield

➺Control Powdery Mildew on apples, apricots, cherries, peaches, nectarines,
grapes, peas, roses & euonymous

➺Treat For Cherry Fruit Fly when cherries begin to turn pink, unless already
using fruit tree spray

➺Control Peach Twig Borer once a month with spinosad

➺Watch For Slugs & Snails control with bait or other techniques

➺Adjust Sprinklers if needed, for increasing heat

➺Move And Replant Bulbs if the foliage has died down

➺Watch For Lawn Insects and treat as necessary

➺Prune & Fertilize flowering shrubs

➺Watch For Signs Of Lawn Disease take a sample to a garden expert if you
suspect a problem

➺Control tobacco budworm on geraniums & petunias

➺Control Weeds before they set & disperse seed

➺Plant Outside
Until June 15th: carrots & endive
Until July 1st: cauliflower, parsley, swiss chard, rutabaga
Until July 15th: beets & broccoli
Until Sept 1st: radishes

*This is not an exhaustive list.  If we’ve overlooked something important, feel free to leave a comment and we will add it to the list!

If you’re local to the Salt Lake area, come in to any of our locations with questions or samples!

Not sure what to do in your yard & garden this month? Check out our June to-do list on www.westerngardens.com

Filed Under: Gardening, Tips & How To's, To-Do List, Utah Gardening, Yard Care Tagged With: Gardening, How To, June gardening to do list, lawn, Lawn Care, tips, Utah, Utah gardening, utah gardens, Western Garden Centers, Western Gardens

It’s Time to Thin Fruit Trees

June 8, 2017 by Vanessa Myers

Welcome Gardening Friend! Glad you dropped in.

Did you know it is important to thin fruit trees from all the blossoms that were pollinated?  Read why it is important and some tips on how to do it!

If all went well in your garden this year, your fruit trees were covered in blossoms that were successfully pollinated. Now your tree branches are filled with a plethora of small fruit that promises to be a bumper crop. All that’s left to do is to keep an eye out until harvest to treat any insects or diseases, right?

Now is the time to thin your fruit trees and remove a lot of the developing fruit.

“Wait,” you say. “Don’t I want all the fruit that the tree produces? I was hoping to can up lots of jams, as well as eat them fresh. If I take some off, I certainly won’t have enough!”

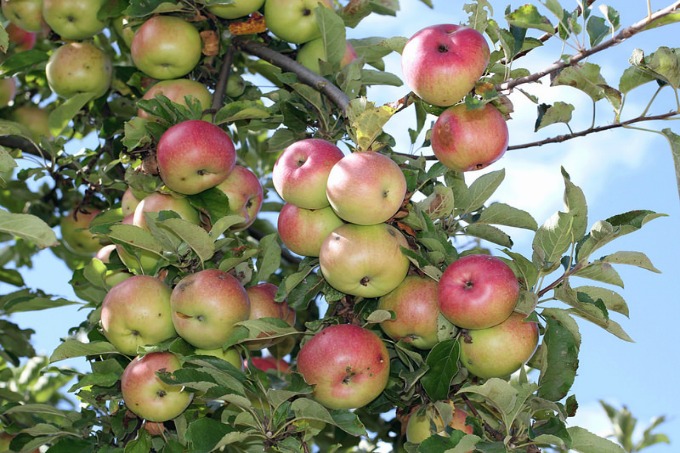
Fruit that is too close on a tree won't be as good as if you had thinned it, likely

These are clustered far too close together. Image by Swallowtail Garden Seeds under a Flickr Creative Commons Attribution License

Think About How the Tree Produces Fruit

Each year, the tree is driven to create flowers and fruit in an effort to reproduce itself. Since at least some of them are destined to fail (frost at a tender time, failure to pollinate, and other disasters), the plant will produce as many fruits as possible.

The most important part of the fruit, reproduction-wise, is the seed inside. The fruit surrounding it is meant in part to help entice animals to eat the fruit and deposit the seed somewhere else, where it can germinate. However, it takes energy and nutrients to form the sweet flesh. When the tree is loaded up, these nutrients have to be spread out between them and you get smaller fruit overall. They will also likely not be as sweet as they could have been if thinned.

You Also Run the Risk of Tree Damage

Even though the sight of a tree branch completely loaded with fruit is a delightful thought, it can be very stressful for the tree if it has to bear so much weight. In some cases, it can even cause the tree to break. You could try to prop up the branch in an effort to avoid this, but it is safer if you just remove the proper amount.

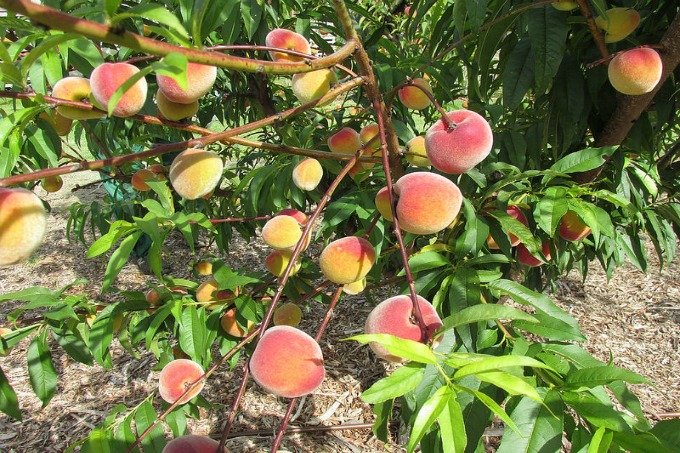
Thin you fruit trees for optimal production

These peaches are properly thinned and look like they’ll be luscious! Image by Forest & Kim under a Flickr Creative Commons Attribution License

How DO You Thin Your Fruit Trees, Then?

When the fruits are about 3/4″ in diameter (about the size of a dime), it’s time to perform this task. Grab a pair of trusty hand pruners and head on over to your tree. You may also need a ladder, depending on height. Start looking over the branches to find the best fruit. Take off any of them with visible damage or that is smaller than others in the cluster. Leave only one fruit out of each bunch. In the end, you want all fruit to be no closer than 6″ for optimal results.

In the end, you want all fruit to be no closer than 6″ for optimal results. Your tree will thank you, and the fruit that you harvest will be large and higher quality.

Make sure that you thin your fruit trees every year

Have you thinned your fruit trees yet?

Filed Under: Fruit, Gardening, Trees, Utah Gardening Tagged With: fruit trees, thinning fruit trees, tree care

Homemade Ketchup Recipe

June 5, 2017 by Jenn Crookston

WELCOME Gardener, Happy to see you here checking out a delicious Homemade Ketchup Recipe for all those tomatoes you are growing!

Homemade ketchup recipe from Western Gardens in UtahAre you looking forward to summertime and all the amazing foods summer brings?  I love picnics and bbq-ing, basically anything that allows me to eat outside and on dishes I don’t have to wash afterward.  One consistent condiment is ketchup, it seems like ketchup goes with just about every summertime meal.
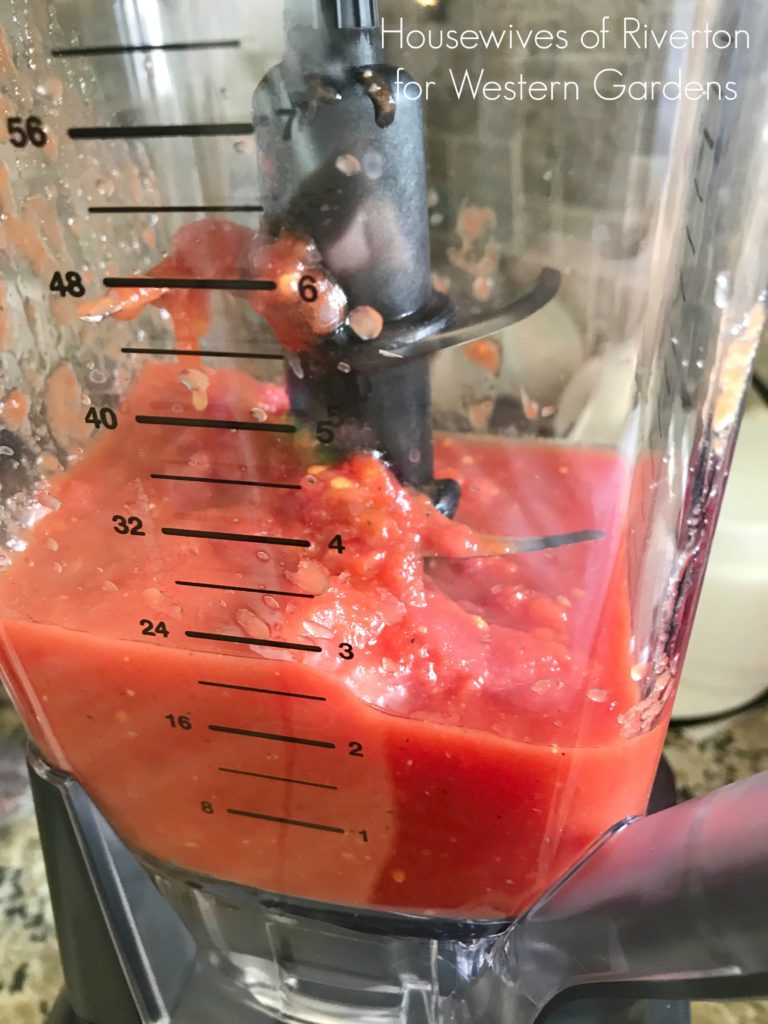
I love trying new recipes, especially recipes that are simple and include items I always have on hand.  Every year we plant a variety of tomato plants and I enjoy using them in the summer and fall.  Unfortunately half of my family are not tomato lovers so I find myself giving tomatoes away so they don’t go to waste.  This year I am determined to learn how to can tomatoes so I can use them all year round and they’re perfect for this Homemade Ketchup Recipe.

Homemade Ketchup RECIPE:

*Whole Peeled Tomatoes, I used 1 large can Whole Peeled Tomatoes (1lb 12oz can)
(I’m looking forward to canning my own tomatoes this year to use for this recipe and many others)
*1/8 cup Apple Cider Vinegar
*1/2 teaspoon Garlic Salt
*1.5 tablespoon Honey
*1-1.5 teaspoon Mustard
*1/4-1/2 teaspoon Worcestershire Sauce
*1/4 teaspoon Black Pepper
*1 teaspoon Onion Powder (can add more to taste)
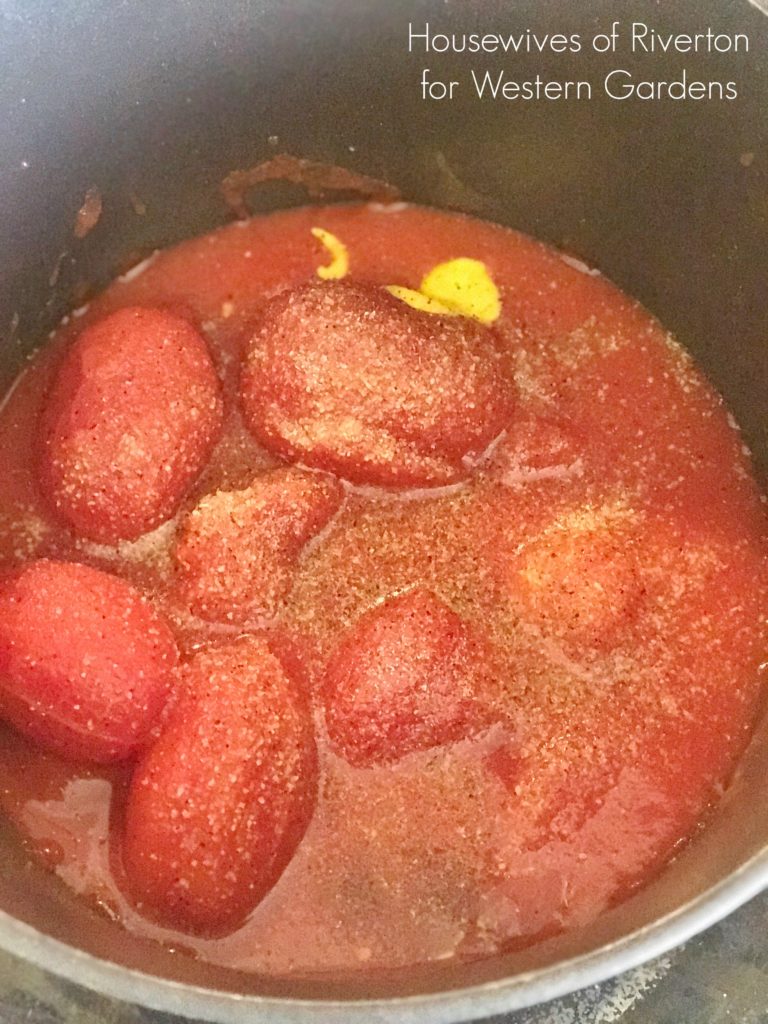
boil your homemade tomatoes for your ketchup

Homemade Ketchup Recipe INSTRUCTIONS:

*Place all ingredients into a medium-size pot.
*Bring ingredients to a boil over medium-high heat.  Once boiling turn down and simmer for 60 minutes.
*After 60 minutes remove from heat and let cool to room temperature.
*Once cool pour into blender and blend until smooth.
*Pour into air-tight container and place in refrigerator for up to 14 days.
Making homemade ketchup from your garden tomatoes is simple and delicious!
While this recipe isn’t the quickest it is quite possibly the simplest recipe you’ll find out there and it is delicious.  I highly recommend making it a couple of days ahead of time, if you can, the more time the flavors have to blend the better it will taste.  I love the rich flavor, I personally love that you can taste more of the tomato flavor and my family all loved it, even the tomato haters, so you don’t have to worry that the flavor is too strong.

I’m excited to bring this delicious ketchup to all our summer gatherings, I can’t wait to try it in homemade fry sauce too!
If you’re planning a bbq this summer or attending one, you need to try one of these amazing salads that are serious crowd pleasers!

Mom’s Potato Salad

Chicken Pasta Caesar Salad

Spinach Salad with Poppy Seed Dressing

Filed Under: Eat from Garden - Recipes, Gardening, How To, Recipes, Utah Gardening, Vegetables Tagged With: eat your garden, garden tomatoes, homemade ketchup, homemade ketchup recipe, ketchup lovers, recipe, recipes, tomatoes

  • « Go to Previous Page
  • Go to page 1
  • Go to page 2
  • Go to page 3
  • Go to page 4
  • Go to page 5
  • Go to Next Page »

Primary Sidebar

Shopping Cart

Items in Your Cart

Your cart is empty
Visit The Shop

Follow Western Gardens

  • Facebook
  • Instagram
  • Pinterest
  • YouTube

See what we’ve been pinning!

Follow Me on Pinterest
Followed by people.
?

Pinterest Badge by Skipser

Here’s What We’ve Been Up To!

Save water and money by Turf Training - train your lawn to grow deep roots
work at western gardens utah garden center
Senior gardening woman Edu Carvalho from Pexels
A Utah Guide to Vertical Gardening in square shape

Copyright © 2026. Western Gardens - Privacy Policy