• Skip to primary navigation
  • Skip to main content
  • Skip to primary sidebar

Western Garden Centers

for what grows here

  • Home
  • How To
  • Gift Cards
  • Calculate Mulch
  • Locations
    • Store Hours
    • About
    • Garden Shop Employment Team
  • Weddings
    • Salt Lake City, UT
    • West Valley, UT
  • Blog
    • Gardening
    • Recipes

Blog

May 12, 2017 by Heather Leister

Welcome, Glad you stopped by!

Garden mulch makes a yard look well kept, but there are other excellent reasons why it is good to lay down a layer of this simple garden basic.
Reasons to use mulch in your flower beds

If you give me the choice between spending a Saturday working in the house or working in the yard, I will choose my yard every time. The reason? For me, there is something deeply satisfying in pulling weeds and neatening up flower beds. Yes, I know that the weeds will eventually grow back, but it takes them longer to return than it does the messes in my house. Those will reappear before the day is over!

After I finish weeding my yard, I like to put down fresh mulch. Not only does it make everything look tidy, it’s an important step in taking care of the yard. Mulch provides several key benefits for your yard. If you’ve never put it down before, consider the following benefits that it offers.
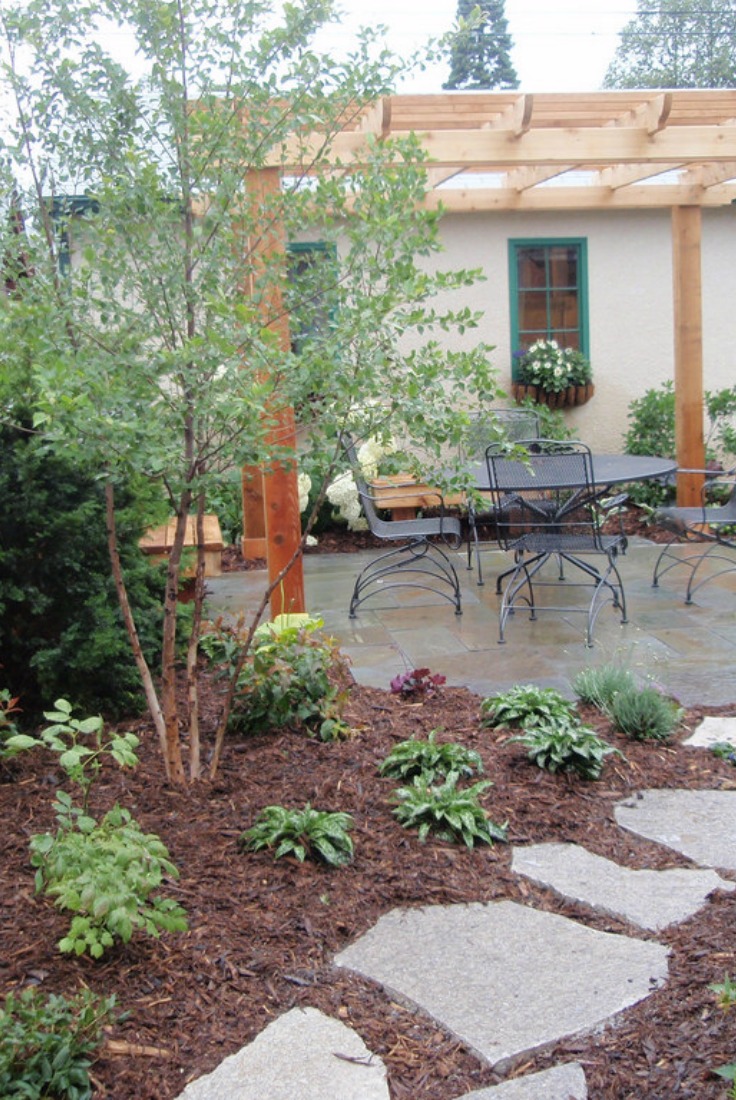
Mulch under perennials and stepping stones for a finished look

Image credit: Flickr

Weed control: A layer of mulch on your flower beds and around your trees will prevent weeds from germinating and growing.

Moderates soil temperature: Mulch will help prevent the temperature in your beds from fluctuating between too hot and too cold. It’s a good idea to apply your mulch after the soil has had a chance to warm up.

Retains moisture: Mulch prevents moisture from evaporating out of the soil. This benefits plant roots and leads to healthier growth.

Prevents erosion: Mulch will also prevent soil from eroding when it rains. When it rains the water hits the mulch first and keeps the soil from washing away.
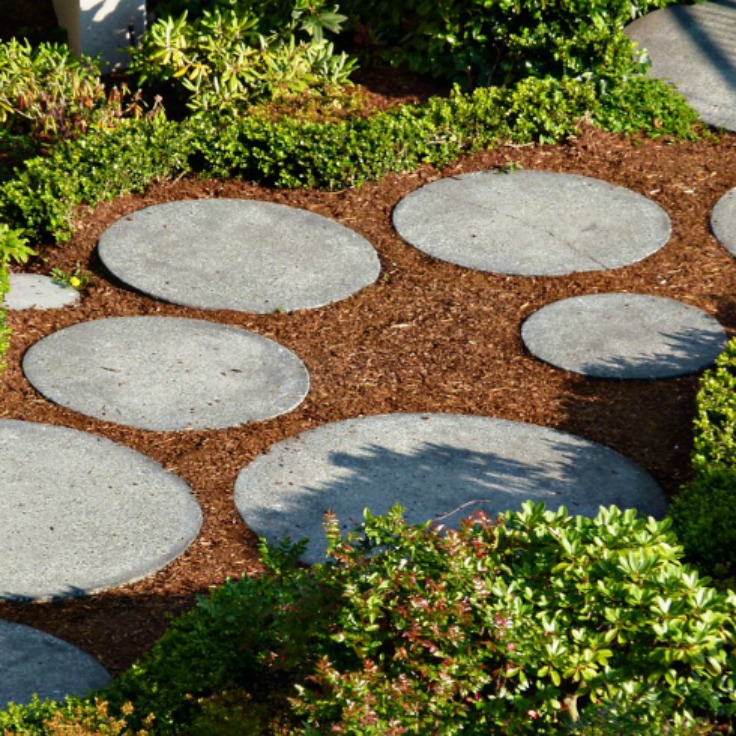
mulch and stepping stones

Image Credit: Pixabay

Adds nutrients to the soil: The definition of mulch is anything that you put down on your soil, but if you choose an organic mulch you will have the benefits of adding nutrients to your soil as your mulch decomposes. Even if you don’t select an organic mulch, the layer will prevent the soil’s nutrients from washing away.

Curb Appeal: Mulch gives your yard a polished look and the choices are endless. I prefer the look of a dark mulch, so we tend to use dark organic mixes that will decompose in our flower beds and around our trees. Other possibilities are rocks, compost, bark, wood chips, landscape fabric, or recycled rubber tires. Whatever you choose, pick something that complements your landscaping and gives your yard a finished look.  Western Gardens has a variety of quality mulch products to recommend.

Light colored mulch for a flower bed

Image credit: Pixabay

Filed Under: Gardening, Tips & How To's, Yard Care Tagged With: flower beds, Mulch, Utah gardening, why use mulch, Yard Care

May 10, 2017 by Vanessa Myers

Hello Gardener, Welcome!

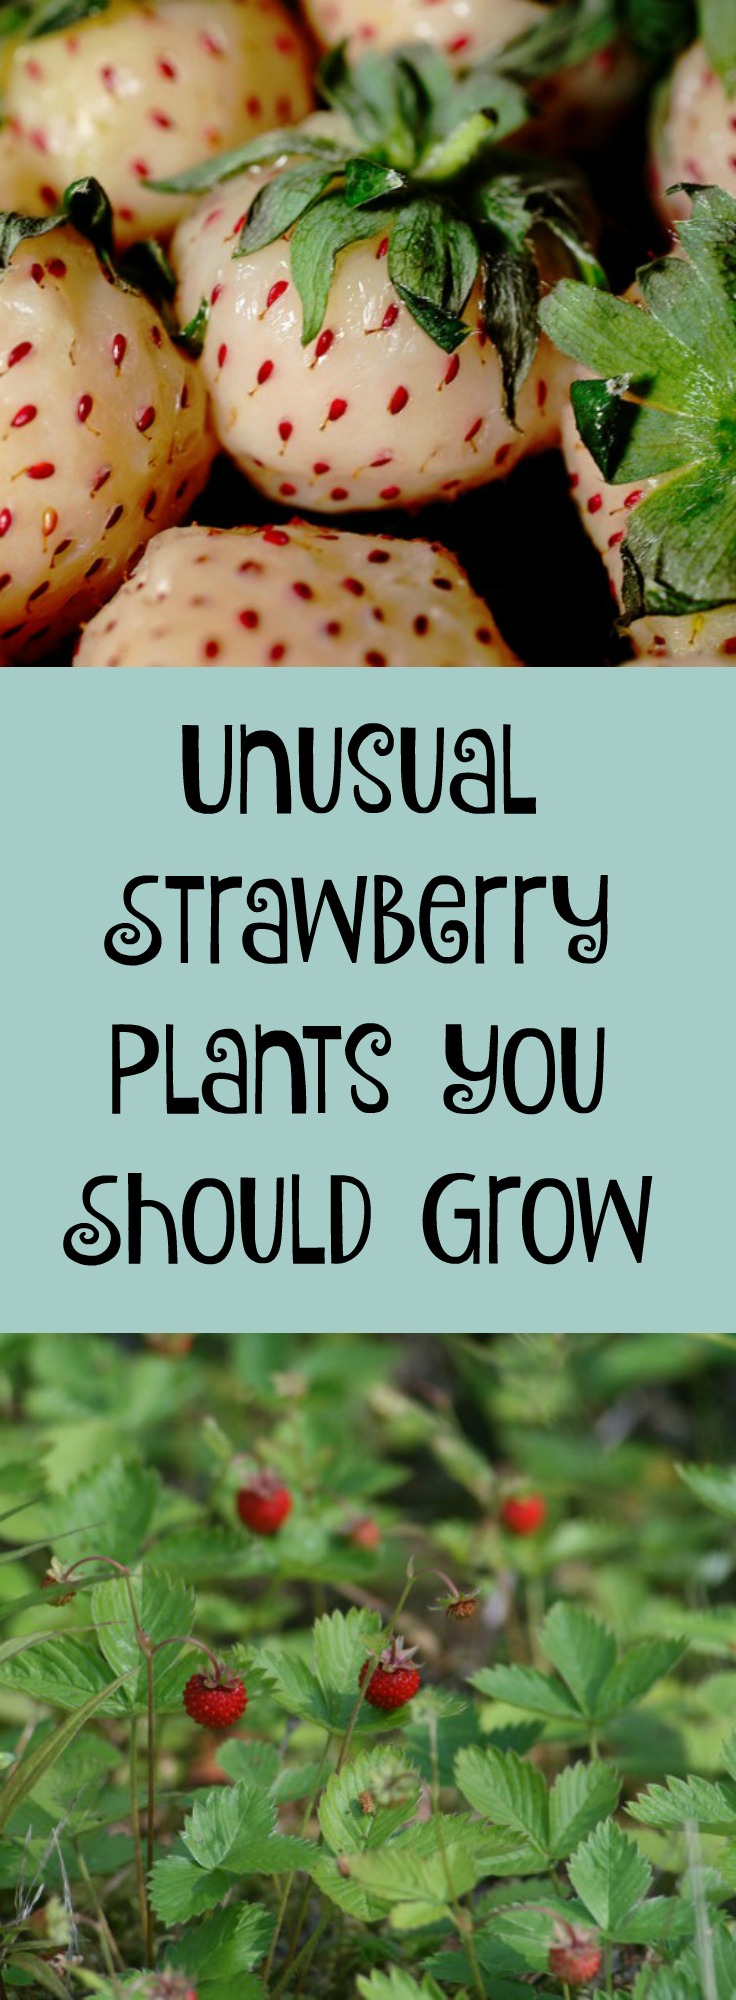
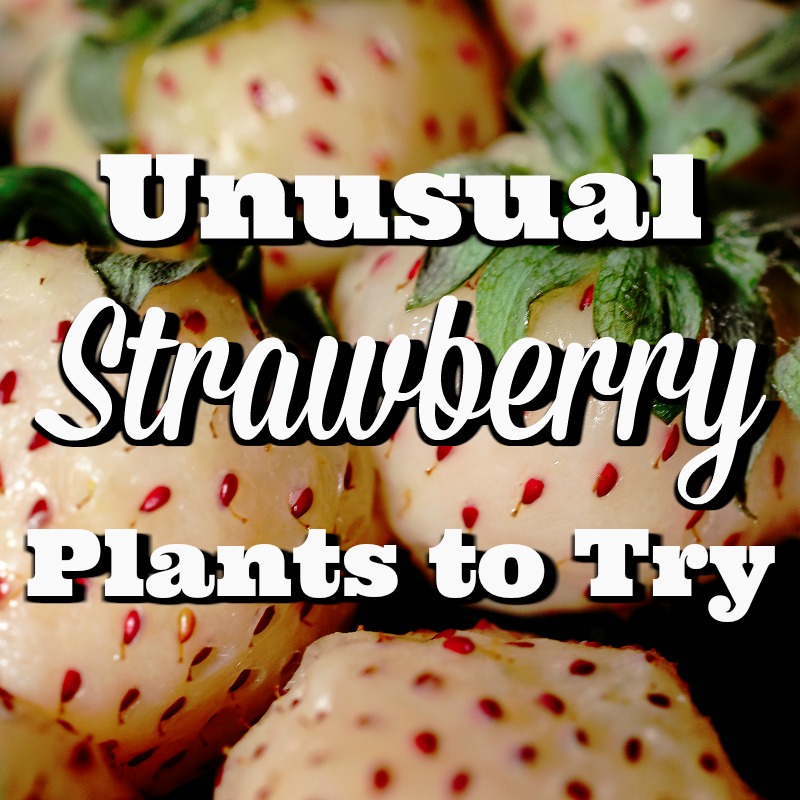
Try these unusual strawberry plants in your landscape this year!

Many gardeners put in a strawberry patch so they can enjoy growing their own delicious red delights. However, did you know that not all strawberries are red and not all blossoms are white? Here are a few of the more unusual strawberry plants that you might want to experiment with during this growing season.

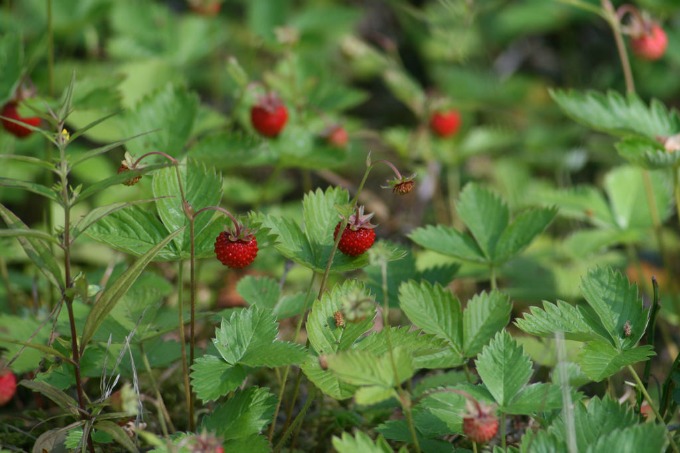
Alpine Strawberries

Alpine strawberries are a common find for European foragers

Image by wheany under a Flickr Creative Commons Attribution License

If you have ever tried foraging in Europe, it is likely that you came across the alpine strawberry. These delicious little fruits grow in abundance in the wild. Good news is that they are slowly starting to become more available in nurseries in the United States. You can also try starting them from seed. They are smaller than the strawberries that we are used to eating but packed with an abundance of flavor.

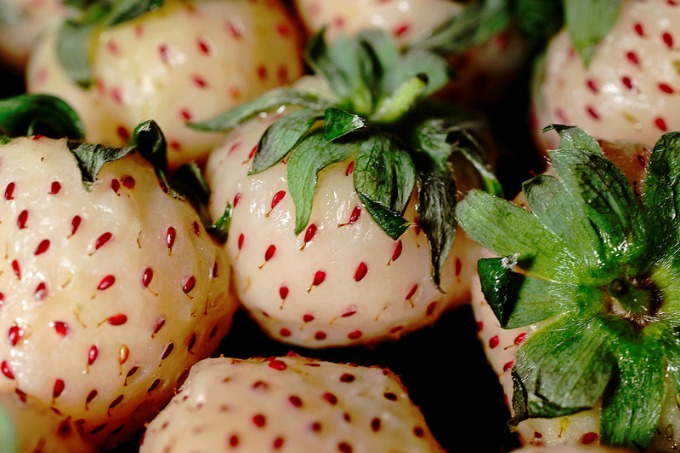
White Carolina Pineberries

If you like the taste of pineapple, try a pineberry for a sweet treat

Image by DaveCrosby under a Flickr Creative Commons Attribution-ShareAlike License

At first blush, it seems like this is simply a strawberry experiment gone wrong. After all, the outer flesh is white and the seeds are red. This, however, is merely the result of crossing together a white strawberry from South America with our familiar red strawberry. Look for a plant as the seeds will not run true to type. The flavor is said to be reminiscent of pineapple, inspiring its common name.

You would want to place these near your other strawberries to help pollination rates. Yield is not as abundant as standard strawberries, as well as being a bit more of a delicate plant, so these are best treated as a fun novelty.  They do bloom in the spring and again in the late summer, almost like an ever-bearer.

Purple Wonder Strawberries

If we’re getting into technicalities, the ‘Purple Wonder’ is more of a deep rich reddish burgundy. However, the difference is indeed notable when placed next to a traditional strawberry. I usually find that the darker strawberries are sweeter, so a whole patch full of these would be heavenly!  They can be grown from seed.

Red and Pink Flowering Strawberries

Choose a pink flowering strawberry as one of your varieties

Image by seelensturm under a Flickr Creative Commons Attribution License

When I think of a strawberry blossom, the color white usually comes to mind. Some cultivars, however, have been developed because they produce flowers that come in hues of red or pink. One of my favorites is called ‘Tristan’ bearing deep rosy blossoms, ‘Tarpan,’ ‘Gasana,’ or ‘Frisan’ all bearing light pink blossoms. Some delightful more traditional varieties geared for our Zone 5 climate include ‘Ozark Beauty’ which is excellent for jam, ‘Eversweet’, or ‘Ft. Laramie’.

A most tasty unique strawberry that is often served in European fine restaurants is the strawberry called ‘Yellow Wonder’.  Yes, it is a yellow berry.  Because of it’s color, the birds are fooled into thinking the berries are not ripe; hence, no need for a bird net to protect your berries from the scavengers!

Western Gardens has most of these unusual strawberry plants for you to explore, but they won’t last long.

Have you grown any of these unusual strawberry plants? Which would you recommend?

Discover some new and unusual strawberry plants to try

Filed Under: Fruit, Gardening, Utah Gardening Tagged With: alpine strawberry, pineberry, pink flowering strawberries, purple wonder strawberries, unusual strawberry plants

May 7, 2017 by Jenn Crookston

Welcome – Glad you dropped in for a great idea!

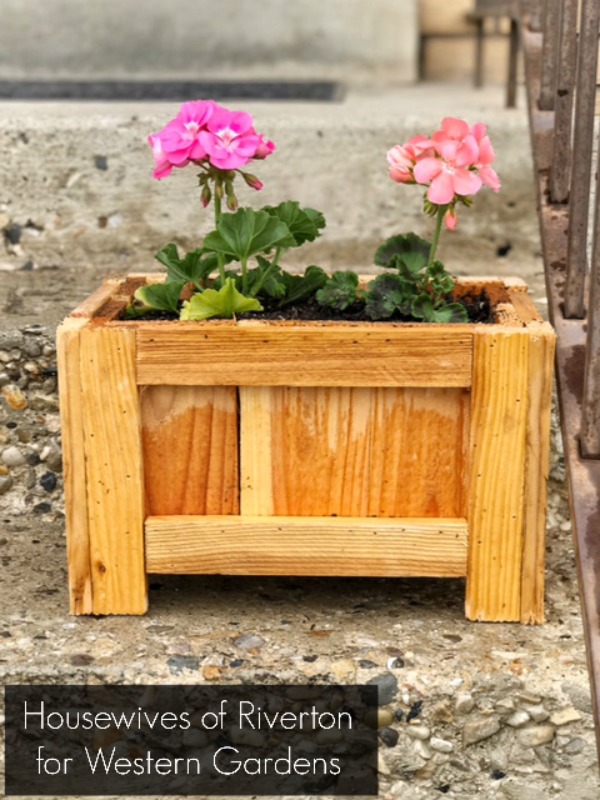
Mother’s Day is just around the corner and I’ve got the perfect Mother’s Day gift that you’ve got plenty of time to create because it is such a fast build.  Your mother/wife/friend will love this DIY Mother’s Day Porch Planter Box.
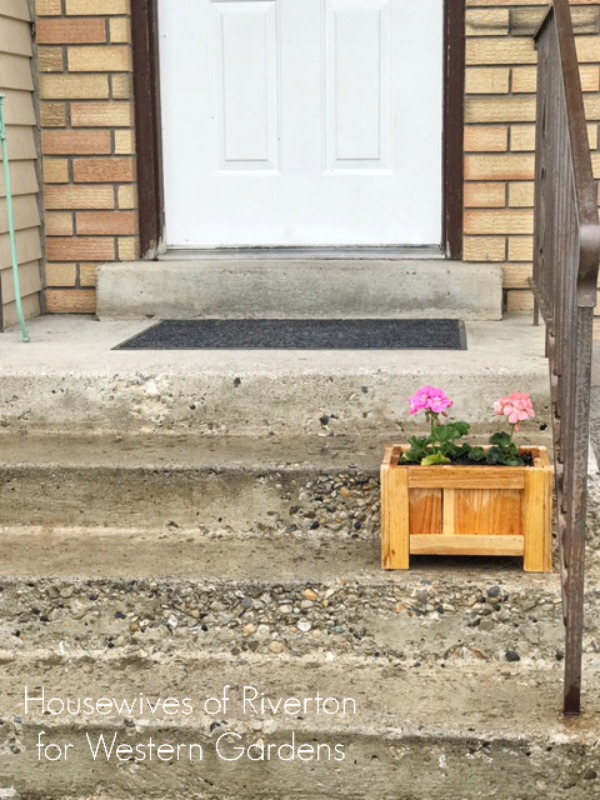
Geraniums in a planter box for your porchI’m pretty sure it’s a proven fact that anything is automatically cuter when it’s small.  That fact holds true with this Mother’s Day Porch Planter Box.  I am completely smitten with how cute it looks sitting on my steps and can’t wait to make it a couple of sisters.  You’re going to love me when I tell you how easy this was to make too.
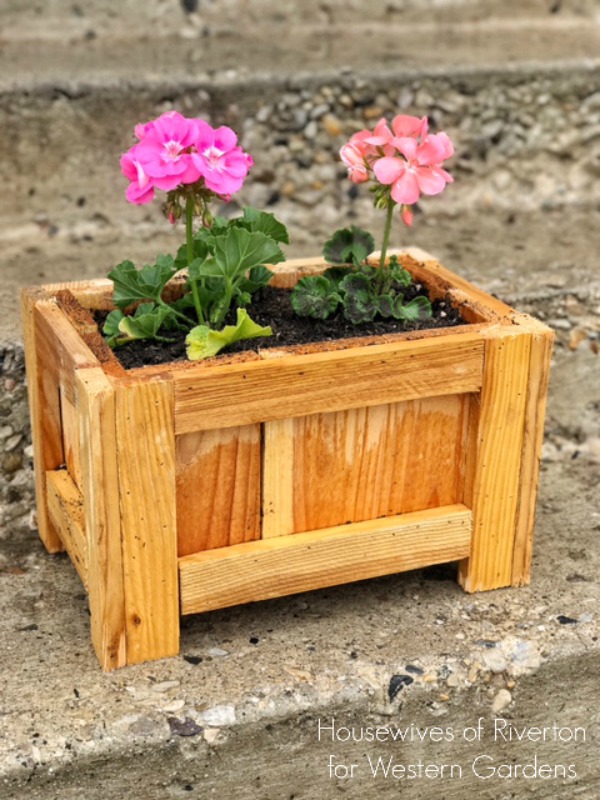
Because I wanted this planter box to be able to sit on a single step on my porch I needed to find materials that weren’t big and bulky.  After walking around the home improvement store for a while and looking at the different options I went with wood fencing and stakes.  Since both of these items are made to be outside in all weather conditions I figured they were perfect for this project and they aren’t bulky pieces of wood which means more room inside the box for flowers.
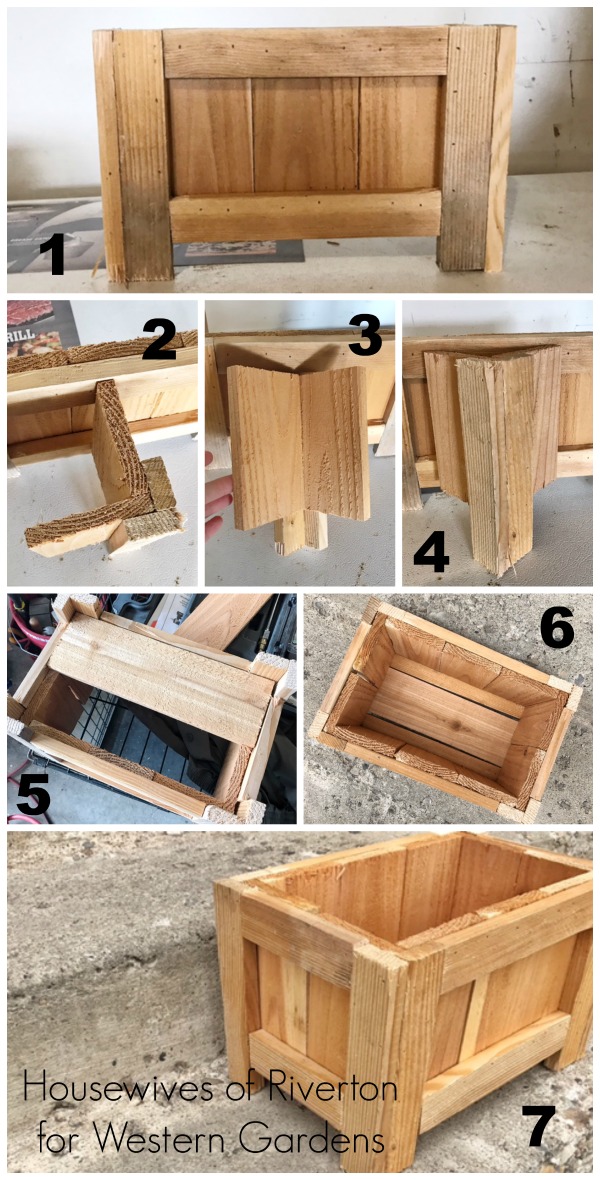
Here is a good photo of the box assembly.  The fencing is less than $2 a board and the stakes we had on hand but I’m pretty sure were around a dollar each.  I used just over 1 fencing board and 2 stakes for one box.  I think with 4 boards and 7 stakes you could make 3 planter boxes, including nails I think you’re looking at 3 planter boxes for under $20, pretty awesome if you ask me!
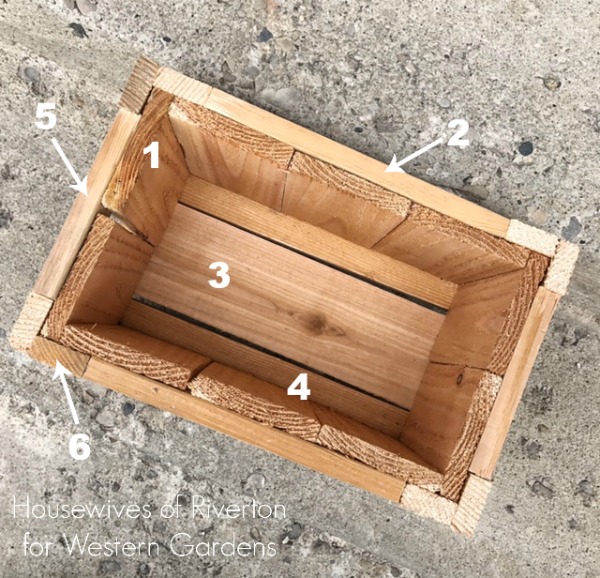
construction of DIY porch planter box for mother's dayI used our miter saw to cut my pieces, if you don’t have a saw at home here is your cut list and the people at the home improvement store can cut them for you.
Cut List:

10 #1 (side pieces) – 3.5″x 6″
4 #2 – (long side braces) 1.4″x 8 5/8″
1 #3 – (middle bottom) 3.5″x 11.5″
2 #4 – (side bottom) 1.5″x 11.5″
2 #5 – (short side braces) 1.5″x 5 1/4″
8 #6 – (corners/legs) 1.5″x 8″

Porch Planter Assembly:

I used a brad nailer to create the box with 1″ finish nails.  If you don’t have a nail gun you can use tiny nails and a hammer to create the box it’ll just take a little more time.  These nails are perfect because they’re easily painted over and hidden if you choose to paint your planter box.

To create my planter box I started by creating one side as shown in photo 1. 

Once I got that side done I created the corners as shown in photos 2-4.

When I had the corners done assembly was easy.  I placed the side brace against one corner piece and then nailed into place.

When it was attached I then placed the next side piece in place and attached it to the side brace.

Photos 5 and 6 show the bottom of the planter box.  As you can see in photo 5 there isn’t quite enough room for 2 pieces of fencing on the bottom.  Photo 6 shows how perfect once piece of fencing and two pieces cut from a stake fit leaving enough room between the pieces to allow water drainage.

As you can see in photo 7 I wasn’t too worried about a perfectly smooth surface, you can sand and paint/stain as desired, I love the little more rustic look so this was perfect for me.
Planter box with living flowers on front porch stairs of houseCan’t you just picture a few more of these darling little planter boxes leading all the way up the stairs.  I can’t wait to get them all finished and filled with beautiful flowers from my local independent garden shop Western Garden Centers.
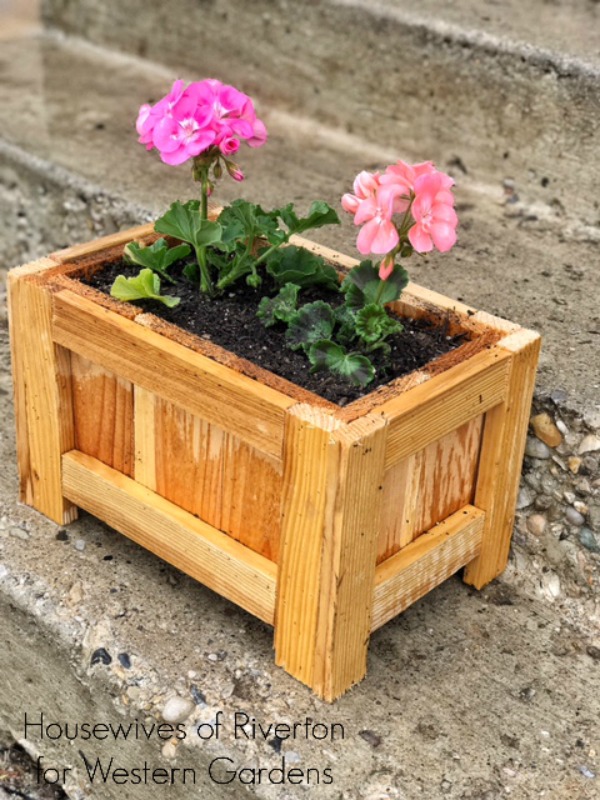
You can easily make this planter box and fill it with flowers for less than you would spend on a bouquet of cut flowers for Mother’s Day and they’ll last all season long and the planter for years to come.
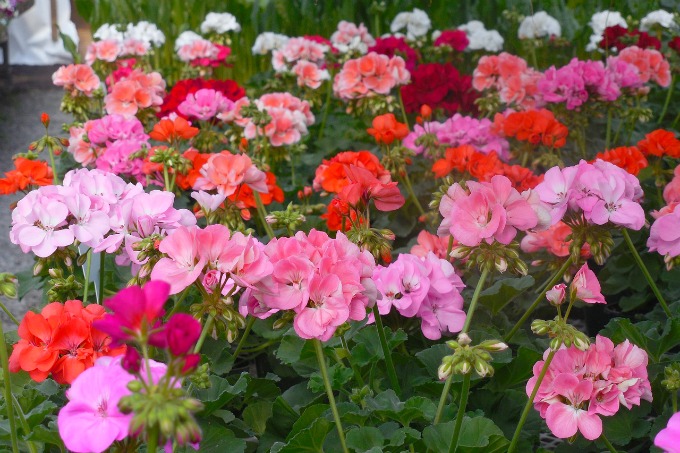
western gardens have geraniums for your planter box

Filed Under: Container Gardening, Flowers, Gardening, How To, Outdoors, Tips & How To's Tagged With: container gardening, DIY, flowers, mother's day gift idea, porch planter, simple gift

May 6, 2017 by Jenn Crookston

fresh strawberry lemonade for National Lemonade dayDid you know that May is National Strawberry Month and that May 20th is National Strawberry Picking Day?  As if those two things weren’t the best on their own, the first Sunday in May is also National Lemonade Day.  As Strawberry Lemonade is my very favorite drink I was excited to come up with the perfect Fresh Squeezed Strawberry Lemonade recipe.  If the reviews from my whole family are to be believed I have succeeded with perfection.
Use your own fresh strawberries for this strawberry lemonade recipe The recipe is simple and delicious, you’re going to love it and love me for sharing it with you.

Fresh Squeezed Strawberry Lemonade Recipe:
1 cup sugar
1 cup cold water + 5 cups cold water
4 lemons + 1 lemon
Approximately 10 large strawberries
(or per your taste, more for garnish)

Easy recipe for National Lemonade day Recipe directions:
In small sauce pan combine 1 cup cold water and 1 cup sugar.  Bring to a boil and stir to dissolve sugar.  Remove from heat and let cool to room temperature and the place in refrigerator to chill.

While sugar mixture is chilling squeeze the juice from 4 lemons (approximately 1 cup).  You’ll want to remove the seeds but keep as much pulp as possible.

To get the most juice from your lemons before cutting heat them individually in the microwave for 15-30 seconds then roll back and forth across the counter.  Then slice in half and using a juicer get as much juice out of them as you can collecting in a dish so you can measure that you have right about 1 cup.

Next remove stems from approximately 10 strawberries, wash, and then mash.
In pitcher combine 5 cups cold water, lemon juice, mashed strawberries, and chilled sugar mixture.  Stir well.

Strawberries will float to the top so be sure to give it a good stir before serving.
I included extra strawberries and lemons to the recipe to use as garnish in both the pitcher and on cups.

grow your own lemons and strawberries for this strawberry lemonade recipe This Fresh Squeezed Strawberry Lemonade recipe is so refreshing, not too tart or sweet, the perfect combination.  My whole family was so excited about this recipe that we’re looking forward to picking up our own strawberry plants to put in our garden this year and did you know that you can grow Lemon Trees indoors?

During a recent trip to Western Gardens I was talking to a woman and she gave me some pointers on how to keep a lemon tree alive here in Utah.  Western carries some lemon trees and I will be getting one as soon as I do a little more research on being an indoor bee.  I don’t think my family will agree with me just letting bees live in the house.  I’m actually looking forward to giving it a try, I’m imagining Fresh Squeezed Strawberry Lemonade made from lemons and strawberries we grew on our own, doesn’t that sound awesome?

I hope you enjoy this recipe and that it adds to your strawberry and lemonade appreciation month. It has already added to ours.

Filed Under: Fruit, Recipes

May 5, 2017 by Becky

WELCOME FRIENDS, Come learn with us!

difference between perennials and annuals

image: Pixabay

As a novice gardener, I need to know what is the difference between perennials and annuals?  Whenever I went to the nursery, I was confused by the terms “annuals” and “perennials.”   When choosing plants for your garden it’s important to know the difference, so I thought I would share some of what has made it easier for me to remember.

Annuals

Annuals are plants that came from seeds earlier this spring.  You can plant them as seeds or you can purchase them as seedlings or starts in flats and pots.  Annuals usually bloom the entire summer until frost kills them.  They don’t survive the winter.  I remember the plants that are annuals because I have to buy them “annually.”

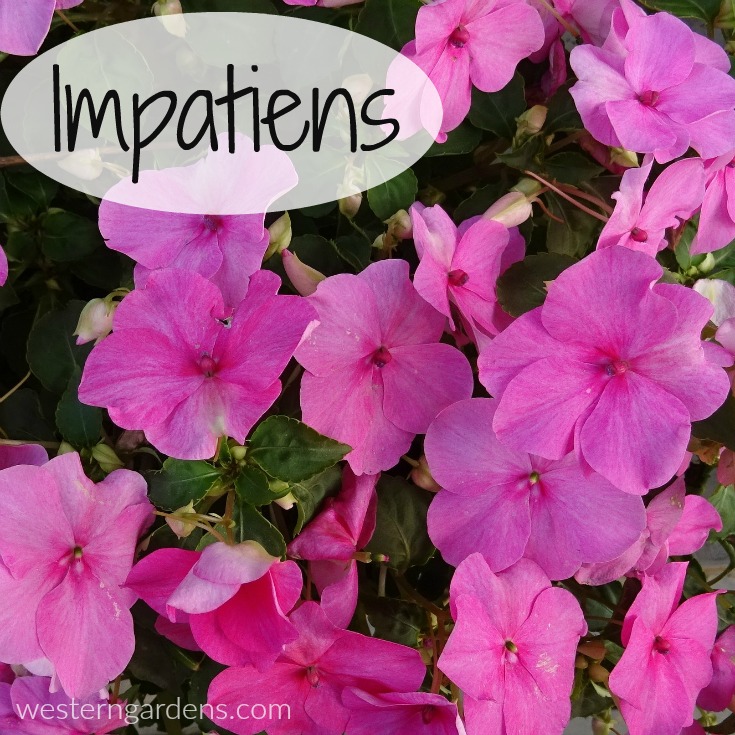
However there are exceptions, some tropical plants are perennial in a tropical climate, but in Utah’s colder climate, they are annuals.  They die every winter and need to be replanted as a new plant.  Geranium, Impatiens, and Bougainvillea are good examples of annuals.

impatiens are annuals in salt lake city

Image: Pixabay

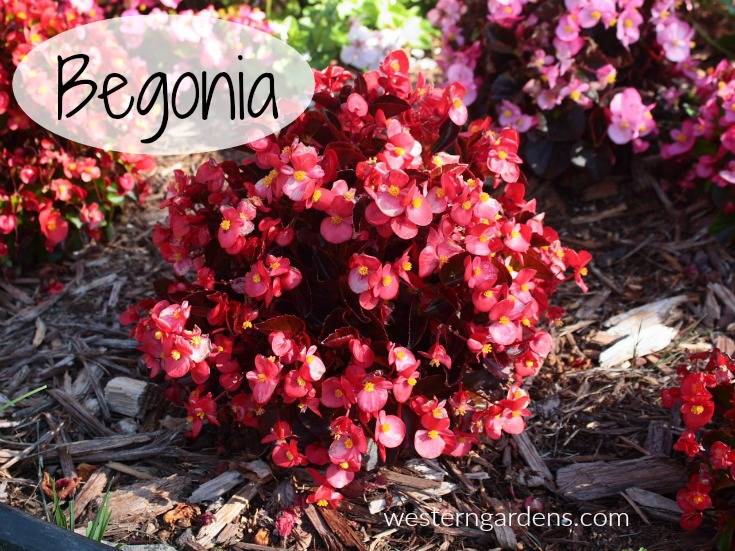
Begonia annual in Utah

Image: Pixabay

Perennials

Perennials that do well in our climate are a different story.  Perennials survive our Utah winters in the growing zone 5.  They bloom again year after year.  The tradeoff is that perennials have a definite blooming season and don’t bloom all summer long.  Usually they bloom from a couple of weeks to a couple of months.  There are many varieties from evergreen, to shade tolerant, or even drought tolerant.  Most die to the ground in fall or winter and spend most of winter dormant.  Most perennials like well-drained soil with plenty of organic material in it.

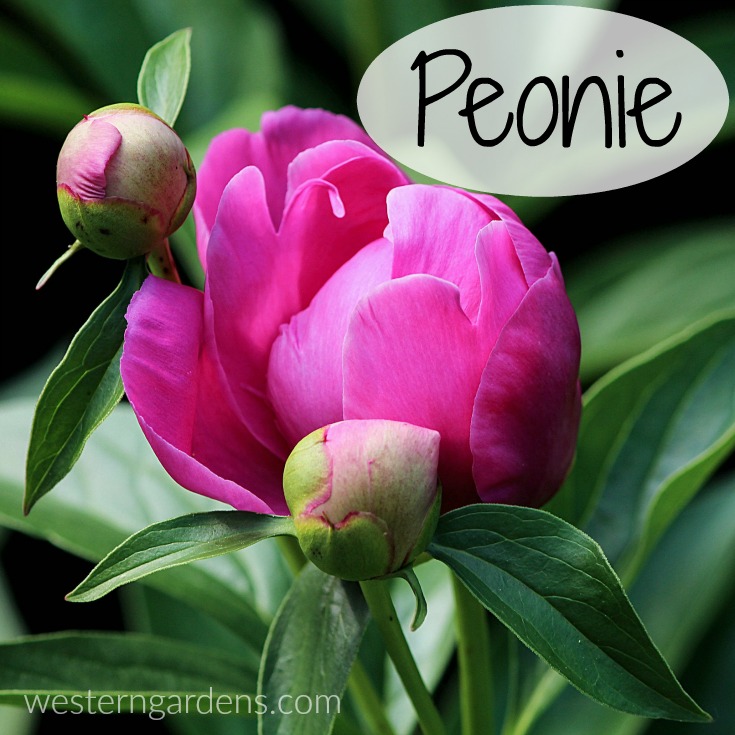
Peonie perennial in Utah

Image: Pixabay

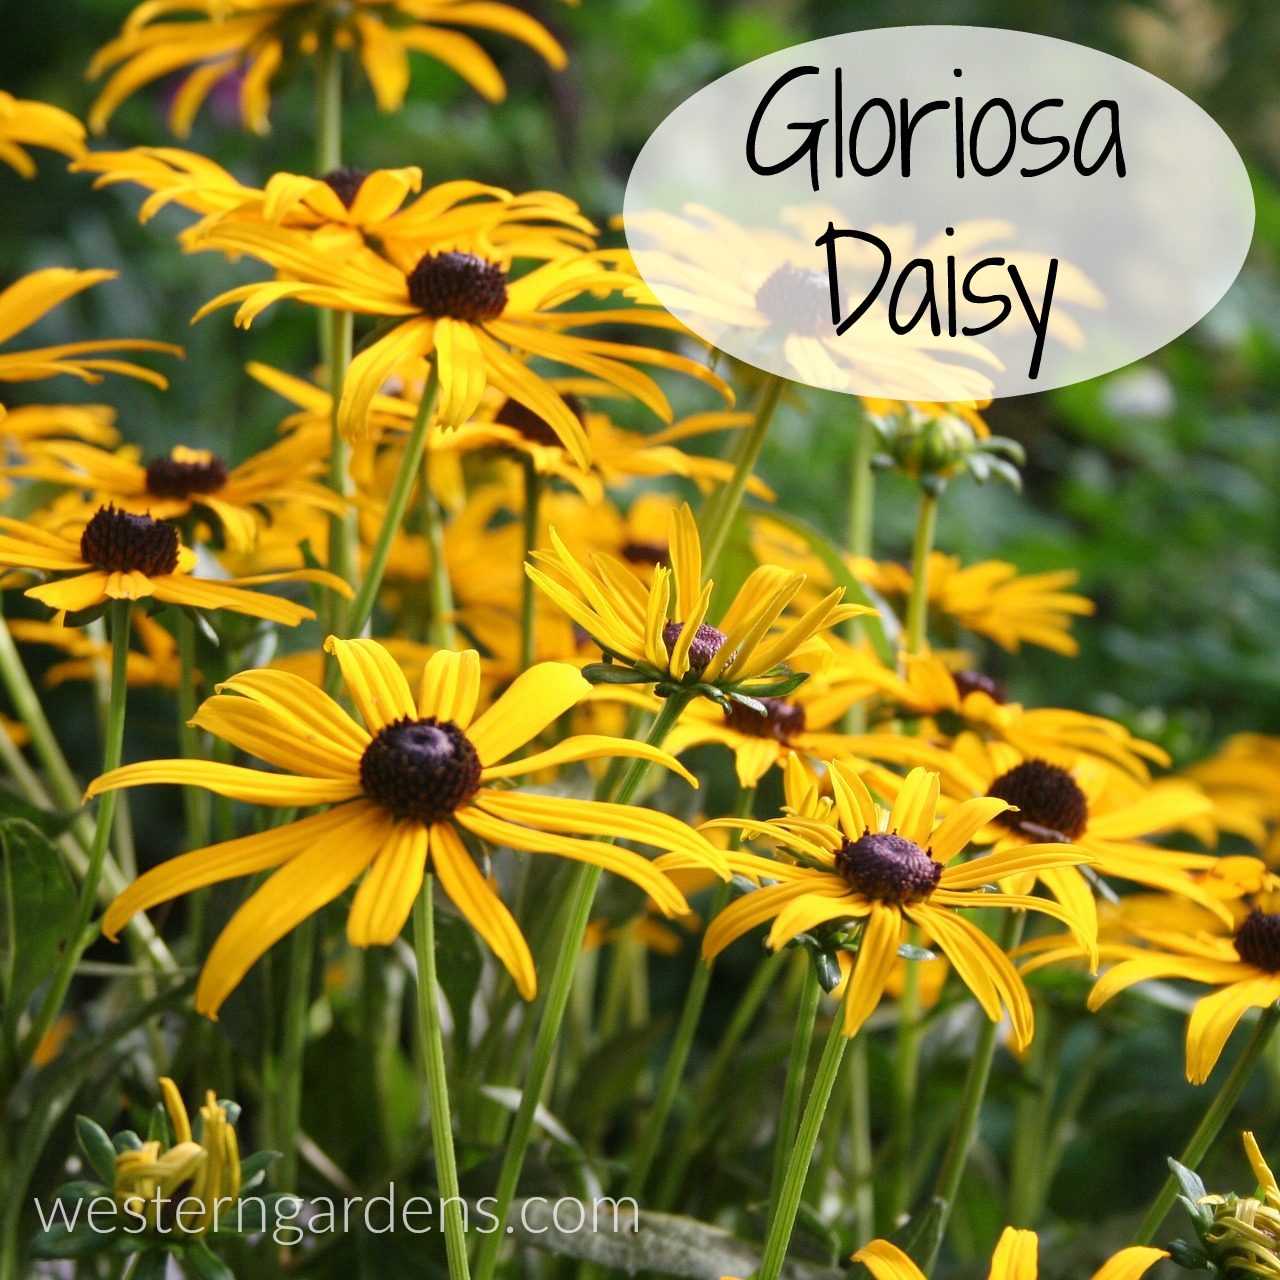
Gloriosa daily perennial

Image: Pixabay

So basically, that’s the difference between perennials and annuals. How long they survive in the climate zone you live in.  In the Salt Lake Valley, we are usually a zone 5, and sometimes can be a zone 6, so be sure and talk to one of our expert gardeners to make sure you get the perfect plants for your soil and landscape.

A Word about Placement

Placing a plant in a good site, in a place it will thrive, is one of the most important differences that will make your flower garden successful.  In my yard I have hot, sunny sites, cool shady sites, and everything in between.  I am always careful not to place a plant that prefers shade, like a Hosta, Fern, or Begonia in a hot sunny spot because it will do poorly.  A hosta in the sun will show it’s displeasure with burned, scorched leaves.  However, planting a peony, Petunia, or Sunflower in the shade will not produce good results either.  Any of our gardeners can help you identify which plants do best in sun, shade, etc.

A Word about Soils

Most soils in Utah are either clay or sand based (like my garden) and will do very well with some organic amendments.  For perennials create a 50/50 mix with existing soil.  For annuals simply spread a 2-3″ layer of organic amendment evenly on top of the existing soil, then dig or till it in.  The hole for perennials should be about twice as wide as the container and an inch or so less in depth.  Place the plant in the hole after popping it out of the container.  If it’s root bound (lots of white roots wrapping around the soil ball), use a short blade utility knife to make a few shallow, vertical cuts around the root ball to stimulate new root growth.  Press the root mass into the hole to make sure there are no voids under the roots and water well using a root starter (we can help you with that at Western Gardens too).

Come see us!

Our garden experts at Western Gardens have a lot of great suggestions to help you get your flower garden blooming all summer long.  From root starter to organic compost, we have everything you need.  Be sure to visit us on Facebook for specials and daily tips.

What do some of you expert gardeners do to keep your flowers strong and healthy.  Feel free to share your experiences here too.

Post revised by Wendy P 5/2017

Filed Under: Annuals, Flowers, Gardening, Perennials, Tips & How To's, Utah Gardening Tagged With: annuals, flowers, Perennials, planting flowers, utah annuals, Utah gardening, utah perennials

May 4, 2017 by Heather Hammerschmidt

Welcome Gardening Friends! Good to see you again.

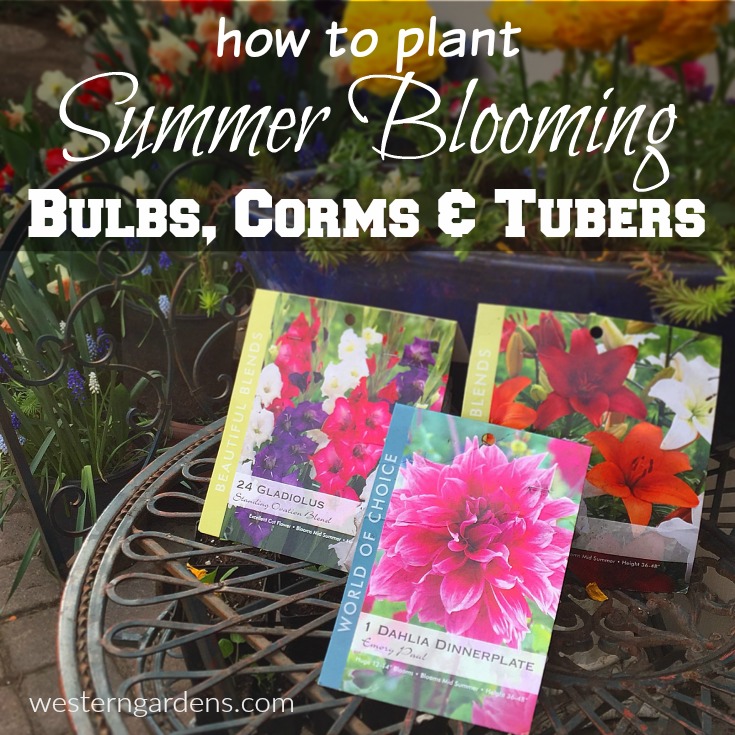
How to plant summer blooming bulbs, corms, and tubers.

I love to plant summer blooming flowers and I’ve been dreaming of a cut flower garden all winter. My dream started last fall when I decided to add more spring bulbs to my garden so that I’d have plenty of flowers for cut arrangements. There is something wonderful about bringing your own beautiful blooms indoors and sharing them with friends and neighbors. As I contemplated spring additions to my flower garden, I decided I also needed to add some summer and fall blooms. Specifically, I wanted to add lilies, gladiolas, and dahlias. These summer flowers are usually not available in late fall, so I patiently waited for them to arrive at the store this spring. Now it’s time to plant and I’m so excited to share with you everything you need to know about planting these beauties!

Lilies (Lilium)

Lilies are such gorgeous flowers. Their sturdy stems and large flowers make them great for cutting. There are two main varieties of lilies that we carry at Western Garden Center: Asiatic and Oriental lilies. Asiatic lilies bloom in early summer. They come in a wide range of colors and heights.  Oriental lilies tend to bloom later than Asiatic varieties. Oriental lilies like Casa Blanca and Stargazer are wonderfully fragrant. Western Gardens carries lily bulbs in early spring and potted lilies later in the season.

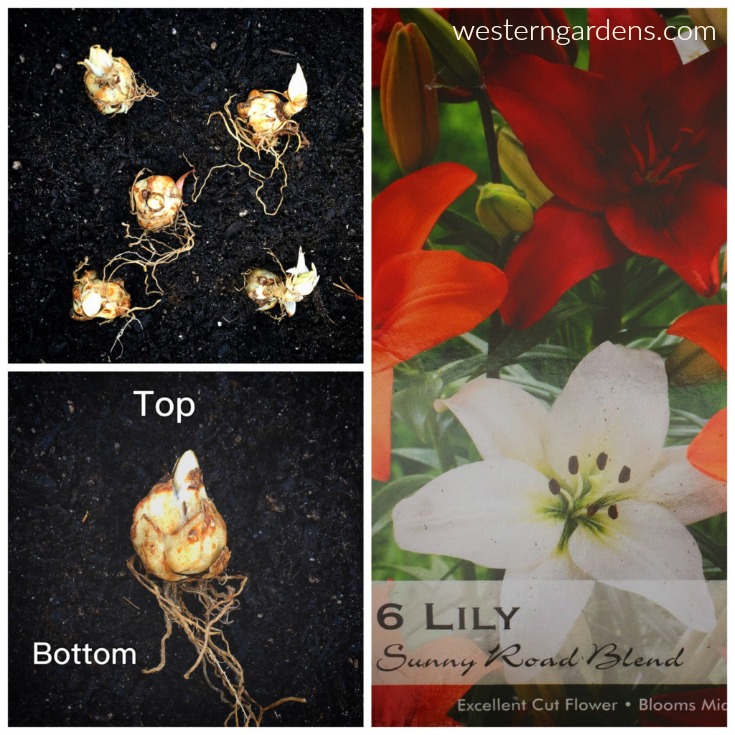
Planting lilies for summer bloomsAsiatic and Oriental lilies are cold hardy perennials in Utah and will winter over. Lilies bulbs are scale bulbs and do best if planted as soon as possible. They prefer to be planted when the soil temperature is below 60 degrees. This helps their roots establish before it gets too hot. They need a sunny location with rich organic soil.  I amend my soil with Bumper Crop® Soil Builder to give them the best possible start. I plant the bulbs 6- 8 inches deep and 6 inches apart. Plant them in groups of three to make a powerful statement. Make sure they had plenty of room, they don’t like competing for resources with other plants. The picture above gives you a visual of which end should be facing up and which end should be facing down.

Gladiolas (gladiolus)

How I love gladiolas! My grandfather would bring home gladiolas for my grandmother. Gorgeous stately blooms graced her dining room table throughout the summers. I’m planting them for two reasons; first in memory of my grandparents and second because I love how long gladiolas last as cut flowers. Their flowers fade from the bottom of the stem upward. You can continue to cut off the stem as the blossoms fade leaving the fresh blossoms for continued enjoyment. Gladiola corms are available in the spring for planting.

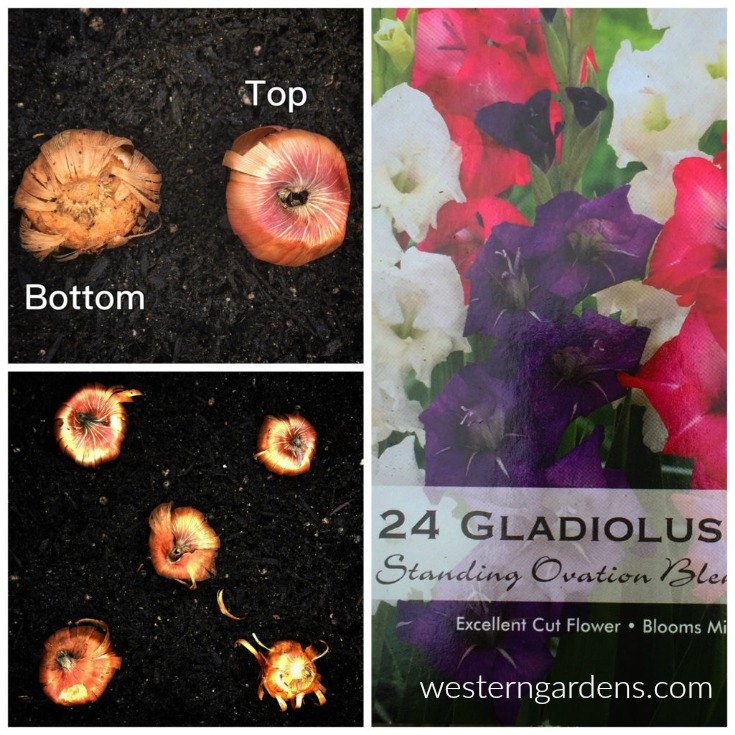
Gladiolas top and bottom of bulbI suggest to plant summer blooming gladiolas each weekend for three consecutive weeks so blooms will last throughout the summer. Gladiolas should be planted after the danger of frost has passed. They need a sunny location. Unlike lilies, they don’t have a problem sharing space with neighboring plants. I will plant them 3-4 inches deep and about 6 inches apart. For a greater impact, I plant them in groups of three or more. Gladiolas are not cold hardy in Utah. In the fall, dig them up and store them over the winter until planting them again next spring. The picture above indicates which direction to plant gladiola corms.
Dahlias

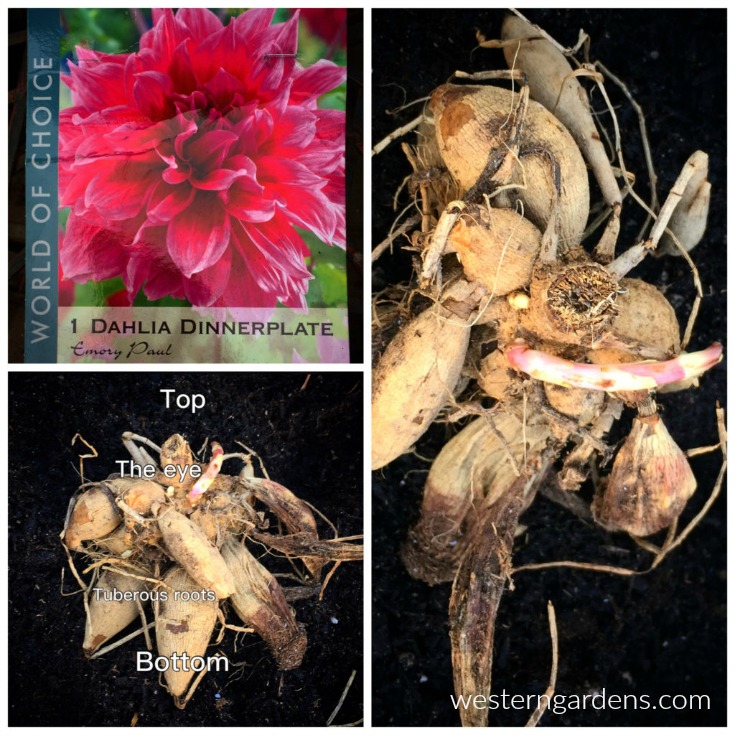
Dahlias are my favorite cut flower. There are so many wonderful varieties in many heights and colors.  Some of the shorter varieties bloom from spring until frost. The larger varieties start blooming in late summer and continue blooming into the fall. Western Garden Center carries dahlias in seeds, tubers, and in plant form.  This year I’ve chosen to plant some Dinnerplate Dahlias from tubers. They have amazingly large blossoms, hence their name.Planting dahlias tubers for a big show of color.Dahlias should be planted in rich organic soil, in a sunny spot, and after the last frost. I am planting mine in pots early so I can get them started. I use Gardener’s Gold Organic Potting Soil. They will remain in pots outdoors for awhile so that when I see that temperatures are going to drop I can bring them inside. After the last frost, I will plant them outside.  When planting it is important to give them plenty of room.  I make sure each tuberous root has space between itself and its neighbors and then I’ll cover them with soil. Last year’s stem (the eye) should just be barely below the surface. Like the gladiolas, dahlias are not cold hardy in Utah.  I will dig up the tubers in the fall and store them indoors over the winter until I plant them again next spring. The picture above identifies the eye of the dahlia and its tuberous roots.
Once they’ve all been planted, I’ll feed them regularly with a Gardner & Bloom’s Bud and Bloom Fertilizer. This helps these summer bloomers develop strong roots and beautiful blossoms.

I can’t wait for my first bouquets! What are your favorite cut flowers? Please share in comments below.

Filed Under: Flowers, How To, Utah Gardening Tagged With: bulbs, cold hardy perennials, corms, cut flowers, dahlias, flowers, garden cut flowers, gladiolas, how to plant, lilies, summer blooming, tubers

May 2, 2017 by Western Gardens

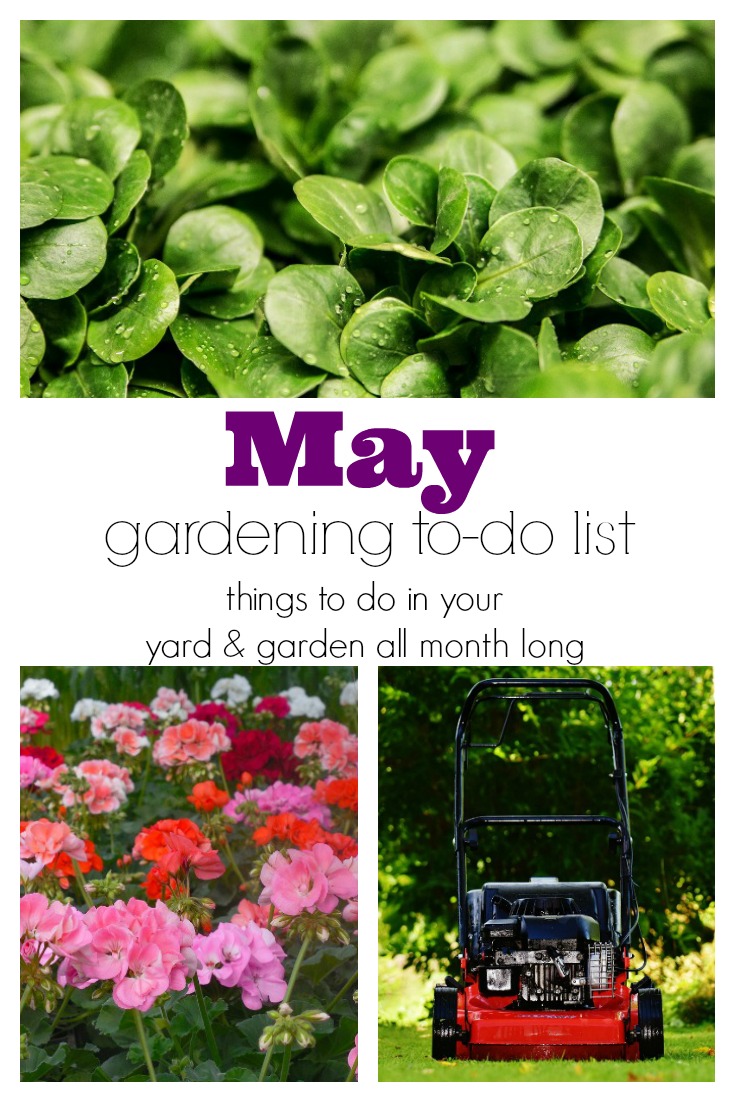
May Gardening To-Do List for all the things you don't want to forget (but don't have time to remember!)

Hello Gardening Friends, thanks for stopping by!

If you’re excited to work in your yard or garden, but not sure where to begin, then you’ve come to the right place!  We’ve put together a list of things to do throughout the month.

May Gardening To-Do List for all the things you don't want to forget (but don't have time to remember!)

You may not need to do everything on this list.  For example, if you don’t have bare patches to reseed or Spring bulb foliage to cut back, skip over those items on the list.  Just pick what applies to your home and yard and plan out when you will do it all throughout the month!

May Gardening To-Do List for all the things you don't want to forget (but don't have time to remember!)

May Gardening To-Do List

➺Train your Lawn – Turn Sprinklers On only when needed – Let the lawn tell you when it needs watering. Click here for more details.

➺Lawn Watering – Use a “moisture meter” probe to determine adequate moisture.

➺Water Conservation – Conserve water by watering before 10:00 am or after 6:00 pm.

➺Lawn Aeration – Its not too late if you haven’t already.

➺Set Lawnmower Height to 2½-3 inches. This allows the lawn to “shade” its soil making for a healthier lawn.

➺Lawn Broadleaf Weed Control (Liquid application) – for Dandelions, violets, etc. Weed-A-Lawn is a great product.  Spot treat or apply to big areas of lawn where needed. Follow manufacturer’s instructions.

➺Lawn Crabgrass and Spurge – Second application of pre-emergent granular (6 weeks after the first application).

➺Fertilize Lawn with a weed-killing post-emergent granular fertilizer —do NOT water in—apply it to a moist lawn and let it sit for a day

➺Seed Bare Patches in Your Lawn unless you’ve already used a pre-emergent, in which case, wait until September to seed bare patches.  Click here for more.

➺Weed, Thin Out & Mulch newly planted seedlings

➺Plant Your Favorite Annuals for beautiful color—most can be safely planted after frost danger has passed (some are hardy enough to be planted earlier, check with your local nursery)

➺Spring Bulbs – Remove Spent Flower Heads (aka dead-heading) and AFTER foliage fades and turns brown, cut back leaves.

➺Summer Blooming Bulbs – Plant dahlias, day lilies, and gladiolus.  Click here for instructions.

➺Plant Trees, Shrubs, and Perennials – Early spring or late fall are great times to do this.  Click here for tips.

➺Divide and/or Transplant Perennials – Summer bloomers: early in the month.  Spring bloomers: after blooming is done.

➺Flowering Shrubs  – Prune after they finish blooming.

➺Pest Control – Boxelder bugs are a nuisance.  Grasshoppers are best controlled when they first hatch.  Watch for Leaf roller on boxelder trees. Try to stay ahead of those slimy slugs and snails.  Closely follow directions on labels when using insecticides as not to harm bees.

➺Plant Outside
Kohlrabi, parsley, parsnips, potatoes,
Until May 15th: onions & peas
After last frost until June 1st: dry beans, snap beans, eggplant, peppers
After last frost until June 10th: watermelon & winter squash
Until July 1st: cauliflower, parsley, swiss chard
Until July 15th: beets & broccoli
After last frost until July 20th: cucumbers and summer squash
Until Sept 1st: radishes

and so much more….

If you liked learning these tips from the experts, here is another good tip – come in and visit us!

Be sure to check out our June Gardening To-Do List too!

*This is not an exhaustive list.  If we’ve overlooked something, feel free to let us know in a comment below!

May Gardening To-Do List for all the things you don't want to forget (but don't have time to remember!)

Filed Under: Gardening, How To, Lawn Care, To-Do List, Utah Gardening, Yard Care Tagged With: Gardening, how to's, may gardening, Monthly To-Do List

April 28, 2017 by Vanessa Myers

WELCOME, glad you stopped by!

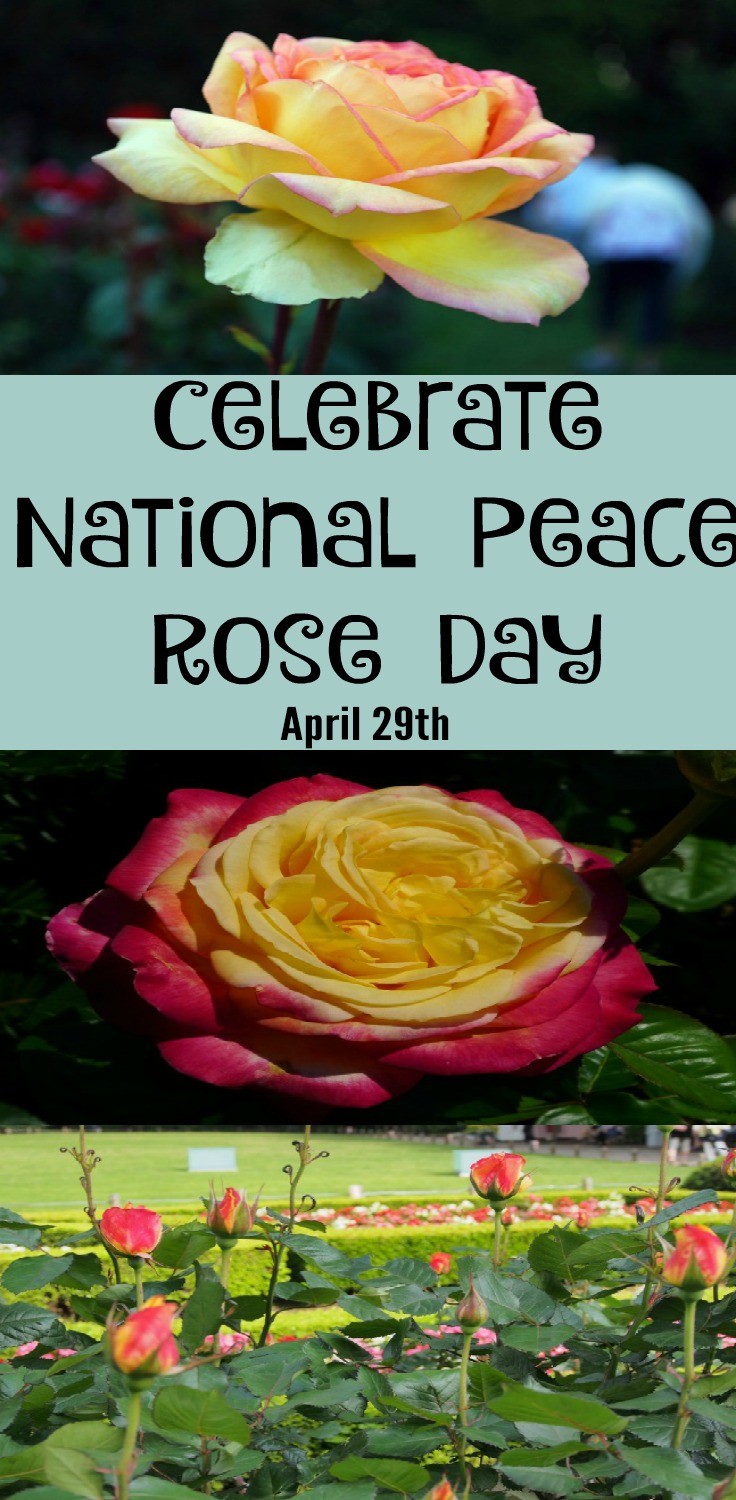
Chances are if you ask a gardener to name a cultivar of rose that they adore, ‘Peace’ would come up many times. This beloved rose is so renowned that it even has its own holiday. National Peace Rose Day is celebrated on April 29th.

National Peace Rose Day is celebrated on April 29th

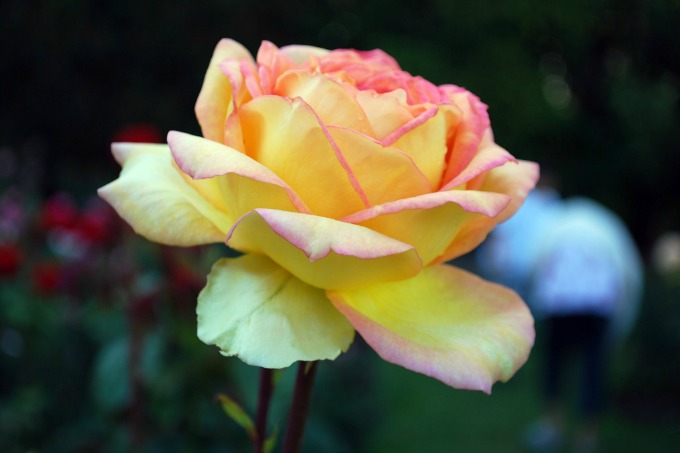
This beauty is the quintessential example of a hybrid tea rose at its best. Large perfumed blossoms are made up of creamy yellow petals that are edged with pink. The foliage is a rich glossy dark green that contrasts nicely and the long stems make them a good choice for floral arrangements.

How Did the ‘Peace’ Rose Come to Be?

Plant the celebrated Peace rose on National Peace Rose Day

Image by hartjeff12 under a Flickr Creative Commons Attribution License

The name ‘Peace’ is apt. Francis Meilland, a plant hybridizer from France, created this cultivar during World War II. He called it Mme A. Meilland in honor of his mother. Instant success ensued when it was introduced to France, Germany, and Italy.

A few years later, the Conard-Pyle Company was able to introduce it to the United States, dubbing it the ‘Peace’ rose. Interestingly enough, the day that it was released was also the end of the war since Berlin fell. It has been one of the most popular roses ever created since.

Why not plant a ‘Peace’ rose or one of the other rose cultivars that claim it as a parent this year to celebrate?

A lovely Chicago Peace rose

Image by digiteyes under a Flickr Creative Commons Attribution-NoDerivatives License

Chicago Peace

If you are a fan of pink roses, choose ‘Chicago Peace’. This kind is much pinker than its parent, with a little bit of cream at the base of each petal.

If you want a Peace rose that will cover a trellis, go for the climbing Peace rose

Image by audreyjm529 under a Flickr Creative Commons Attribution License

Climbing Peace

As you might imagine, this version is very similar to the original ‘Peace’, with the distinction of being one of the climbing roses. Train it up on a trellis or pergola for a gorgeous display.

Desert Peace

Richer hues of pink and gold dance through the blossom of a ‘Desert Peace’ rose, adding pops of color to your landscape. The long stems make it perfect for a vase display.

The Love and Peace rose claims the famed Peace rose as one of its parents

Image by chipmunk_1 under a Flickr Creative Commons Attribution-ShareAlike License

Love and Peace

This cultivar holds the honor of being one of my favorite flowers. I had the opportunity to work in the rose breeding department at Bailey Nursery with Ping Lim, the man who created this ‘Peace’ descendent. The blossoms are big enough that it fills both hands as you bring it closer to inhale the sweet heady fragrance, and the outer petals feature a heavier outline of pink than its parent.

Which of these roses with ‘Peace’ rose parentage is your favorite? Plant one for National Peace Rose Day!

Filed Under: Flowers, Gardening Tagged With: Chicago Peace rose, climbing Peace rose, Desert Peace rose, Love and Peace rose, National Peace Rose Day, Peace rose

April 26, 2017 by Marjorie Carter

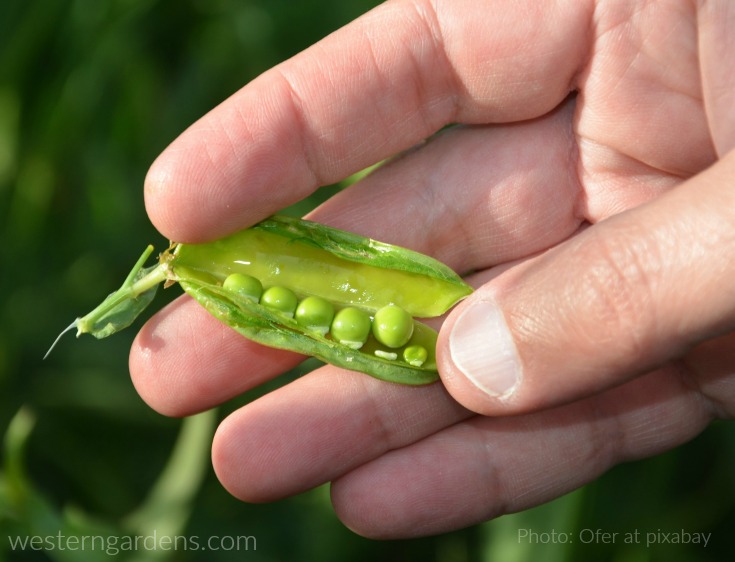
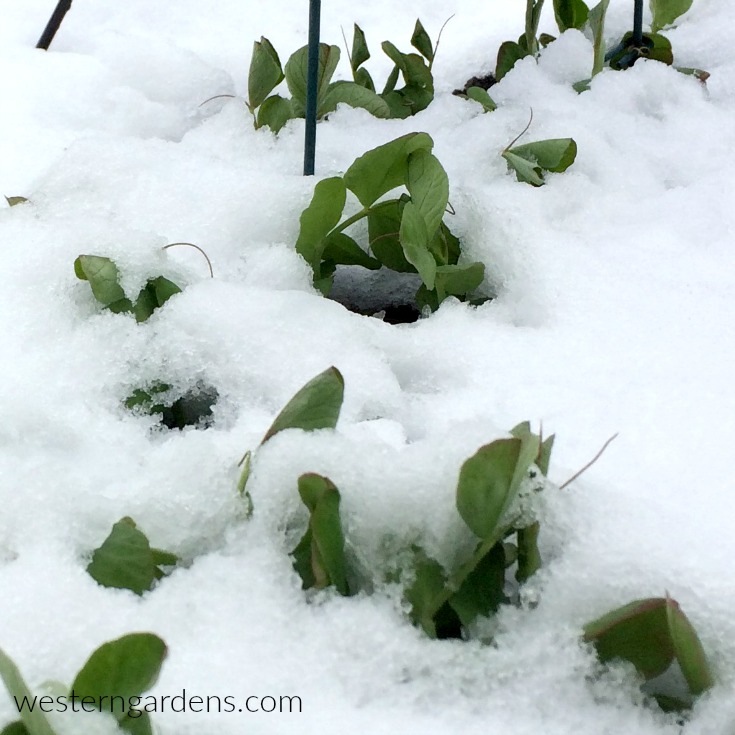
Our favorite garden varieties of peas from the gardenEach year as we get to the last few weeks of winter, my husband and I watch for the first day when it is warm enough for us to work outside in our garden for a few hours so we can plant peas.  We can’t wait to get them in the ground!  Though along the Wasatch front, we typically don’t plant until March, we’ve planted them as early as mid-February (straight in the ground; no greenhouse) and still had great success. Peas are a cool weather plant that needs little attention beyond watering and harvesting.  They tolerate snow and light frost so don’t be afraid to plant peas early.
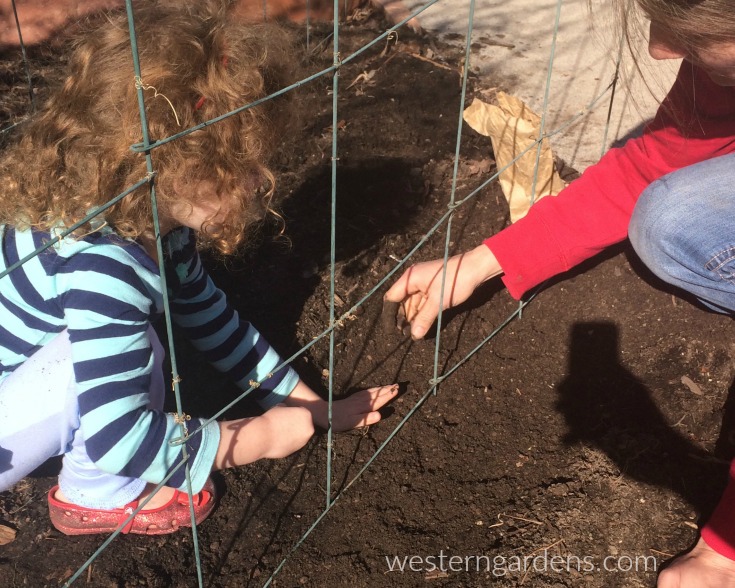
KIDS & PEAS … Planting peas is a great activity to do with young children.  The seeds are a real bonus to work with:

  1. They are large enough that they are easy for small fingers to pick up.  
  2. They are also easy to find after the inevitable spill.
  3. Planting is as simple as sticking your finger in to the ground, dropping in a seed, and covering with soil.  

Again, the size of the seed made this something I could do with my 18 month old.  She has helped plant every year since and even gets upset if she thinks she’s being left out of the planting process for the peas.
little girl planting peas with her mother

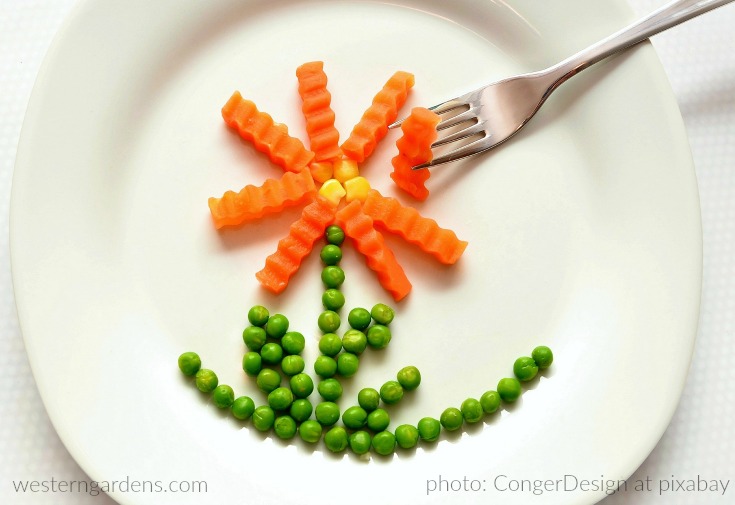
Peas and carrots on dinner plate - photo by CongerDesign - Pixabay CC0 license

Fun idea to see and eat the peas the children grow. That is if you can get any that far into the house from the garden!

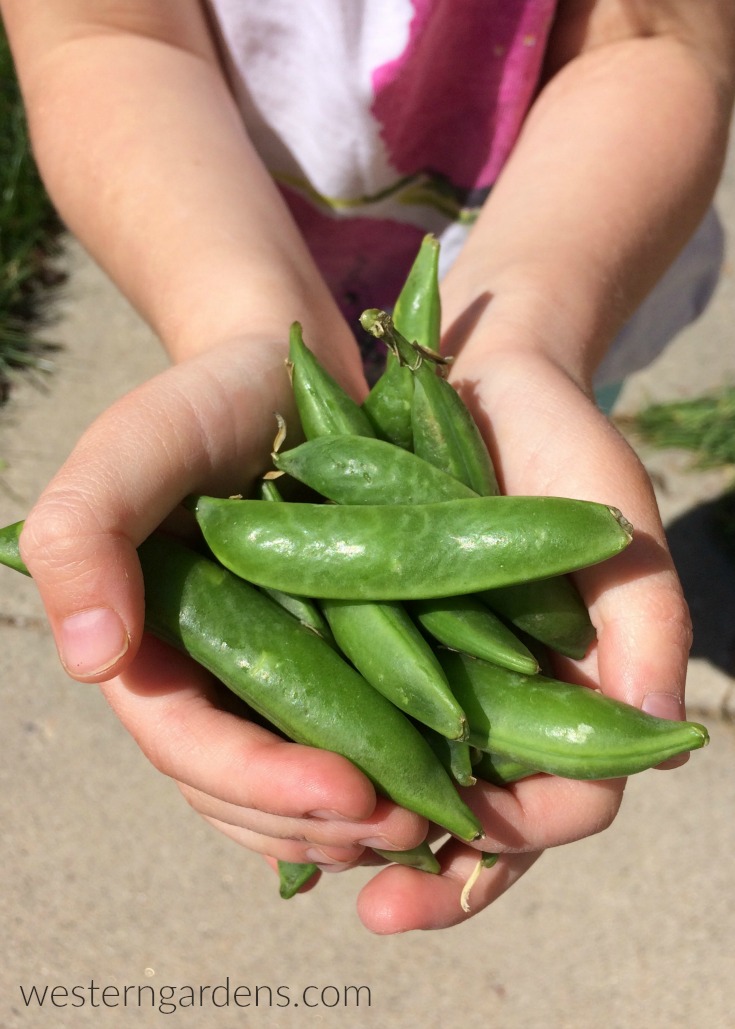
FRESH PEAS IN THE GARDEN… My husband will only eat shelled peas that are freshly picked from the garden.  If they’ve been cooked, frozen, canned, or otherwise tampered with, he will not touch them.  (He’ll eat snap peas in stir fry). When our daughter was very young, we’d go out in the garden to pick peas and she’d eat as many as we’d give her.  Her preferred method was eating them straight out of our hands. She will still eat as many as she can get her hands on, but she’s big enough to do the picking and shelling on her own now.  

plant peas to eat by the handful

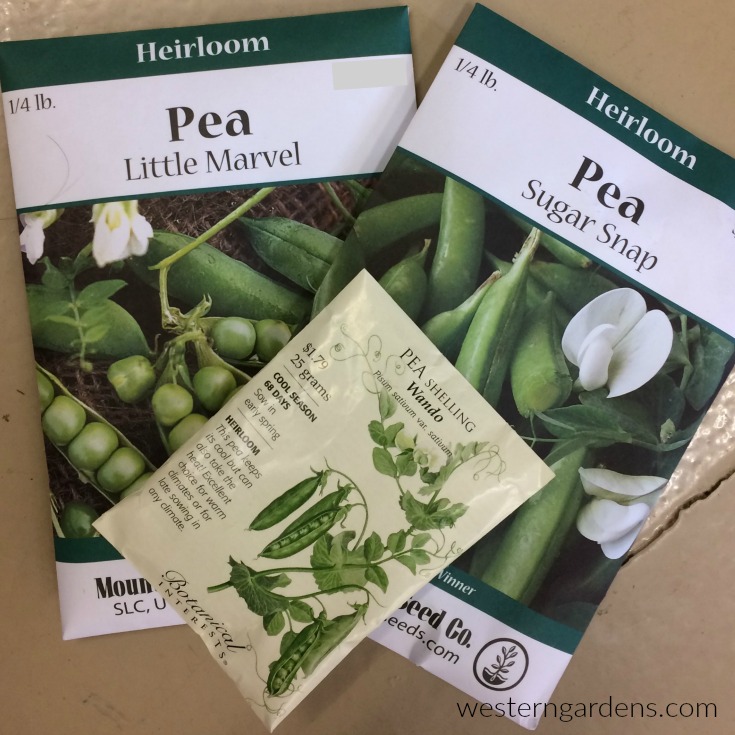
OUR FAVORITE VARIETIES…We’ve tried lots of varieties of peas over the past several years (Green Arrow, Alaska, Snap Peas, Little Marvel, Blue, and more) and have found that our favorites for flavor and abundance on the vine are Little Marvel (a shelling pea) and Snap Peas (edible pods, no shelling required).  We also grow Blue shelling peas because their flower is so beautiful. If you’ve never seen a blue pea, the flowers are purple and white and the pea pods are a dark purple/blue color, making them easy to find on the vine.  Buy quality seeds from your local garden center like Western Garden Centers in Salt Lake City and West Valley, Utah.

Find quality seeds of peas to plant at Western Garden Centers, garden shop in Utah

DID YOU KNOW… Peas are one of the oldest known vegetables.  Archaeologists have found them in ancient tombs at Troy and Thebes. Dried peas keep indefinitely.  This allowed them to survive the ocean voyage to become one of the first crops grown by English colonists coming to North America.

DID YOU KNOW… Peas are “nitrogen fixers”, meaning they take nitrogen from the atmosphere and convert it to ammonia (which is chemically comprised of nitrogen and hydrogen), thereby making the nitrogen available to other plants and organisms in the soil.  This means peas are a great spring crop because they naturally help fertilize your soil prior to planting other garden fruits and vegetables that need nitrogen in order to thrive (think tomatoes!).

TIP:  To maximize this benefit, at the end of the peas’ growing season, trim the plant off at the soil line instead of pulling them out, leaving the roots behind.

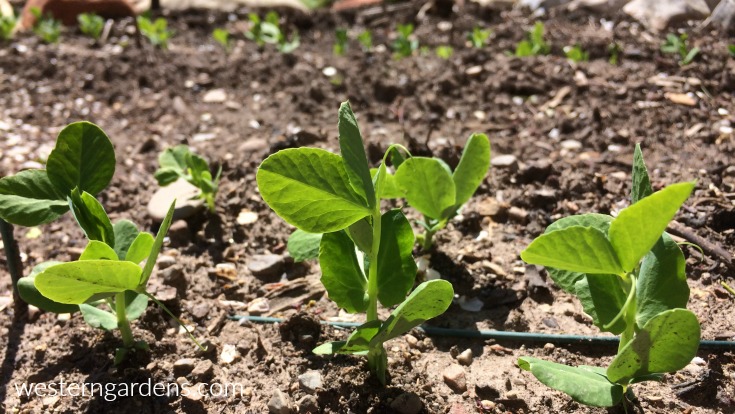
GROWING TIP … A friend suggested presoaking the peas prior to placing them in the soil.  This will soften the seeds and allow them to germinate more quickly. Soak for around 12 hours, no more than 24, before planting.  We tried it this year because we wish our peas would sprout sooner.  It worked!  Our peas were sprouted and broken through the soil less than 10 days after planting them, instead of 2 weeks or more.  We look forward to eating our peas that much sooner this year!  

Rows of planted peas coming up in the vegetable garden

FALL PLANTING … After the summer heat is gone (about Labor Day), plant peas again for a fall crop.  Read the package of which variety will produce according to the time you have.

Hmm…  Sounds like something new to try with our garden this fall.

Eat peas straight out of the garden


Filed Under: Gardening, Kids in the Garden, Tips & How To's, Utah Gardening, Vegetables, Veggie Gardening Tagged With: blue shell peas, cold hardy vegetables, cool season vegetables, garden peas, little marvel peas, peas, plant peas, snap peas, Utah gardening, zone 5 peas

April 20, 2017 by Wendy Pettit

WELCOME Zucchini Chefs, Here is a yummy recipe to try!

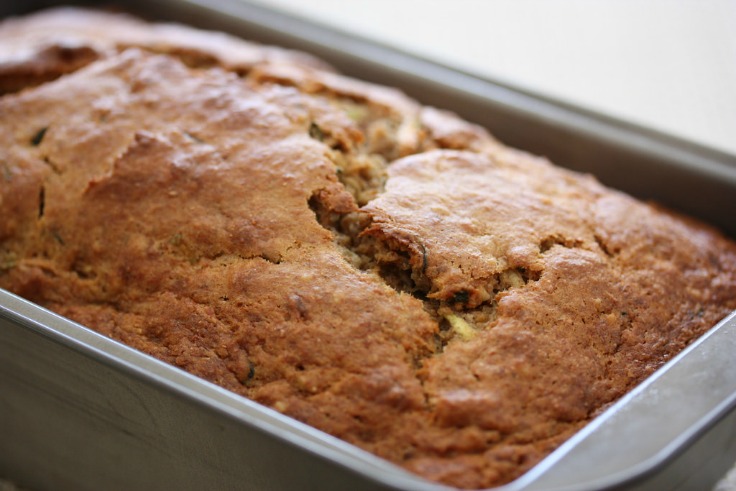
Here is a family favorite zucchini bread recipe for your celebration of National Zucchini Bread Day on April 25th.  On the 24th, pull out your leftover frozen grated zucchini from last year’s harvest or load up the kids and let them each choose a fresh zuc from the local produce store.  Have all your recipe ingredients ready for the next day’s celebrations!  On the 25th, mix, bake and eat some bread, load up the kids and go buy new quality zucchini seeds from Western Gardens or any local independent garden center, and start the seeds indoors.  The kids will love seeing these easy and fast seeds sprout and seedlings grow. If you live in the Salt Lake area, you’ll be safe to plant them outside in your garden after Mother’s Day in May!

Photo by Meal Makeover Moms with a Flickr CC0 license

Bookmark or pin this recipe for summer deliciousness and for next April’s National Zucchini Bread Day!

Banana Zucchini Bread Recipe by Amy Christensen / Cahoon Cook Book

3 eggs

2 cups sugar

1 cup canola oil

1 cup zucchini, grated

1 cup banana, mashed

1 tablespoon vanilla

3 cups flour

1 teaspoon baking powder

1 teaspoon salt

1 tablespoon cinnamon

1/2 cup semisweet chocolate chips, mini preferred

Combine first 6 ingredients together mixing well.  Add flour, baking powder, salt and cinnamon.  Mix in chocolate chips.

Bake in 325 degree oven for 1 hour.

Makes 3 small loaves.


Happy National Zucchini Bread Day everybody!

Filed Under: Eat from Garden - Recipes, Recipes Tagged With: frozen zucchini, National Zucchini Bread Day, zucchini, zucchini bread, zucchini bread recipe

  • « Go to Previous Page
  • Go to page 1
  • Interim pages omitted …
  • Go to page 5
  • Go to page 6
  • Go to page 7
  • Go to page 8
  • Go to page 9
  • Interim pages omitted …
  • Go to page 21
  • Go to Next Page »

Primary Sidebar

Shopping Cart

Items in Your Cart

Your cart is empty
Visit The Shop

Follow Western Gardens

  • Facebook
  • Instagram
  • Pinterest
  • YouTube

See what we’ve been pinning!

Follow Me on Pinterest
Followed by people.
?

Pinterest Badge by Skipser

Here’s What We’ve Been Up To!

Save water and money by Turf Training - train your lawn to grow deep roots
work at western gardens utah garden center
Senior gardening woman Edu Carvalho from Pexels
nursery center open to public

Copyright © 2025. Western Gardens - Privacy Policy