• Skip to primary navigation
  • Skip to main content
  • Skip to primary sidebar

Western Garden Centers

for what grows here

  • Home
  • How To
  • Gift Cards
  • Calculate Mulch
  • Locations
    • Store Hours
    • About
    • Garden Shop Employment Team
  • Weddings
    • Salt Lake City, UT
    • West Valley, UT
  • Blog
    • Gardening
    • Recipes

Blog

October 1, 2016 by Western Gardens

October Gardening To-Do List

Welcome gardening friends, thanks for stopping by!
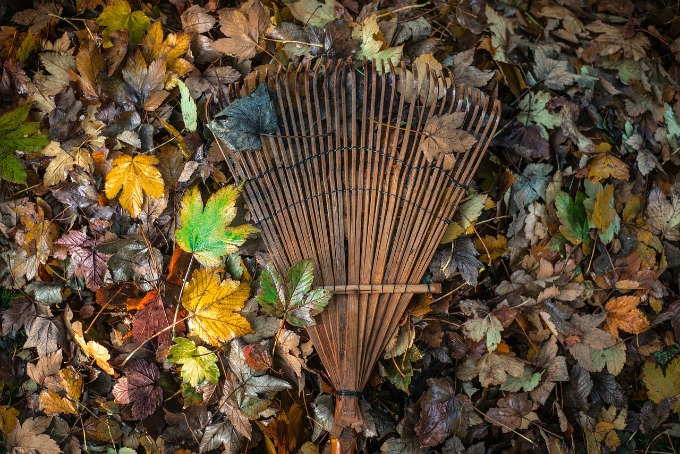
October Gardening To-Do List

If you’re excited to work in your yard or garden, but not sure what to do in the cooler October weather, then you’ve come to the right place!  We’ve put together a list of things to do throughout the month.
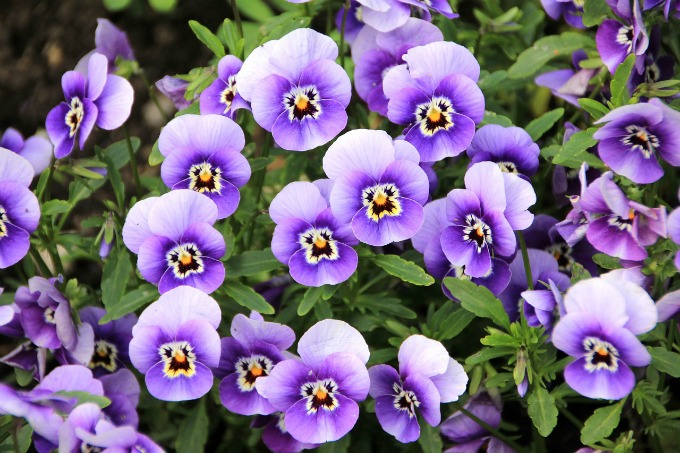
October Gardening To-Do List

You may not need to do everything on this list.  For example, if you don’t have bulbs to plant or stone fruit trees to spray, skip over those items on the list.  Just pick what applies to your yard and plan out when you will do it all throughout the month!

October Gardening To-Do List

➺Plant trees & shrubs

➺Buy Spring Bulbs from your local nursery, if you haven’t already

➺Plant Spring Bulbs at the proper depth with a complete fertilizer, if you haven’t already

➺Plant Paper Whites in beautiful indoor pots

➺Store summer flowering bulbs in a cool, dry place

➺Fertilize lawn, according to your schedule

➺Aerate Lawn if necessary

➺Mow Lawn short for winter

➺Plant Pansies for fall color

➺After A Killing Frost remove dead plant material and debris from veggie & flower beds

➺Inventory your tools and inspect for damage, make any necessary repairs or replacement

➺Control Field Bindweed also known as Wild Morning Glory, control other weeds as well

➺Dig Tender Bulbs cannas, dahlias & gladiolus, after a hard frost

➺Drain and Winterize sprinkler system

➺Spray Stone Fruit Trees for Coryneum blight after leaves fall

➺Assess Your Yard for changes to make next year

➺Rake Leaves and add them to your garden.  DESTROY Aspen leaves, as they are usually diseased

➺Drain Or Add Fuel Stabilizer to lawn mower.  Change oil and store for the winter

➺Disconnect Hoses drain and store for the winter

➺Cover Patio Furniture to protect it from the winter weather, especially wood furniture

Be sure to check out November’s to-do list to keep your yard and garden looking their best into the winter!
October Gardening To-Do List

Filed Under: Gardening, To-Do List Tagged With: Monthly To-Do List

September 15, 2016 by Vanessa Myers

10 beneficial insects you want in your garden! If you spot these in your yard, you're in good shape!

Welcome Gardening Friends! Thanks for stopping by.

Do you ever see insects in your garden and wonder which ones are friendly and which ones aren’t?  Which ones are helping and which ones are harming?  Then keep reading, I’ve put together 10 Beneficial Insects You Want in Your Garden!

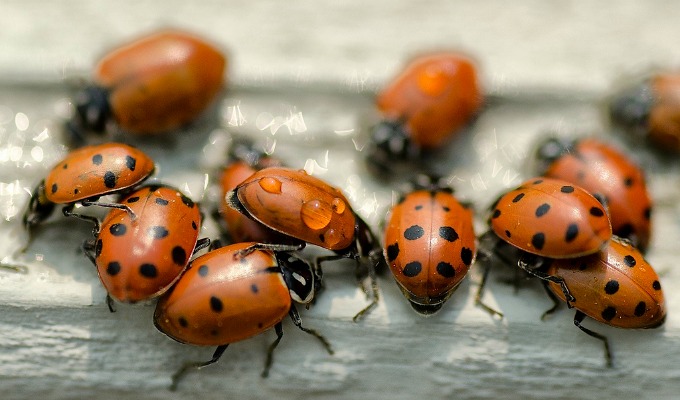
Ladybugs are definitely beneficial for your garden

Image by snowpeak under a Flickr Creative Commons Attribution License

10 Beneficial Insects You Want in Your Garden

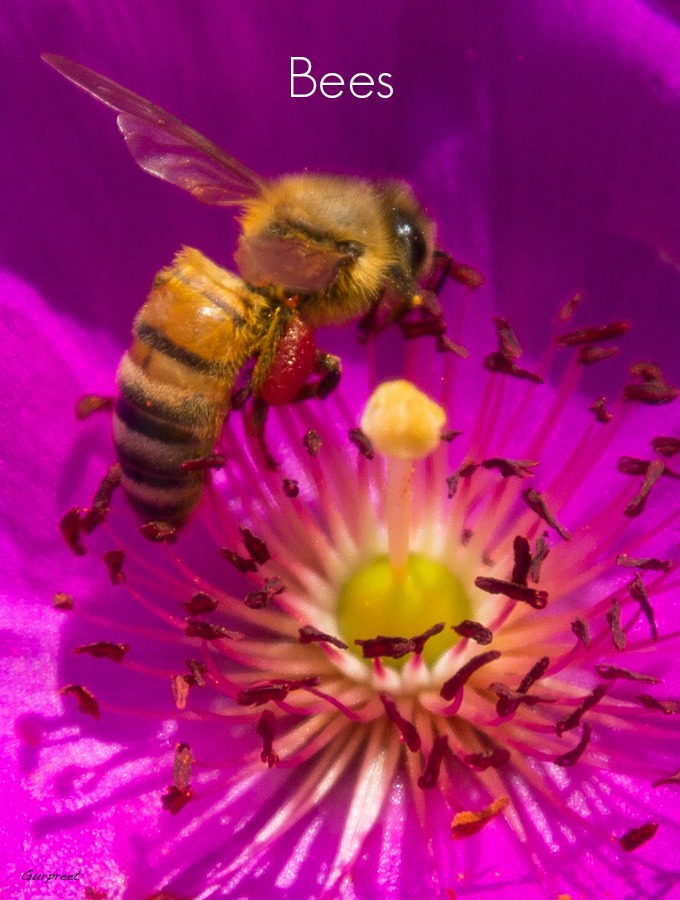
Bees will help pollinate many of your flowers

Image by zoxcleb under a Flickr Creative Commons Attribution-ShareAlike License

1. Bees

Bees are pollinating powerhouses and you want to see as many of them in your garden as you can get.  The more pollinators you have in your garden, the more fruit your plants will produce.

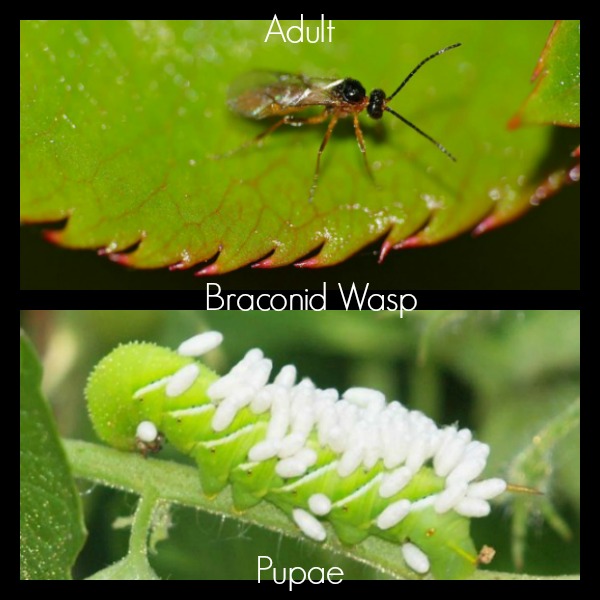
Braconid wasps lay their eggs in caterpillars

Adult Image by berniedup under a Flickr Creative Commons Attribution-ShareAlike License, Pupae Image by Bev Wagar under a Flickr Creative Commons Attribution License

2. Braconid Wasps

If you have ever found a tomato hornworm on your plants, you have seen the havoc that they can wreak. It won’t take them long to munch away all of the leaves on your tomato plants and you should squish it as soon as possible. However, if you ever find one that looks like the picture above, leave it alone. Braconid wasps are predatory and these beneficial insects lay their eggs in pests like the tomato hornworm. The larva feed on the caterpillar’s body, then emerge and form cocoons. This ultimately ends in the demise of the hornworm and more wasps to hone in on your other pests.

Some Pests Targeted by Various Braconid Wasps:

  • Aphids
  • Beetles
  • Caterpillars
  • Squash Bugs
  • Stink Bugs
Butterflies and moths are good pollinators for your garden plants

Image by Michael Khor under a Flickr Creative Commons Attribution License

3. Butterflies and Moths

Butterflies and moths are not just dainty beauties that like to flit around your garden.  They serve as pollinators for many different flower species, enabling them to produce fruit.  They can potentially be harmful while in the larval stage as caterpillars since they eat away at leaves.  Many times, though, it’s not enough to ultimately harm the plant and you can allow them to complete their metamorphosis.

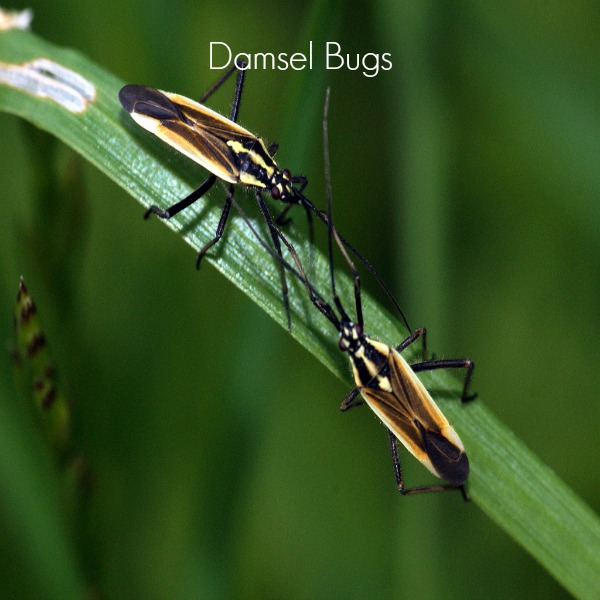
Damsel bugs are one type of beneficial insect

Image by Bennyboymothman under a Flickr Creative Commons Attribution License

4. Damsel Bugs

Don’t confuse damsel bugs with damselflies, which are similar to their relatives, the dragonflies. Damsel bugs are true insects that love to go after many of the pests that snack on your vegetable garden plants.

Pests Targeted by Damsel Bugs Include: 

  • aphids
  • small caterpillars
  • moth eggs
Dragonflies love pests like mosquitoes

Image by Join the Dots under a Flickr Creative Commons Attribution License

5. Dragonflies

Dragonflies can consume their bodyweight in bugs every 30 minutes, so they’re a great help in keeping the pests at bay!

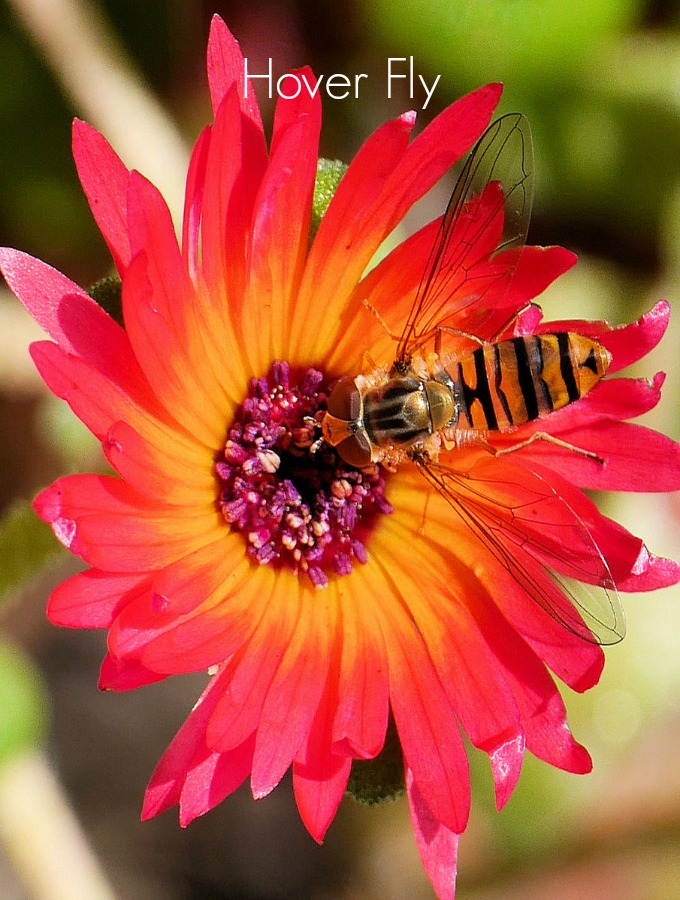
Hover flies will eat aphids, scales and thrips

Image by Smabs Sputzer under a Flickr Creative Commons Attribution License

6. Hover Flies

Hover flies, also known as syrphid flies, flower flies and drone flies, are great for controlling aphids, thrips, scale insects and caterpillars.  They are almost as effective as lady bugs in controlling aphids!

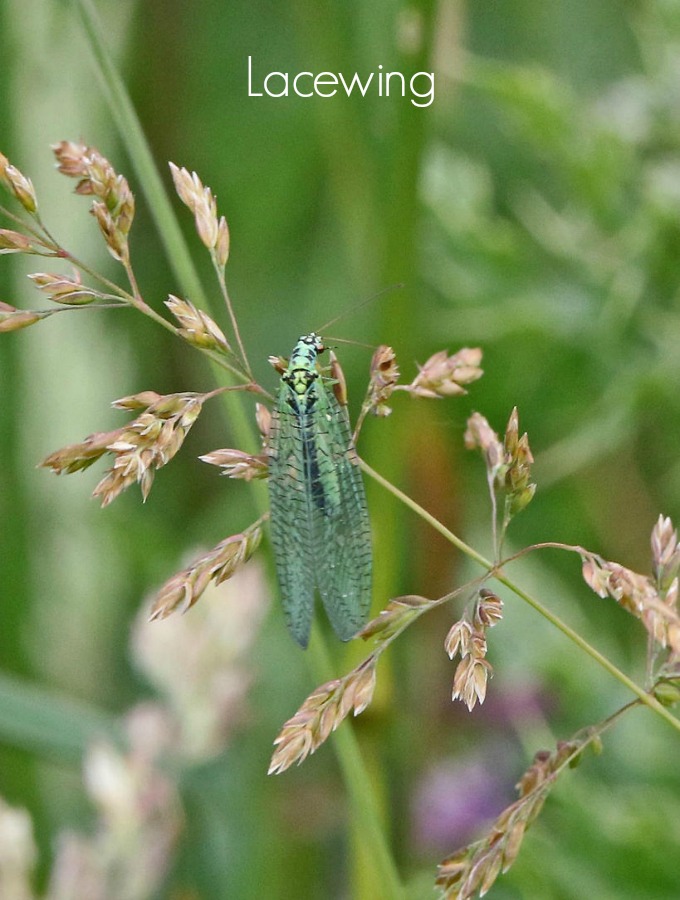
Lacewings will eat a large variety of harmful insects

Image by Mick Sway under a Flickr Creative Commons Attribution-NoDerivatives License

7. Lacewings

Lacewings are a helpful addition to the garden because the larvae are voracious predators of many pests including: aphids, spider mites (especially red mites), thrips, whitefly, leafhoppers, some beetle larvae, eggs of pest moths, and mealybugs.

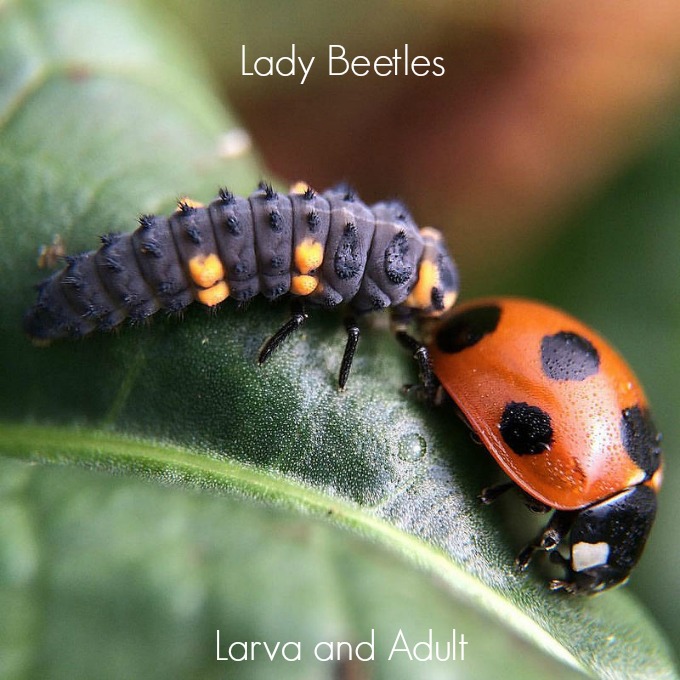
Both ladybug larva and adults are beneficial insects

Image by norio_nomura under a Flickr Creative Commons Attribution-ShareAlike License

8. Lady Beetles

Lady Beetles, more commonly known as Lady Bugs, are a popular addition to many gardens.  They are sold in local nurseries because they’re so effective at controlling aphids and other pests like small caterpillars, thrips and other soft-bodied insects.

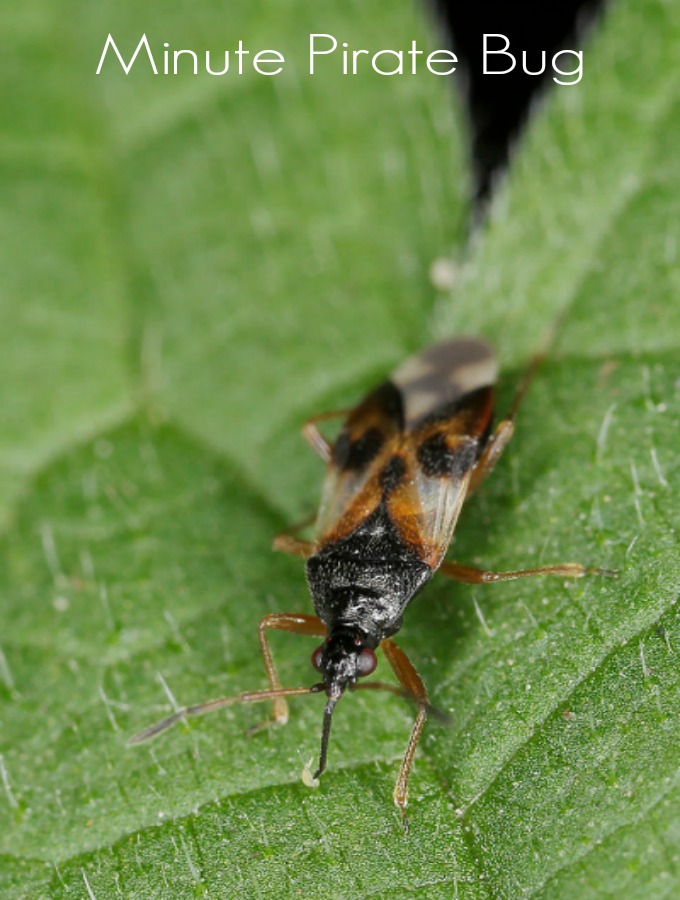
One insect that is beneficial in your garden is the minute pirate bug

Image by gbohne under a Flickr Creative Commons Attribution-ShareAlike License

9. Minute Pirate Bugs

Minute Pirate Bugs are tiny bugs (less than ⅕ of an inch long!) that are helpful in ridding your garden of pests including: aphids, spider mites, and thrips.  They are very predatory, and can consume up to 20 thrips larvae every day!

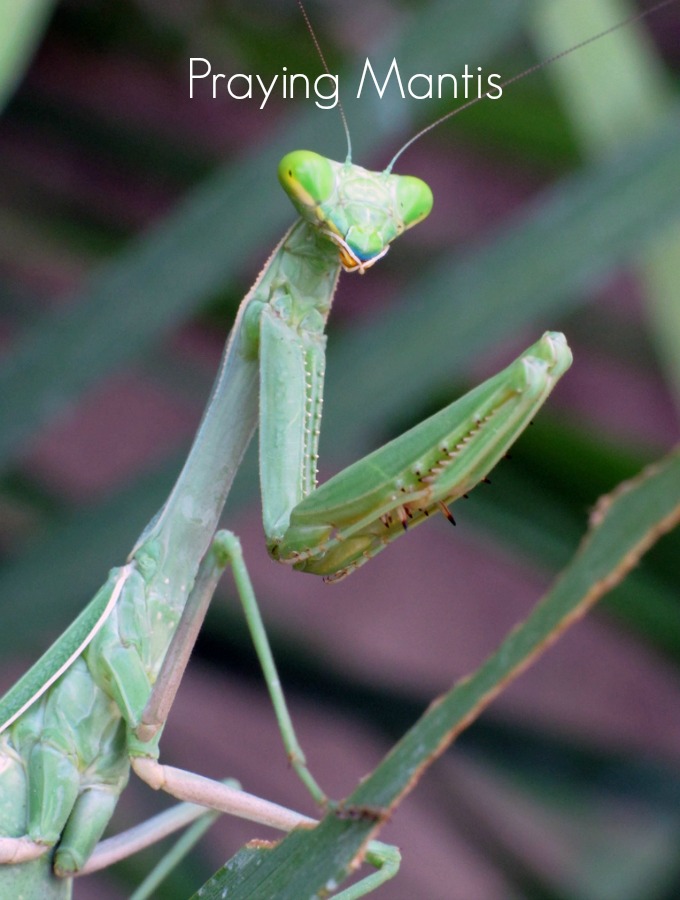
Praying mantises are so named because of how their legs are folded

Image by siamesepuppy under a Flickr Creative Commons Attribution License

10. Praying Mantises

Praying Mantises are helpful hunters because they prey on flies, crickets, beetles & moths.  These are great bugs to see in the garden!  But you should note that they are indiscriminate hunters…they eat pesky insects as well as beneficial ones, so just prey that they eat the pests!  😅

Honorary Mention: Spiders

Spiders are not included on this list because they are not actually insects.  Like other arachnids, they have eight legs, while insects have six. Many people shudder just at the thought of them. However, they truly are one of the most beneficial creatures to have around your garden since they take care of a lot of pests. If you can stifle the urge to squash any that are nonpoisonous, your garden will thank you!

What are your favorite beneficial insects?  Let us know in the comments below!

Filed Under: Gardening, Tips & How To's Tagged With: beneficial bugs, beneficial insects, bugs, garden, Gardening, insects, pests, Utah gardening

September 1, 2016 by Western Gardens

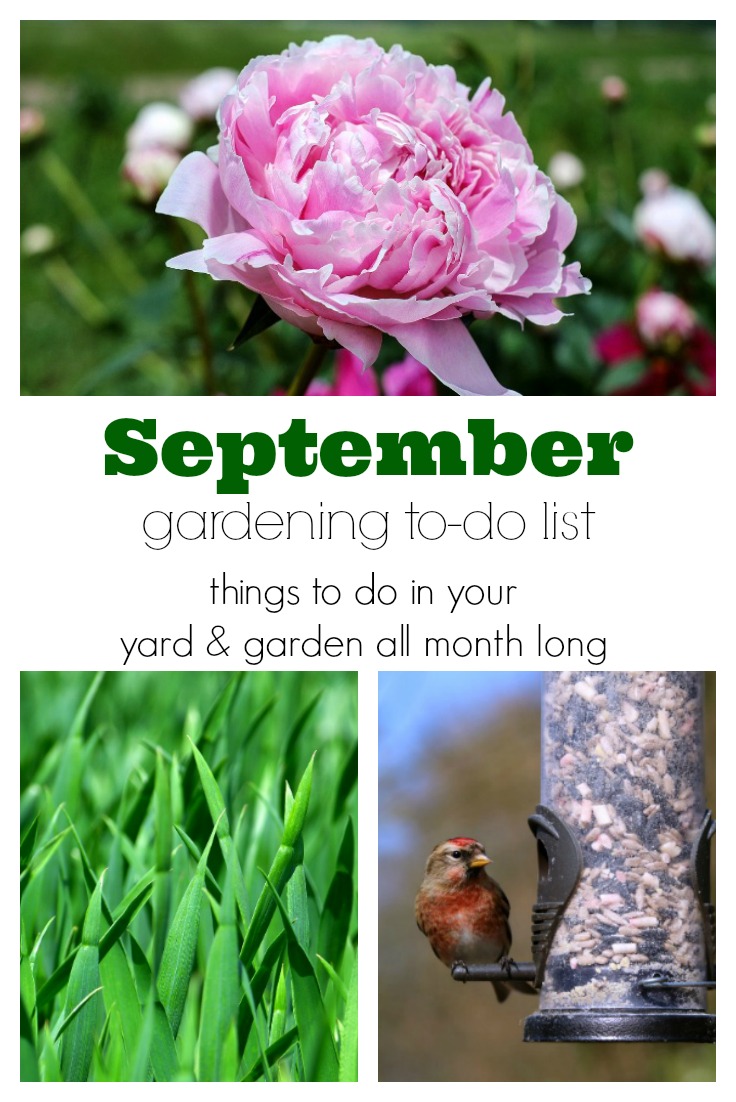
September Gardening To-Do List

Welcome friend, thanks for stopping by!

September Gardening To-Do Lists...to make taking care of your yard easier!

If you’re excited to work in your yard or garden, but not sure what to do in the cooler September weather, then you’ve come to the right place!  We’ve put together a list of things to do throughout the month.

You may not need to do everything on this list.  For example, if you don’t have roses, then you won’t need to worry about letting the hips form.  Just pick what applies to your yard and plan out when you will do it all throughout the month!

September Gardening To-Do Lists...to make taking care of your yard easier!

September Gardening To-Do List

➺Plant trees & shrubs

➺Watch For Frost Warnings and cover tender crops if necessary

➺Don’t Store apples and potatoes together

➺Stop Dead-Heading roses and let hips form

➺Buy Some Spring Bulbs from your local nursery

➺Plant Spring Bulbs (tulips, daffodils, etc) at the proper depth with a complete fertilizer

➺Plant Pansies with your fall bulbs

➺Keep Up with insect and weed control, keep watching for slugs & snails {check out THIS article for 3 simple ways to control snails!}

➺Last Treatment for peach twig borer

➺Treat Lawn Weeds with weed spray

➺Lay Seed for a new lawn, or lay sod

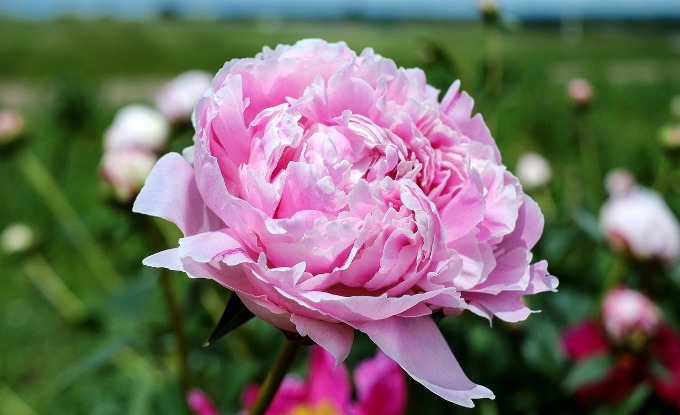
➺Divide Peonies if necessary

➺Stop Watering fruit trees

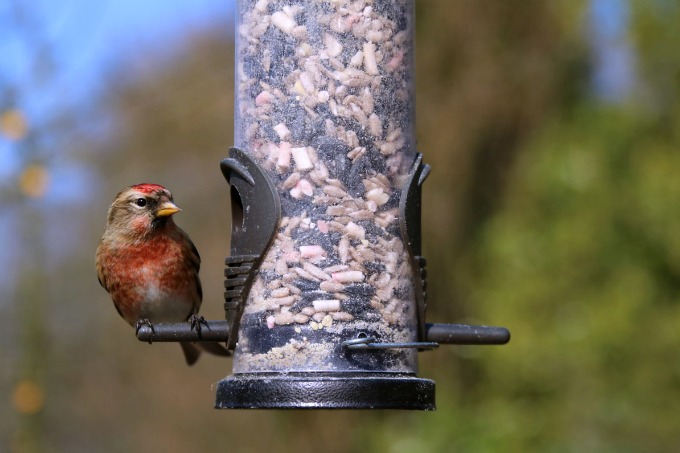
➺Start Feeding wild birds, if you stopped in the spring

➺Install a Roof De-Icing Cable to avoid winter ice build-up

Be sure to check out October’s Gardening To-Do List too!

September Gardening To-Do List...to make taking care of your yard easier!

Filed Under: Gardening, To-Do List Tagged With: Gardening, How To, how to's, tips, to-do list

August 1, 2016 by Sydney Anderson

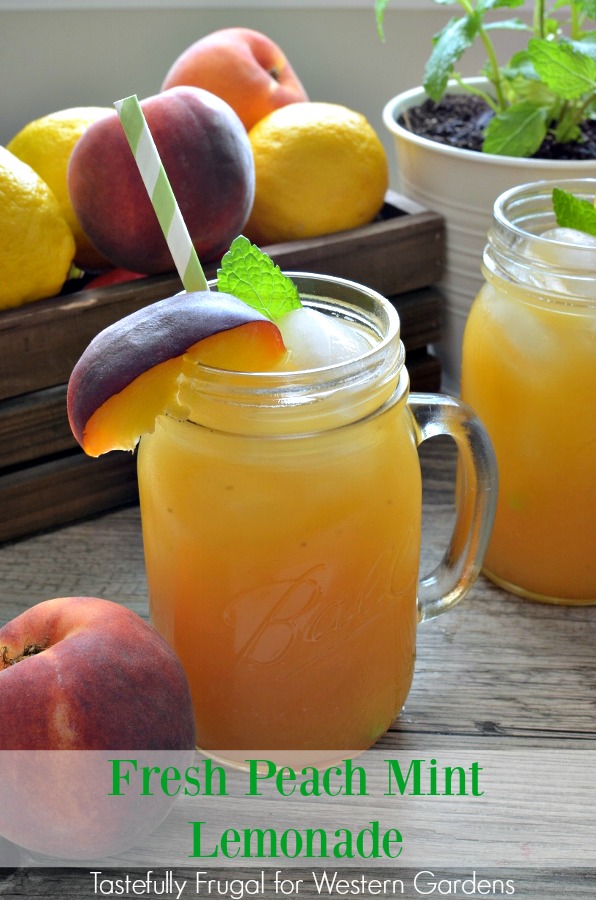
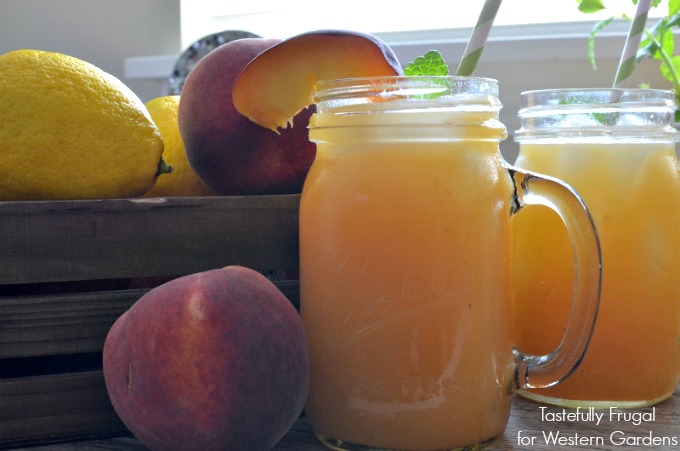
Fresh Peach Mint Lemonade: Sweet peaches paired with cool mint add a refreshing twist to traditional lemonade.

Hello, thanks for stopping by!

Do you love a tangy, refreshing lemonade on a hot summer day?  Me too!  Add in some peaches and mint and you have the ultimate drink…Fresh Peach Mint Lemonade!

Fresh Peach Mint Lemonade: Sweet peaches paired with cool mint add a refreshing twist to traditional lemonade.

Sweet peaches and refreshing mint pair perfectly with tangy lemonade.  We can’t grow lemon trees here in our Utah climate, but if you grow peaches and mint in your garden, this recipe is a necessity!

Fresh Peach Mint Lemonade: Sweet peaches paired with cool mint add a refreshing twist to traditional lemonade.

For help picking the right trees and tips for taking care of them talk, to an expert at Western Gardens.  There are a lot of varieties and they’ll help you choose exactly what you need!  (And if you ask nice, they might even show you some of the cool multi-variety trees like the “fruit salad” tree!  It has four different kinds of fruit grafted onto ONE tree!  So cool, right?!)

Fresh Peach Mint Lemonade: Sweet peaches paired with cool mint add a refreshing twist to traditional lemonade.As I was slicing peaches for this lemonade, I saw my blooming mint plant on the counter and decided to throw some mint leaves into the mix too.  And I’m so glad I did!  The mint added a cool, refreshing hint to the sweetness and made every sip a wonderful mix of tart, tangy, sweet and refreshing. I’ve made three batches so far and I’ve found that the longer you let the lemonade cool in the fridge, the better it tastes. I recommend letting it cool in the fridge for at least 3 hours.
Fresh Peach Mint Lemonade

Ingredients:

  • 4 cups water
  • ½ cup sugar
  • 4 medium peaches, pits removed and quartered
  • 2 Tbsp mint leaves
  • 1 cup fresh lemon juice (about 3 large lemons)

Directions:

  1. Add water and sugar to a large saucepan and bring to a boil.
  2. Add mint and peaches to sugar/water mix, reduce heat to med-low and let simmer for 5 minutes.
  3. Pour into a blender jar and remove the center of the lid, if possible (to allow steam to escape).
  4. Place a towel over the lid and blend on low for 25-30 seconds, or until smooth.
  5. Pour through a cheesecloth or fine mesh strainer into a pitcher. Discard the solids.
  6. Whisk in lemon juice and cool in fridge for at least 3 hours.

 Fresh Peach Mint Lemonade: Sweet peaches paired with cool mint add a refreshing twist to traditional lemonade.

Are you a tangy lemonade fan?  Or do you prefer your drinks a little sweeter?  No matter what your taste is, Western Gardens has a wide variety of herbs and fruit trees to make any drink your taste buds can imagine!  Talk to an expert today to see what plants will thrive best in your garden.

If this Fresh Peach Mint Lemonade sounds good, check out these other tasty drinks!Fresh Peach Mint Lemonade

Blackberry Mint Lemonade | Brazilian Lemonade | Lemon Berry Slush

To get a PRINTABLE version of this recipe, click NEXT!

Western Gardens | Utah

Pages: Page 1 Page 2

Filed Under: Fruit, Recipes Tagged With: fresh fruit, lemonade, mint, peach, recipe

July 15, 2016 by Sydney Anderson

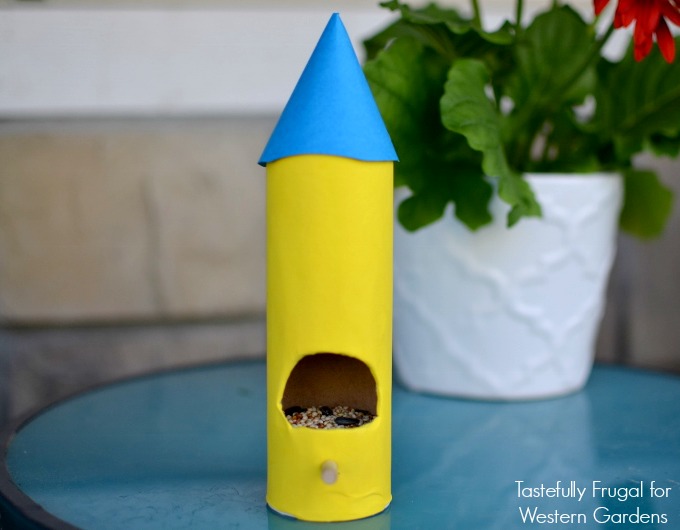
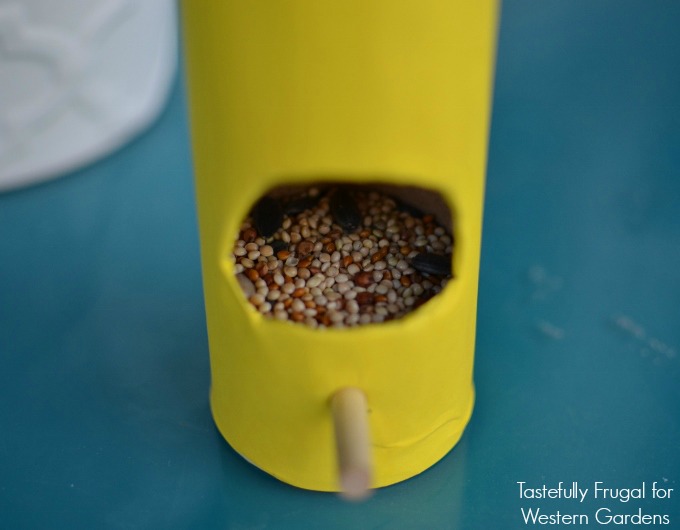
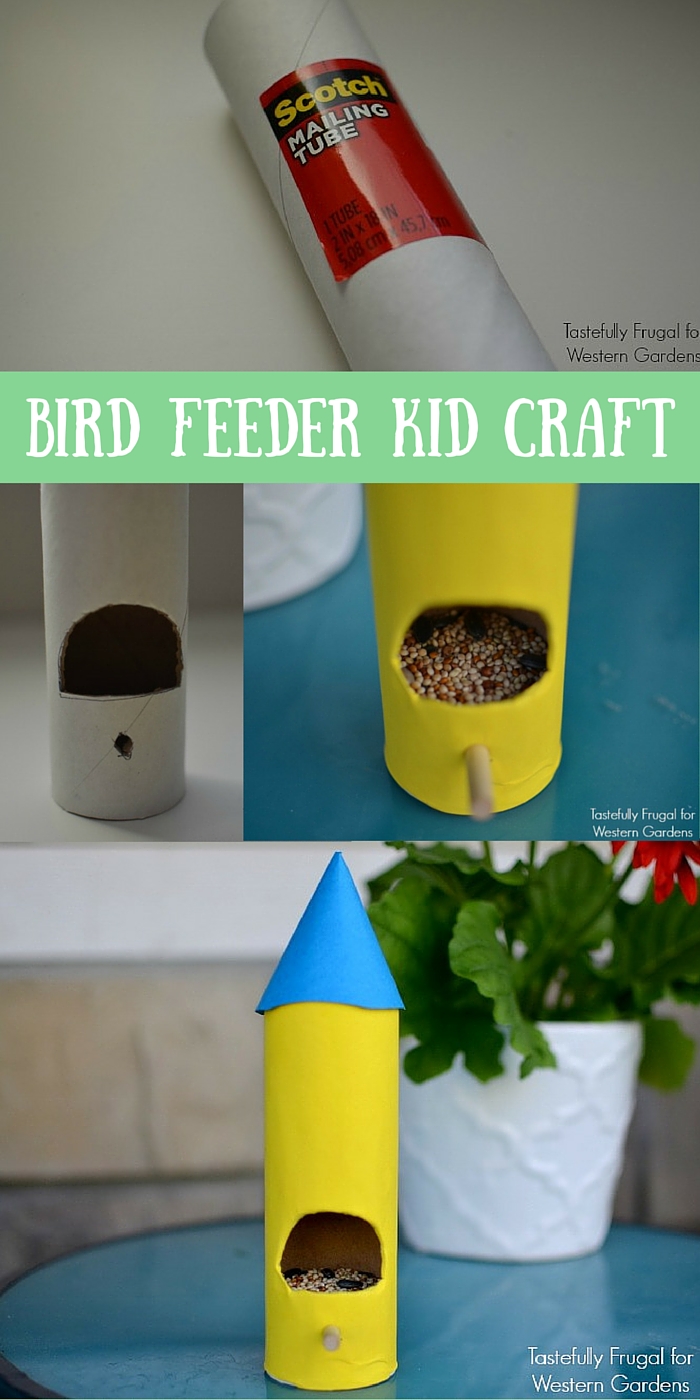
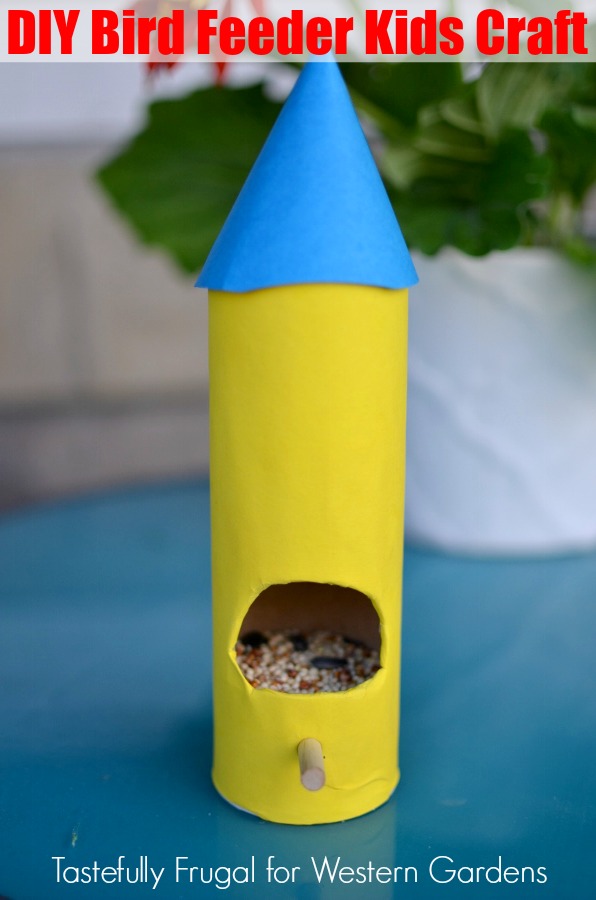
This DIY Bird House is a great kid craft, it’s easy to make and customize…even for little hands!DIY Bird Feeder Kid Craft: Let kids make their own bird houses in just a few minutes!

Do you get birds in your yard? We didn’t get many last year, but this year it seems like there is always a flock (well, at least 5 or 10!) coming and going throughout the day.  My boys love looking out the window and watching them on the grass, so I decided to bring nature a little closer to home and build a bird house for the front porch!

DIY Bird Feeder Kid Craft: Let kids make their own bird houses in just a few minutes!I didn’t think my kids would have the patience to sit through building a birdhouse from wood (they are 3 and 4) so I decided to go with something a little more simple.
DIY Bird Feeder Kid Craft: Let kids make their own bird houses in just a few minutes!

DIY Bird House Kid Craft

Supplies:

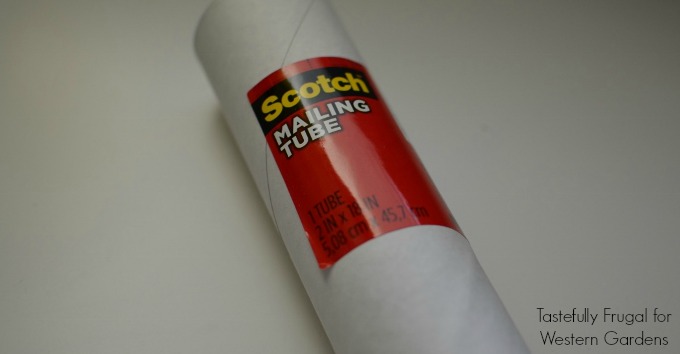
  • Shipping Tube (I picked this one up from the FedEx store for $3)
  • Wooden Dowels (you can pick them up at any hardware or hobby store)
  • Cardstock or Construction Paper
  • Scissors
  • Hot Glue Gun
  • X-Acto Knife or Razor Blade
  • Washi Tape, Feathers, Beads or other embellishments
  • Bird Seed (I found a huge variety at Western Gardens)

DIY Bird Feeder Kid Craft: Let kids make their own bird houses in just a few minutes!

DIY Bird Feeder Kid Craft: Let kids make their own bird houses in just a few minutes!

Directions:

  1. Decide on the height of birdhouse you want, measure and cut the shipping tube (we made ours 6″).
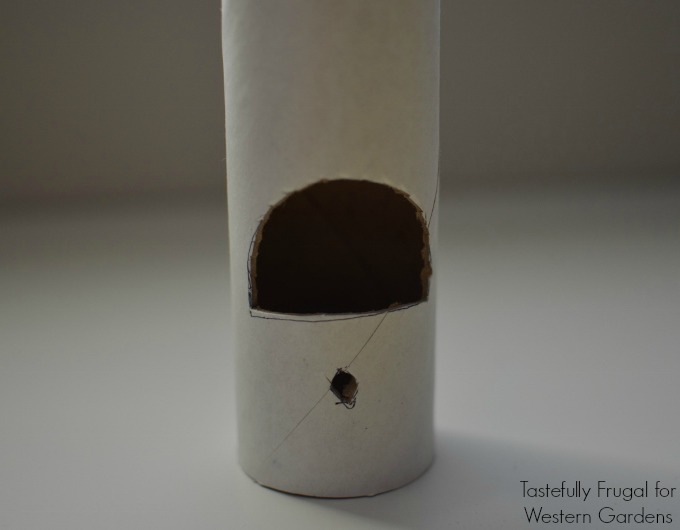
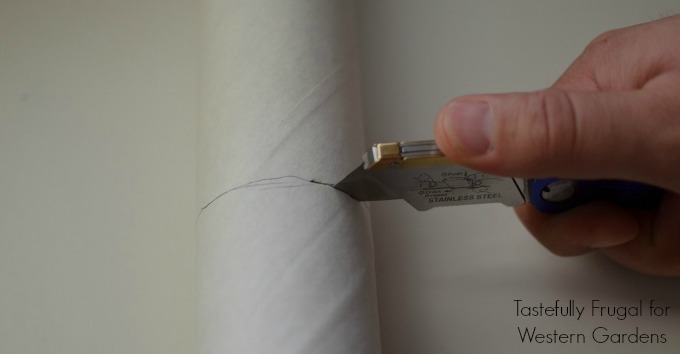
  2. Trace a half circle on the shipping tube to put the food in, and cut it out with the X-acto Knife.
  3. Measure and cut the dowel for the perch (ours was about 3″ long).
  4. Cut a small hole below the larger hole in the tube (for the dowel to go in).
  5. Wrap cardstock around tube, measure and cut the cardstock to fit around the tube.
  6. Hot glue the cardstock on to the tube.
  7. Hold the tube up to the light and cut out the large and small circles in the cardstock.
  8. Place the dowel inside the smaller hole and use hot glue to secure.
  9. Hot glue the shipping lid into place.
  10. Cut a piece of cardstock in a contrasting color 6″ x 2.5″.
  11. Roll into a cylinder and hot glue together.
  12. Let kids embellish the roof however they want.
  13. Use hot glue to attach the cylinder to birdhouse.
  14. Pour birdseed into the larger hole.

DIY Bird Feeder Kid Craft: Let kids make their own bird houses in just a few minutes!

Place it on a solid surface, or thread string or rope through the top of the tube to hang from a branch or a porch hook. We have ours sitting on our front patio table and the birds still come up for a snack!  These birdhouses are made with cardstock, so make sure to bring them in if you know a storm is coming…they probably won’t make it through the rain.

DIY Bird Feeder Kid Craft: Let kids make their own bird houses in just a few minutes!

My boys love looking out the window and watching the birds eat from their feeder! We’re also making a bird bath to see if we can get a few more visitors from nature to our porch. What fun ways do you like to bring nature close to home?  Tell me in the comments below!

Check out another fun way to get kids into nature:

Color Scavenger Hunt | Tastefully Frugal

Color Scavenger Hunt

Filed Under: Crafts Tagged With: Birdhouse, DIY, Kids Craft

July 10, 2016 by Kirsten

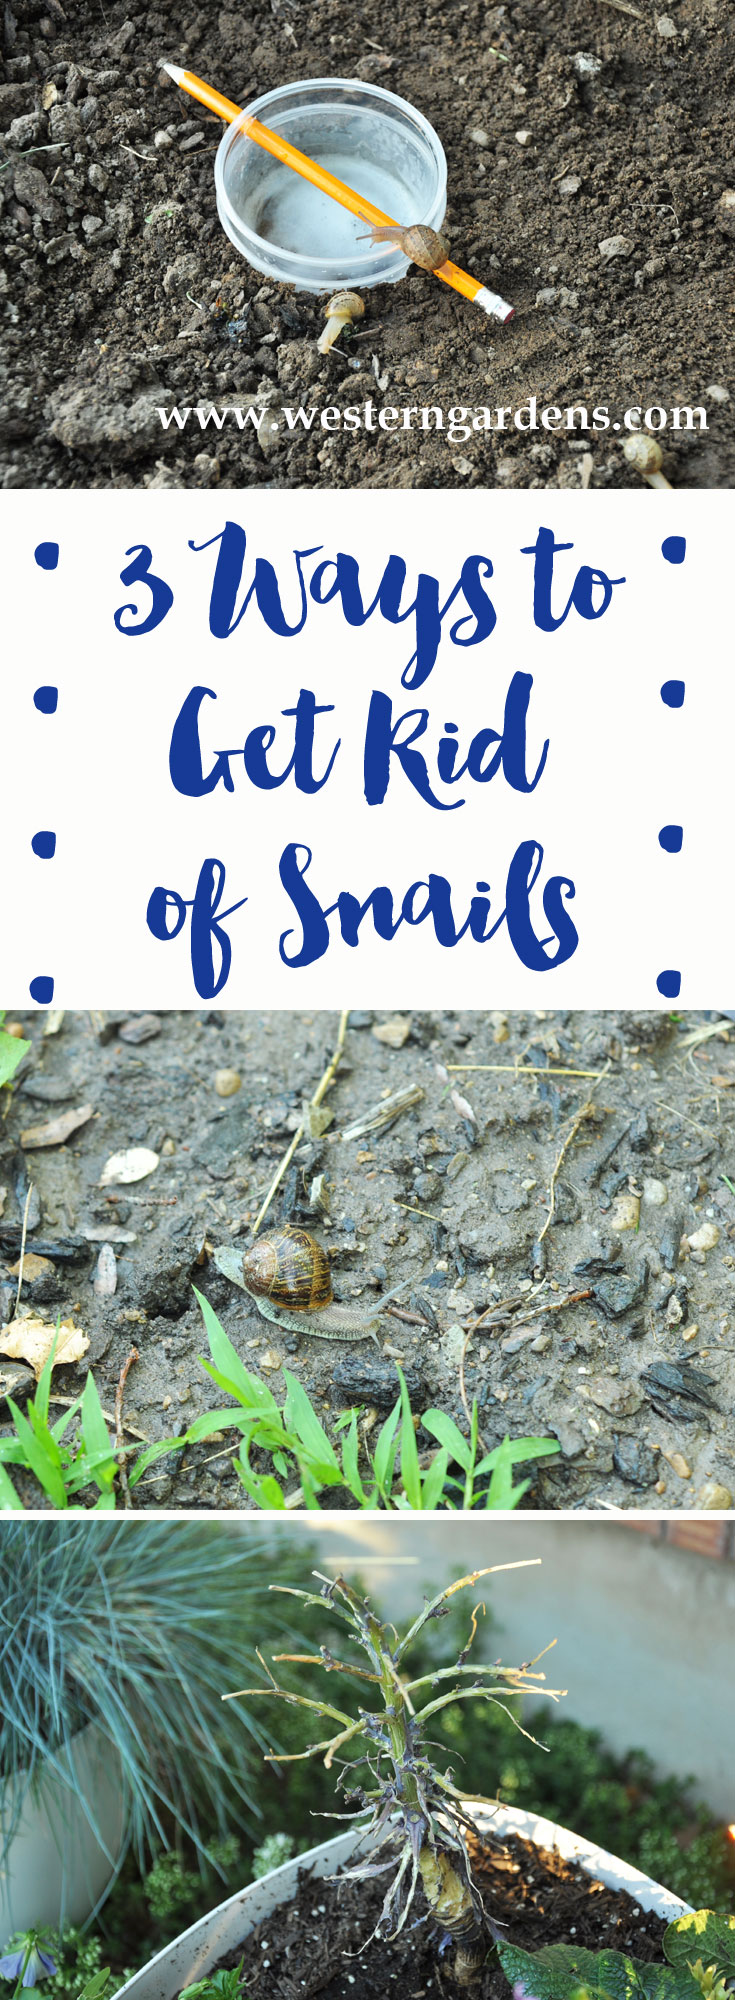
3 easy & cheap Ways to Get Rid of Snails, safe for pets and wildlife! www.westerngardens.com

Hello, thanks for stopping by!
3 Ways to Get Rid of Snails www.westerngardens.com

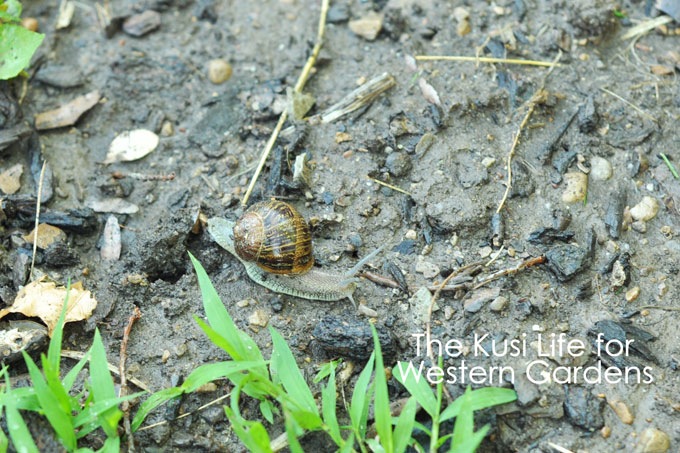
Have you ever had issues with snails or slugs eating your garden?  I sure have!  They’ve devoured some of my favorite plants, which motivated me to find some safe, natural ways to get rid of them!
3 Ways to Get Rid of Snails www.westerngardens.com
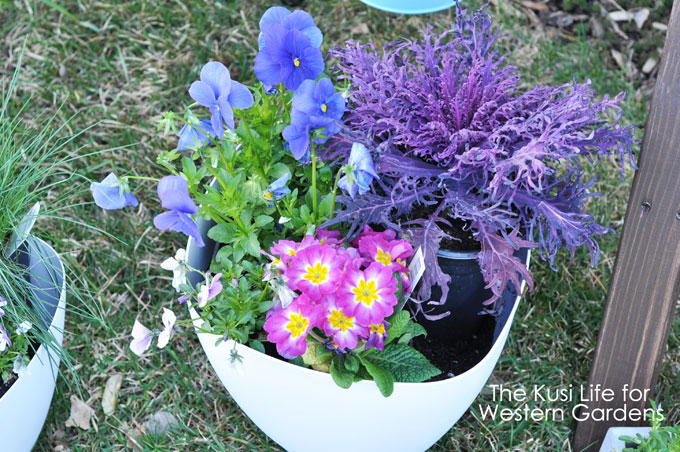
This is a pot I was prepping to plant in early Spring.  I especially love the bright colors, they look so happy!
3 Ways to Get Rid of Snails www.westerngardens.com
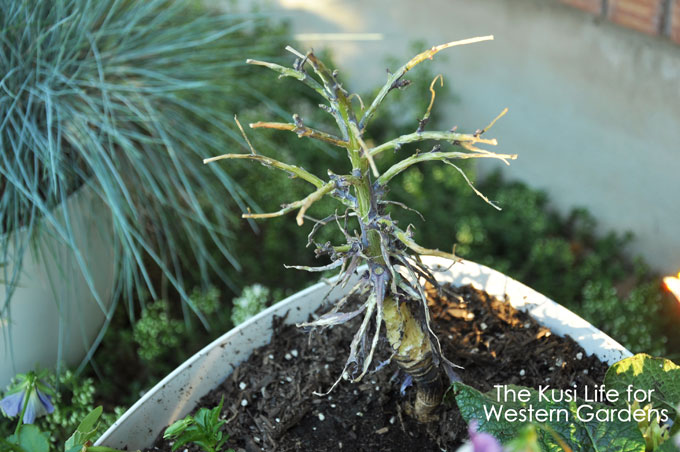
But this is what was left of my purple decorative kale after a gang of snails enjoyed it for a week or two. I actually found 5 or 6 snails sleeping contently in my pot. I was not happy with them!  If you need to protect your plants too, try one of these cheap and easy methods!  Beer Traps, Egg Shells and Sluggo all have benefits, so keep reading to see which one is right for you!

3 Ways to Get Rid of Snails

 1. Beer Traps

3 Ways to Get Rid of Snails www.westerngardens.com
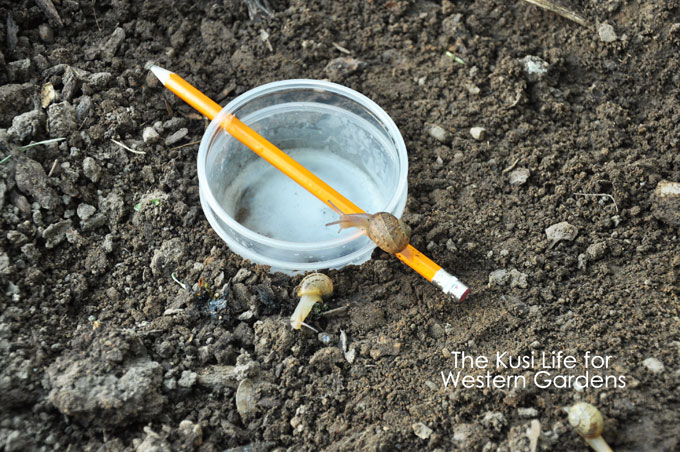
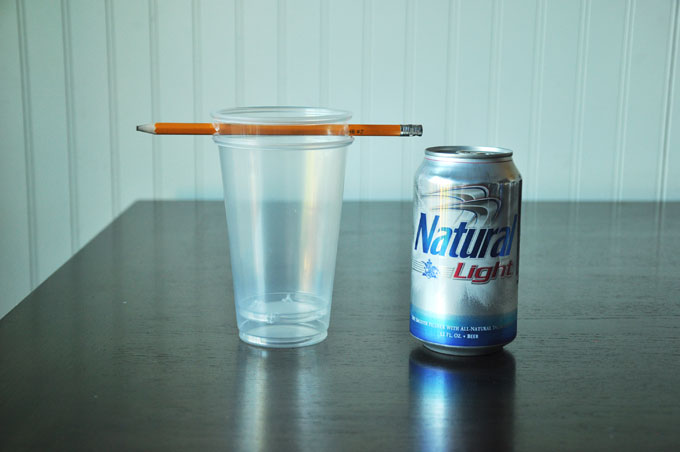
I developed this particular trap to make it easy to get rid of the snails after they drown in beer.
3 Ways to Get Rid of Snails www.westerngardens.com

Beer Trap Supplies:

  • 2 disposable plastic cups
  • an old pencil
  • a can of beer
3 Ways to Get Rid of Snails www.westerngardens.com
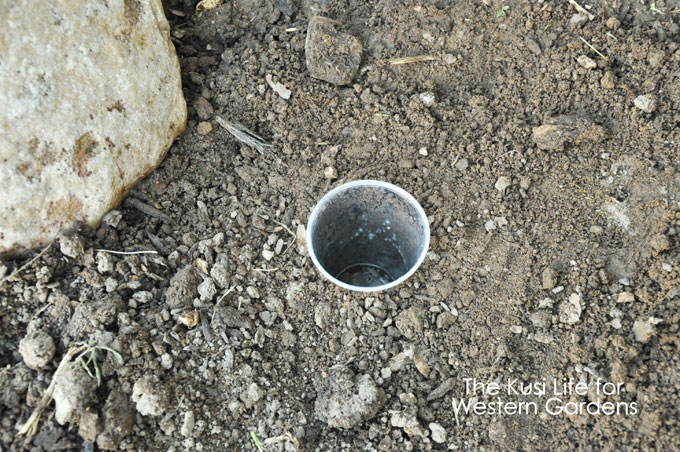
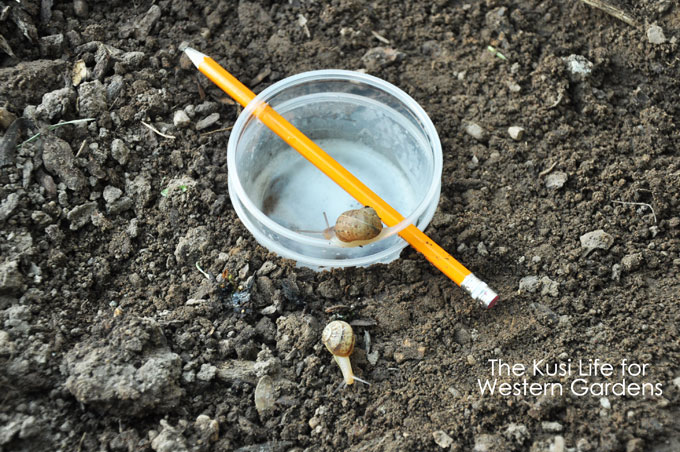
In the evening, dig a hole outside in your vegetable or flower garden, near your plants. Place the cup inside the hole. Make it level with the ground so the snails don’t have to climb far.
3 Ways to Get Rid of Snails www.westerngardens.com
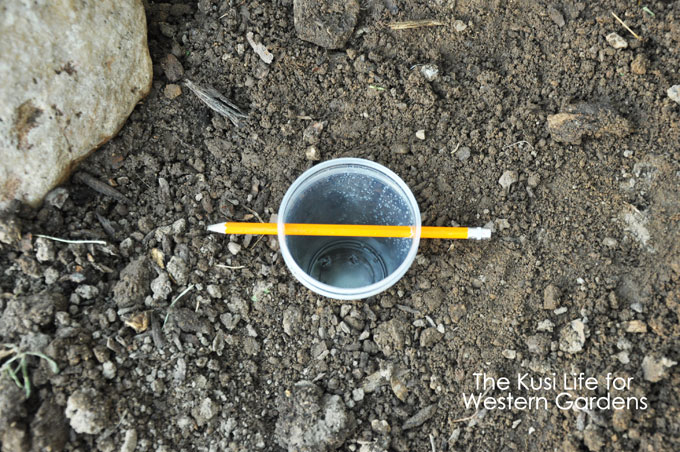
Using scissors, carefully poke 4 drainage holes in the bottom of the remaining cup.  Poke two more holes near the top, just under the lip, for the pencil to go through. This will ensure a gap between the cups so you can easily remove the top one to dispose of the snails the next morning.
3 Ways to Get Rid of Snails www.westerngardens.com
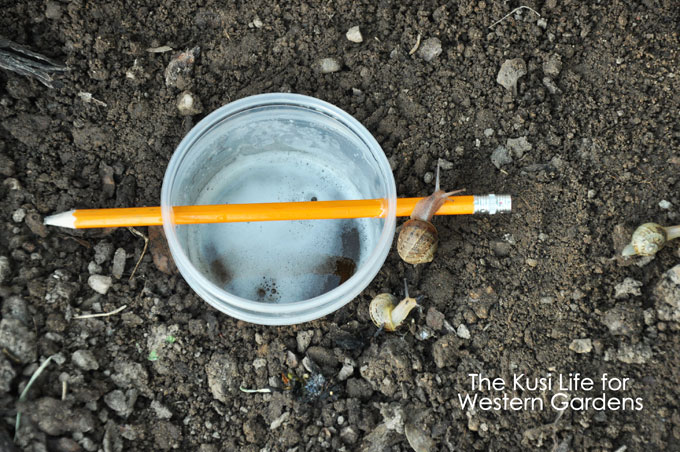
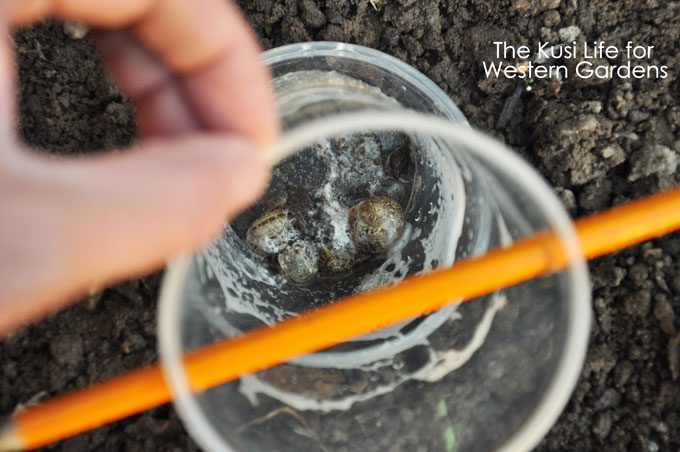
Place the cup with the holes and pencil inside the cup buried in the ground. Pour the whole can of beer inside the cup, leaving about an inch of headspace. This forces the snails to climb down into the cup, where they will drown in the beer.
3 Ways to Get Rid of Snails www.westerngardens.com
We put a few of our snails near the cup, and they were immediately drawn to the beer!
3 Ways to Get Rid of Snails www.westerngardens.com
He started in on his own.
3 Ways to Get Rid of Snails www.westerngardens.com
And down he went for a drink.
3 Ways to Get Rid of Snails www.westerngardens.com
We caught 5 snails the first night!  To empty the dead snails, just pull the inner cup out and the beer will drain out the holes.  Dispose of the snails and gently push the pencil cup back into the inner cup, and the beer will fill back into that inner cup.
This method is easy, it uses only a few items, and I saw results literally overnight. The beer will last up to a week, but after being in the heat all day, I prefer to change it every other night.

Don’t Want to Buy Beer?

The yeast is what lures the snails to the cup to take a drink.  If you don’t want to buy beer because you don’t drink or you just want to save some money, you can make your own yeast mixture with a few pantry staples!

DIY Yeast Snail Bait

  • 1 Tbsp of flour
  • 1 tsp of sugar
  • 1 tsp of yeast
  • 2 cups of water

Click HERE for printable Beer Trap instructions!

2. Egg Shells

3 Ways to Get Rid of Snails www.westerngardens.com
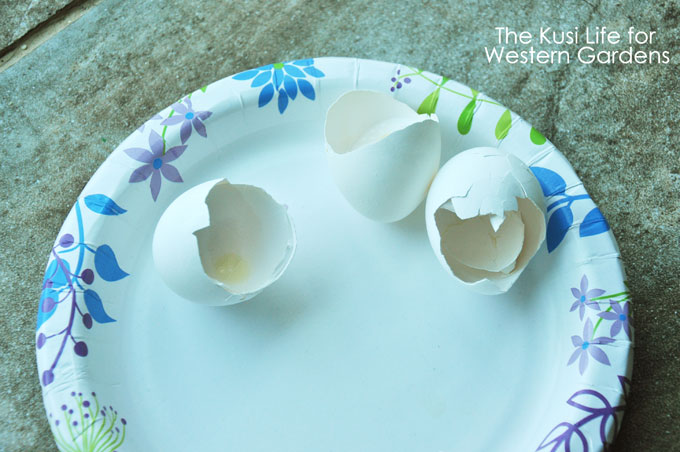
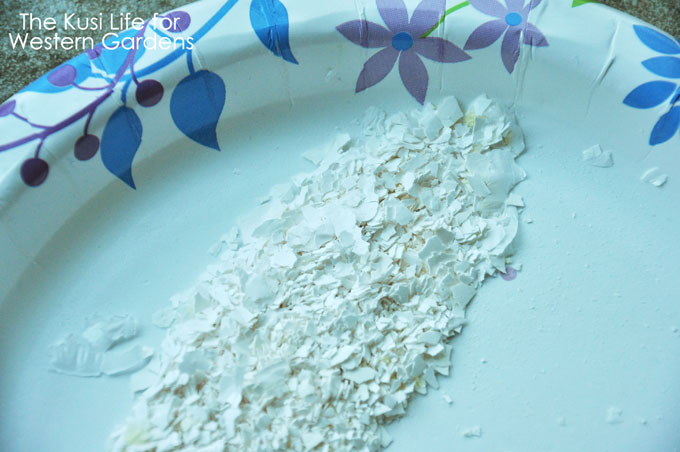
If you eat a lot of eggs, this is a free way to deter snails from your plants—and I stress the word deter, as this will not kill them. Simply save the shells from your eggs and allow them to dry out for a day or two. Then, using the bottom of a cup, crush the egg shells into small, sharp pieces.  Sprinkle the egg shells all the way around your plants, making a border. Make a fairly wide berth around the plant, or the snails will not be deterred.
3 Ways to Get Rid of Snails www.westerngardens.com
Snails hate the sharp pieces and will turn around and look for another place to eat…but they will not die, which is honestly what I want…to get rid of them entirely!  If it rains or if you water, you will probably need to sprinkle more egg shells around your plants again, otherwise they will be feeding on your plants the moment they get the chance!  This isn’t all bad though…egg shells are great for the garden because they add a lot of nutrients to the soil.

3. Sluggo

3 Ways to Get Rid of Snails www.westerngardens.com
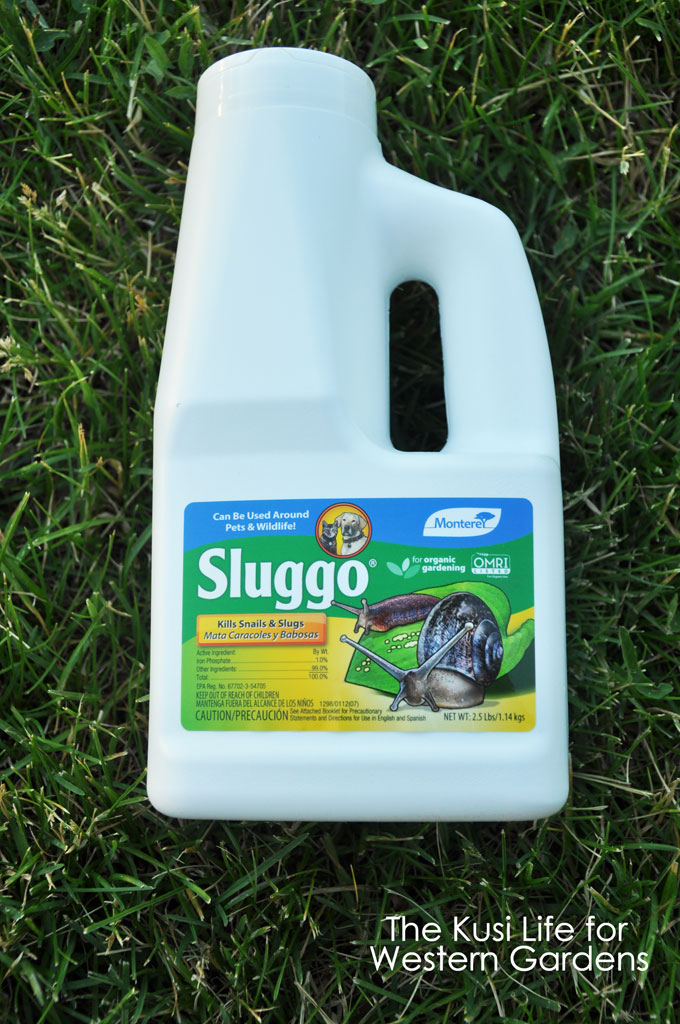
Sluggo is a great option when it comes to purchasing a natural snail-killing bait. It is completely safe to use around wild animals and pets as it has iron phosphate—a natural mineral found in the soil.  The snails eat the bait, lose their appetites, head to their hiding place and die within a few days.  And it still works if it rains or if you water your garden!  Sprinkle it around your plants about every two weeks.  I purchased mine as a recommendation from one of the associates at Western Gardens and I love it!

Which One is Best?

There are other methods that claim to get rid of (or deter) snails.  After trying just these 3 methods though, I have to say I loved seeing the dead snails in the beer.  It’s so satisfying to see a difference that quickly. However, the Sluggo is the easiest method of the 3.  Sprinkle the tiny pellets every two weeks and walk away.  This gives me more time to enjoy other things!  Like weeding.  😉  Both of these methods will rid you of snails, and hopefully prevent them from laying eggs before they die.
Have you had success in deterring/killing snails or slugs?  I would love to hear what has or hasn’t worked for you!
See the Happy!
           Kirstensig
Pages: Page 1 Page 2

Filed Under: Gardening, How To, Tips & How To's Tagged With: control, deter, DIY, get rid of, natural, repel, safe, slugs, snails

July 5, 2016 by Kirsten

HELLO FRIENDS, WELCOME!

5 Reasons you need Drip Irrigation www.westerngardens.com

Drip Irrigation www.westerngardens.com

If you’re anything like me, you find gardening so rewarding—the planting, nurturing, and harvesting is such an amazing process. Eating something you grew, sharing it with friends and neighbors…it’s such an awesome feeling! And then it happens.  You get you get your water bill in the mail and all those awesome feelings are gone! Ugh!

The first year we purchased our home, we had an amazing garden! I loved being able to see the progress and use the different vegetables in our family meals. We had an awesome crop of watermelons, which require quite a bit of water, and by the second month we had a water bill of over $200! I began comparing the purchasing of 6 or 7 watermelons from the store to my $200  water bill and I was second guessing my desire for a garden the next year!

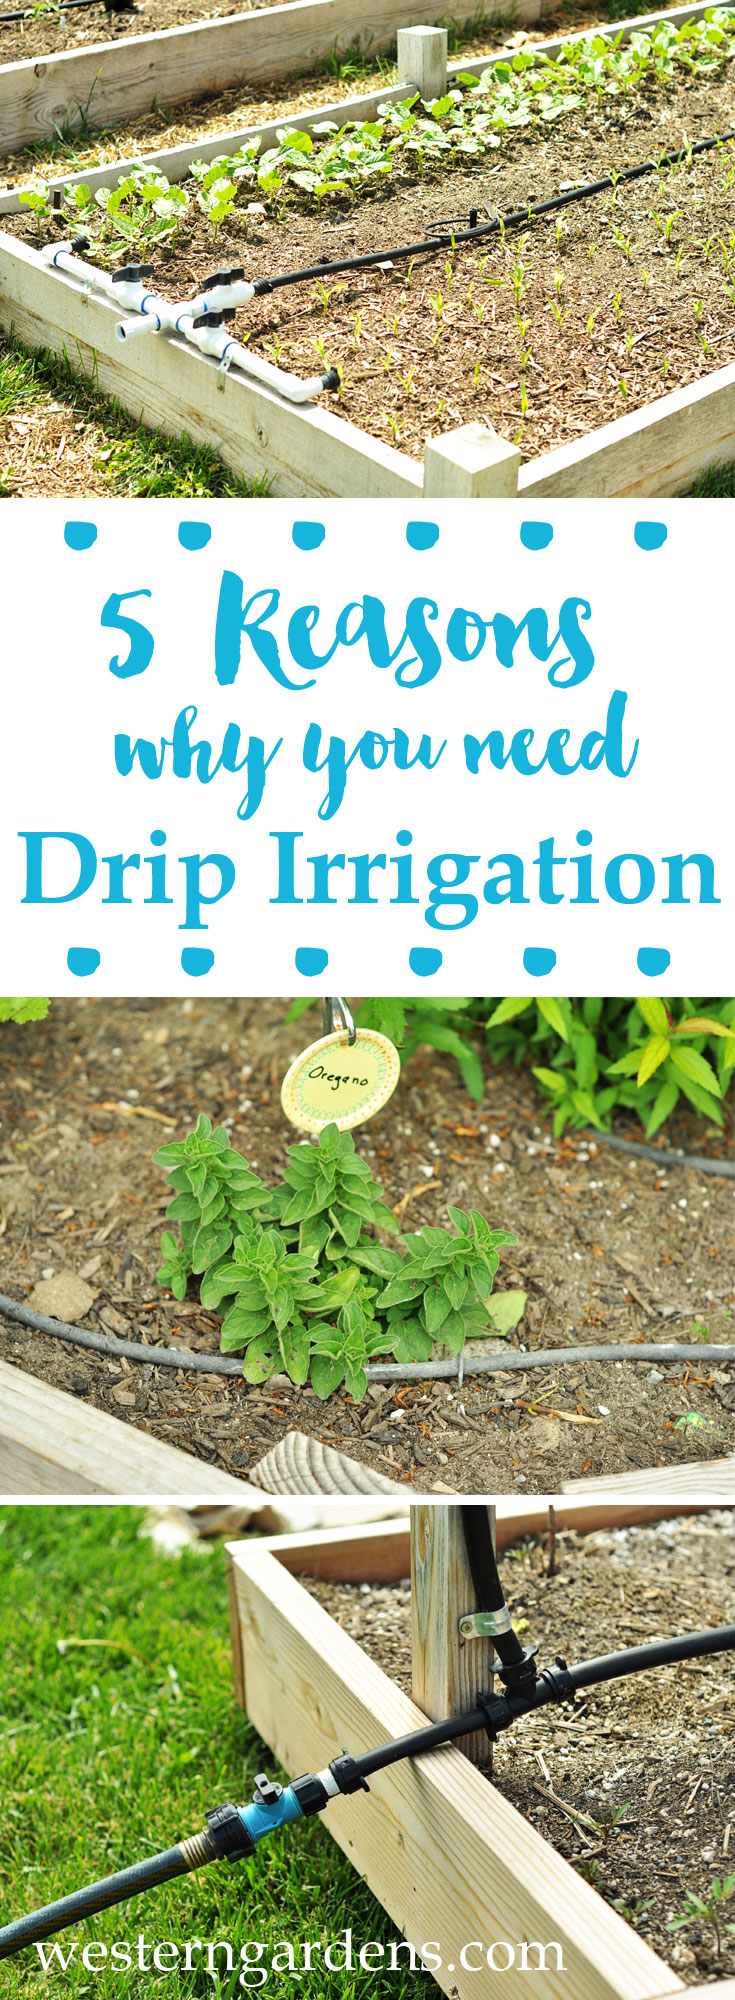
If you are not using drip irrigation in your garden, then this is the time to start!  I’ve got five reasons you need to invest in drip irrigation, and once you have it installed, you will see the benefits from day ONE, I promise!

5 Reasons you need Drip Irrigation www.westerngardens.com

5 Reasons You Need Drip Irrigation

1. Water Efficiency

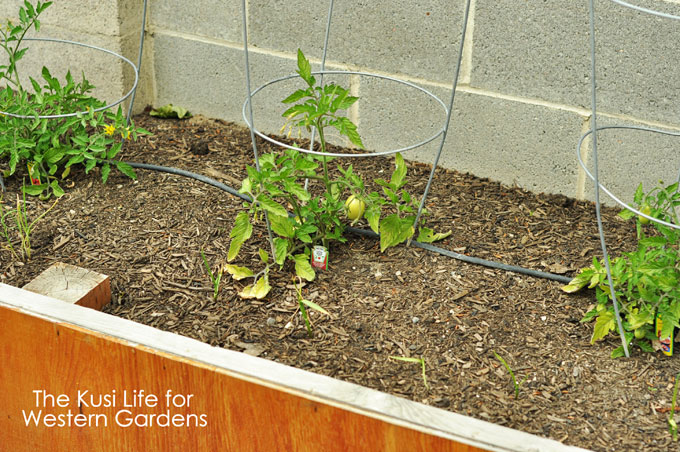
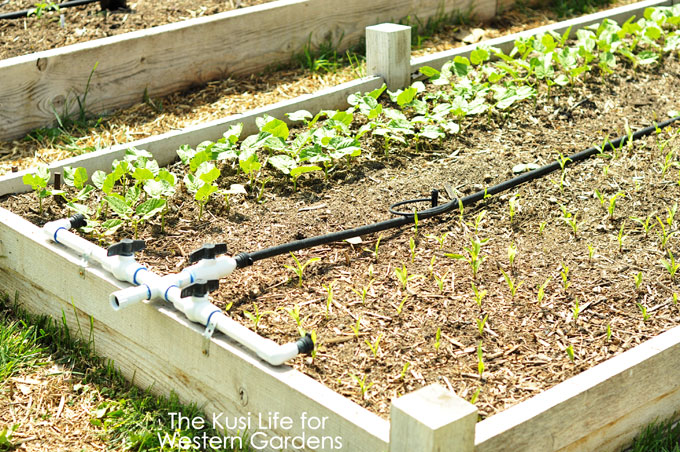
Drip irrigation will deliver water directly to the root zone of a plant. The water will seep slowly into the soil one drop at a time. You will see that almost no water is lost from evaporation or through water running off into other directions, rather than the plant you are actually trying to nourish. Some studies show that using a drip irrigation system can save anywhere from 30%-70% water compared to other methods of watering, like sprinklers. Being able to conserve water in Utah is a must, almost every year we hear about the drought we’re living through!

5 Reasons you need Drip Irrigation www.westerngardens.com

2. Reduce Costs

No one wants to have a water bill of $200—it’s just way too much to pay each month! Because yards, gardens, and drip irrigation systems are all so different, it’s hard to calculate how much a person will save on their own water bill. The studies say that, on average, a person will use about 50% less water, and depending on different features and how efficiently the drip system is planned and set up, it can save up to 70%. Once you have your drip irrigation installed, compare your bill to the year before.  You could save anywhere from 50%-70% on that part of your bill!!

5 Reasons you need Drip Irrigation www.westerngardens.com

3. Save Time

Life is so fast-paced, and we all wish we could have more time.  Well, having a drip irrigation system can do that for you! Drip systems can eliminate the need to drag around hoses and sprinklers, set timers, and make sure you remember to rotate and then shut them off when the rotation is all done (I am definitely guilty of forgetting to shut them off!).  If you opt for a system that uses a timer, you will only need to take a few seconds to turn the system on, and that system will shut off automatically for you when it is all done. Even if you don’t want to invest in a timer, you will really only need to turn it on once and remember to shut it off anywhere from 5-10 minutes later. So much easier than rotating sprinklers!

5 Reasons you need Drip Irrigation www.westerngardens.com

4. Healthier Plants = An Increase in Crops

Who doesn’t want to get the most they can out of their garden? Wouldn’t you love a steady flow of harvest throughout the summer and into early fall? Drip irrigation can help with that too! Plants watered with a drip system will grow more quickly, and are more productive. This is because they have all the water they need and the plant growth isn’t slowed by water stress (I know I am not the only one who forgets to water at the same time everyday!). Another thing that drip systems can help avoid are fungal diseases, which often develop under moist conditions and occur when plants get too much water.

5 Reasons you need Drip Irrigation www.westerngardens.com

5. Reduce Growth of Weeds

Who wouldn’t love to have fewer weeds to pull?  I know I would!  Drip systems help with that too!  Because drip irrigation delivers water directly to the plants you want to grow, less water is wasted on weeds. The soil between the plants will remain drier, which discourages weeds from sprouting.  I am all about that!

5 Reasons you need Drip Irrigation www.westerngardens.com

Are you ready to invest a bit of money and time into your garden?  There are starter kits sold for gardens anywhere from really small to very large.  Just make sure you purchase one that you can add to later, if you might need to.  You wont regret it!  You will love all the benefits of drip irrigation, and so will your pocketbook!

See the Happy!

Kirstensig

For more questions about drip irrigation, stop by any of our locations and talk to a Garden Solutions Expert!

Filed Under: Gardening Tagged With: conservation, drip irrigation, drip system, Gardening, increase in crops, save money, save time, water, water efficiency, watering system

July 2, 2016 by Jenn Crookston

Hi friends, thanks for stopping by!

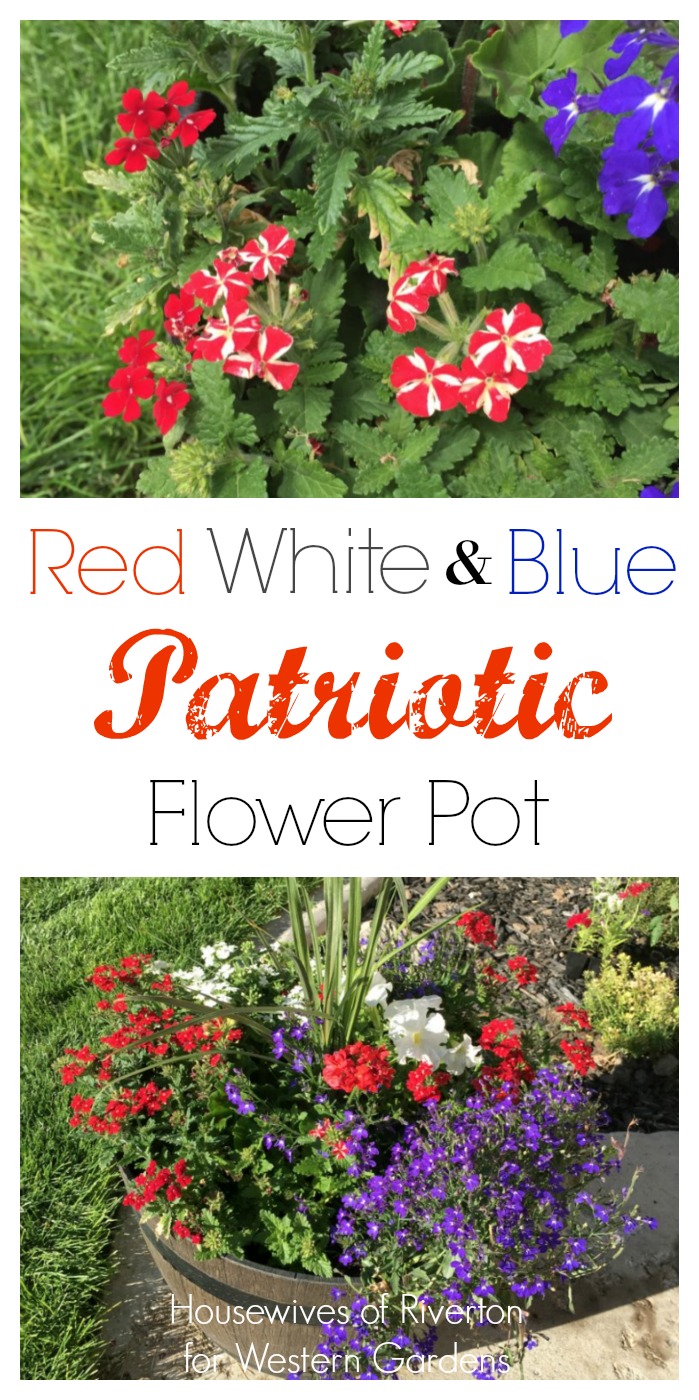
Red, White & Blue Flower Pots to dress up your patriotic 4th of July porch!

Patriotic Flower PotDo you love unique, patriotic outdoor decor?  Especially when flowers are involved?  Me too!
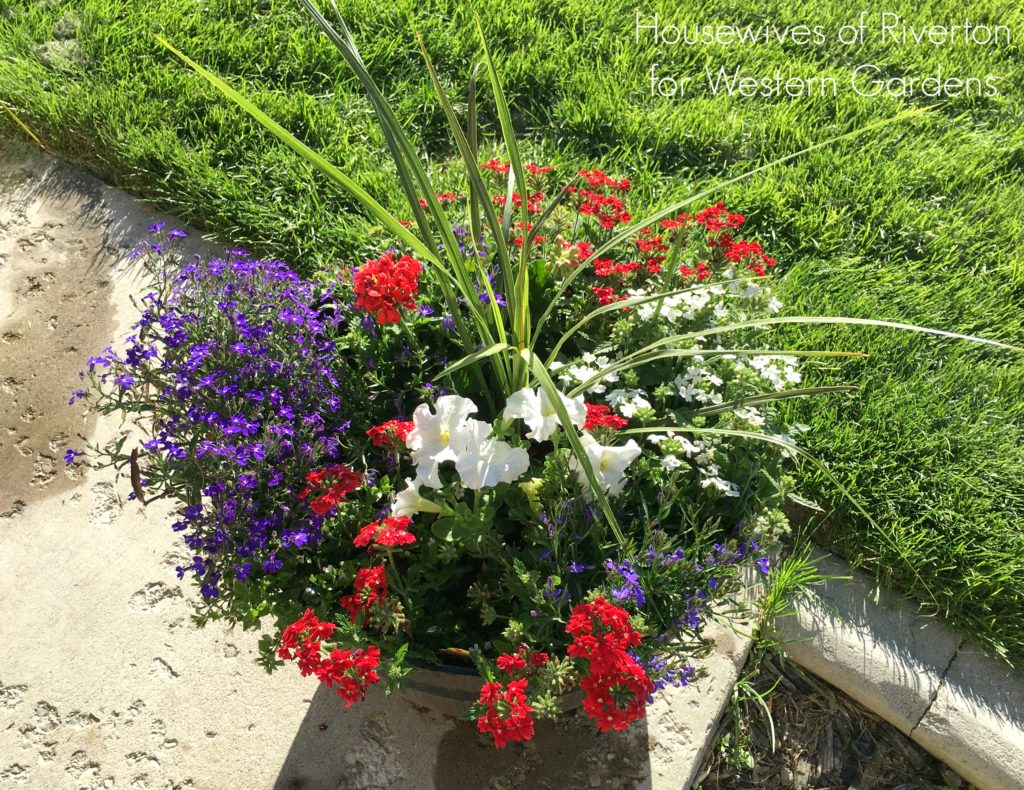
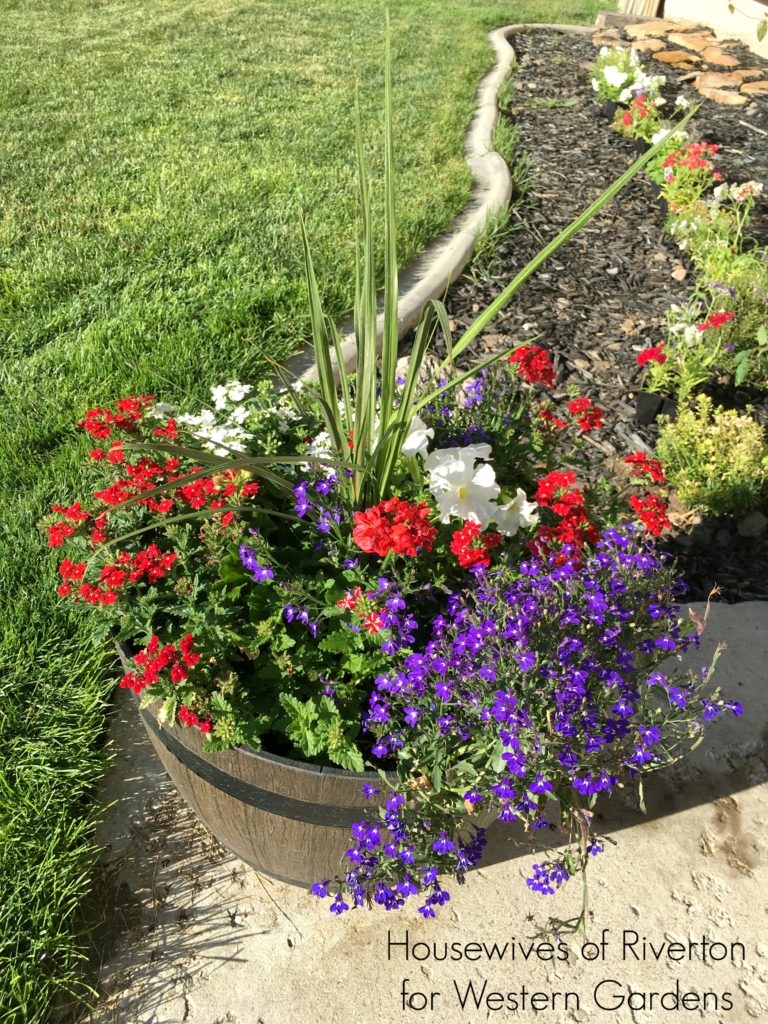
When I started my flower pots this year I knew I wanted a red, white & blue patriotic flower pot.  I love how all the colors look together and I love how this variety of flowers blend in this container.  The colors, the flower sizes & styles, and the greenery all just work perfectly.
Patriotic Flower PotI’m so happy with how my pots are doing this year!  I know that learning the proper steps from the Garden Solution Experts at Western Gardens has really increased my success, and because of how well my plants are doing, I keep wanting to plant more and more!
For a perfect flower pot in Red, White and Blue, start with your choice of pot (make sure it has drainage holes in the bottom).  Fill your pot 1/3 full with packing peanuts (this helps with drainage and takes up space without adding weight to the pot) and then fill another 1/3 full of fresh potting soil (I use Gardener’s Gold).  Lay your plants out how you want them to look in the pot before removing them from their plastic containers and filling the rest of the way with potting soil.
Patriotic Flower Pot

Red, White & Blue Patriotic Flower Pot:

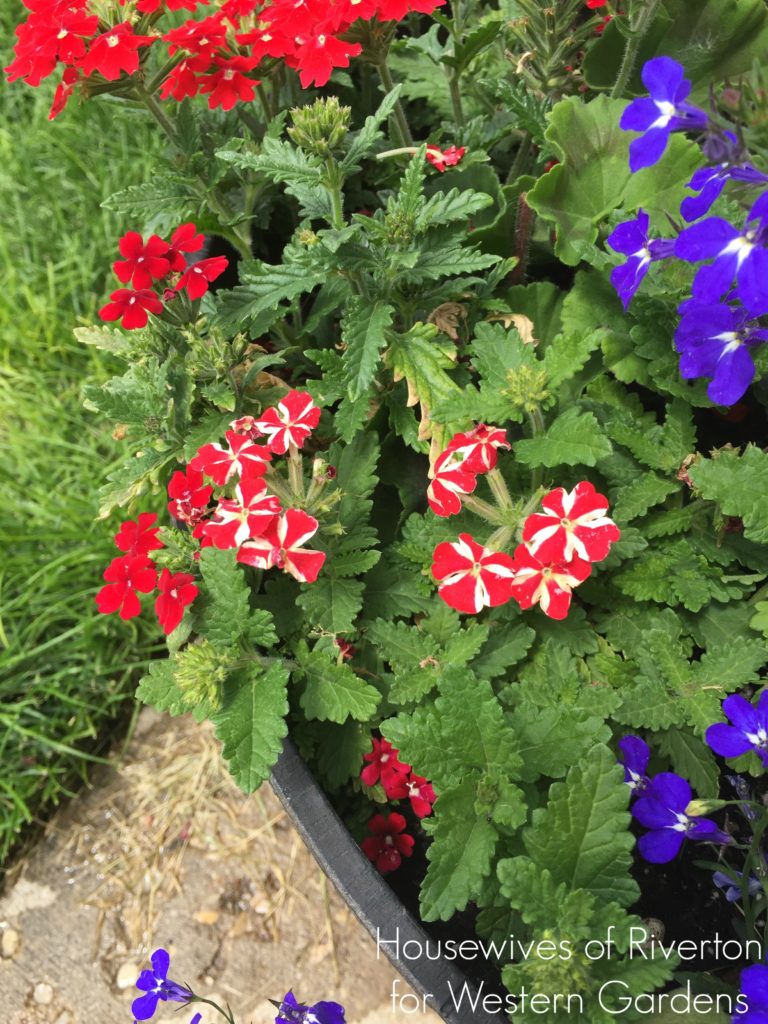
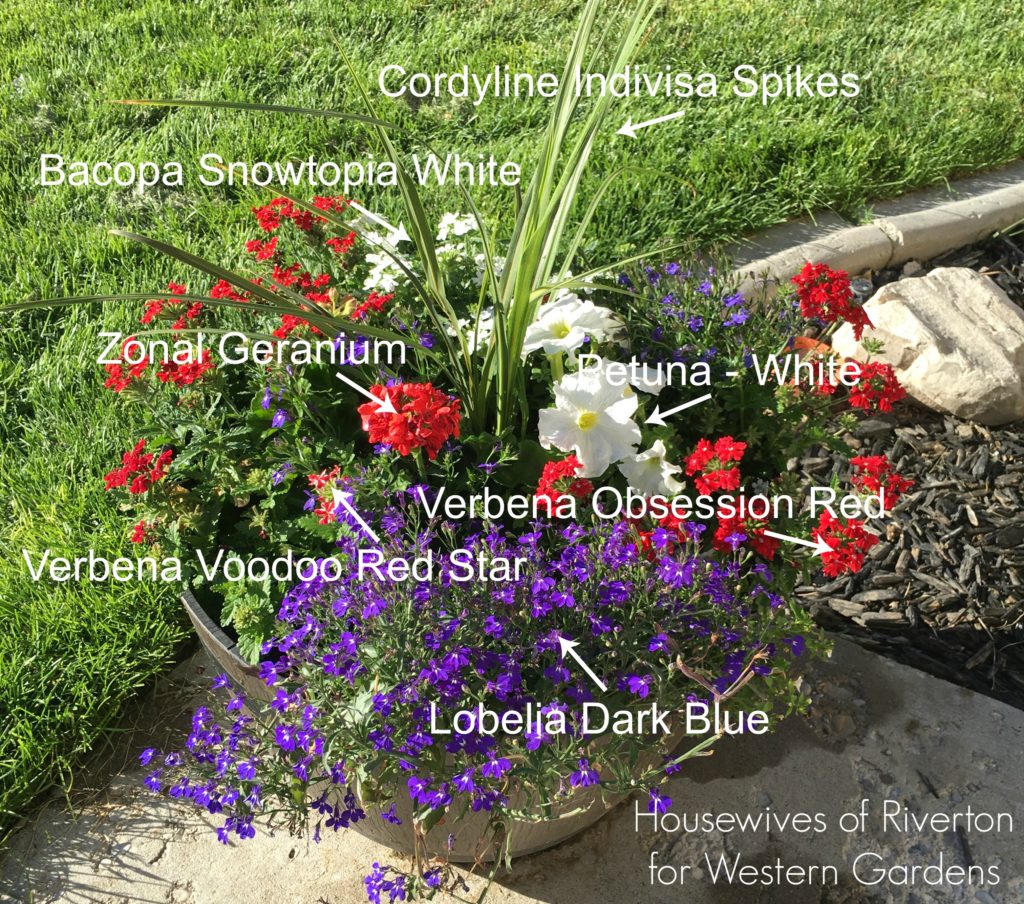
Red – Verbena Voodoo Red Star, Verbena Obsession Red, Zonal Geranium
Blue – Lobelia Dark Blue
White – Petuna and Bacopa Snowtopia White
Green – Cordyline Indivisa Spikes

Both the Cordyline Spikes and the Zonal Geranium are the thrillers for this pot.  My spillers are the Bacopa Snowtopia White and the Lobelia Dark Blue.  The fillers for this pot are White Petunia and Verbena Voodoo Red Star and Verbena Obsession Red.

I planted the Spikes and Geranium in the middle of the pot and then laid my other flowers out in a red/white/blue pattern around the outside.  It has all filled in so perfectly, I just love it!
Patriotic Flower Pot
I’m excited to create a smaller table top version of this pot for my 4th of July decor.  It’s hard not to create 20 of these pots to line the whole front of my house, they’re just perfect for the summer!

For more 4th of July fun check out these projects!
Patriotic Flower PotHand Print Flag Shirt – United States of America Wood Sign – Patriotic Star String Art

Filed Under: Annuals, Container Gardening, Flowers, Gardening, Utah Gardening Tagged With: 4th of July, decor, flower pot, flowers, Gardening, holiday, How To, patriotic, porch pot, Western Garden Centers

June 27, 2016 by Western Gardens

Welcome gardening friends, thanks for stopping by!

July Gardening To Do List, so you can easily keep up with your yard & garden! Because you’re busy and need one less thing to worry about.

If you’re excited to work in your garden, but not sure what to do in the summer heat of July, then you’ve come to the right place!  We’ve put together a list of things to do in your yard and garden throughout the month.

July Gardening To Do List, so you can easily keep up with your yard & garden! Because you’re busy and need one less thing to worry about.

You may not need to do everything on this list.  For example, if you don’t have iris planted in your yard, then you won’t need to dig, divide and replant it.  Just pick what applies to your yard and plan out when you will do it all throughout the month!

July Gardening To Do List, so you can easily keep up with your yard & garden! Because you're busy and need one less thing to think about!

Mike from our Sandy location was just featured on KUTV 2 News, teaching how to keep your plants healthy and happy in the summer heat, plus some veggies you can plant now for a second crop this season!

July Gardening To-Do List

➺Thin & Fertilize veggies

➺Fertilize lawn, if needed

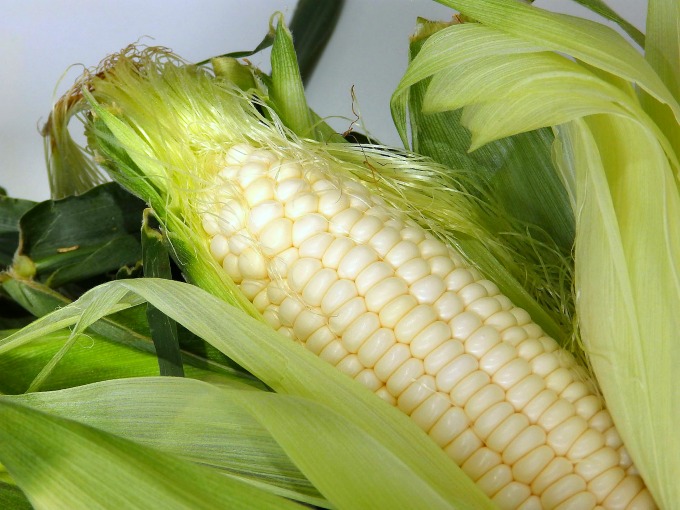
➺Treat Corn Silks to prevent corn earworms

➺Control peach twig borer and all stone pit fruits with spinosad

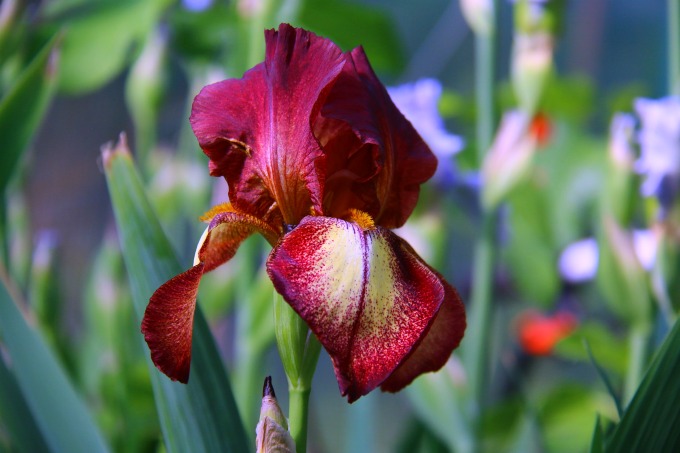
➺Dig, Divide & Replant iris

➺Control Codling Moth on apples & pears

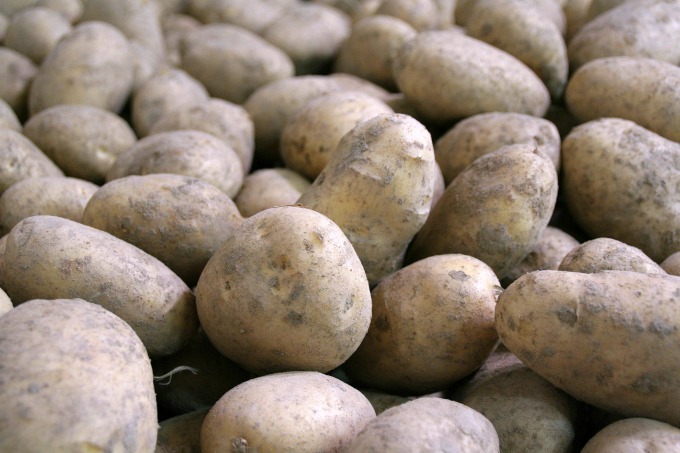
➺Fertilize potatoes with nitrogen

➺Remove faded blossoms on roses and ground cover

➺Watch for insect invasions

➺Adjust Sprinklers if necessary, for increasing heat

➺Cut Back & Fertilize annuals for longer bloom

➺Provide An Even Supply of water to tomatoes, to prevent blossom end rot

➺Summer Watering Is Critical for birch trees

➺Things To Keep Away From Tree Trunks: weeds, grass, mowers and trimmers

➺Remember—water lawn early in the morning or at night

➺Plant Outside
Until July 15th: beets & broccoli
Until Sept 1st: radishes

*This is not an exhaustive list.  If we’ve overlooked something important, feel free to leave a comment and we will add it to the list!

If you’re local to the Salt Lake area, come in to any of our locations with questions or samples!

July Gardening To Do List, so you can easily keep up with your yard & garden! Because you're busy and need one less thing to think about!

Filed Under: Gardening, To-Do List Tagged With: Gardening, History, How To, tips, Utah, veggies

June 21, 2016 by Jenn Crookston

Hi there!  I’m so glad you stopped by today!

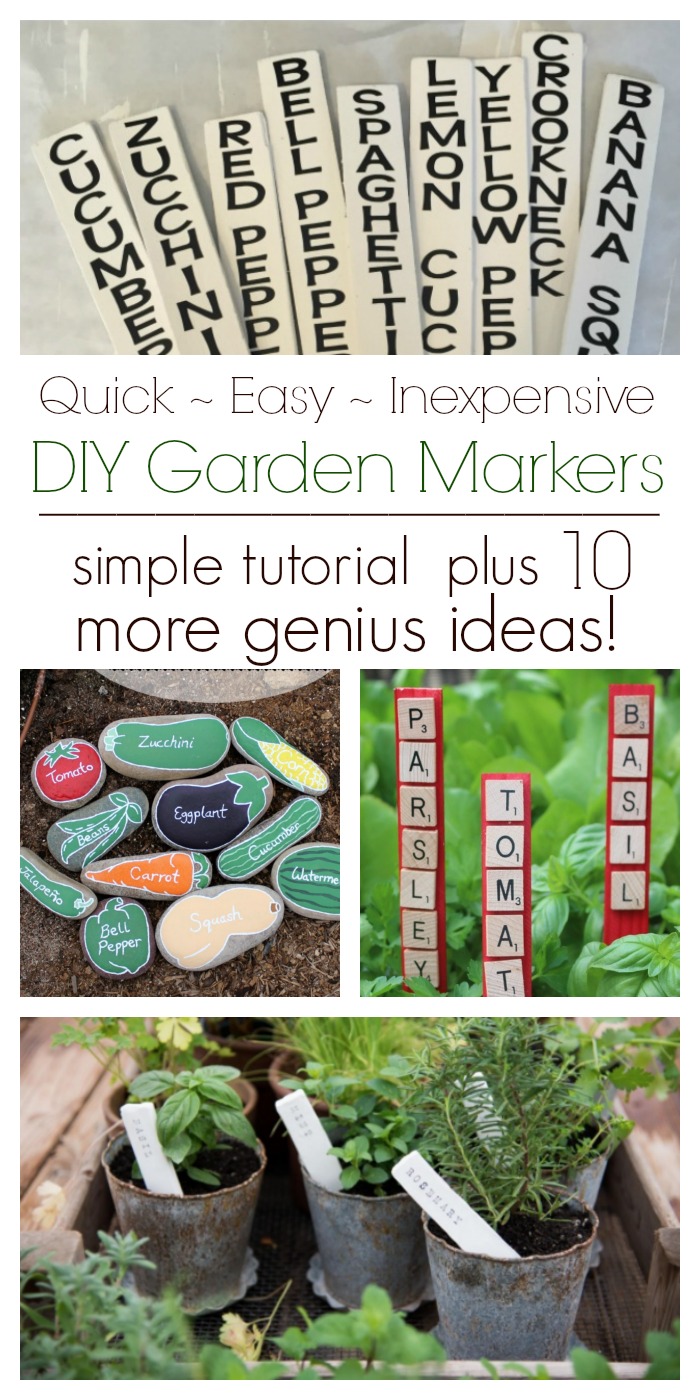
DIY Garden Markers

Are you looking for an easy (and nearly free!) way to mark your veggies in the garden?  I have a simple idea for you!  Because if you’re like me, you probably won’t remember what you planted and where it went…but these DIY garden stakes will keep you organized and excited to see what veggies you’ve got coming.

DIY Garden Markers

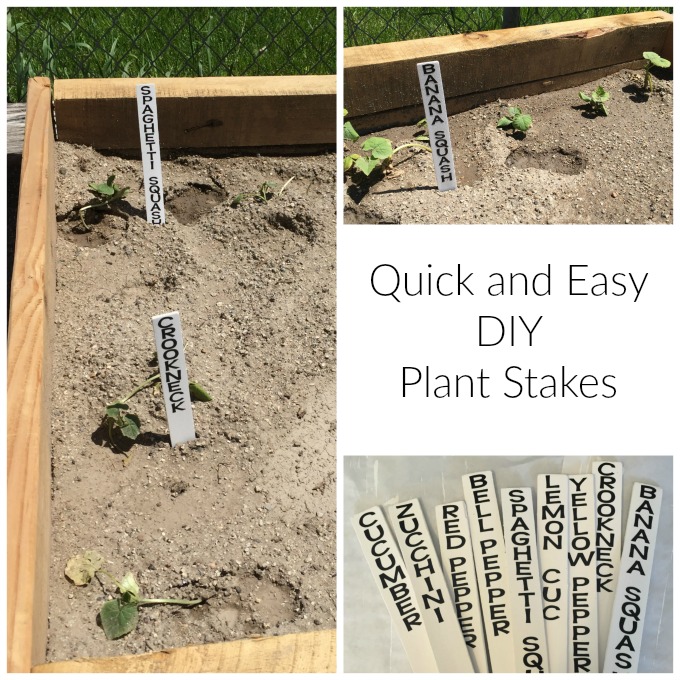
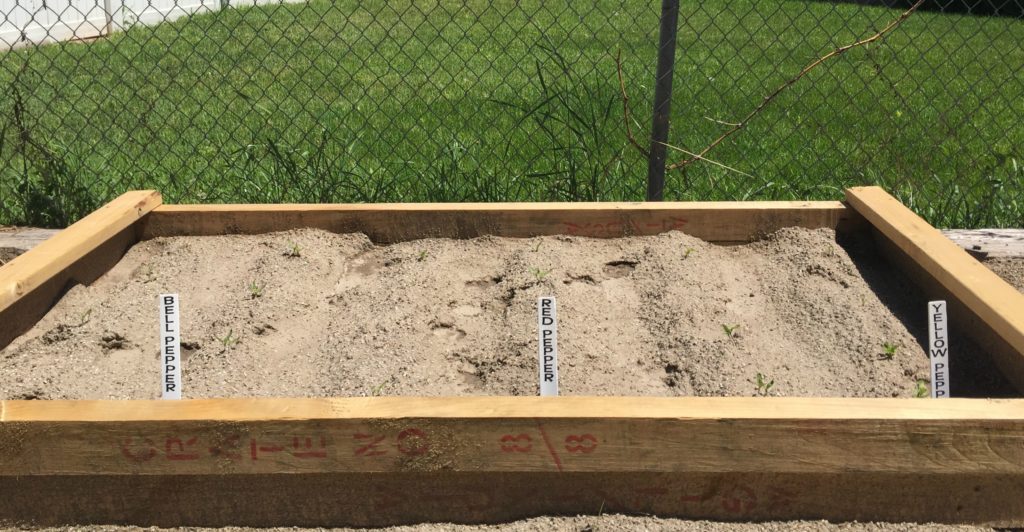
This year we built some raised garden boxes to grow our veggies, and I can’t wait to see them overflowing with produce!  And I’ll know exactly what I have since these DIY garden stakes are so easy to see and read.

DIY Garden MarkersI was working on another project recently, and I mentioned it to the employee at my local paint counter.  She passed me a handful of stir sticks and said, “I think these might work for your project!”  And she was right!  Since then, when I’ve got a project to create, I consider what free items I can use.  For my DIY Garden Stakes, I headed back to the paint counter and requested some paint stir sticks.  I love how obvious it is that I’m not the only person who asks for stir sticks but no paint…without batting an eye, they just pass them over!
DIY Garden Markers

DIY Garden Markers

  1. Lay paint sticks out on wax paper (the paint doesn’t stick to the wax paper, making it easier to flip the sticks over).
  2. Paint with an exterior paint, for added durability (it’ll take a few thin coats to cover the stamped print on sticks, but if you don’t care about the back side being painted, you can get away with one coat).
  3. When the paint is dry, use outdoor vinyl and a vinyl cutter (like a Cricut machine) to cut out the names of each of your plants, and attach them to one end of the stir stick.
  4. If you don’t have a vinyl cutter, use a Sharpie to write the veggie names.
  5. Use as is, or cut the ends of your paint stir sticks to a point, to look more like a stake.  I didn’t need to do this since my soil was soft enough to push my markers in without a point.

I love how they look in the garden!  The bright white with the easy-to-read black print makes me smile each time I walk out to the garden.

DIY Garden Markers

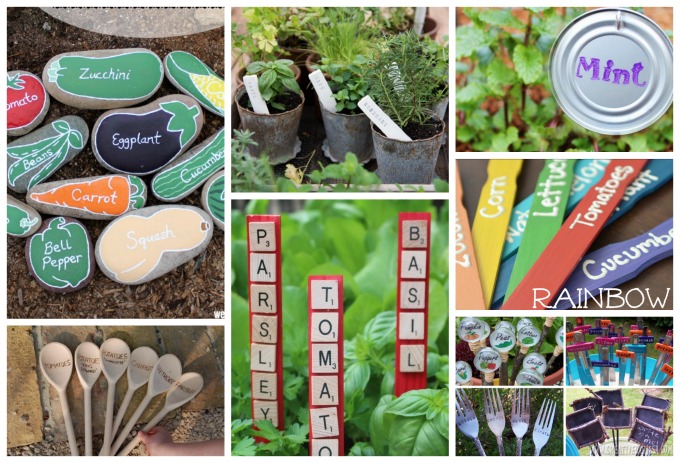
Looking for even more garden marker inspiration?  Click the image below to see 10 cute, easy and inexpensive ideas!

DIY Garden Markers

Pages: Page 1 Page 2

Filed Under: Crafts, Gardening

  • « Go to Previous Page
  • Go to page 1
  • Interim pages omitted …
  • Go to page 7
  • Go to page 8
  • Go to page 9
  • Go to page 10
  • Go to page 11
  • Interim pages omitted …
  • Go to page 21
  • Go to Next Page »

Primary Sidebar

Shopping Cart

Items in Your Cart

Your cart is empty
Visit The Shop

Follow Western Gardens

  • Facebook
  • Instagram
  • Pinterest
  • YouTube

See what we’ve been pinning!

Follow Me on Pinterest
Followed by people.
?

Pinterest Badge by Skipser

Here’s What We’ve Been Up To!

Save water and money by Turf Training - train your lawn to grow deep roots
work at western gardens utah garden center
Senior gardening woman Edu Carvalho from Pexels
nursery center open to public

Copyright © 2025. Western Gardens - Privacy Policy