• Skip to primary navigation
  • Skip to main content
  • Skip to primary sidebar

Western Garden Centers

for what grows here

  • Home
  • How To
  • Gift Cards
  • Calculate Mulch
  • Locations
    • Store Hours
    • About
    • Garden Shop Employment Team
  • Weddings
    • Salt Lake City, UT
    • West Valley, UT
  • Blog
    • Gardening
    • Recipes

Container Gardening

5 Dos and Don’ts for Planting Herbs

May 17, 2016 by Sydney Anderson

Hi friends! I’m so glad you stopped by!

Want to start an herb garden? Here are 5 Dos and Don'ts to help get you started!
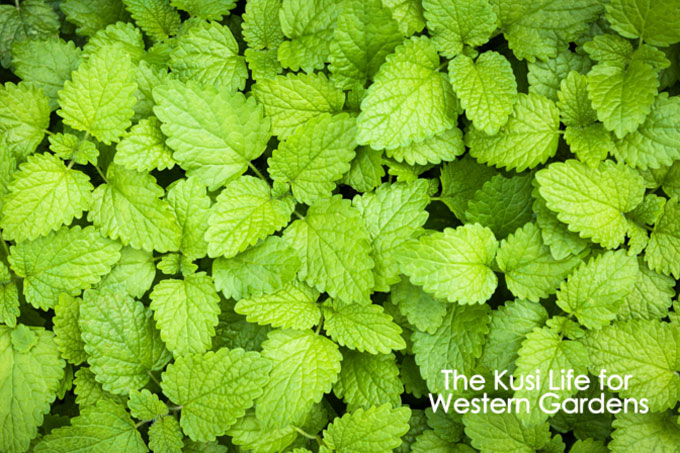
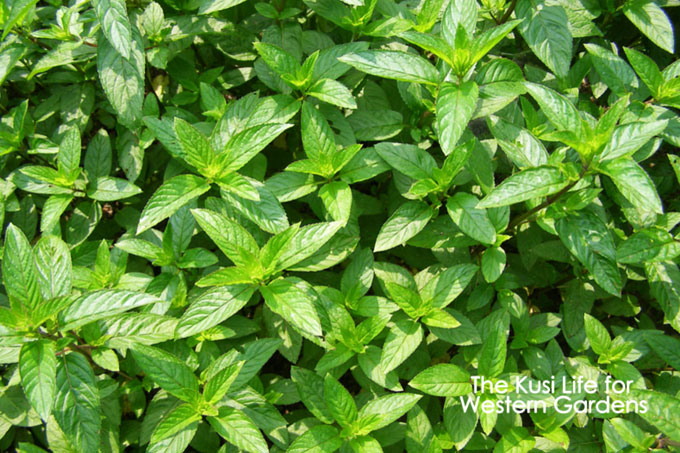
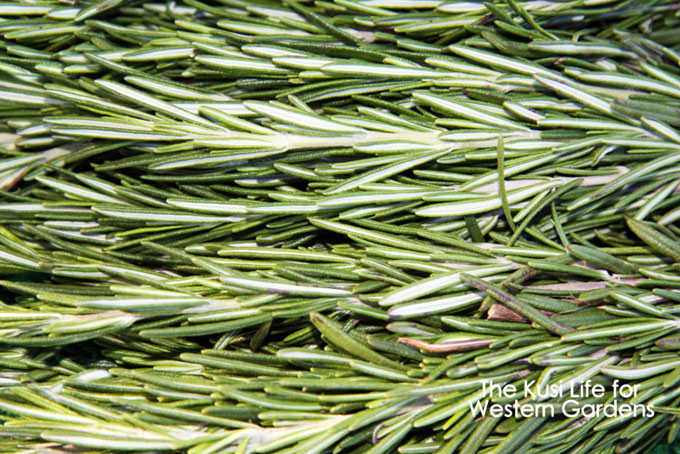
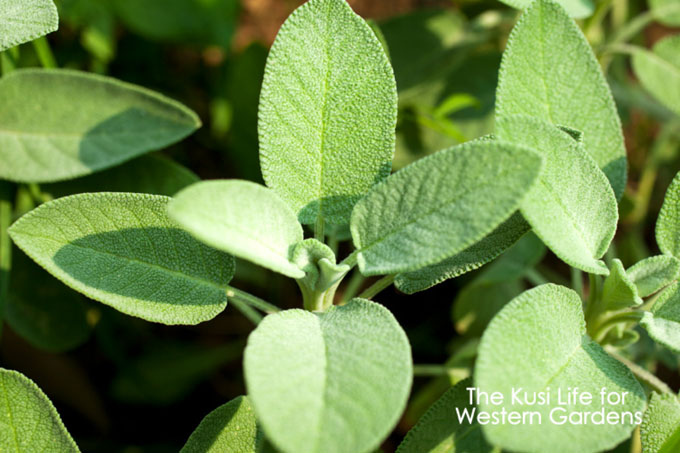
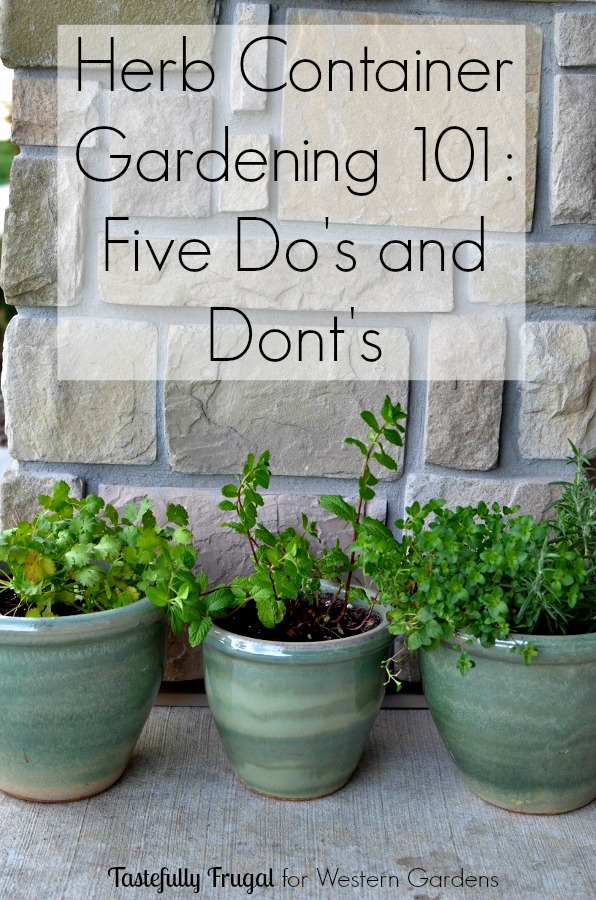
Don’t you just love the smell and taste of fresh herbs?!  Want to have fresh, healthy herbs at home without the expense of an extra grocery store run?  (And have you seen how much they charge for a tiny container of wilted herbs?!)

I’ve cooked with both store-bought and homegrown herbs, and I can tell you two things. One, homegrown always tastes better, and two, you can’t just plant a bunch of herbs in a pot and hope they thrive.

As our family grows, so does our food budget. I’m starting to find ways I can cut our grocery bill here and there so that by the time my kids are teenagers we won’t be stuck spending $1000 a month just on food!

Want to start an herb garden? Here are 5 Dos and Don'ts to help get you started!

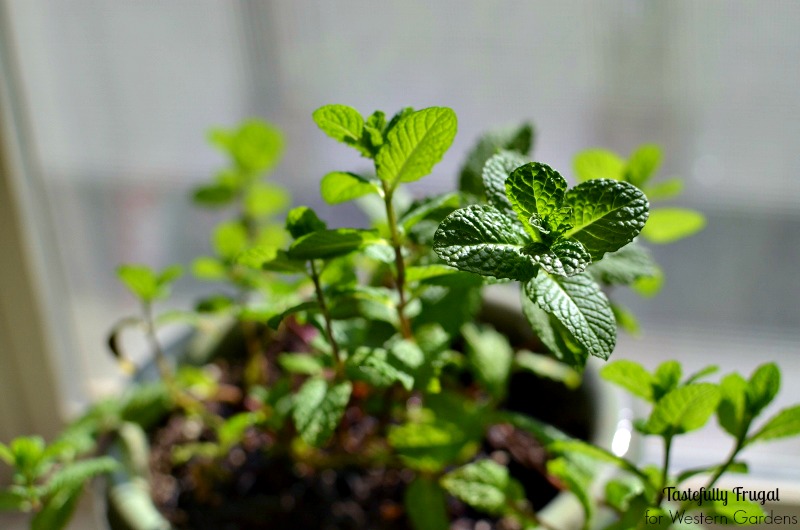
One of the first things to know is not all herbs are created equal!  Some need more water, some like less sun, some have long roots and need space to grow. I’m going to share five lessons I’ve learned when it comes to growing your own herbs!

Click NEXT to see the 5 Dos and Don’ts for Growing Great Herbs!

Western Garden Centers | Salt Lake City | Sandy | West Valley UTAH

Pages: Page 1 Page 2

Filed Under: Container Gardening, Gardening, Herbs, How To Tagged With: basil, cilantro, food, Gardening, How To

10 Flowers for Beautiful Hanging Baskets

May 11, 2016 by Kirsten

Welcome, I’m so glad you’re here!

Do you ever see gorgeous hanging baskets that are filled to the brim with blooms cascading down over the sides, and wonder what kind of flowers they are?   And how you can get your hands on some to beautify your own yard?!

Hanging baskets can add so much to a sunny wall, or brighten up shady areas with flowers that flourish in the shade. I also love giving hanging baskets as a gift for those who are getting up in age or have bad knees, because there is no kneeling down in the dirt required, and choosing the appropriate flower can bring the receiver blooms from the summer months, on up to the fall!

If you have ever wondered what the best flowers for hanging baskets are, I’ve got you covered!

10 plants for beautiful hanging baskets- https://westerngardens.com/

One of the most important things you need to consider is if the space you want to decorate has full sun, or if it is in the shade most of the day. If you plant sun-loving flowers in the shade, they won’t thrive.  The same is true if you plant shade lovers in the sun.

You can have each hanging basket dedicated to one type of flower, or you can mix different flowers in each basket giving different colors and textures. Just be sure to put Shade Lovers together and Sun Lovers together!  Also make sure you get the trailing variety of flower for your hanging baskets.

Filed Under: Annuals, Container Gardening, Flowers, Gardening, Outdoors, Perennials, Tips & How To's, Utah Gardening Tagged With: flowers, Gardening, Mother's Day, tips, Western Gardens

Plants That Repel Mosquitoes

May 1, 2016 by Kirsten

5 Plants that Repel Mosquitoes - www.westerngardens.com

Hello and Welcome!

Do mosquitoes drive you crazy?  Do you love spending time outside until you become a feast for these pesky creatures?  Keep reading for our list of plants that repel mosquitoes…a simple solution that doesn’t involve chemical-laden sprays!

Mosquitoes are a real problem, not just because they’re annoying and no one likes the itchy bumps they leave behind, but because they carry disease.  Zika is the newest threat here in the U.S. and it’s particularly alarming for women who are pregnant or who want to become pregnant, as it causes birth defects.

The first step to reducing mosquitoes is to make sure you don’t have standing water around your home, as they need water to reproduce.  This includes rain gutters, outside toys, wagons, dog bowls, etc. Even a bottle cap of water can be a breeding ground for mosquitoes.

The next thing to do is add some mosquito-repelling plants to your landscape and containers.  It’s important to note that the mere presence of these plants doesn’t necessarily repel mosquitoes.  {There are a lot of claims that they do, but there is no scientific backing to support this idea!}

So now what?  To harness the power of these plants, you must actually break the leaves on the plants and rub the oil on your skin in order to truly repel the mosquitoes.

If essential oils are your thing, try THIS recipe for a kid-friendly spray.  You can also try making your own essential oils!  But whether or not you make your own oils, add these plants to your yard to keep your family safe from the summer mosquitos!

Plants that Repel Mosquitoes

5 Plants that Repel Mosquitos - www.westerngardens.com

1—Lavender ⇧ 

Lavender is a beautiful plant with a lovely fragrance. It’s known to bring on calmness and relaxation, and can even help you get to sleep. Lavender oil has also been known to stop the itchiness of bug bites and sunburns. Spraying lavender on your body masks your natural scent and will help keep you free of mosquito bites! You can make your own lavender oil by removing the flowers and allowing them to dry, then boiling them in fractionated coconut oil.

5 Plants that Repel Mosquitos - www.westerngardens.com

2—Lemon Balm ⇧

Many people enjoy lemon tea from lemon balm leaves and say they have found relief for indigestion, better sleep, and reduced anxiety. You can easily crush the leaves in your hands and rub them over your skin as a natural mosquito repellent.

5 Plants that Repel Mosquitos - www.westerngardens.com

3—Peppermint ⇧ 

Not only is peppermint used in tea and in baking, but it is a fantastic repellent for mosquitoes. It’s easy to gently crush some leaves in your hands and rub over your skin or exposed areas where mosquitoes can bite you. Not only can peppermint repel mosquitoes, it can help relieve the itch, as it has a cooling/tingling feeling when applied to the skin.

5 Plants that Repel Mosquitos - www.westerngardens.com

4—Rosemary ⇧

Rosemary is a great herb to have in your garden as the scent helps repel mice and deer. You can make delicious savory dishes and have the added benefit that using just a few leaves a day gives you all the vitamin A you need. Rosemary can be boiled in fractionated coconut oil and then be sprayed on your body as a natural mosquito repellent.

5 Plants that Repel Mosquitos - www.westerngardens.com

5—Sage ⇧

Sage isn’t just for cooking anymore!  This herb is a little different from the others on our list…you can actually burn some dried sage bundles to help keep the mosquitoes away.  We recommend using it in combination with some of the other essential oils mentioned above for total mosquito repelling success!

When you apply natural mosquito repellents on your skin for the first time, make sure you place a small amount on the back of your hand and rub it in. Wait one to two hours to see if the repellent causes irritation.  If you have no irritation, you can spray or rub the repellant over the exposed areas to keep the mosquitoes away.

Have you found another natural way to keep the mosquitoes at bay?  Tell us in a comment below!

See the Happy!

Kirstensig

Filed Under: Container Gardening, Gardening, Herbs, Outdoors, Tips & How To's Tagged With: chemical free, DIY, essential oils, lavender, lemon balm, mosquito, mosquitoes, natural, non toxic, peppermint, plants, repel, repellent, rosemary, sage

Mother’s Day Flower Garden in a Basket

April 30, 2016 by Jenn Crookston

Welcome!  I’m so glad you’re here.

Mother's Day flower garden in a basket

Do you love gardening and giving beautiful gifts?  Then I have the perfect project for you!

I’ve been bitten by the gardening bug this year.  I have been enjoying getting my hands dirty and creating beautiful things with flowers.  This Mother’s Day Flower Garden in a Basket quickly turned into a favorite project!

Looking for a simple but beautiful gift for Mom? Try this Mother's Day Flower Garden in a Basket!

I love when an idea turns out how I hoped it would when I imagined it.  What I love about this project is that it is easy to customize, it can be as big or small as you want and can include a variety of flowers.

For this project you’ll need:

  • Favorite flowers
  • Basket
  • Potting Soil
  • Basket Liner

For my particular basket I collected some of my favorite flowers and an old Easter basket.  The Easter basket was blue and that didn’t work for what I wanted, so I started by painting it white.  I was happy that the basket liner fit well inside which helped make everything look nicely put together.

Looking for a simple but beautiful gift for Mom? Try this Mother's Day Flower Garden in a Basket!
The reason I call this a Flower Garden in a Basket is because in a big enough basket you can place the plants inside the basket in their original container making it easy for the receiver of the basket to plant the flowers in their yard or into flower pots if they want to.  For my basket I took the flowers out of their containers but kept them separated with additional potting soil which will still make them easy to remove from the basket if that is what is desired.

Looking for a simple but beautiful gift for Mom? Try this Mother's Day Flower Garden in a Basket!

This basket contains the following flowers/plants:

  1. Cordyline Indivisa Spikes
  2. Pansies
  3. Trailing Petunia
  4. Red Nancy
  5. Bowles Cunningham Periwinkle

If they stay in the basket they’ll fill in beautifully and look fantastic on an outdoor table or on the porch.  If they are taken out of the basket they’ll be a wonderful addition to the yard or another flower pot.

I can’t wait to put a few more of these together to give to some of the best Mother’s I know!

Here are a few breakfast recipes sure to make Mom smile when you make her breakfast in bed Mother’s Day morning!

Looking for a simple but beautiful gift for Mom? Try this Mother's Day Flower Garden in a Basket!
Stuffed French Toast Casserole ~ Breakfast Burritos ~ Strawberry Shortcake Pancakes

Filed Under: Annuals, Container Gardening, Crafts, Flowers, Gardening, How To, Perennials, Tips & How To's Tagged With: flowers, Gardening, How To, how to's, Mother's Day

DIY Hanging Basket Frame – A Mother’s Day Gift

April 28, 2016 by Kirsten

Looking for the perfect gift for the gardening mom? Check out this simple and beautiful DIY Hanging Basket Frame - A Mother's Day Gift www.westerngardens.com

Welcome!  I’m so happy you’re here!
DIY Hanging Basket Frame - A Mother's Day Gift www.westerngardens.com

Are you looking for a beautiful, unique gift for your favorite gardening mom?  With Mother’s Day just around the corner, I’ve come up with a gift idea for all the moms out there who have a hard time gardening because they can no longer kneel down for long periods of time.  Whether it’s because of knee problems or advancing age, this DIY Hanging Basket Frame is perfect for any sitting gardening enthusiast!

This frame is about 3 feet tall, can accommodate 3 hanging baskets, and has 2 “shelves” for boxes on each side. I love this frame because all the planting can be done at a table, and once its set up, watering can easily be done with a watering can. It has been a fun addition to our own yard, and one I wish we had for our patio all those years we were renting apartments!

I drew up my idea, and my husband made it a reality. He was in fabrication/welding for several years and told me this would not only be visually appealing, but also strong enough to handle a lot of weight…and I think we accomplished both of those things! The other awesome thing about it is that we were able to make it for less than $15!

DIY Hanging Basket Frame – A Mother’s Day Gift

Supplies for your Hanging Basket Frame:

  • Miter Saw (you need to be able to make 22.5° angled cuts)
  • Power Drill with #2 Phillips bit and ⅛ inch drill bit (for pilot holes)
  • 2 – 8 ft pieces of wood 2.5 x 1.5 inches
  • 1 – 8 ft piece of wood 1.5 x 1.5 inches
  • 1 – 8 ft piece of wood 1.5 x .5 inches
  • 3  J-Screws (4 inch)
  • 3 nuts (¼ of an inch)
  • 24 – 2 inch wood screws
  • Sand paper
  • Exterior Stain (I used Olympic Maximum)
  • Paint brush

You will begin by measuring and marking each cut.

DIY hanging basket frame www.westerngardens.com

Measure and mark the 1.5 x 1.5 piece at 58 inches. **If you would like to add another 10 inches, you would be able to hang two additional hanging baskets, one on each side.  This is up to you.

Measure and mark the  2.5 x 1.5 at 38 inches  (x4)

Measure and mark the 2.5 x 1.5 at 19 ¾ inches (x2)

Measure and mark the 1.5 x .5 at 9 inches (x4)

Once you have measured them all go ahead and cut each piece.

DIY Hanging Basket Frame - A Mother's Day Gift www.westerngardens.com

Pull the 38 inchers aside. You will cut each end with a 22.5° angle, opposite direction on each end – this will help the two A-frames to sit right on the ground.

Now take the two 19 ¾ inchers and cut each end at a 22.5° angle – same direction on each end.

DIY Hanging Basket Frame - A Mother's Day Gift www.westerngardens.com

These 4 pieces will make your two “A” frames.

DIY Hanging Basket Frame - A Mother's Day Gift www.westerngardens.com 
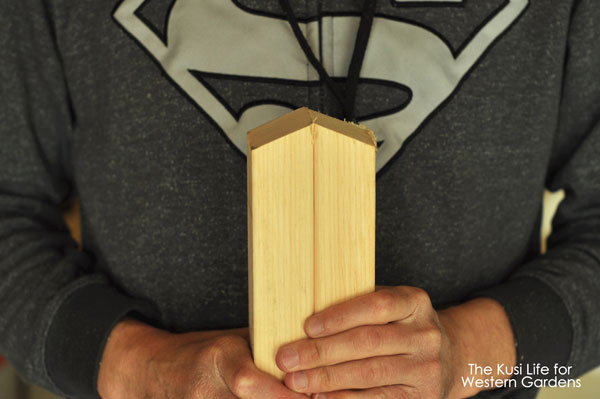
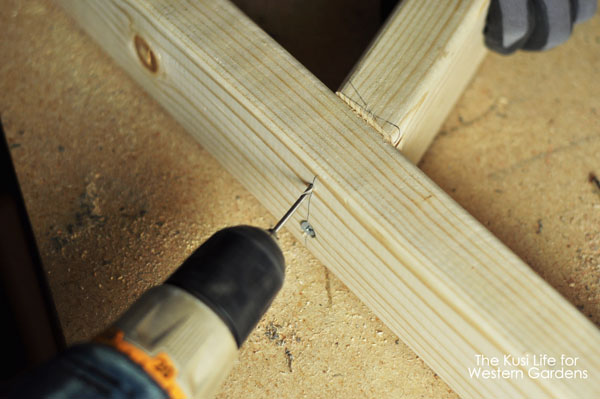
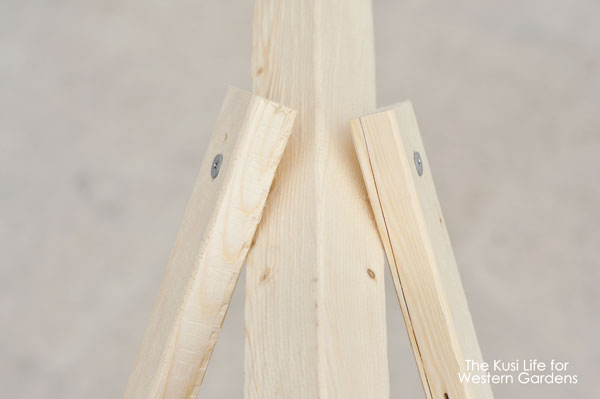
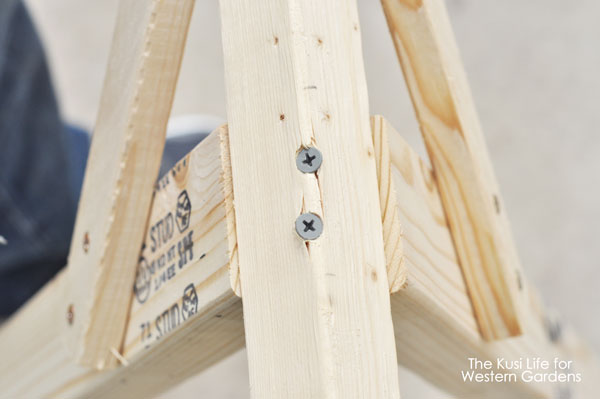
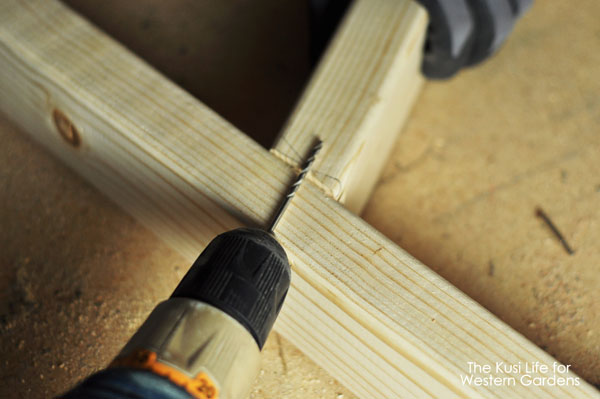
Lay the two 38 inchers on the ground with the 19 ¾ incher in the middle to form the “A.” Using your drill, you will drill a pilot hole in the direction shown here.

DIY Hanging Basket Frame - A Mother's Day Gift www.westerngardens.com

With the #2 Philips bit, insert the screw. Make another pilot hole about ¾ of an inch apart from the other screw, as shown in the picture above. Repeat this step on all 4 sides of the frame. Now you should have the two “A” pieces done.

DIY Hanging Basket Frame - A Mother's Day Gift www.westerngardens.com

For this step you will need someone to help hold the two “A” frames up. Lay the 58 incher on top of the two frames and measure 5 inches from the end. This is where it will lay. **If you decided to add the 10 inches, measure 10 inches from the end.

DIY Hanging Basket Frame - A Mother's Day Gift www.westerngardens.com

Now take the 9 inchers and drill a pilot hole, then screw it in. You will add another screw about ¾ of an inch just above that. Do the same on the other side.

DIY Hanging Basket Frame - A Mother's Day Gift www.westerngardens.com

Before you drill the pilot hole from the 9 incher into the 58 incher, use a level and make sure it is level and sitting evenly. Repeat it on the back side of the frame now.

DIY Hanging Basket Frame - A Mother's Day Gift www.westerngardens.com

Now drill the pilot from the 9 incher into the 58 incher, then screw them together.

DIY Hanging Basket Frame - A Mother's Day Gift www.westerngardens.com

It should look like this.
DIY Hanging Basket Frame - A Mother's Day Gift www.westerngardens.com DIY Hanging Basket Frame - A Mother's Day Gift www.westerngardens.com

Now, to secure the 58 incher, you will drill two pilot holes in opposite directions as pictured above, on each side.

DIY Hanging Basket Frame - A Mother's Day Gift www.westerngardens.com

It should look like this.

DIY Hanging Basket Frame - A Mother's Day Gift www.westerngardens.com

I did a quick sand job so it would be smooth and easy to stain.

DIY Hanging Basket Frame - A Mother's Day Gift www.westerngardens.com

I used Olympic Maximum Sealant and Stain in one. We used it for our deck and it has held up really well.

Hanging Basket Frame www.westerngardens.com

After allowing it to dry over night, we then drilled the 3 pilot holes 12 inches apart for the hanging baskets.
DIY hanging basket frame www.westerngardens.com

Here is what  the “J” screws look like. They come with only one nut so you have to buy 3 extra nuts to have one nut on the bottom of the the “J” and another on the top, so it will be secure. Screw those in and you are ready to hang your baskets!

DIY Hanging Basket Frame - A Mother's Day Gift www.westerngardens.com

I had a blast going to Western Gardens to purchase all my flowers. The staff there are awesome and helped me make my vision become a reality!  If you think Mom will want to choose her own flowers for her Hanging Baskets, a gift certificate to Western Gardens is the perfect idea so she can add her own special touch to this gorgeous display.

I have had lots of compliments on how much this adds to our yard, and my husband has had people ask him to make them one too! It really is an easy project that I think anyone would love to receive as a gift for Mother’s Day! How will you celebrate the women in your life this year?

See the Happy!

Kirstensig


Filed Under: Annuals, Container Gardening, Crafts, Gardening, How To, Utah Gardening Tagged With: DIY, frame, gift, hanging baskets, Mother's Day, tutorial

Best Plants for Window Boxes

April 23, 2016 by Jenn Crookston

Welcome!  I’m so glad you stopped by!

Are you looking for the best plants that will really stand out in your window boxes this year?  Flowers that will thrive, even in uncertain Spring weather?  Then you’ve come to the right place!  I’m sharing 6 of my favorite picks for gorgeous window boxes.

The best plants for your spring window boxes! Flowers that will survive sun and snow.Those who know me well know that my house and I just aren’t best friends.  I probably couldn’t have picked a house with an exterior that I like less!  But since an all-new exterior isn’t in the plans, I have to do what I can to make it as pretty as possible.

The best plants for your spring window boxes! Flowers that will survive sun and snow.

A few years ago I finally convinced my husband that we needed flower boxes for the windows.  We’ve had varying degrees of success, so this year I am determined to get these window flower boxes prize-worthy!  You know what I’m talking about, right? Jaw-dropping window boxes like this one from The Lily Pad Cottage.
The best plants for your spring window boxes! Flowers that will survive sun and snow.
Isn’t it just beautiful? I’m in awe.

I needed some advice to start out right in my quest for gorgeous window boxes, so I headed to Western Gardens to get some help.  Andrea answered all my questions and gave me some great tips that I can’t wait to share with you!

The best plants for your spring window boxes! Flowers that will survive sun and snow.

Prep Your Boxes Correctly:

  • Replace the liners in each flower box.  I was amazed at what this did to make everything look better immediately!
  • Fill the liners a little less than half full with styrofoam packing peanuts.  This will reduce weight and save potting soil, and allow more air and water to get to the roots.
  • Fill the rest of the liner with fresh potting soil, like Gardner’s Gold.
  • Plan out your flowers.  I planted earlier in the spring than normal, so I made sure to choose flowers that were all cold-tolerant (since April snow is a thing here!)
  • Ensure you have doubles of every flower, if you need to make matching boxes like I did.
  • Don’t overfill your boxes. Let your flowers get established before you fill in gaps.

Window Box Flowers (left to right, repeated in each box):

  1. Pansy Frizzle Sizzle Mix
  2. Primrose Danova Mix
  3. Vinca Bowles Cunningham Periwinkle
  4. Ranunculus Bloomingdale Mix
  5. Pansy Delta Premium Beaconsfield
  6. Pansy Matrix Lemon
  7. Pansy Frizzle Sizzle Mix

The same rules apply to window boxes as porch pots.  To create a truly awe-inspiring display, you need a filler, a spiller, and a thriller.  See my tips for porch pots if you’re not sure what this means!

Pansies and primrose are great fillers with a lot of wonderful color.  The Vinca will spill beautifully over the sides, and the tall, red Ranunculus is currently thrilling my boxes!

As these flowers grow and spread, they will fill the boxes nicely. These flowers should all last several months, depending on how quickly our Utah weather turns hot.

The best plants for your spring window boxes! Flowers that will survive sun and snow.

Two final tips for healthy window boxes:

  • Check the water regularly.  The heat from the house may increase your boxes’ water needs.
  • Fertilize regularly for the best blooms.  I use ferti-lome blooming and rooting soluble plant food, which is perfect for big, beautiful blooms.  Click here to see why I recommend this one!

I can’t wait to share how my window boxes progress this summer.  Here’s to growing gorgeous!

While I’m waiting for my flower boxes to fill out, I’ll be enjoying these delicious recipes with my family:

The best plants for your spring window boxes! Flowers that will survive sun and snow.
Gluten Free Oatmeal Cookies ~ Spinach Salad w/Poppy Seed Dressing ~ Strawberry Lemonade Cookies

Filed Under: Annuals, Container Gardening, Gardening, Utah Gardening Tagged With: flowers, Gardening, How To, how to's, tips, Utah, Western Garden Centers, Western Gardens

Mother’s Day Flower Pots

April 19, 2016 by Sydney Anderson

Welcome!  I’m so glad you’re here!

Are you looking for a simple, inexpensive present that the moms in your life will not just cherish, but enjoy every day?  Then create this bright and fun Mother’s Day gift, with the help of little hands!

Mother's Day Flower Pots are the perfect gift for all the mothers in your life! A sweet and simple gift to bring a pop of color to her home and a smile to her face.

Mother’s Day is right around the corner. Somehow this holiday always sneaks up on me! Maybe it’s because we have 5 bazillion birthdays from March to May or maybe it’s because with the warmer weather, I want to spend every waking moment outside; but it seems like I always remember Mother’s Day the Friday before and am always scrambling to make something for the moms in my life. But not this year!

Mother's Day Flower Pots are the perfect gift for all the mothers in your life! A sweet and simple gift to bring a pop of color to her home and a smile to her face.

I’ve learned that handmade gifts are the way to go when it comes to moms (and grandmas). Not only do they always bring a smile to their face, but it’s also more fun to make gifts. And it’s a lot more affordable too!

Mother's Day Flower Pots are the perfect gift for all the mothers in your life! A sweet and simple gift to bring a pop of color to her home and a smile to her face.

For this gift, I enlisted help from my two partners in craft. This gift couldn’t be any easier to make, and what kid doesn’t love getting a little dirty?!

Mothers-Day-Pot-Supplies

Mother’s Day Flower Pots

Supplies

  • Terra Cotta Pot – I used a 6″ because it was the perfect size for my boys’ hands. You may want a bigger or smaller one depending on how big your kids’ hands are.
  • Saucer to go under the pot – This terra cotta saucer costs about $1 but you can get a plastic one for much less.
  • Paint – I like using acyrlic craft paint (like these) because it dries quickly and is easy to clean up.
  • Sponge Paint Brush(es) (optional) – I’ve found after doing hand print art with my boys, the hand prints turn out clearer if you brush the paint onto their hands instead of letting them put their hands in the paint by themselves.
  • Sharpie
  • Flowers – you can buy them now or wait until you’re ready to give your gift. Western Gardens always gets a big shipment of new flowers just before Mother’s Day.
  • Potting Soil

Mother's Day Flower Pots are the perfect gift for all the mothers in your life! A sweet and simple gift to bring a pop of color to her home and a smile to her face.

Directions:

  1. Pick mom’s 2-3 favorite colors (or let your kids pick their favorite colors) and pour some on a paper plate.
  2. Using your paintbrush, paint the first color on one of your kids’ hands (You can also let the kids press their hands in the paint if you don’t have a paintbrush).
  3. Press hand firmly along side of pot.
  4. Paint the next color on the other hand (or next child’s hand) and space about 1″ from the first hand print on the pot.
  5. Continue with same color pattern spacing about 1″ from the last hand print until you’ve covered the whole pot.
  6. Using your Sharpie, write Happy Mother’s Day 2016 on the rim of the pot. (I thought about attaching a tag that said Happy Mother’s Day 2016, but I know the tag will probably get lost, and in 15 years I probably won’t remember what year we made this!)
  7. Plant flowers and give to mom.

Mother's Day Flower Pots are the perfect gift for all the mothers in your life! A sweet and simple gift to bring a pop of color to her home and a smile to her face.

What is your mom’s favorite flower? How great would they look in one of these pots?! Check out Western Gardens for a huge selection of flowers any mom would love.

Here are a few more Mother’s Day gift ideas:

Mothers-Day-Printable-Content-It-Is-A-KeeperMother’s Day Free Printable

Thank You For Helping Me Bloom Mother's Day Gift: A fun, quick and easy gift idea for that special mom in your life. #BestMomsDayEver #ad #CollectiveBiasDIY Tissue Paper Flower

Filed Under: Container Gardening, Crafts, Flowers, How To Tagged With: craft, how to's, Mother's Day

8 Tips-Planting Early Spring Flower Pots

April 16, 2016 by Jenn Crookston

Welcome gardening friends!  

Do you love seeing splashes of color in the early spring?  Especially when winter hasn’t quite worn off yet, and the landscape can look a little gray and uninviting?  

I’m here to help!  With these 8 Tips for Planting Early Spring Flower Pots, you can take your yard from winter-blah to spring-wow!

I am very excited to start gardening this year!  So excited, in fact, that I have no desire to wait for Mother’s Day to get planting (here in Utah, Mother’s Day is about the time to start).

8 Tips for planting early spring flower pots, to help pull your yard out of the winter blues and into the happy colors of spring!

I’ll be honest.  I don’t have a perfect track record with flowers, potted or in the ground. My plants don’t always die, but my record is inconsistent and it doesn’t seem to matter if I do the same thing each year or not, it’s still hit or miss.

But I didn’t want swing and miss this year, so I headed to Western Gardens with my mother-in-law Sue (my personal go-to flower guru) and we consulted the experts there.

When we first arrived at Western Gardens I couldn’t help but notice all the beautiful flowers they already had in their pots out front.

8 Tips for planting early spring flower pots, to help pull your yard out of the winter blues and into the happy colors of spring!

Sue and I both loved this pot!  Since it’s still quite cold, I was impressed with how much color was in the pot and how great the flowers looked. Some even had ice sitting on them, and yet here they were in their vibrant beauty!

To make sure we were doing everything possible to have the best chance of success, we asked a Plant Pro from Western Gardens to help us out.  Andrea answered all of our questions and gave us so much great advice! I appreciated her friendly personality and really appreciated that she never once made me feel foolish for my lack of knowledge.

I was thrilled to discover such a wide variety of flowers and plants that are cold-weather hardy and perfect for early spring flower pots. With our temperamental Utah springs, we can have beautiful spring-like weather in February, only to have snow on the ground in April.  With these cold-weather flowers, I can have blooms all spring long.

8 Tips for planting early spring flower pots, to help pull your yard out of the winter blues and into the happy colors of spring!

8 Tips for Planting Early Spring Flower Pots:

1. Talk to your local gardening shop (if you’re here in Utah, visit Western Gardens in Sandy, Downtown Salt Lake, and West Valley City).  Ask them what flowers and plants work best in your area for early spring planting.  It will vary depending on your location and climate.  To make the most of your pots, you’re going to want expert advice!

2. Choose a filler, a spiller, and a thriller (these are different flowers that will fill in the pot, spill down the sides, and thrill the eye…think grass spikes)!  Click HERE for more details.

3. Gather other necessary supplies:

  • Styrofoam packing peanuts (enough to fill each pot 1/3 full)
  • Fresh potting soil (like Gardener’s Gold)
  • Fertilizer (like ferti-lome blooming and rooting soluble plant food. The high middle number (9-58-8) is responsible for the flowering of plants and flowers, which means it’ll help your potted plants/flowers have beautiful blooms − or if you’re planting fruits/veggies, this helps with food production.)

8 Tips for planting early spring flower pots, to help pull your yard out of the winter blues and into the happy colors of spring!

4. Fill your pot 1/3 full with styrofoam packing peanuts (they partially fill the pot without adding weight, and allow for air and water to have room to move around the roots of the plants). Fill the remaining 2/3 of your pot most of the way with potting soil (leaving a few inches of space at the top, you’ll need it in a few minutes!).

8 Tips for planting early spring flower pots, to help pull your yard out of the winter blues and into the happy colors of spring!

5. Arrange your flowers in the pot before you plant. Here I’ve got my plants all laid out to get an idea of how I want the pot to look when it’s finished. Once you’re happy with the arrangement, then start potting each one (don’t forget to gently tear some of the roots on each flower before you plant it, this helps the roots spread into the surrounding soil and promote growth).

8 Tips for planting early spring flower pots, to help pull your yard out of the winter blues and into the happy colors of spring!
6. Add more potting soil once all your plants are potted, to fill in any holes.

7. Water your flowers to make sure they’ve got a nice, fresh drink to help keep them perky.  Don’t oversaturate your pot.

8. Fertilize, dead-head & water your flower pots to keep them looking their best all spring!  Fertilize regularly (organic and chemical fertilizers have different instructions, read carefully!  We recommend organic for pots, as chemical fertilizers leave a salt residue), remove expired blooms (so the plant’s energy can go to make new ones!), and water when soil is just barely moist (don’t let it dry out).

8 Tips for planting early spring flower pots, to help pull your yard out of the winter blues and into the happy colors of spring!

The plants and flowers featured in my pots are:

Fillers:

  • Pigeon Purple Flowering Kale (perennial) 
  • Flowering Cabbage (perennial) 
  • Candy Tuft Tahoe (perennial)
  • Pansy Fizzle Sizzle Mix (annual)
  • Pansy Matrix Lemon (annual) 
  • Ranunculus Bloomingdale Mix (annual) 
  • Pansy Delta Premium Beaconsfield (annual)
  • Primrose Danova Mix (annual) 

Spillers

  • Red Nancy (annual) 
  • Bowles Cunningham Periwinkle (annual) 

Thrillers

  • Cordyline Indivisa Spikes (annual) 

8 Tips for planting early spring flower pots, to help pull your yard out of the winter blues and into the happy colors of spring!

I am absolutely in love with how my pots turned out!  And with these tips and advice, I know I’ll have beautiful pots all spring. A few of the plants I chose are perennials (they’ll come back year after year), so when they stop blooming, they can be replanted in the ground for next year! 

These flowers will all last several months, and possibly through June, depending on how quickly it gets hot. I love that my pots are already planted, and that I can add other flowers as some of them expire, to keep some beauty outside my home all spring, summer and fall!

8 Tips for planting early spring flower pots, to help pull your yard out of the winter blues and into the happy colors of spring!

Now that all my flowers and plants look so beautiful, I need some new pots for them!  I think that will be my reward for keeping them pretty and healthy all season.

Here are a few more things to love about Spring that you can find over on my blog!

RHW Collage
Gluten Free Oatmeal Cookies ~ Spinach Salad w/Poppy Seed Dressing ~ Strawberry Lemonade Cookies

Filed Under: Annuals, Container Gardening, Flowers, Gardening, How To, Perennials, Tips & How To's Tagged With: flowers, Gardening, how to's, spring

5 Plants for Utah Porch Pots

April 12, 2016 by Heather Leister

Need some beautiful, new plants for your porch pots? Try these 5 native Utah plants to freshen up your outdoor decor!

Welcome, gardening friends!  We’re so glad you’re here.

Do you love having beautiful flowers on your porch?  But have you grown tired of the same old geraniums and gerbera daisies that you plant year after year? If you’re ready to try something new in your flower pots this spring, then you’ve come to the right place!

We’re sharing five gorgeous plants that you should add to your gardening arsenal.  If you’re in Utah like us, these plants will thrive because they are native to our area.  They are perfect for planting in your containers, so give these beauties a try!

1. Bee Balm

Need some beautiful, new plants for your porch pots? Try these native Utah plants to freshen up your outdoor decor!

Bee Balm is a showy, native wildflower that will add color and excitement to your flower pots.  The plant requires well-drained soil, so you will need to ensure that your container is large enough to accommodate the plant’s growth.  Bee Balm attracts hummingbirds and butterflies, making it the perfect centerpiece for a container.

2. Silvery Lupine

Need some beautiful, new plants for your porch pots? Try these native Utah plants to freshen up your outdoor decor!

This native perennial can grow up to 1-2 feet tall.  Silvery leaves and spikes are covered with small showy flowers.  The height of the Silvery Lupine makes it an ideal showpiece in a pot.

3. Four O’Clock

four o'clock 2

The Four O’Clock is a fragrant, colorful flower that will thrive in dry soil. The Four O’Clock opens in the late afternoon, or on cloudy days, so it’s ornamental blossoms will complement your daytime blooming plants.

4. Wasatch Penstemon

wasatch pestemon 2

The Wasatch Penstemon is a familiar fixture in Utah’s Wasatch Mountains. The small plant blooms in a gorgeous blue, but it may take two years for flowers to appear. Seeds should be planted in the late fall, which means you’re going to have to plan ahead. It will be worth it in the end, when spring arrives you’ll have a mountain valley in a pot on your porch.

5. Prairie Aster

Need some beautiful, new plants for your porch pots? Try these native Utah plants to freshen up your outdoor decor!

The Prairie Aster is an upright perennial that thrives in the desert and will require little watering or attention. The flowers resemble daisies and are tiny and elegant. Once it blooms the Prairie Aster will attract butterflies and birds, bringing excitement to your flower pots.

If you can’t decide which Utah native plants to put in your containers, or you want more information, we can help!  At Western Gardens we carry a large selection of Utah native plants, and our staff knows exactly what grows here. Bring us your questions, we’re here to help you figure out exactly what you need for your flower pots or yard.

Images:
Prairie Aster, Wasatch Penstemon – Flickr
Bee Balm, Silvery Lupine, Four O’clock – commons.wikimedia.org

Filed Under: Container Gardening, Flowers, Gardening, Utah Gardening Tagged With: flowers, Gardening, tips, Utah

  • « Go to Previous Page
  • Go to page 1
  • Go to page 2

Primary Sidebar

Shopping Cart

Items in Your Cart

Your cart is empty
Visit The Shop

Follow Western Gardens

  • Facebook
  • Instagram
  • Pinterest
  • YouTube

See what we’ve been pinning!

Follow Me on Pinterest
Followed by people.
?

Pinterest Badge by Skipser

Here’s What We’ve Been Up To!

Save water and money by Turf Training - train your lawn to grow deep roots
work at western gardens utah garden center
Senior gardening woman Edu Carvalho from Pexels
nursery center open to public

Copyright © 2025. Western Gardens - Privacy Policy