• Skip to primary navigation
  • Skip to main content
  • Skip to primary sidebar

Western Garden Centers

for what grows here

  • Home
  • How To
  • Gift Cards
  • Calculate Mulch
  • Locations
    • Store Hours
    • About
    • Garden Shop Employment Team
  • Weddings
    • Salt Lake City, UT
    • West Valley, UT
  • Blog
    • Gardening
    • Recipes

Flowers

5 Plants for Utah Porch Pots

April 12, 2016 by Heather Leister

Need some beautiful, new plants for your porch pots? Try these 5 native Utah plants to freshen up your outdoor decor!

Welcome, gardening friends!  We’re so glad you’re here.

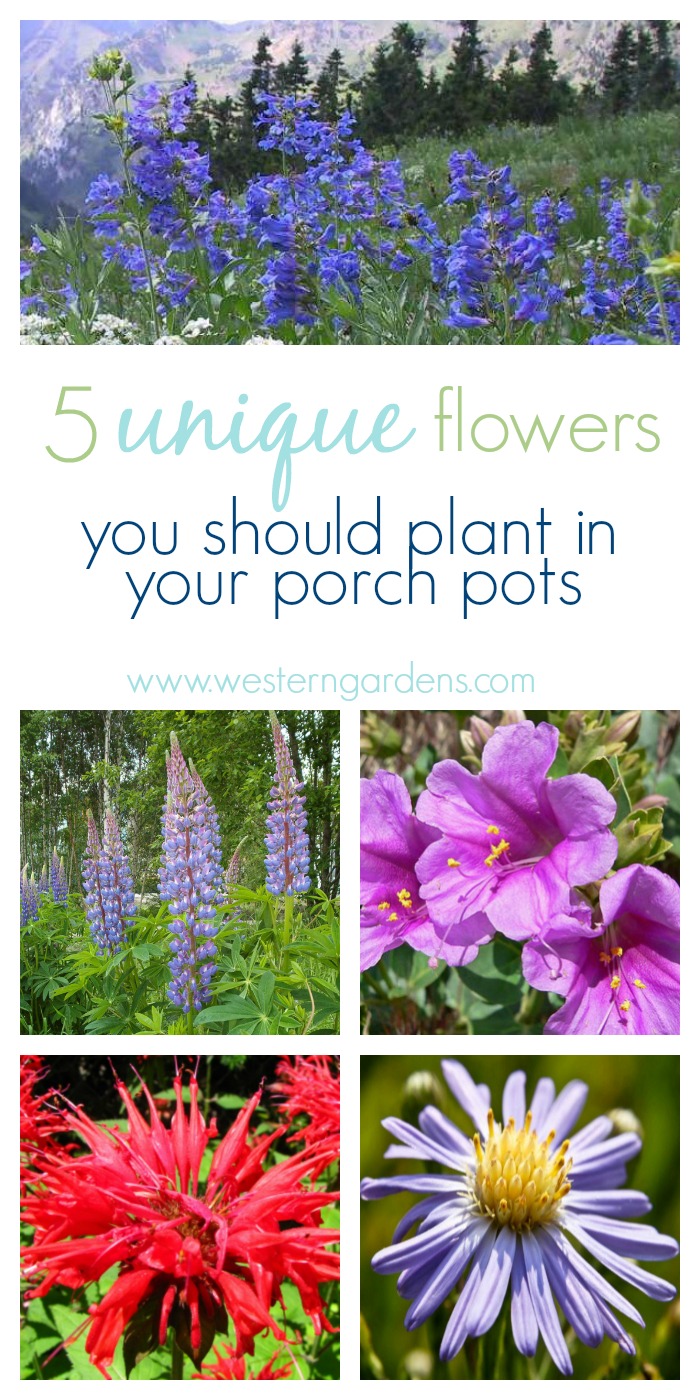
Do you love having beautiful flowers on your porch?  But have you grown tired of the same old geraniums and gerbera daisies that you plant year after year? If you’re ready to try something new in your flower pots this spring, then you’ve come to the right place!

We’re sharing five gorgeous plants that you should add to your gardening arsenal.  If you’re in Utah like us, these plants will thrive because they are native to our area.  They are perfect for planting in your containers, so give these beauties a try!

1. Bee Balm

Need some beautiful, new plants for your porch pots? Try these native Utah plants to freshen up your outdoor decor!

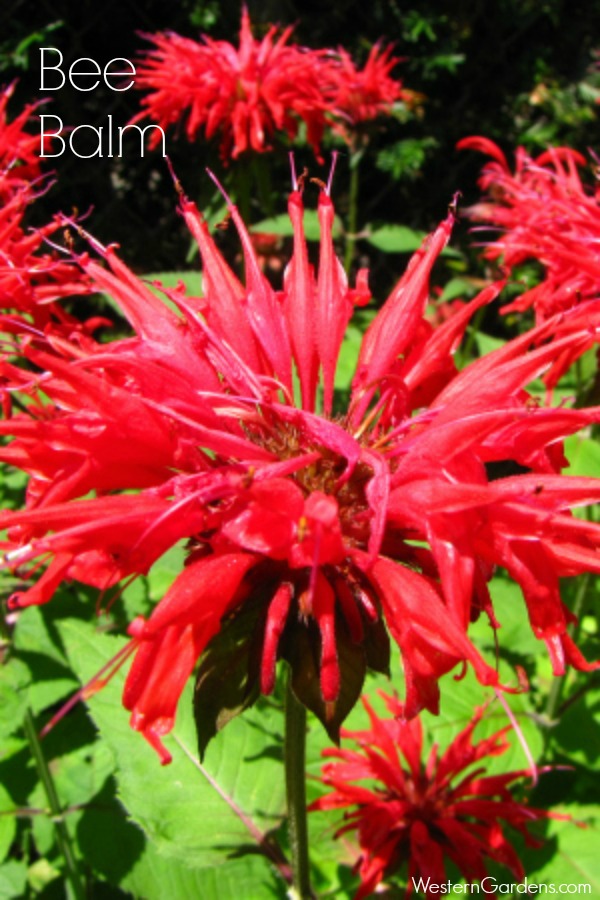
Bee Balm is a showy, native wildflower that will add color and excitement to your flower pots.  The plant requires well-drained soil, so you will need to ensure that your container is large enough to accommodate the plant’s growth.  Bee Balm attracts hummingbirds and butterflies, making it the perfect centerpiece for a container.

2. Silvery Lupine

Need some beautiful, new plants for your porch pots? Try these native Utah plants to freshen up your outdoor decor!

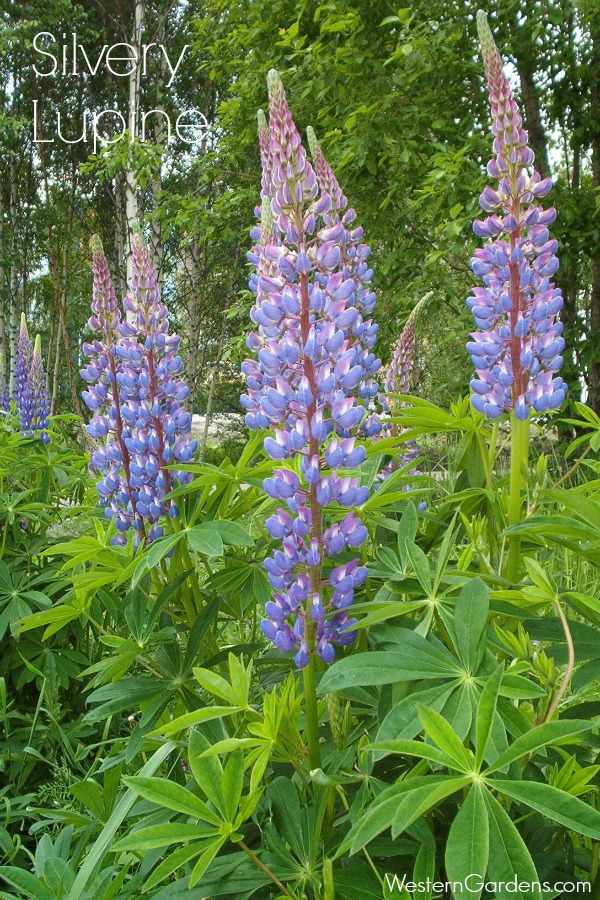
This native perennial can grow up to 1-2 feet tall.  Silvery leaves and spikes are covered with small showy flowers.  The height of the Silvery Lupine makes it an ideal showpiece in a pot.

3. Four O’Clock

four o'clock 2

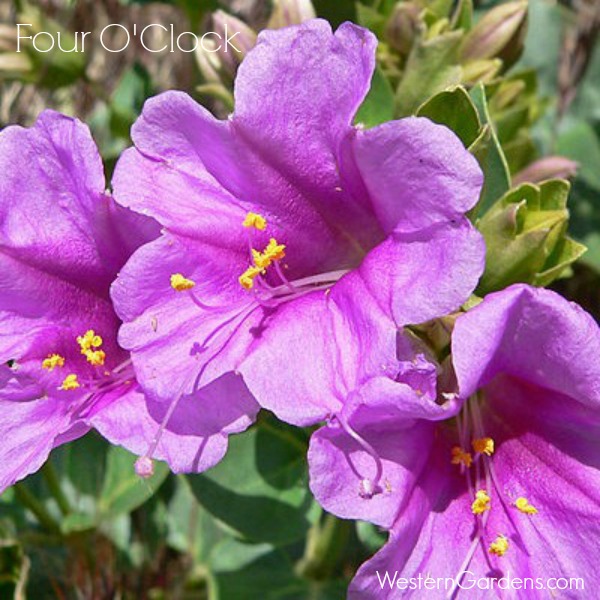
The Four O’Clock is a fragrant, colorful flower that will thrive in dry soil. The Four O’Clock opens in the late afternoon, or on cloudy days, so it’s ornamental blossoms will complement your daytime blooming plants.

4. Wasatch Penstemon

wasatch pestemon 2

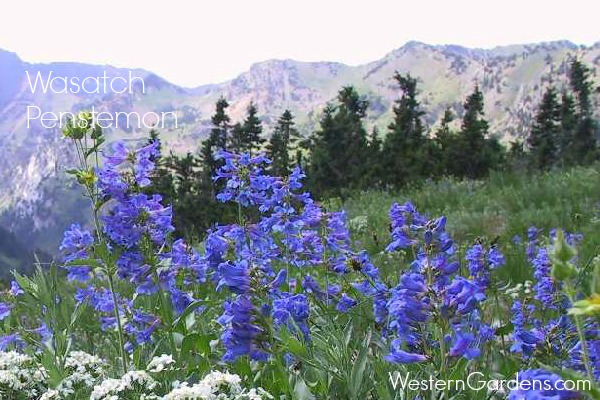
The Wasatch Penstemon is a familiar fixture in Utah’s Wasatch Mountains. The small plant blooms in a gorgeous blue, but it may take two years for flowers to appear. Seeds should be planted in the late fall, which means you’re going to have to plan ahead. It will be worth it in the end, when spring arrives you’ll have a mountain valley in a pot on your porch.

5. Prairie Aster

Need some beautiful, new plants for your porch pots? Try these native Utah plants to freshen up your outdoor decor!

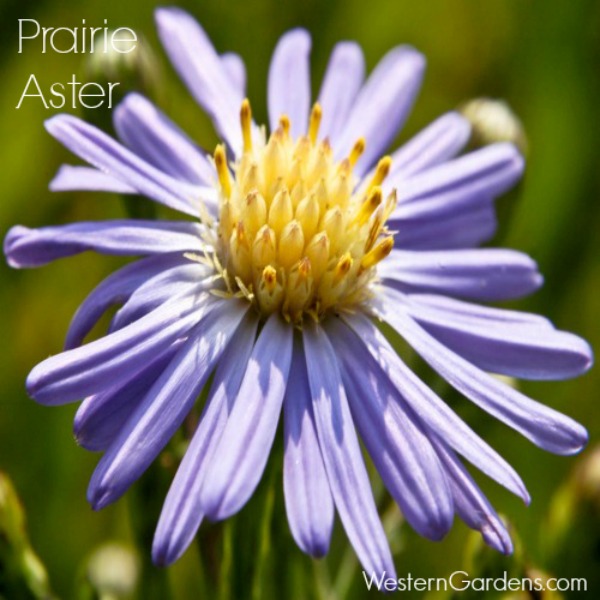
The Prairie Aster is an upright perennial that thrives in the desert and will require little watering or attention. The flowers resemble daisies and are tiny and elegant. Once it blooms the Prairie Aster will attract butterflies and birds, bringing excitement to your flower pots.

If you can’t decide which Utah native plants to put in your containers, or you want more information, we can help!  At Western Gardens we carry a large selection of Utah native plants, and our staff knows exactly what grows here. Bring us your questions, we’re here to help you figure out exactly what you need for your flower pots or yard.

Images:
Prairie Aster, Wasatch Penstemon – Flickr
Bee Balm, Silvery Lupine, Four O’clock – commons.wikimedia.org

Filed Under: Container Gardening, Flowers, Gardening, Utah Gardening Tagged With: flowers, Gardening, tips, Utah

How to Plant a Spring Flower Bed

April 1, 2015 by Becky

Planting a Spring flower bed may seem like a daunting task if you’re new to gardening, but we have 10 easy tips and tricks to help you create a beautiful, inviting  space in your yard.

Planting Spring Flowers1 -Lay Out Your Plants Before You Buy.  Today’s planting actually started out on the floor in the nursery of Western Gardens.  I laid out all of my plants on a cement square to help me decide how much I needed for the space to be planted.  Once I had what I needed, it was easy to load up and head to the flower bed!

Planting Spring Flowers2- Clean Up Your Flower Beds.  I always start every planting by cleaning up what’s already there.  It seems simple, but it makes a big impact to just clear away old debris. 3- Add 2 Inches of Compost Over Top of the Flower Bed.  No need to work it into the soil, the nutrients will work their way down to your plants’ roots.  We could almost just stop here, at this point the bed already looks so much fresher and cleaner!  The fun part is next though, so let’s get planting!

Planting Spring Flowers4- Use an Auger to Plant Bulbs.  One of my favorite tools is a bulb planting auger.  It’s an attachment that fits a standard-size drill, and it makes planting bulbs SO easy and fast!  {You can pick one up at your nearest Western Gardens.}  Just drill down about 6 inches, drop your bulbs in, and fill back in with soil!  Bulb planting at its finest.  And simplest.

Planting Spring Flowers5- Add Unique Plants like Veggies!  I am always looking for ways to plant veggies in a landscape, so I took some along.  Lettuce for some extra green, and some sugar snap peas to put on the trellis.  It’s a great addition because it’s unique and beautiful, and who doesn’t want a sugar snap pea on their way out the door?

Planting Spring Flowers6- Incorporate Unique Elements that you might not always see in a flower bed.  I found a trellis at Western Garden Center that went perfectly with the yellow front door and bistro table on the patio.  Always try to find cool things to throw in a landscape, but never force it.  If it doesn’t go with the flow, don’t try to make it work.

Planting Spring Flowers7- Adjust Flowers Prior To Digging.  Before I dig any holes for my flowers, I lay them all out in the bed still in their containers.  This is the time to make changes and play around with design.  One important tip I always give is, take 10 steps back, take a deep breath, and look at what you are about to do.  Adjust now before it’s too late!

Planting Spring FlowersIf everything looks perfect, take your hand shovel, and dig into that bed!  All the hard work is over now, so it is time to get everything into the ground.  8- Before the flowers go in the ground, gently tear part of the plants’ root systems…it will encourage the roots to grow into the surrounding soil instead of circling itself (like it’s been doing in the container).  9- Once all your flowers are planted, quickly give it a drink of water.  If you’re planting when it’s hot outside, there’s a good chance those plants are in shock.  Watering them right away will help them get established in their new home.

Planting Spring Flowers10- Don’t Be Afraid To Try Something New!  We can’t wait to see those Sugar Snap Peas on that trellis!  Now grab a lemonade,  pull up a chair and enjoy your beautiful new flowers… and enjoy a sugar snap pea for me!

Planting Spring FlowersPlants in this post’s flower bed include:   Sugar Snap Peas, Lettuce, Pansies, Prim Rose, Ornamental Cabbage, Ranunculus

{We are often asked what kind of compost we use in our own gardens.  We recommend Bumper Crop all natural organic soil builder.  It’s great for veggie gardens, flower beds, planter boxes, and pretty much anywhere else you want to put it!}Planting Spring Flowers

Filed Under: Flowers, Gardening, Outdoors, Tips & How To's, Yard Care Tagged With: flowers, garden tools, gardening, how to's, tips, Western Garden Centers, Western Gardens

Deadhead Flowers

June 21, 2014 by Becky

You want your garden to always look it’s best, so don’t forget to deadhead your flowers when the blooms are spent!  It’s easy, quick, and gives your plants a fresh look.  It will also encourage more blooms on your flowers, so you get more bang for your planting buck.

deadhead flowers Collage main

Why Deadhead?

Plants want to ensure the survival of their species, so they produce seeds to grow the next generation.  Flowers produce blooms, which will typically develop seeds.  Once the plant has gone to seed, it will stop producing blooms because it has already done its job…it doesn’t need any more flowers.  To get your flowers to keep producing beautiful blooms, remove the dead ones so they can’t produce seeds, and it will continue flowering in an effort to get those seeds! {THIS BEING SAID HOWEVER, most flower plants that are sold in stores are hybrids.  They are bred by growers to develop different traits like color and hardiness.  These flowers generally DO NOT produce seeds that should be replanted.  Do not save seeds from hybrids, they will not produce a plant that is the same as the parent plant.  Check with your local garden center if you aren’t sure about your particular plants.}

How Often?

How often you deadhead really depends on the size of your garden and how much you are in it.  A small garden can go a couple of weeks in between deadheading, while some gardeners deadhead every day.  You will quickly figure out how often you need and want to deadhead as you spend time in your garden.

How do I Deadhead a Flower?

It’s easy to deadhead flowers!  You can pinch off the expired bloom between your thumb and forefinger, or go down to the first leaf below the flower and pinch it off there to hide the cut stem.  If you don’t want to use your fingers, or the stem is too tough, use garden shears or even scissors for a nice, clean cut.

deadhead flowers Collage

My 7 year old wanted to paint my nails sparkly green. Not sure if it’s coincidence or fate that I have a green thumb in these pictures!

As you deadhead flowers in your garden, you will notice more blooms and get more mileage out of your beautiful flowers.  It only takes a few minutes to clear the dead flower heads away, but it will give you (and everyone else who sees your garden) more enjoyment as you spend time in your lovely space.

Happy Gardening!

Filed Under: Flowers, Gardening, Tips & How To's, Yard Care Tagged With: deadhead, flowers, gardening, how to's, tips

Companion Planting 101

May 10, 2014 by Becky

Companion planting can help your garden flourish in ways it never has before.  You can have healthier plants and a better harvest (and even control some garden pests!) by choosing with care which plants go together and which plants to keep apart.  Companion planting isn’t difficult once you have a few basics down.  This is, however, a very broad subject, so we’ll cover the basics here to get you started!  Through companion planting you can:

  • enhance the flavor of your harvest (plants like herbs can enhance the flavor of nearby plants)
  • increase your yield (some plants help others grow better)
  • improve nitrogen (some plants can make nitrogen available to other plants)
  • repel pests (the biochemicals of certain plants can repel insect and other pests)
  • attract good guys (beneficial insects are attracted to or like to inhabit certain plants)
  • divert pests (certain plants attract pests, which can keep them away from your garden)
Companion Plants

{The list looks small, just click on it to enlarge!}

companion plants
Other highly beneficial plants to consider for your garden:
  • catmint: deters ants
  • chamomile: helps keep nearby plants healthy
  • foxglove: lends strength and longer life to nearby plants
  • lavender: attracts bees and deters caterpillars, mice, ticks & rabbits
  • marigolds: deter pests
  • marjoram: repels insect pests, attracts bees
  • mint: repels insects pests, attracts beneficial insects
  • nettles: a weed, but it excretes nutrients into the soil and protects against aphids, black fly & mildew
  • pennyroyal: deters ants & burrowing insects
  • soybeans: nourishes and reconditions soil, and deters corn pests
  • tansy: repels pests
  • tarragon: beneficial to nearby plants
  • yarrow: good for veggies & herbs, attracts beneficial bugs

Bruschetta squareOne of our favorite combinations for the garden is one of our favorite combinations for the kitchen…tomatoes and basil!  Basil will add subtle flavor to tomatoes, makes it more disease resistant, and repel aphids, fruit flies & house flies, and it will attract bees!  If you missed last week’s recipe for
bruschetta, a simple but amazing combination of tomatoes and basil,  be sure to pin it so you can make it this summer!  We will keep bringing you weekly garden-fresh recipes to give some kitchen inspiration for all those delicious fruits and veggies!

Happy planting!

Filed Under: Flowers, Fruit, Gardening, Tips & How To's, Tomatoes, Vegetables Tagged With: flowers, Fruit, gardening, how to's, veggies

How to Plant a Flower Pot

May 3, 2014 by Becky

Flower pots are an easy, beautiful way to dress up your porch and yard.  They add a great pop of color and a lot of interest, and you can try something new without a commitment to your landscape.  We’ve put together a few tips to make your planters really stand out and look their best this Spring!

flower pots

Choose Your Pot

  • Pick something that will match its surroundings…or stand out and make a statement!

Prepare Your Pot

  • The first thing to add to your pot is a coffee filter.  This will let water drain through the hole, but keep all that potting soil where it belongs…in the pot!  This is especially helpful if your planters will be on a porch or patio, or other area you want to keep clean.
  • Add a couple of inches of small rocks over the coffee filter.  This will help your soil drain better, which will keep your plants healthier.
  • If your pot is large and you worry that it will be too heavy when filled, try placing a smaller pot inside your large pot and upside down over the layer of rocks.
  • Once your rocks (and smaller inverted pot, if necessary) are in place, add some potting soil.  Fill the pot about 2/3 full.  This way you can set each of the plants in the pot without digging individual holes…you will fill soil in between the plants once they are all in place.

Add some Drama!

  • The three types of plants for your pot are “Thrillers, Fillers & Spillers.”
  • When you remove the plants from their containers, gently tear the roots away from the soil so they will begin to grow into the soil, instead of circling  their root ball.
  • Thrillers add height and dimension.  Place in the center of your pot.  Grasses are a great choice for a center plant, anything from Purple Fountain Grass to Dracaena Spikes.
  • Fillers add rich color and interest.  Place around your “thriller” plant.  Choose your favorite flowers…the possibilities are endless!
  • Spillers add a special, dramatic touch as they begin to cascade over the side of your pot.  They stay beautiful all season long.  Sweet Potato Vines and Creeping Jenny are always popular!

flower pot 4

Make it Odd

  • Use odd numbers when you are adding plants to your pot.  One of those basic design principles…odd numbers are more pleasing to the eye.  Add them in 1’s, 3’s or 5’s.

Keep it Happy

  • Be sure to give your flowers pot the water they need, but don’t over-water!  Feel the soil…if it’s still nice and moist, don’t water.  If the soil is just barely moist, it’s time for water.  {A good rule of thumb is to stick to your finger in the soil about two inches to feel how moist it is.  Let the soil become just moist between waterings, but don’t let it dry out.}  Plants in full sun will need water more frequently than plants in full shade.  You will figure out quickly how often to water your pots, then just make it part of your gardening routine!

Check out our video, Mike will show you how to put it all together!

Flower pots are a gorgeous addition to any yard.  We would love to see yours!  Email your pictures to [email protected] for a chance to be featured on our Instagram account!  {Or use the hashtag #westerngardencenter}  Be sure to follow us @western_gardens if you aren’t already!

flower pot blog main

Filed Under: Flowers, Gardening, Tips & How To's Tagged With: dirt, flower pots, flowers, how to's

Edible Flowers

April 18, 2014 by Becky

Edible flowers are a fun addition to a summer salad, are gorgeous when candied, and make beverages more beautiful.  They are easy to use and add a special flare to your dish!

Edible Flowers

Some of the flowers on our list may surprise you.  You might already have them growing in your yard without even realizing the culinary excitement that awaits!  There are a few things to remember when cooking with flowers:

  • use flowers that are grown organically
  • make sure the flowers you want to eat are edible, as some flowers can make you sick
  • eat flowers in moderation, they can cause digestive or allergy problems if overusededible flower anatomy
  • if you know you are allergic to a certain plant, avoid eating its flower
  • eat the edible parts (usually just the petals) of edible flowers–remove pistils and stamens
  • Do not use non-edible flowers as a garnish, guests may reasonably assume that if a flower is in their food, they can eat it

 Top Ten Edible Flower Picks

Borage is an annual herb (also known as starflower).  Borage flowers are usually blue, but can also appear pink or white.  They have a faint cucumber taste and are well-suited to salads, beverages and desserts.

Chrysanthemums have a mild flavor.  Sprinkle the petals over a salad for a beautiful presentation.

Daylilies are slightly sweet with a mild vegetable flavor and work well for garnishes, desserts, or even deep frying!  Use only the orange daylily.

Lavender has a sweet floral flavor and lends itself well to both sweet and savory dishes.  Use it in desserts or stews, or simply use it as a beautiful garnish.

Nasturtiums are one of the most commonly used edible flowers.  They have a sweet, peppery flavor.  Beautiful as a garnish, in a salad, or even on an open-faced sandwich.

Pansies can be eaten whole (including violas and johnny-jump-ups).  They have a sweet flavor and are good for use in salads, drinks and desserts.

Dianthus has a clove-like flavor and adds lovely color to a salad.  Beautiful in an ice ring for a party, or freeze petals in individual ice cubes.

Roses are a staple in many yards, and perhaps soon in many kitchens!  All varieties are edible.  The flavor varies between types and colors, but they are generally fruity, with deep colors having a more pronounced flavor.  Great for salads, garnishes, beverages, and many other culinary uses.

Scented Geraniums are ideal in desserts, drinks, and even frozen in ice.  Flavor generally corresponds with variety.  The Citronelle variety may not be edible.

Squash is possibly the most surprising member of our list.  They can be eaten raw, sauteed in butter, or even deep fried!  This is a great way to prevent waste if your plants produce more than you (and all of your neighbors!) can use.

*Please note: this list is not exhaustive.  Many flowers are edible.  This list contains our ten favorites.  If you want to eat a flower that does not appear on this list, make sure to reference a reputable source to ensure its safety.  Some flowers can make you sick.

We are developing recipes for flowers and will begin posting when they are in season.  If you have a favorite flower recipe or idea that you would like to share, leave it in a comment!  We just might feature you in an upcoming post!

Filed Under: Flowers, Recipes, Tips & How To's Tagged With: flowers, gardening, green, recipe

  • « Go to Previous Page
  • Go to page 1
  • Go to page 2
  • Go to page 3

Primary Sidebar

Shopping Cart

Items in Your Cart

Your cart is empty
Visit The Shop

Follow Western Gardens

  • Facebook
  • Instagram
  • Pinterest
  • YouTube

See what we’ve been pinning!

Follow Me on Pinterest
Followed by people.
?

Pinterest Badge by Skipser

Here’s What We’ve Been Up To!

Save water and money by Turf Training - train your lawn to grow deep roots
work at western gardens utah garden center
Senior gardening woman Edu Carvalho from Pexels
A Utah Guide to Vertical Gardening in square shape

Copyright © 2026. Western Gardens - Privacy Policy