• Skip to primary navigation
  • Skip to main content
  • Skip to primary sidebar

Western Garden Centers

for what grows here

  • Home
  • How To
  • Gift Cards
  • Calculate Mulch
  • Locations
    • Store Hours
    • About
    • Garden Shop Employment Team
  • Weddings
    • Salt Lake City, UT
    • West Valley, UT
  • Blog
    • Gardening
    • Recipes

How To

How to Choose an Apple Tree in Utah

September 21, 2017 by Wendy Pettit

Fall is a wonderful time to plant trees and the apple tree is one of the easiest fruit trees to grow.  Surprisingly, how to choose an apple tree is easy to learn as well.  Learn these three basic criteria as you prepare for this investment.  Nearly all apple trees require a second variety close by in order to pollinate.  So as you are considering, be sure to have a first and second choice.

How to Choose an Apple Tree – 3 Criteria:

  1. Right SIZE – Choose the right size of tree for your space.  You need to look at your space and maybe even measure the space so you know what you are purchasing.
  2. Right VARIETY – Type of fruit desired.  Do you want fresh eating apples, or just cooking apples?  You will be investing time and effort into you tree, so they may as well be apples that will please you and serve your purpose.
  3. Right TIME – When does it flower and when is harvest time.  Apples require a second variety to cross-pollinate, therefore you want 2 apples trees that will bloom about the same time.

SIZES of Trees:

  • Standard size tree – can grow to 25-30 feet tall along Wasatch Front with a spread of 25-30 feet.  You need a large area for the standard size tree.  Standard trees take 4-8 years to produce mature fruit.  These trees are very good in cold-climates, but be ready to prune every year.
  • Semi-dwarf (sometimes called half-standard) – can grow 12-15 feet tall along the Wasatch Front and same width if not pruned.  This tree will have mature fruit in 3-5 years.
  • Dwarf or Genetic Dwarf tree or Bush trees – Can grow 6-10 feet tall along the Wasatch Front and just as wide.  These trees produce mature fruit in 3-4 years.
  • Others:  There are several other types of fruit trees.  These would include espalier and columnar.  See your local experts at the neighborhood nursery for what will grow in your area and for availability.

Nearly all semi-dwarf and dwarf or bush trees are grafted.  Growers graft or attach the desired fruiting branch to a “rootstock” trunk.  The rootstock determines how big your tree will get.  Shopping your reputable local garden nursery will ensure that you are buying a quality product – good grafting onto a quality rootstock.  There are different rootstocks for different areas.  Your local nursery experts will only sell what will work here along the Wasatch Front, versus a big company back east somewhere that orders for their stores throughout the country.

VARIETY of Fruit:

There are literally over 7000 apple varieties.  Obviously many more than what you find at the local grocery market.  Visiting a good local farmers market can expose you to other varieties you can taste before you make an investment into your own tree.

Click HERE to see a basic break down of the more popular varieties and their best uses.


Remember that your tree is your investment, so you want to produce something you will use and enjoy for years and years to come.  Apples trees can live as long as 60 years or more.

TIMES for Blooming:

As mentioned above, nearly all apples need a pollinator apple tree in the general area.  If you have neighbors that have apples trees, planting one in your yard should still give you plenty of harvest.  But if you are the only one, then you may need to plant two different varieties of apples.  For example, in commercial orchards, farmers often plant some golden delicious apple trees along with their main crop.  Golden Delicious trees are known to be good pollinators.  Be sure to choose two varieties that overlap their flowering time.

Midseason bloomers:

  • Crimson Beauty
  • Gala
  • Jonamac
  • Jonathan
  • McIntosh
  • Golden Delicious
  • Jonagold
  • and others

Late bloomers:

  • Fuji
  • Granny Smith
  • Rome Beauty
  • Winesap
  • and others

Poor pollinators:  Jonagold and Winsesap (plus a few more), are considered poor pollinators.  Don’t plan on them being your pollinating tree.

Hardiness and Cold Requirements:  Be sure to check at your local garden center for those varieties that are actually hardy for your area.  You need to choose an apple tree that will survive your climate year round.  And on the other hand, realize that apples require a certain amount of cold temperatures to have the sugars set and the fruit to ripen properly.  If the fruit doesn’t get the required coldness, the fruit will be a disappointment for all the time and effort you’ve put into your harvest.

For example, my parents planted a Red Delicious apple down south in the area of St. George, Utah.  The fruit grew but never turned red and always had a mealy texture and flavor. The fruit never was like their Red Delicious apples from their trees up in northern Utah.  The tree eventually was cut out.

Conclusion:

Now you know the basic criteria for how to choose an apple tree.  You need to consider the right size of tree, the right type of apple, and the right blooming time for good pollination. What a great investment for your yard, yourself, and your family!

In future posts, we will go through proper planting procedures, learn about any pest control needed, and how and when to properly prune your tree.   Soon you will be enjoying the fruits of your labor.

Check out these recipes for apple goodies (submitted by Western Garden patrons):

Simple Apple Chips and Apple Pie Filling

Simple Applesauce and Apple Butter


Filed Under: Fruit, Gardening, How To, Trees, Utah Gardening Tagged With: Apple trees, blooming time, choosing trees, fruit trees, How To, how to choose, tree size, utah apple trees, utah fruit trees

Planting New Trees 101- Secrets to Help Your New Tree Thrive!

July 26, 2017 by Vanessa Roush

Welcome Friends! Glad you dropped in.


In Utah, spring and fall are the best times for planting new trees.  Here are a few secrets to help you find success with your new investment that will beautify and make your yard and home more enjoyable for a long time.

Planting New Trees Begin With Buying an Appropriate Healthy Tree

The first step to a healthy tree is to purchase from a quality local independent garden center or nursery. Big box stores tend to get trees that look okay for a season but suffer down the line because of poor soil, crowding, root chopping, inadequate root ball size, rough handling, and poor care.  Often these warehouse stores don’t own the plant inventory; it is on consignment, so less care is given to the material.  A local independent store, like Western Gardens, also has experts who can help you pick the right tree for the conditions at your house and your growing Zone. Check for trees that have 10’’-12’’ of root ball per inch in diameter of the tree trunk. When selecting a tree, take into account the mature height and width. Material from a quality grower usually has a tag indicating the mature height of the tree.  Some trees may look cute now planted a few feet from the house and close to another one, but after a few years this can become very problematic. Also consider planting a tree of an underutilized species in your area.

Planting new trees can be easy and satisfying.

Transport Your New Tree Home

Local independent gardening stores can deliver your tree for a nominal fee, and you can have the peace of mind knowing that it was transported carefully. If you are transporting your tree home yourself, make sure that it is properly secured and avoid going on the freeway or driving at high speeds. It’s preferable to transport them on their side in the back of a truck so that the leaves aren’t taking the brunt of the air flow as you drive. This can desiccate the leaves and put the tree into shock. As the tree is lifted in and out, be careful to handle gently. Dropping or rough handling can also put your tree into shock.

Evaluate the Branching of Your Tree and Decide Which Way It Should Face

This is often an overlooked step, or an after thought most of the time. Every tree has different branching and some have a better side than others when it comes to aesthetics. First place the tree in the spot where you’d like to plant it and turn it until the branching is how you like it . Take a few steps back, walk around, and look at it from different viewing angles. Consider the main viewing point for the tree, or other things like proximity to fences, driveways, side walks, and power lines.

Evaluate the branching of the tree before planting new trees.

Dig the Hole and Fill with Water

Dig the hole twice as wide and twice as deep at the root ball. If you are planting a tree that likes well drained soil, but you have clay soil, then be sure to dig the hole much wider and supplement with some good soil.  Bumper Crop mixed in with your soil is one of our favorite recipes.  The hole should not be deeper than the root ball itself.  Use your hose to fill the hole with water and let soak down a bit.  This insures that there will be good moisture deep down for the roots of your tree to take hold.

Planting New Tree in Hole – Rotate and/or Straighten

If your tree came out of a bucket, check to make sure the roots are not root bound, or circling around itself. If they are, take a razor blade or knife and cut an X on the bottom and make 4 cuts along the sides. If it was wrapped in burlap and/or with twine, remove any plastic twine because this will not decompose. Loosen the burlap.  These steps are important so that the roots do not become wrapped around itself causing the tree to girdle itself and die.  Place the tree in the hole and backfill it around the sides. Around the trunk, mulch can be 1’’ thick and then increase in depth up to 4’’ toward the outer edge of the rootball. Check and make sure the tree is straight. Also make sure that you can see the flare of the trunk; it should not be covered.

http://www.gardeners.com/how-to/tree-planting/8741.html

Image Credit: Gardeners.com

Watering A New Tree

Planting new trees into the ground isn’t the end.  Watering is very important.  The amount of water varies on the type of tree and soil conditions at the planting site. If you are unsure, ask your local gardening expert. Trees should be watered when planted and also the following day. Then follow with every 3 days or so. The first 2 years of the tree’s life are the most important for establishing roots. When you water, try to do a slow drip so that it can soak down deep and encourage deep roots. Some sprinkling systems may provide adequate watering, but try to avoid high pressure sprinkler heads from spraying the trunk of your tree. It’s not necessary to fertilize trees during their first season.

Monitoring Tree Growth and Health

Don’t forget to monitor the health of your tree as time passes by. If you notice the leaves or needles look sick, take a sample of the problem or at least a photo to Western Gardens where their experts there can diagnose most problems just by examining your sample. They can give you suggestions for chemical and/or organic methods to resolve the issue.

Planting new trees is a wonderful experience because you are investing in the future.

Filed Under: Gardening, How To, Tips & How To's, Trees, Utah Gardening Tagged With: fall planting, planting new trees, Planting trees, Planting trees in the right spot, spring planting, tree planting, Utah gardening

Harmful Garden Insects: Organic Management

July 18, 2017 by Marjorie Carter

 Welcome, Friends! Glad you’re here for some tips to organically manage those pesky harmful garden insects so you’ll have produce left to harvest!

Harmful garden insects can be managed organic methods

All yards and allotments will have harmful garden insects every year; it’s part of nature.  These insects need to eat in order to feed the beneficial insects.  Eliminating ALL the harmful insects from your garden would be time, labor, and resource intensive. You also run the risk of depleting the food source for beneficial insects and other animals that feed on the harmful critters.

Wise Goal – An important and wise goal is to control the harmful garden insects enough to reduce the damage to your garden to a manageable level.  Meaning that by harvest time, there is something left for you to eat.  Losing one or two tomatoes is manageable and probably hardly noticed, but an entire decimated crop means there’s a problem to address. 

aphids are harmful garden insects that can be easily controlled

Aphids – One year we had aphids on our herbs which was easily treated by spraying the affected plants with neem oil, a wonderful organic product found at Western Gardens.  This significantly reduced the number of bugs.  They were further kept at bay by some helpful ladybugs, also found at your garden shop. 

Neem Oil is safe organic product. Read label

We were careful to thoroughly wash our herbs before eating them to remove any remaining aphids. Washing anything you harvest before eating it is always a good idea anyway.

Harmful garden insects include the Leaf Miner

Leaf Miner – Last year, our challenge was leaf miner larvae on our Swiss chard.  In this case, we simply discarded any leaves that had been extensively chewed.  Otherwise, we snipped off the parts that didn’t look as appetizing, like anything that had a visible egg attached to it (usually on the underside of the leaves), washed everything, and then enjoyed our tasty green salad.

tracks of leaf miner on pepper plant leaves

This year, now that we know to look for the leaf miner eggs on the leaves, we were more attentive with our starts for our garden and inspected them daily, looking for them or other harmful garden insects.  We found eggs on our pepper plants and did our best to remove them when the plants were small.  We used a piece of duct tape wrapped around a finger to remove the eggs.

duct tape wrapped around one finger helps lift off insect eggs from plants

We found that using a gentle fingernail was still too rough for the tender young leaves, so gently touching the tiny eggs with the sticky duct tape easily lifted them off.  

Eggs of the leaf miner on pepper plants

Once the plants were more mature and could withstand a little insect activity, we were less vigilant at egg removal, but still mindful of looking for eggs once in a while.  Read more on homemade remedies for treating leaf miners by clicking here.

harmful garden insects also include squash bugs

Squash Bug – This year, we planted pumpkins for the first time.  We had heard of the dreaded squash bug and had been looking for them but hadn’t seen any damage to the plants.  Then, just last week (late June), one of our pumpkin plants was nearly devoured overnight by something.

Squash bug eggs are easy to spot and remove.

We assumed it was the infamous squash bug.  This assumption was reinforced when, upon closer inspection of the plant, we found a mating pair of squash bugs with a third one waiting on the side-line and eggs attached to the underside of the remaining leaves and the stem. We posted photos of the damage to a Facebook gardening group and learned of some other likely culprits.  That night my husband went out with a headlamp and a bottle of neem oil to investigate.

earwigs are harmful but also beneficial

Earwigs – Someone suggested the damage looked like the work of earwigs.  My husband found several earwigs eating on the plant and a swarm of them hiding in a nearby crevasse. Earwigs are a complicated insect in the garden.  They are not only harmful, but also beneficial.  They aid in breaking down organic matter (composting) and they also eat aphids and other harmful insects. However, when there are too many of them around a young susceptible plant, they can be very destructive.  We could also see evidence of earwigs damage on a few leaves of nearby tomato plants.  This minimal damage doesn’t pose a risk to a plant that has hundreds of leaves to perform.  In comparison, the pumpkin plant had only a dozen leaves to start with and most of those were very damaged. 

earwigs eating pumpkin plant leaves

My husband sprayed neem oil on the earwigs on the plant, in the swarm nearby, and even in their nest. It’s still uncertain whether the plant will survive though it already shows signs of new growth. We monitor it closely to prevent another insect attack that would probably kill it.

Another organic alternative that works to kill earwigs is diatomaceous earth, which also now offers a nice dispensing bottle which helps cut down on waste and mess.  Check it out at Western Gardens.

diatomaceous earth is a natural organic product to control crawling insects in the garden.

As for the squash bugs, not the main culprits to the pumpkin plant, they were probably snacking on it also.  We’re still removing eggs as we find them (using the duct tape trick mentioned above) and killing any adults.  Their numbers can quickly get out of hand. Again, diatomaceous earth works well to control squash bugs.

Beneficial vs Harmful Insects – Lady bugs, praying mantis, and birds are a few examples of creatures that feed on the harmful garden insects; hence, we like to see these around around the yard.  When considering how to handle any harmful garden insects, the first reaction should generally not be total annihilation.  Rather, try to reduce their numbers and also allow the beneficial insects and animals to do their part until the plant is mature enough to withstand the damage. 

Good luck and happy hunting!

CLICK HERE to read about beneficial insects you want in your garden.

10 beneficial insects you want in your garden! If you spot these in your yard, you're in good shape!

Filed Under: Flowers, Gardening, How To, Insects, Tips & How To's, Utah Gardening, Vegetables, Veggie Gardening, Yard Care Tagged With: Gardening, harmful garden insects, harmful insects, How To, organic management, organic pest controls, Utah gardening, Western Gardens

Can You Grow Blueberries in Utah?

July 7, 2017 by Vanessa Myers

July 10th is National Pick Blueberries Day!  Read this article to help you decide whether to grow and “pick” your own in Utah or just “pick” them up at the grocery store.

Perhaps you have heard about all of the health benefits of blueberries like antioxidants and Vitamin C and would like to start growing them. Residents here, however, may find them to be quite a challenge to raise successfully. Why would we have a hard time growing blueberries in Utah?

Can you grow blueberries in utah?

Blueberry Image by Fixed in Silver under a Flickr Creative Commons Attribution – ShareAlike License

What Kinds of Conditions Do Blueberries Need?

Blueberries belong to the Ericaceae, or heath family. Other members that you are likely familiar with are azaleas, rhododendrons, cranberries, and heather. As a general rule, they need acidic conditions in order to grow and thrive.

Conditions in Utah, however, are quite the opposite. In many areas, the soil registers on the alkaline side of the pH scale, as does the water. If you tried to plant blueberry bushes straight into your garden without any adjustments, they might try to valiantly struggle along for a while, but won’t be able to grow well and will likely just die in the end.

There’s also the matter of the texture of our soil. Blueberries like to have looser/coarser soils like sand since they form a network of thinner roots instead of a large one. Many areas around here are the finer clays that would make it harder for the bushes to properly spread out their roots and get all of the water and nutrients that they would need for success.

Test your soil before you try to grow blueberries in Utah

Soil pH test Image by michaelstyne under a Flickr Creative Commons Attribution – ShareAlike License

So How CAN You Grow Blueberries in Utah?

You would need to acidify your soil in preparation for planting these and plan on the possibility of needing to repeat the process in the future. Start by buying a pH test kit or send off a sample to the Extension service to gauge how much change would be needed.

The easiest way would be to get a large container that you could fill with acidified potting soil. You could also try preparing special planting beds with soil that has had materials like peat worked into it to make it more acid. Over time, though, it will continue to move back towards alkaline here in Utah (especially if you use untreated water) and you will have to fuss over it.

University of Utah’s Extension service offers a more extensive discussion on the specific ways that you can work on acidifying soil and water found in Utah, along with the challenges that can come along with it.

Blueberries in Utah can be a pain to grow

Image by words under a Flickr Creative Commons Attribution – NoDerivatives License

Is It Worth It?

I am always up for a challenge and like to see if I can grow plants that are a bit more work. You may feel that way, too. However, if you’re just wanting to enjoy some fresh blueberries, it would be easier to concede in this case and buy some at the local store, saving your space for all of the other fruit trees, shrubs and plants that do just fine in Utah.

Have you tried to grow blueberries in Utah?

Filed Under: Fruit, Gardening, How To, Utah Gardening Tagged With: blueberries in Utah, growing blueberries in utah, Utah fruit

Homemade Ketchup Recipe

June 5, 2017 by Jenn Crookston

WELCOME Gardener, Happy to see you here checking out a delicious Homemade Ketchup Recipe for all those tomatoes you are growing!

Homemade ketchup recipe from Western Gardens in Utah
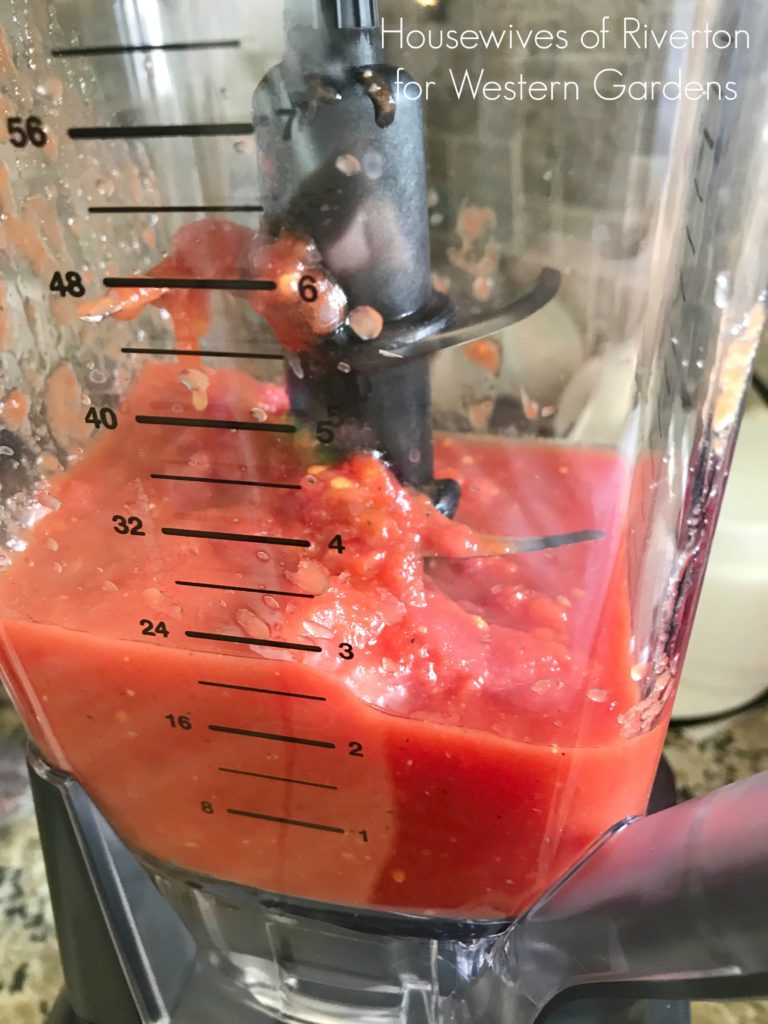
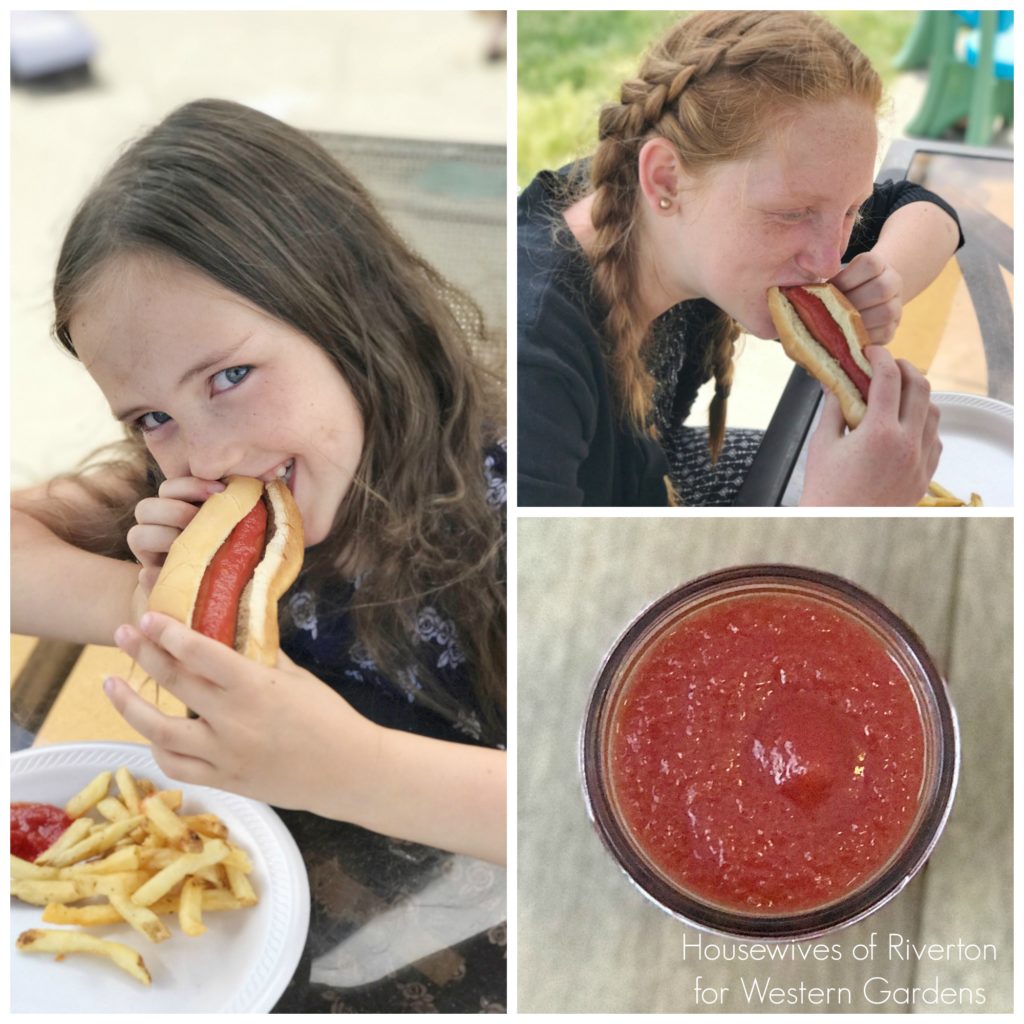
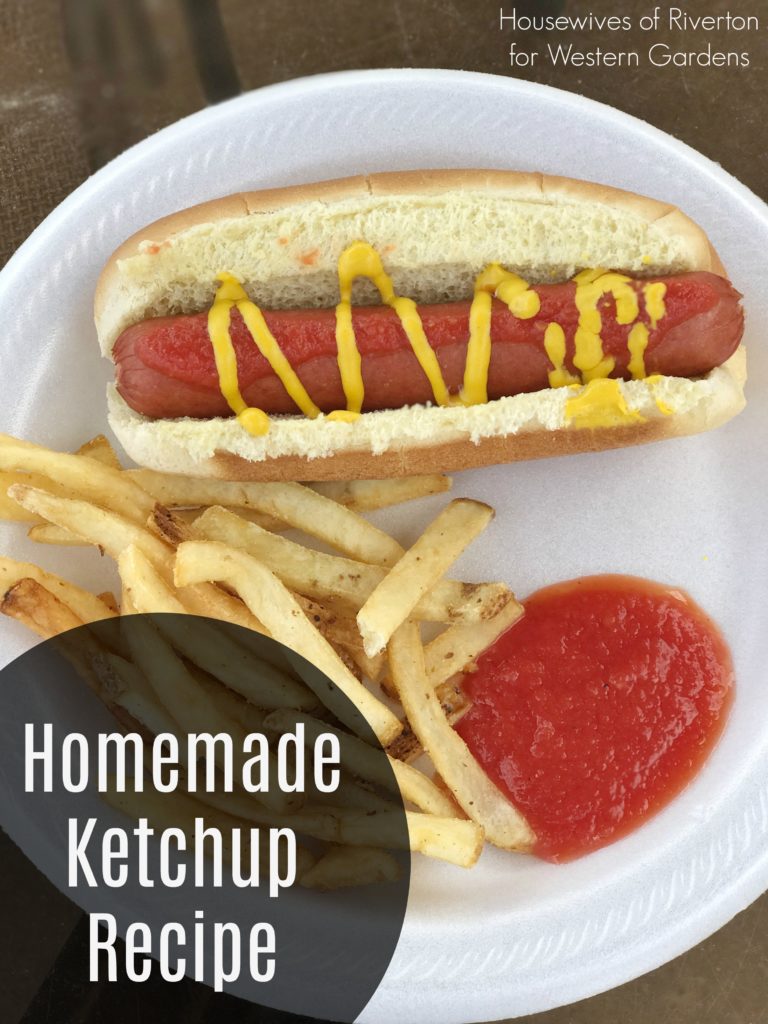
Are you looking forward to summertime and all the amazing foods summer brings?  I love picnics and bbq-ing, basically anything that allows me to eat outside and on dishes I don’t have to wash afterward.  One consistent condiment is ketchup, it seems like ketchup goes with just about every summertime meal.
I love trying new recipes, especially recipes that are simple and include items I always have on hand.  Every year we plant a variety of tomato plants and I enjoy using them in the summer and fall.  Unfortunately half of my family are not tomato lovers so I find myself giving tomatoes away so they don’t go to waste.  This year I am determined to learn how to can tomatoes so I can use them all year round and they’re perfect for this Homemade Ketchup Recipe.

Homemade Ketchup RECIPE:

*Whole Peeled Tomatoes, I used 1 large can Whole Peeled Tomatoes (1lb 12oz can)
(I’m looking forward to canning my own tomatoes this year to use for this recipe and many others)
*1/8 cup Apple Cider Vinegar
*1/2 teaspoon Garlic Salt
*1.5 tablespoon Honey
*1-1.5 teaspoon Mustard
*1/4-1/2 teaspoon Worcestershire Sauce
*1/4 teaspoon Black Pepper
*1 teaspoon Onion Powder (can add more to taste)
boil your homemade tomatoes for your ketchup

Homemade Ketchup Recipe INSTRUCTIONS:

*Place all ingredients into a medium-size pot.
*Bring ingredients to a boil over medium-high heat.  Once boiling turn down and simmer for 60 minutes.
*After 60 minutes remove from heat and let cool to room temperature.
*Once cool pour into blender and blend until smooth.
*Pour into air-tight container and place in refrigerator for up to 14 days.
Making homemade ketchup from your garden tomatoes is simple and delicious!
While this recipe isn’t the quickest it is quite possibly the simplest recipe you’ll find out there and it is delicious.  I highly recommend making it a couple of days ahead of time, if you can, the more time the flavors have to blend the better it will taste.  I love the rich flavor, I personally love that you can taste more of the tomato flavor and my family all loved it, even the tomato haters, so you don’t have to worry that the flavor is too strong.

I’m excited to bring this delicious ketchup to all our summer gatherings, I can’t wait to try it in homemade fry sauce too!
If you’re planning a bbq this summer or attending one, you need to try one of these amazing salads that are serious crowd pleasers!

Mom’s Potato Salad

Chicken Pasta Caesar Salad

Spinach Salad with Poppy Seed Dressing

Filed Under: Eat from Garden - Recipes, Gardening, How To, Recipes, Utah Gardening, Vegetables Tagged With: eat your garden, garden tomatoes, homemade ketchup, homemade ketchup recipe, ketchup lovers, recipe, recipes, tomatoes

DIY Porch Planter Box for Mother’s Day

May 7, 2017 by Jenn Crookston

Welcome – Glad you dropped in for a great idea!

Mother’s Day is just around the corner and I’ve got the perfect Mother’s Day gift that you’ve got plenty of time to create because it is such a fast build.  Your mother/wife/friend will love this DIY Mother’s Day Porch Planter Box.
Geraniums in a planter box for your porch
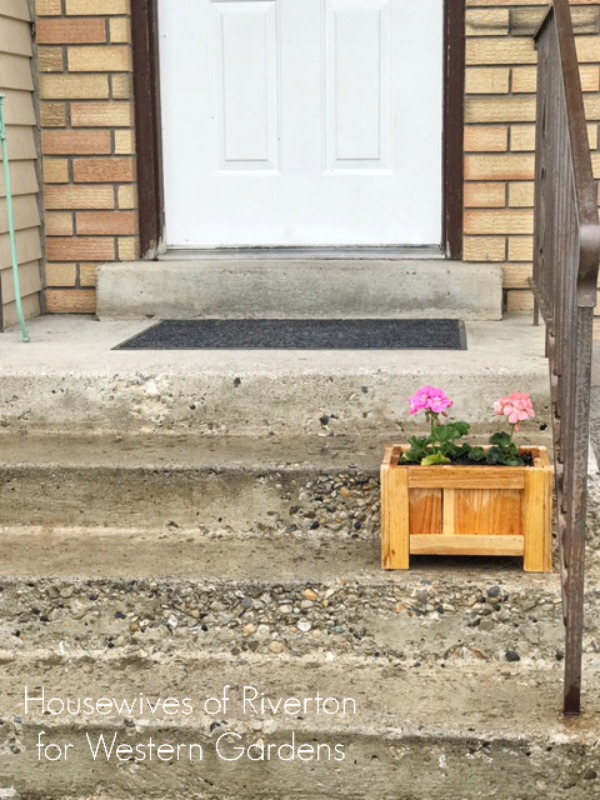
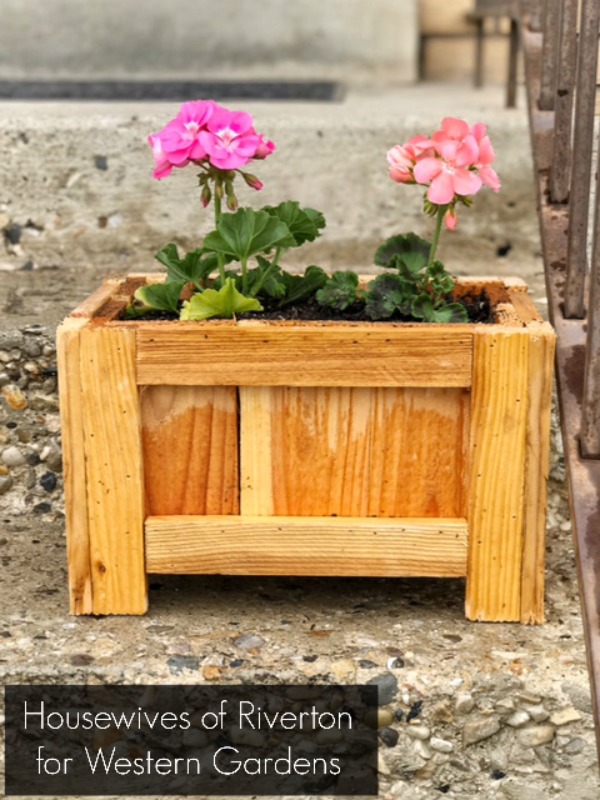
I’m pretty sure it’s a proven fact that anything is automatically cuter when it’s small.  That fact holds true with this Mother’s Day Porch Planter Box.  I am completely smitten with how cute it looks sitting on my steps and can’t wait to make it a couple of sisters.  You’re going to love me when I tell you how easy this was to make too.
Because I wanted this planter box to be able to sit on a single step on my porch I needed to find materials that weren’t big and bulky.  After walking around the home improvement store for a while and looking at the different options I went with wood fencing and stakes.  Since both of these items are made to be outside in all weather conditions I figured they were perfect for this project and they aren’t bulky pieces of wood which means more room inside the box for flowers.
Here is a good photo of the box assembly.  The fencing is less than $2 a board and the stakes we had on hand but I’m pretty sure were around a dollar each.  I used just over 1 fencing board and 2 stakes for one box.  I think with 4 boards and 7 stakes you could make 3 planter boxes, including nails I think you’re looking at 3 planter boxes for under $20, pretty awesome if you ask me!
construction of DIY porch planter box for mother's dayI used our miter saw to cut my pieces, if you don’t have a saw at home here is your cut list and the people at the home improvement store can cut them for you.

Cut List:

10 #1 (side pieces) – 3.5″x 6″
4 #2 – (long side braces) 1.4″x 8 5/8″
1 #3 – (middle bottom) 3.5″x 11.5″
2 #4 – (side bottom) 1.5″x 11.5″
2 #5 – (short side braces) 1.5″x 5 1/4″
8 #6 – (corners/legs) 1.5″x 8″

Porch Planter Assembly:

I used a brad nailer to create the box with 1″ finish nails.  If you don’t have a nail gun you can use tiny nails and a hammer to create the box it’ll just take a little more time.  These nails are perfect because they’re easily painted over and hidden if you choose to paint your planter box.

To create my planter box I started by creating one side as shown in photo 1. 

Once I got that side done I created the corners as shown in photos 2-4.

When I had the corners done assembly was easy.  I placed the side brace against one corner piece and then nailed into place.

When it was attached I then placed the next side piece in place and attached it to the side brace.

Photos 5 and 6 show the bottom of the planter box.  As you can see in photo 5 there isn’t quite enough room for 2 pieces of fencing on the bottom.  Photo 6 shows how perfect once piece of fencing and two pieces cut from a stake fit leaving enough room between the pieces to allow water drainage.

As you can see in photo 7 I wasn’t too worried about a perfectly smooth surface, you can sand and paint/stain as desired, I love the little more rustic look so this was perfect for me.
Planter box with living flowers on front porch stairs of house
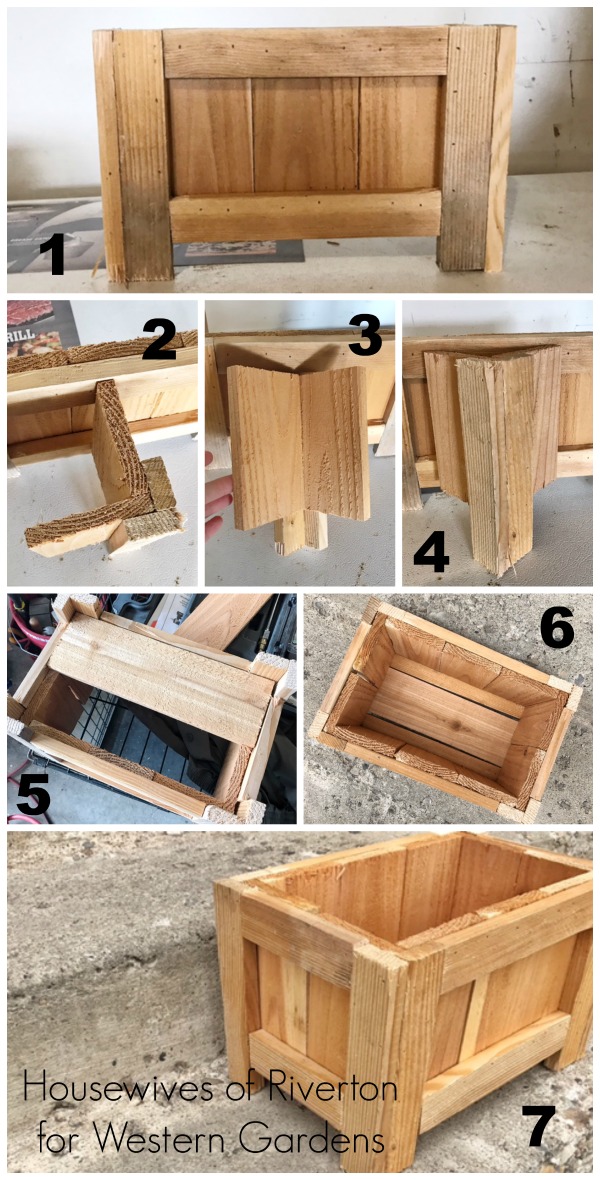
Can’t you just picture a few more of these darling little planter boxes leading all the way up the stairs.  I can’t wait to get them all finished and filled with beautiful flowers from my local independent garden shop Western Garden Centers.
You can easily make this planter box and fill it with flowers for less than you would spend on a bouquet of cut flowers for Mother’s Day and they’ll last all season long and the planter for years to come.
western gardens have geraniums for your planter box

Filed Under: Container Gardening, Flowers, Gardening, How To, Outdoors, Tips & How To's Tagged With: container gardening, DIY, flowers, mother's day gift idea, porch planter, simple gift

Plant Summer Blooming bulbs, corms and tubers

May 4, 2017 by Heather Hammerschmidt

Welcome Gardening Friends! Good to see you again.

How to plant summer blooming bulbs, corms, and tubers.

I love to plant summer blooming flowers and I’ve been dreaming of a cut flower garden all winter. My dream started last fall when I decided to add more spring bulbs to my garden so that I’d have plenty of flowers for cut arrangements. There is something wonderful about bringing your own beautiful blooms indoors and sharing them with friends and neighbors. As I contemplated spring additions to my flower garden, I decided I also needed to add some summer and fall blooms. Specifically, I wanted to add lilies, gladiolas, and dahlias. These summer flowers are usually not available in late fall, so I patiently waited for them to arrive at the store this spring. Now it’s time to plant and I’m so excited to share with you everything you need to know about planting these beauties!

Lilies (Lilium)

Lilies are such gorgeous flowers. Their sturdy stems and large flowers make them great for cutting. There are two main varieties of lilies that we carry at Western Garden Center: Asiatic and Oriental lilies. Asiatic lilies bloom in early summer. They come in a wide range of colors and heights.  Oriental lilies tend to bloom later than Asiatic varieties. Oriental lilies like Casa Blanca and Stargazer are wonderfully fragrant. Western Gardens carries lily bulbs in early spring and potted lilies later in the season.

Planting lilies for summer blooms
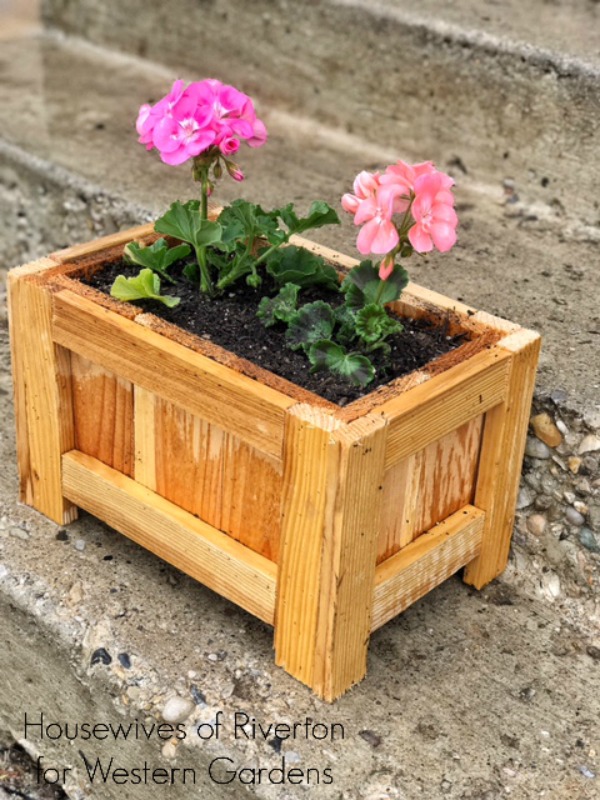
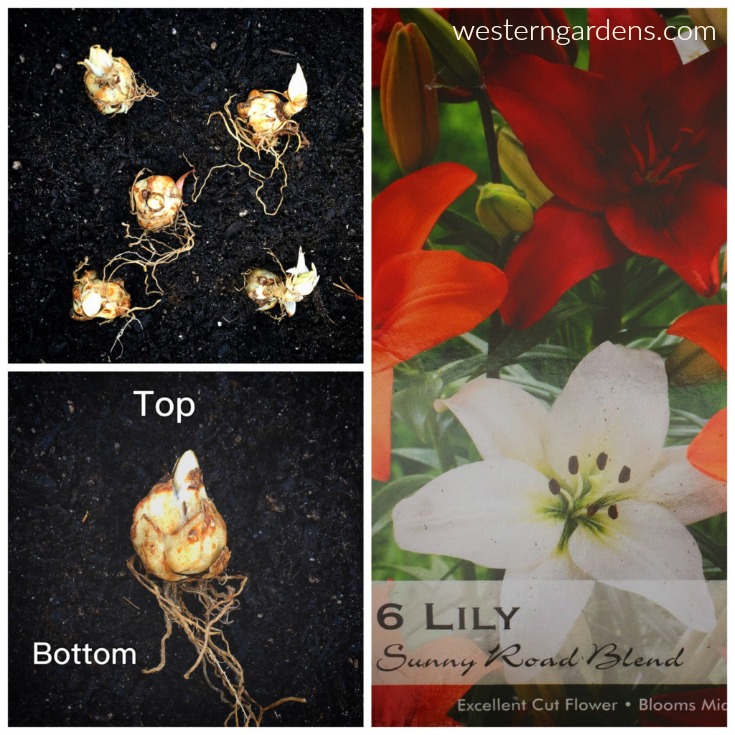
Asiatic and Oriental lilies are cold hardy perennials in Utah and will winter over. Lilies bulbs are scale bulbs and do best if planted as soon as possible. They prefer to be planted when the soil temperature is below 60 degrees. This helps their roots establish before it gets too hot. They need a sunny location with rich organic soil.  I amend my soil with Bumper Crop® Soil Builder to give them the best possible start. I plant the bulbs 6- 8 inches deep and 6 inches apart. Plant them in groups of three to make a powerful statement. Make sure they had plenty of room, they don’t like competing for resources with other plants. The picture above gives you a visual of which end should be facing up and which end should be facing down.

Gladiolas (gladiolus)

How I love gladiolas! My grandfather would bring home gladiolas for my grandmother. Gorgeous stately blooms graced her dining room table throughout the summers. I’m planting them for two reasons; first in memory of my grandparents and second because I love how long gladiolas last as cut flowers. Their flowers fade from the bottom of the stem upward. You can continue to cut off the stem as the blossoms fade leaving the fresh blossoms for continued enjoyment. Gladiola corms are available in the spring for planting.

Gladiolas top and bottom of bulb
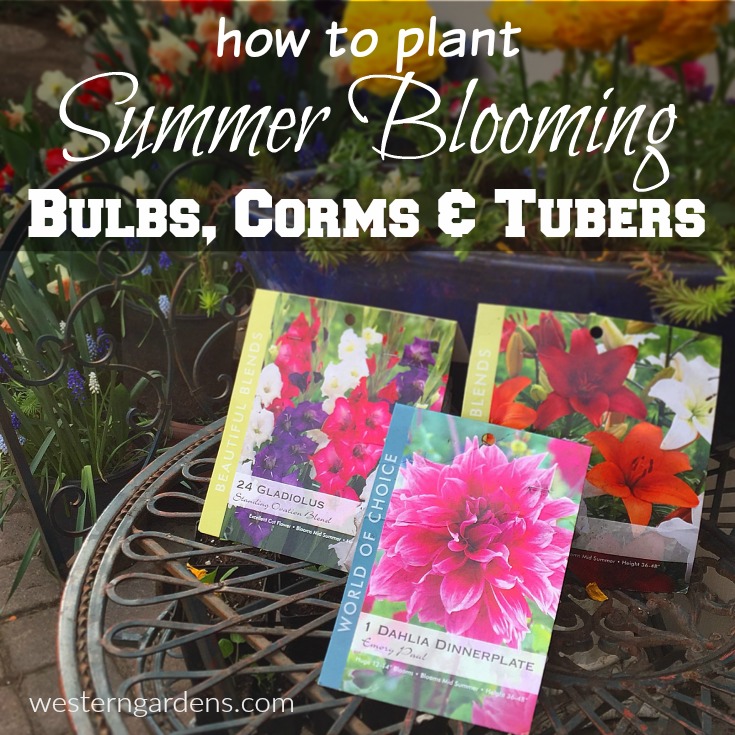
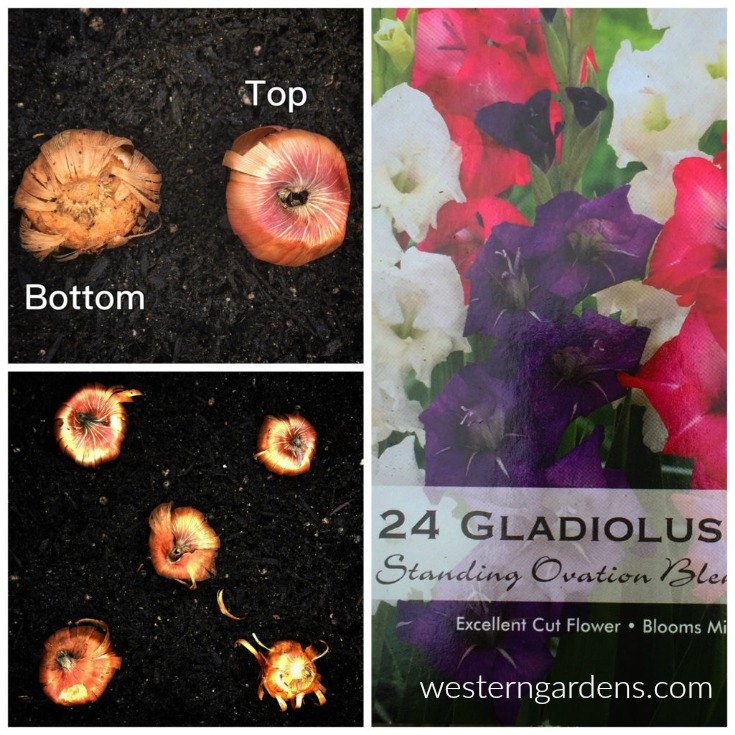
I suggest to plant summer blooming gladiolas each weekend for three consecutive weeks so blooms will last throughout the summer. Gladiolas should be planted after the danger of frost has passed. They need a sunny location. Unlike lilies, they don’t have a problem sharing space with neighboring plants. I will plant them 3-4 inches deep and about 6 inches apart. For a greater impact, I plant them in groups of three or more. Gladiolas are not cold hardy in Utah. In the fall, dig them up and store them over the winter until planting them again next spring. The picture above indicates which direction to plant gladiola corms.

Dahlias

Dahlias are my favorite cut flower. There are so many wonderful varieties in many heights and colors.  Some of the shorter varieties bloom from spring until frost. The larger varieties start blooming in late summer and continue blooming into the fall. Western Garden Center carries dahlias in seeds, tubers, and in plant form.  This year I’ve chosen to plant some Dinnerplate Dahlias from tubers. They have amazingly large blossoms, hence their name.Planting dahlias tubers for a big show of color.
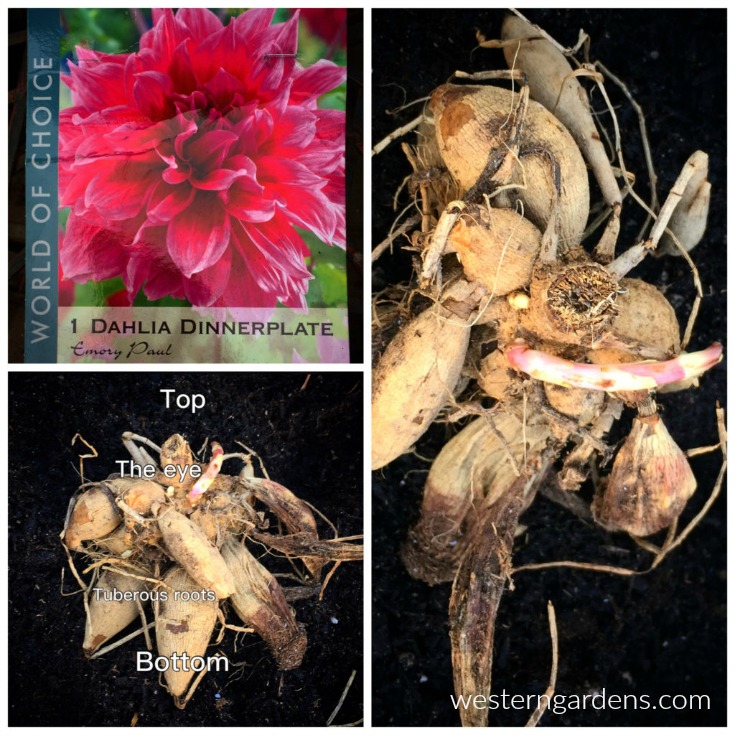
Dahlias should be planted in rich organic soil, in a sunny spot, and after the last frost. I am planting mine in pots early so I can get them started. I use Gardener’s Gold Organic Potting Soil. They will remain in pots outdoors for awhile so that when I see that temperatures are going to drop I can bring them inside. After the last frost, I will plant them outside.  When planting it is important to give them plenty of room.  I make sure each tuberous root has space between itself and its neighbors and then I’ll cover them with soil. Last year’s stem (the eye) should just be barely below the surface. Like the gladiolas, dahlias are not cold hardy in Utah.  I will dig up the tubers in the fall and store them indoors over the winter until I plant them again next spring. The picture above identifies the eye of the dahlia and its tuberous roots.

Once they’ve all been planted, I’ll feed them regularly with a Gardner & Bloom’s Bud and Bloom Fertilizer. This helps these summer bloomers develop strong roots and beautiful blossoms.

I can’t wait for my first bouquets! What are your favorite cut flowers? Please share in comments below.

Filed Under: Flowers, How To, Utah Gardening Tagged With: bulbs, cold hardy perennials, corms, cut flowers, dahlias, flowers, garden cut flowers, gladiolas, how to plant, lilies, summer blooming, tubers

May Gardening To-Do List

May 2, 2017 by Western Gardens

May Gardening To-Do List for all the things you don't want to forget (but don't have time to remember!)

Hello Gardening Friends, thanks for stopping by!

If you’re excited to work in your yard or garden, but not sure where to begin, then you’ve come to the right place!  We’ve put together a list of things to do throughout the month.

May Gardening To-Do List for all the things you don't want to forget (but don't have time to remember!)

You may not need to do everything on this list.  For example, if you don’t have bare patches to reseed or Spring bulb foliage to cut back, skip over those items on the list.  Just pick what applies to your home and yard and plan out when you will do it all throughout the month!

May Gardening To-Do List for all the things you don't want to forget (but don't have time to remember!)

May Gardening To-Do List

➺Train your Lawn – Turn Sprinklers On only when needed – Let the lawn tell you when it needs watering. Click here for more details.

➺Lawn Watering – Use a “moisture meter” probe to determine adequate moisture.

➺Water Conservation – Conserve water by watering before 10:00 am or after 6:00 pm.

➺Lawn Aeration – Its not too late if you haven’t already.

➺Set Lawnmower Height to 2½-3 inches. This allows the lawn to “shade” its soil making for a healthier lawn.

➺Lawn Broadleaf Weed Control (Liquid application) – for Dandelions, violets, etc. Weed-A-Lawn is a great product.  Spot treat or apply to big areas of lawn where needed. Follow manufacturer’s instructions.

➺Lawn Crabgrass and Spurge – Second application of pre-emergent granular (6 weeks after the first application).

➺Fertilize Lawn with a weed-killing post-emergent granular fertilizer —do NOT water in—apply it to a moist lawn and let it sit for a day

➺Seed Bare Patches in Your Lawn unless you’ve already used a pre-emergent, in which case, wait until September to seed bare patches.  Click here for more.

➺Weed, Thin Out & Mulch newly planted seedlings

➺Plant Your Favorite Annuals for beautiful color—most can be safely planted after frost danger has passed (some are hardy enough to be planted earlier, check with your local nursery)

➺Spring Bulbs – Remove Spent Flower Heads (aka dead-heading) and AFTER foliage fades and turns brown, cut back leaves.

➺Summer Blooming Bulbs – Plant dahlias, day lilies, and gladiolus.  Click here for instructions.

➺Plant Trees, Shrubs, and Perennials – Early spring or late fall are great times to do this.  Click here for tips.

➺Divide and/or Transplant Perennials – Summer bloomers: early in the month.  Spring bloomers: after blooming is done.

➺Flowering Shrubs  – Prune after they finish blooming.

➺Pest Control – Boxelder bugs are a nuisance.  Grasshoppers are best controlled when they first hatch.  Watch for Leaf roller on boxelder trees. Try to stay ahead of those slimy slugs and snails.  Closely follow directions on labels when using insecticides as not to harm bees.

➺Plant Outside
Kohlrabi, parsley, parsnips, potatoes,
Until May 15th: onions & peas
After last frost until June 1st: dry beans, snap beans, eggplant, peppers
After last frost until June 10th: watermelon & winter squash
Until July 1st: cauliflower, parsley, swiss chard
Until July 15th: beets & broccoli
After last frost until July 20th: cucumbers and summer squash
Until Sept 1st: radishes

and so much more….

If you liked learning these tips from the experts, here is another good tip – come in and visit us!

Be sure to check out our June Gardening To-Do List too!

*This is not an exhaustive list.  If we’ve overlooked something, feel free to let us know in a comment below!

May Gardening To-Do List for all the things you don't want to forget (but don't have time to remember!)

Filed Under: Gardening, How To, Lawn Care, To-Do List, Utah Gardening, Yard Care Tagged With: Gardening, how to's, may gardening, Monthly To-Do List

Use Living Flowers for Centerpieces during Easter and Spring

April 14, 2017 by Jenn Crookston

Use living flowers for centerpieces this Easter. Contains basket, tulips, bunnies, fake grass and plastic eggs
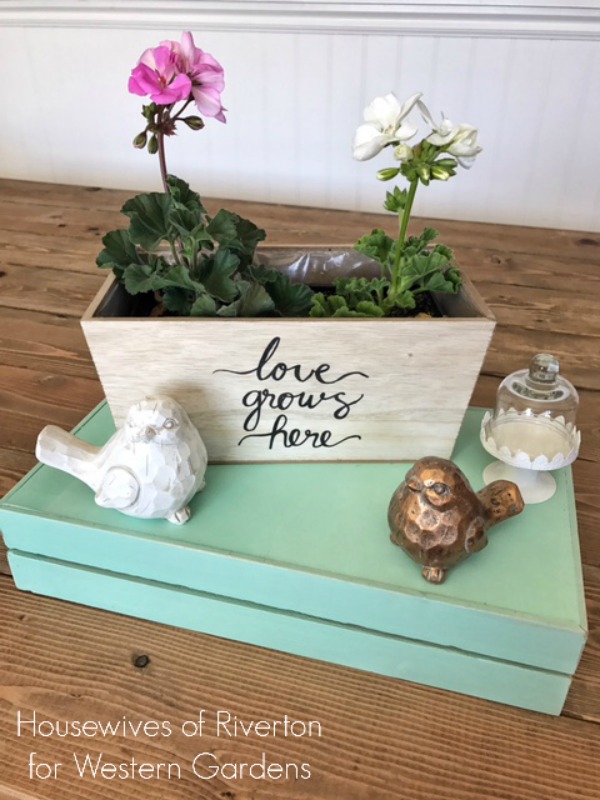
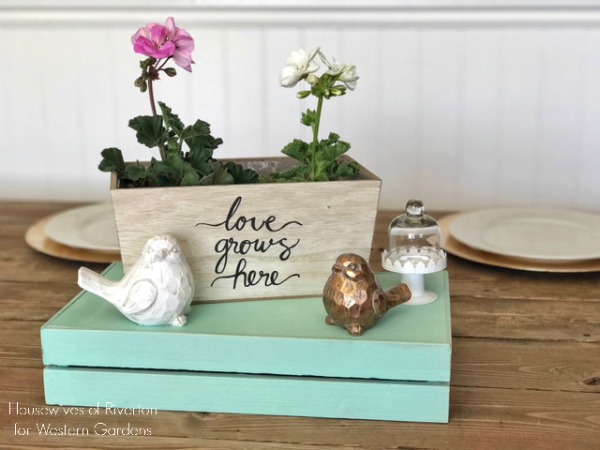
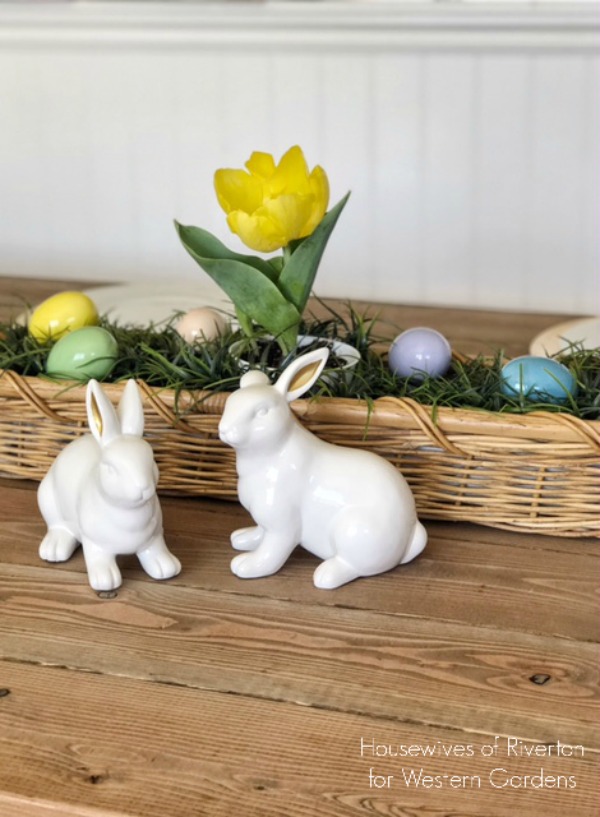
It’s pretty safe to say the very best part of Spring is the beautiful living flowers for centerpieces.  I love having fresh flowers in and around my home.  I love the instant brightness they bring and the amazing smells…it’s like bringing sunshine right inside the house.

As I plan my spring and Easter decor I love to plan for flowers anywhere and everywhere I can.  While I love a beautiful spring bouquet I especially love finding ways to use fresh flowers inside that I can then transfer outside so they can continue to grow and beautify my home.
Easter table centerpieces with tulips and ceramic bunnies
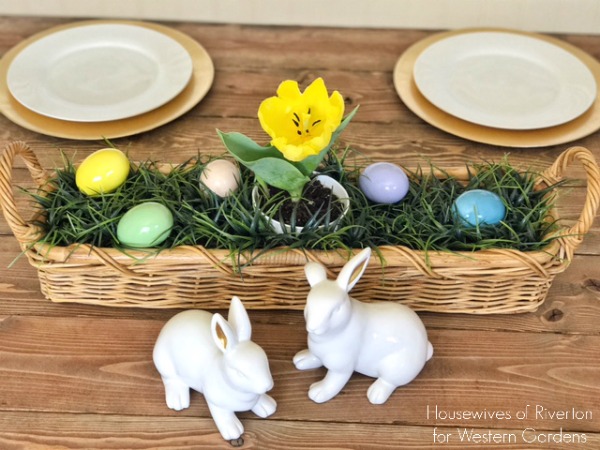
First up I have this adorable Easter Table Centerpiece.  Using just a few items (many you may already have on hand) you can create the perfect centerpiece for your Easter dinner that will last for years to come because you can take that Tulip bulb and plant it in your yard!

Easter Table Centerpiece Supplies:
Basket
(I used a long skinny one I had on hand, you could use any variety)
Fake Grass
(or real grass if you plan ahead and grow some – see growing Wheatgrass)
Small Bucket
Fake Eggs
Ceramic Bunnies
Live Flowers
(I used a tulip, but again any flower would work.  Dainty primroses and colorful pansies are also great living flowers in centerpieces.)

First gather your supplies, plant your flower in the bucket and then place the bucket in the center of the basket and arrange your fake grass.  Once you have the grass arranged place fake eggs in the grass, mine had a hole in one end so I made sure to place the egg so that wouldn’t show.

I used two ceramic bunnies in front of the basket to bring the whole Easter look together. Simple and oh so cute.
Geraniums are a great way to use living flowers for centerpieces.
Once bunnies and Easter eggs are past being in season it’s time for a new Spring Centerpiece to take over the table.

Spring Table Centerpiece Set Up:
I found this cute blue crate at Target and flipped it upside down then added these little chubby birds and tiny cake stand from Hobby Lobby.  The Love Grows Here crate is also from Target and I love that it comes lined with plastic so adding flowers that need watering won’t damage it or anything under it.

I added two geraniums in their little plastic store bought containers, they are a perfect fit!
Easter table centerpieces with geraniums
While I love love love how both of these centerpieces turned out I think my very favorite part is that when I’m ready to make a change for the next season/holiday I get to plant these flowers outside and watch them continue to grow, I don’t have to throw them away in 7-10 days like we have to with cut flowers.

I highly recommend finding ways to bring living flowers into your decor.  I promise they’ll put a smile on your face every time you walk past them.

Filed Under: Crafts, Flowers, How To, Tips & How To's Tagged With: DIY, easter centerpieces, flowers, home decor, living flowers, living flowers centerpieces, spring centerpieces, use living flowers in centerpieces, Western Gardens

Wheat Grass Easter Eggs – Kids Project

March 28, 2017 by Wendy Pettit

Welcome Friends!  Glad you dropped in.

This Wheatgrass Easter Egg is a great kid craft to do anytime in the spring, not just for Easter.  It is inexpensive and easy to make – even little 3 year-old hands can do this; customizable to whatever you have – plastic egg, bucket, basket, whatever; quick and fun to do – who doesn’t like to play in the dirt; and very gratifying within a few days – children observe the growing seeds.  If you want to do this for the holiday, you need to think ahead about 1 1/2 weeks. Easter changes every year, so be sure to check the calendar!

wheatgrass easter eggs are simple to make and fun to watch grow.

SUPPLIES:

» Leak-proof Easter container – pail, bottle, cup, plastic-lined basket, etc.  (I’m using a large plastic easter egg I found at my local dollar store. It came with a lid.)

» Plastic wrap or plastic lid

» Potting soil or vermiculite  (I used potting soil from my last year garden pots.)

» Whole-wheat grain (I used 30 year old wheat I had in my food storage.)

» Water

Items needs for making wheatgrass easter egg project.

Soil, whole wheat grain, container, plastic wrap or cover, and water. That’s it!

Wheatgrass Easter Egg INSTRUCTIONS:

1. One to two weeks before Easter, fill container with soil or vermiculite to 1-2 inches below the top of the rim.  Gently pat down.

Placing soil into container.

Little by little putting soil in to within 1-2 inches of rim.

Pat down the soil

Gently pat soil. (You can talk or sing to it too if you want!)

Little girl with soil on hands.

Don’t have to get all dirty!

2. Sprinkle a layer of wheat over the soil.

Sprinkling wheat grain on top of the soil.

The layer of wheat stays on top of the soil. Do not cover the seeds with dirt.

3. Pour water into container until water is barely visible beneath the wheat.  Note: Drain or “bail” out some water if you accidentally add too much and the seeds are swimming.

Pour water onto seeds and dirt.

Be slow and careful when pouring water into your container.

bailing out too much water from seeds and soil.

Be careful to bail out water if you get too much. Don’t want the seeds to drown!

4. Place lid or plastic wrap over the wheat.  

5. Place container in a sunny spot (not in direct sunlight).

6. After 2-3 days, small sprouts should appear.  Remove plastic top.  

Little wheatgrass starts are popping out.

Take lid or plastic off when you see the wheat growing. Put in good sunlight (not direct-sunlight).

7. Watch your wheatgrass grow.

NOTE:  During this process, if wheat appears to be dry, mist lightly with water.

8. In 7-10 days, you should have a velvety grass patch!!  

wheatgrass grows quickly.

Be patient and watch your grass grow. For fun, get a ruler and mark how far the grass grows in a day.

I initially did this project with a group of women.  We tied pretty ribbons around the eggs and shared them with family and neighbors to watch grow.

Wheatgrass Easter Eggs are ready to give away with ribbon around them.

Put a ribbon around the egg and give to another to let them see the seeds grow. Or keep for yourself and enjoy measuring how much the grass grows in a day! Or make a fairy garden in the grass!

9. Add smaller plastic eggs or other little Easter characters in the wheatgrass, if desired.  After the wheatgrass had grown in the egg that I kept for my own family,  I placed in the grass colorful plastic eggs filled with jelly beans and other Easter favorites.  IDEA: It could be fun to create a fairy scene.

A byproduct of this activity – Wheatgrass juice  

Instead of throwing away your Wheatgrass Easter Egg, you could try making wheatgrass juice.  You’ve got a good little crop to give it a try.  Wheatgrass is gluten-free and is touted as one of the best super foods.  Many believe that it can detoxify the body and improve digestion.   Learn some basics about preparing this superfood by clicking here. 

Basics about wheatgrass juice


Filed Under: Crafts, How To Tagged With: Easter, easter craft, easter eggs, how to's, kid crafts, kid friendly, Kids Craft, seeds, wheat, wheatgrass

  • « Go to Previous Page
  • Go to page 1
  • Go to page 2
  • Go to page 3
  • Go to Next Page »

Primary Sidebar

Shopping Cart

Items in Your Cart

Your cart is empty
Visit The Shop

Follow Western Gardens

  • Facebook
  • Instagram
  • Pinterest
  • YouTube

See what we’ve been pinning!

Follow Me on Pinterest
Followed by people.
?

Pinterest Badge by Skipser

Here’s What We’ve Been Up To!

Save water and money by Turf Training - train your lawn to grow deep roots
work at western gardens utah garden center
Senior gardening woman Edu Carvalho from Pexels
A Utah Guide to Vertical Gardening in square shape

Copyright © 2026. Western Gardens - Privacy Policy